
Approving Vendors And Timekeepers with Smart Invoice
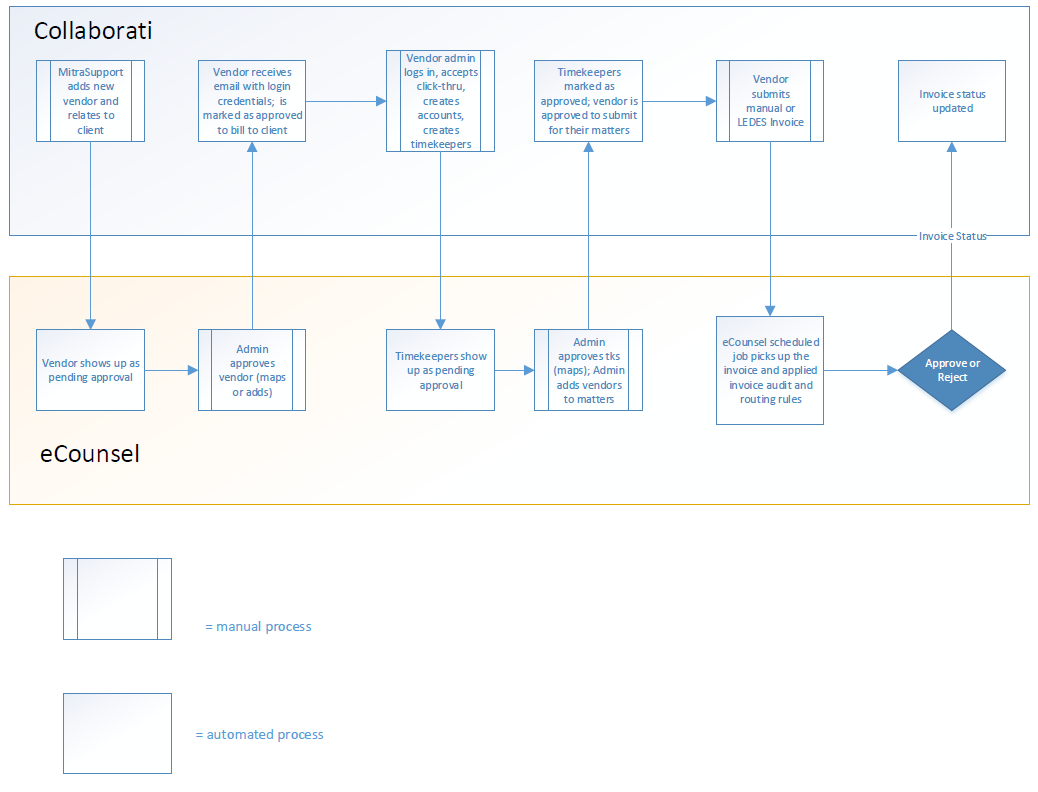
In order to submit invoices in Collaborati to a client using eCounsel and Smart Invoice, the client must approve the vendor. If the vendor does not exist in Collaborati, the client requests Mitratech Support to enter the vendor into the Collaborati system. Then, after the vendor is added to Collaborati, the scheduled task in eCounsel brings the vendor approval notification to the client in the eCounsel Lobby. The client approves the vendor to submit invoices and maps the vendor to an existing vendor/player in eCounsel.
The vendor administrator then creates accounts and timekeepers in Collaborati. The scheduled task in eCounsel brings the timekeeper approval notification to the client in the eCounsel Lobby. The client approves and maps the timekeepers in eCounsel and associates the vendor with the matters for which the vendor may submit invoices. The scheduled task sends this information back to Collaborati.
Approving Vendors
After the vendor has been associated with the client in Collaborati and the scheduled task has run, the vendor approval request appears in the eCounsel Lobby of the approver.
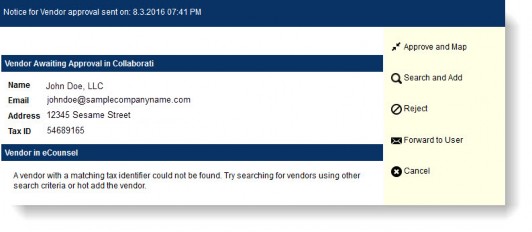
The approver has the following options:
- Approve and Map – approves the vendor for submitting invoices and maps the vendor to an existing eCounsel entity record.
- Search and Add – allows you to search for a matching vendor or create a new vendor record if no existing vendor with a matching tax identifier was found.
- Reject – rejects the vendor approval and removes the request from the Lobby. If the client accidently rejects a vendor, the vendor can resubmit the request.
- Forward to User – sends the approval notice to another user in eCounsel for approval.
- Cancel – closes the window with no changes saved.
Vendors must be mapped to entities, not to people. If the vendor is a sole proprietorship, create an entity for that person.
To Approve or Reject a Vendor in eCounsel:
- In the eCounsel Lobby, click the Vendor is Awaiting Approval link for the vendor.
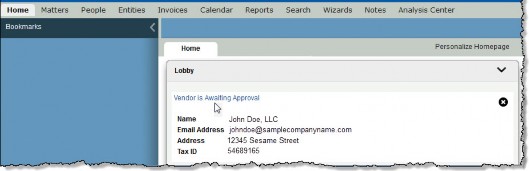
- The Notice for Vendor approval appears.
- If you want to reject the vendor, click Reject. If you reject a vendor by mistake, ask the vendor to resubmit the request.
- If you want to approve the vendor and the matching vendor is found in eCounsel, click Approve and Map. The vendor is now approved and mapped to eCounsel and the notification is removed from the Lobby. If a matching vendor could not be found, the option to Approve and Map is disabled. The TAXID for the Collaborati vendor does not have to match the TAXID for the vendor in eCounsel.
- If a matching vendor does not exist in eCounsel, click Search and Add. If the vendor appears in the list, select the vendor and click Approve and Map.
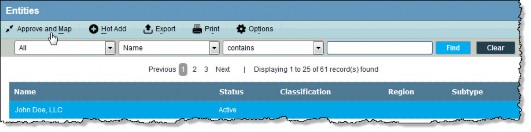
- If the vendor does not appear in the list and you want to enter the information manually, click Hot Add. Enter the vendor information and then click Find Duplicates. If duplicate records are found, review the list.
- If one of the duplicates is a correct match, select that record to approve and map.
- If no duplicate matches your vendor, click Continue, fill out the appropriate information for the vendor, and click Save.
The timekeeper is now approved and mapped to eCounsel and the notification is removed from the Lobby.
![]() If you click the
If you click the Delete button for an approval notification in the Lobby, the alert will be deleted and will not re-appear. You will not be able to approve the vendor unless you received an e-mail notification.
To Forward a Vendor to Another User for Approval:
- In the eCounsel Lobby, click the Vendor is Awaiting Approval link.
- Click the Forward to User link.
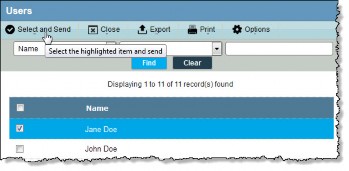
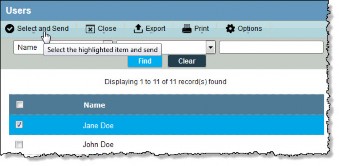
- In the list of users that appears, select the checkboxes for users to whom you want to forward the vendor approval request, and then click the Select and Send button. The approval notice is forwarded to the selected users and now appears in their Lobby.
Associating Vendors to Matters
An approved vendor must be a player on individual matters in order to bill against those matters.
To Associate a Vendor to a Billable Matter:
- In the Matters module in eCounsel, click the name the matter.
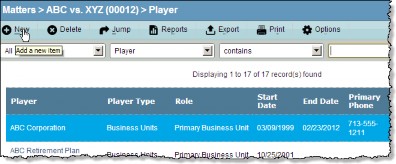
- In Edit mode, select the Player tab.
- If the vendor does not exist as a player, click New and select the vendor in the Player field. If the vendor already exists as a player on the matter, the vendor is already associated with the matter.
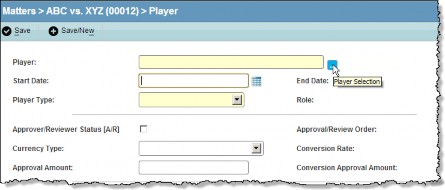
- Click the
 button next to the Player text box to select an entity or person.
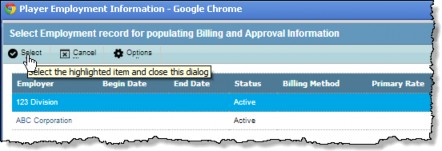
- If more than one active employment record exists for a person, select the employer from the Player Employment Information dialog box.
- Select the type of player and role from the dropdown lists. The player type selected determines the list of available roles.
- If the player has invoice approval authorization, click on the Approver/Reviewer Status [A/R] checkbox and enter the maximum amount for which the player has approval authority in the Approval Amount text box. This amount is retrieved from the person’s record in the People module. If the amount does not exist, enter the amount on the player record.

- If the entity is to have costs allocated to it, check the Chargeback checkbox and, if not already completed, enter the chargeback percentage and related account codes. When an invoice is linked to this matter, the account codes will be entered automatically into the invoice allocation record.

- Complete the remaining fields by entering information directly into the text boxes or select from the dropdown lists.
- Click the
 Save button.
After the scheduled synchronization task runs, the vendor is able to see the matter in Collaborati.
Removing a Vendor from a Matter
When a vendor is removed as a player from a matter or the matter is closed, the vendor can no longer see or bill against that matter in Collaborati. However, the client can still download pending invoices from that vendor.
When you remove the vendor as a player on the matter, that matter will be available in Collaborati for that vendor until the scheduled Collaborati Vendors/Timekeepers/Codes/Matters task runs again.
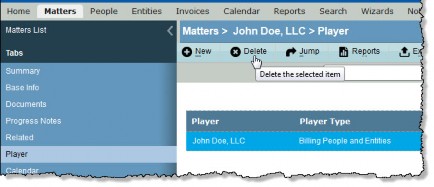
To Manually Remove a Vendor from a Matter:
- In the Matters module in eCounsel, click the name of the matter.
- In Edit mode, select the Player tab.
- Highlight the vendor and click the
Delete button.
If the vendor has an End Date as a player on matter, the vendor is removed from that matter on that date. The eCounsel administrator can configure an extended invoice submission period in Suite Manager that allows the vendor a designated period of time after an end date in which the vendor can still submit invoices. See the section on Configuring Invoice Integration Settings on page 27 for information on configuring the invoice submission period.
To Specify an End Date for a Vendor on a Matter:
- In the Matters module in eCounsel, click the name of the matter.
- In Edit mode, select the Player tab.
Click the vendor’s name and specify an end date using the calendar icon next to the End Date field.

- Click Save.
Configuring Vendor E-mail Notifications
Authorized vendors can receive notifications about invoice submissions by e-mail. When an invoice is rejected manually, a notification e-mail will be sent by eCounsel to the vendor/law firm to all notification e-mail addresses on the Billing Info tab for the entity.
To Specify the Vendor’s E-mail Address:
- In the Entities module in eCounsel, click the name of the vendor.
- In Edit mode, select the Billing Info tab.
- In the Add the vendor’s e-mail addresses for notifications re: invoice submissions area, click New to add the vendor’s e-mail addresses.

- Enter the individual’s e-mail address and click Save.
Deauthorizing Vendors
When a client manually deauthorizes a vendor in eCounsel, the vendor can no longer see or submit invoices to that client in Collaborati. However, the client can still download pending invoices from that vendor.
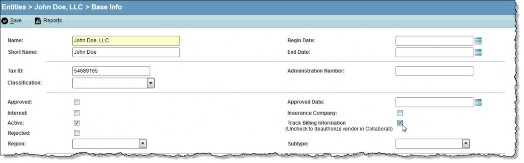
To Manually Deauthorize a Vendor:
- In the Entities module in eCounsel, click the name of the vendor.
- In Edit mode, select the Base Info tab.
- You have two options:
- Deselect the Track Billing Information checkbox.
- Inactivate the vendor by clearing the Active checkbox. If the vendor is made active again, the vendor is not automatically re-authorized.
- Click Save.
- E-mail support@mitratech.com to request that the vendor be disassociated from the client in Collaborati.
To Reauthorize a Vendor Who has been Manually Deauthorized:
- In the Entities module in eCounsel, click the name of the vendor.
- In Edit mode, select the Base Info tab.
- Select the Track Billing Information checkbox on the Base Info tab.
Importing Timekeepers
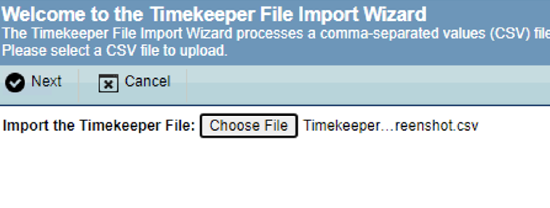
The Timekeeper File Import Wizard allows you to import a Comma-Separated Values (CSV) file that contains information about people who bill time against matters in eCounsel. Electronic invoices can then be submitted to eCounsel for the timekeeper and any business rules (such as a maximum billing rate, etc.) can be enforced.
The wizard uses a basic formatted CSV file that can be viewed and updated in Microsoft Excel. Contact Mitratech Support for a sample template file. This template file can then be distributed to your company’s vendors/law firms to enter information concerning the vendor/law firm employees that will be timekeepers on any invoices. After receiving the completed file from the vendor/law firm, review the information for accuracy, then save the file in Microsoft Excel as a CSV file to be imported using the wizard.
The eInvoicingTKImport.csv template file is located in the Templates\Timekeeper File Import
directory on the Suite installation media or can be obtained from Mitratech Customer Support.
![]() The following are required fields in the CSV file:
The following are required fields in the CSV file:
- Vendor Tax ID
- Timekeeper ID (Admin Number)
- Last Name
- First Name
- Billed Rate
- Billing Method
- Currency
Note that in Collaborati, each timekeeper must have a unique e-mail address.
The Timekeeper File Import Wizard uses the following rules to determine if updates or new records should be created:
- The wizard verifies the vendor identifier if two or more entities use the same tax identifier in eCounsel. The following values are accepted:
- A blank value
- A single vendor using the tax identifier
- Two or more vendors using the same tax identifier (the vendor identifier in the import file must match one of these)
- If duplicate timekeeper records exist in the import file, eCounsel returns an error. Remove any duplicates before re-submitting.
- eCounsel rounds all rates to two decimal points. Since the import file allows you to submit four decimal points for rates, the wizard will create a new record with the updated information and make the existing record inactive.
- If the timekeeper already exists in eCounsel, but the telephone or e-mail information differs from the existing information, eCounsel creates a new communication record with the imported information.
- If the timekeeper record already exists, but the rate is different, the wizard will create a new record with the updated information and make the existing record inactive.
- In order to import phone numbers, communication lookup types of “Phone – Business” (Primary Phone in .CSV file) and “Phone – Mobile” (Mobile Phone in .CSV file) are required.
![]() The Timekeeper File Import Wizard can only import a maximum of 500 records from the import file at one time. If you are importing more than 500 records, use multiple import files and repeat the steps to import each one separately.
The Timekeeper File Import Wizard can only import a maximum of 500 records from the import file at one time. If you are importing more than 500 records, use multiple import files and repeat the steps to import each one separately.
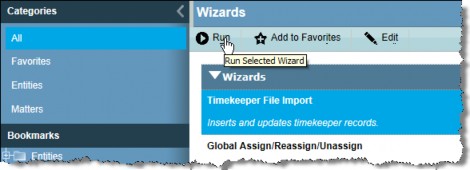
To Import Timekeepers:
- Open eCounsel and click the Wizards module.
- Select the Timekeeper File Import Wizard on the Wizards List page and click
 Run.
Run.
- Click the Browse button to select the .CSV file to import, then click Next.
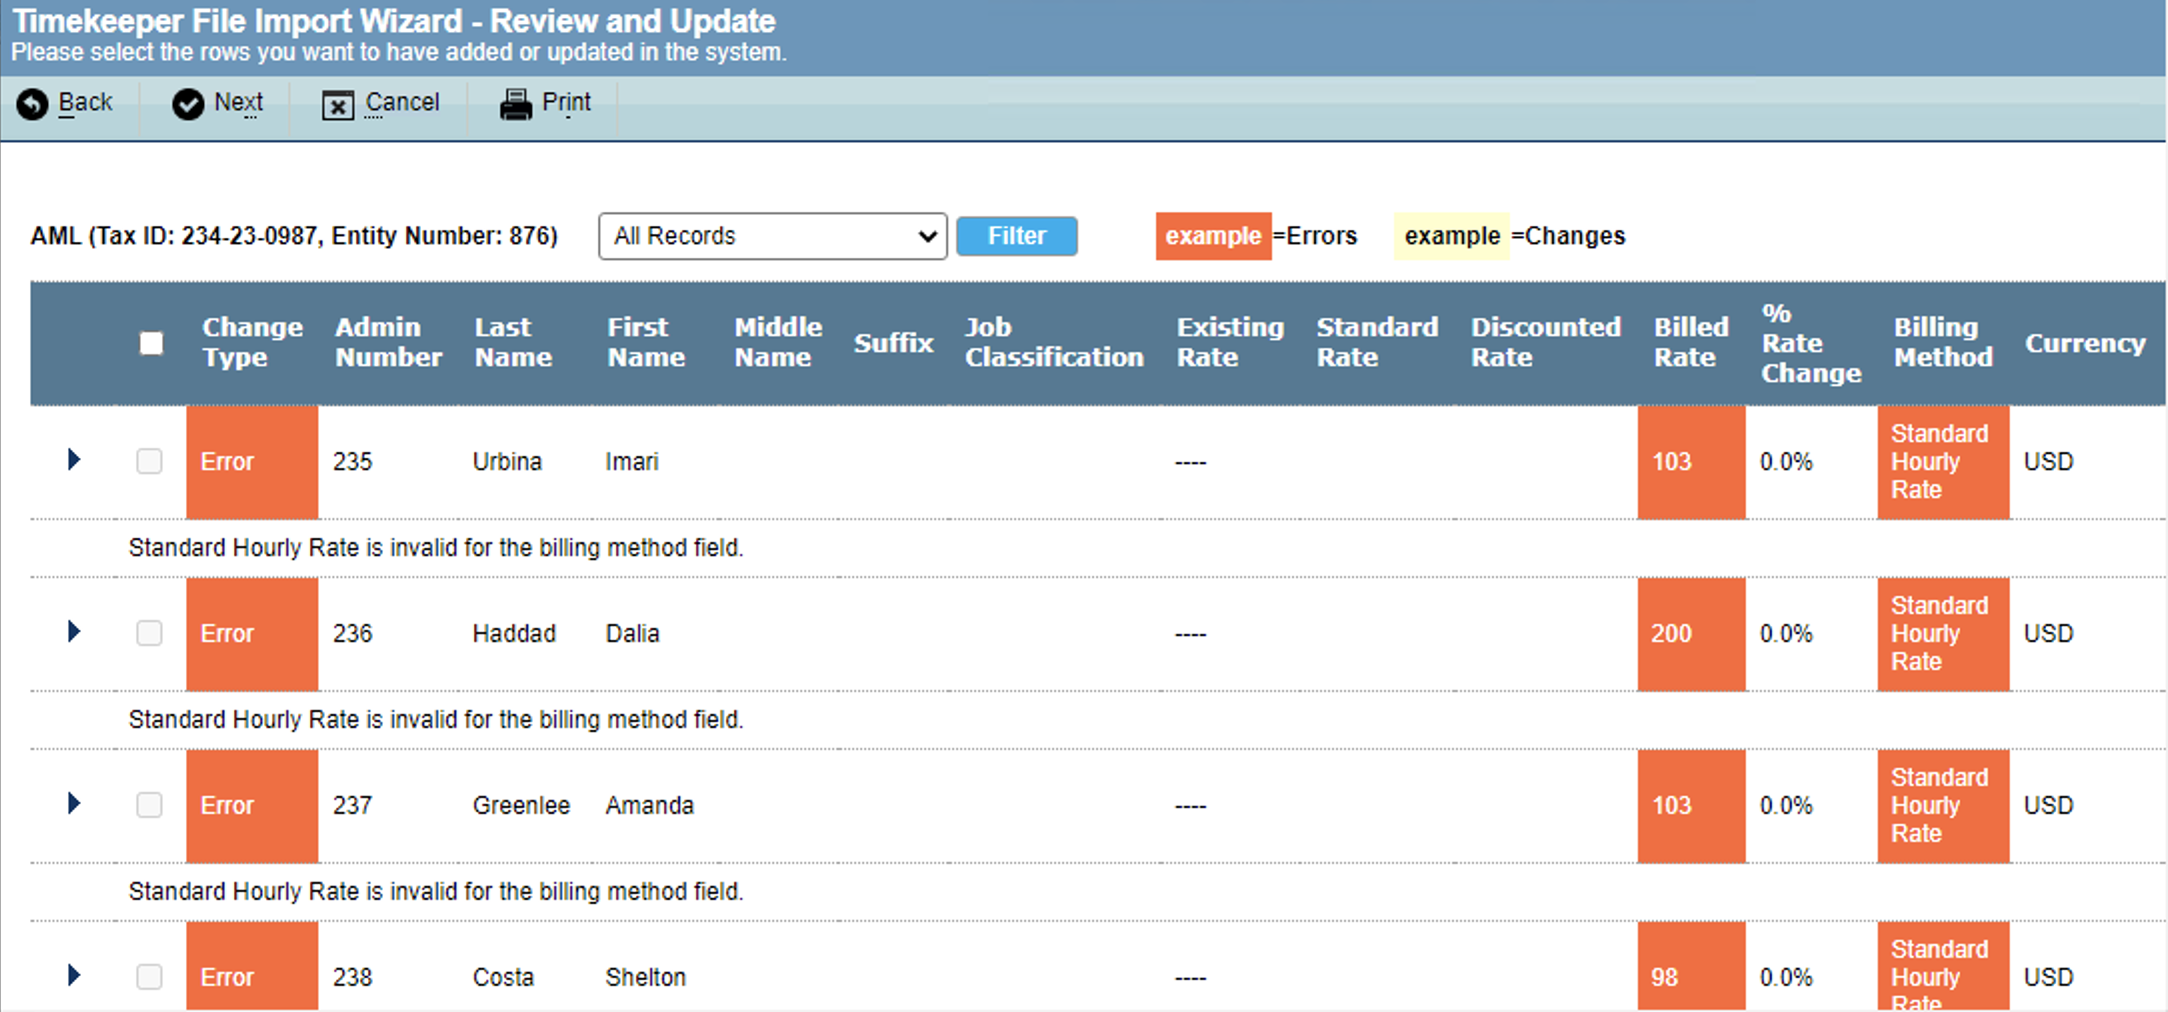
- Review the information that will be imported, then click the checkbox on each row to select the rows to be imported (click the checkbox in the heading to import all rows). All rows with errors display with a red background and cannot be imported.
![]() You cannot change information using the Timekeeper File Import Wizard. If information needs to be modified, click Cancel, modify the CSV file, and re-submit the file.
You cannot change information using the Timekeeper File Import Wizard. If information needs to be modified, click Cancel, modify the CSV file, and re-submit the file.
- Click Next.
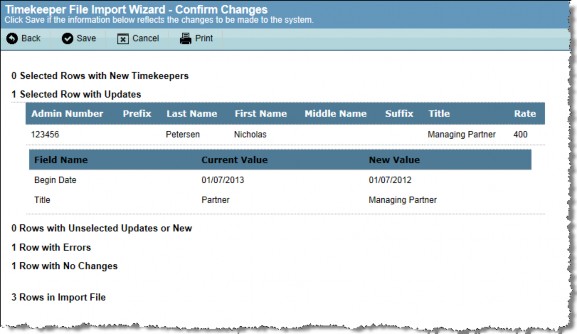
- Click Save to import the selected information into eCounsel.
- Click
 Close or Import Another File.
Approving and Mapping Timekeepers
After a client approves a vendor in eCounsel, the vendor can submit timekeepers for that client in Collaborati. The approver then receives a Lobby notification to approve the timekeeper. eCounsel uses the TKID and vendor name to map the vendor timekeeper to an existing timekeeper in eCounsel. If a matching timekeeper exists, the approver can approve or reject the mapping. If a matching timekeeper does not exist in eCounsel, the approver has two options:
- Request that the vendor updates the timekeeper spreadsheet with the new timekeeper and reimports the timekeeper spreadsheet. When the timekeeper is approved, the timekeeper data is updated and added to eCounsel.
- Enter the timekeeper information from the vendor into eCounsel manually.
To Approve or Reject a Timekeeper to a Record in eCounsel:
- In the eCounsel Lobby, click the Timekeeper is Awaiting Approval link for the specific timekeeper.
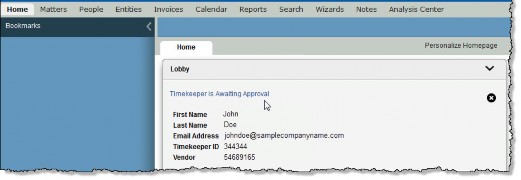
- The Notice for Timekeeper approval appears.
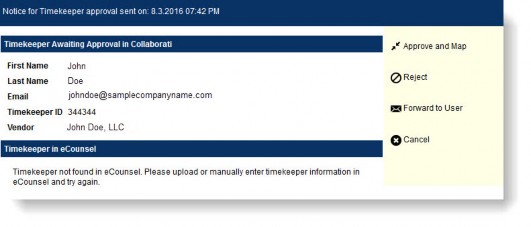
- If you want to reject the timekeeper, click Reject. If you reject an invoice by mistake, ask the vendor to resubmit the timekeeper.
- If you want to approve the timekeeper and a matching timekeeper exists in eCounsel, click Approve and Map. The timekeeper is now approved and mapped to eCounsel and the notification is removed from the Lobby. If a matching timekeeper could not be found, the option to Approve and Map is disabled.
The timekeeper is now approved and mapped to eCounsel and the notification is removed from the Lobby.
![]() If you click the Delete button for an approval notification in the Lobby, the alert will be deleted and will not re-appear. You will not be able to approve the vendor unless you received an e-mail notification.
If you click the Delete button for an approval notification in the Lobby, the alert will be deleted and will not re-appear. You will not be able to approve the vendor unless you received an e-mail notification.
To Forward a Timekeeper to Another User for Approval:
- In the eCounsel Lobby, click the Timekeeper is Awaiting Approval link for the specific timekeeper.
- Click the Forward to User link.
- In the list of users that appears, select the checkboxes for users to whom you want to forward the timekeeper approval request, and then click the Select and Send button. The approval notice is forwarded to the selected users and now appears in their Lobby.
Deauthorizing Timekeepers
When a client deauthorizes a timekeeper in eCounsel, the timekeeper can no longer bill against matters for that client.
To Deauthorize a Timekeeper:
- In the People module in eCounsel, click the name of the timekeeper.
- In Edit mode, select the Base Info tab.
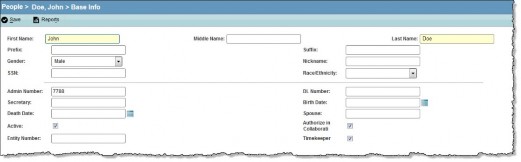
- You have two options:
- Deselect the Authorize in Collaborati checkbox.
- Inactivate the timekeeper by clearing the Active checkbox. If the person is made active again, the timekeeper is not automatically re-authorized.
- Click Save.
To reauthorize a timekeeper who has been deauthorized, select the Authorize in Collaborati checkbox.
Exporting Timekeepers
Starting in Suite 8.11 SP 9, users can send vendors a list of current Active Timekeepers and corresponding information so that the vendors can update timekeepers that are no longer valid and should be end dated.
To export timekeepers:
- From the vendor's Employee tab, click the new Timekeeper Export button.
- Select the date range and integration format (Collaborati or Corridor).
- Click Export. The results will be exported into a CSV file.