
How to Use the New Matter Wizard
Understanding the New Matter Wizard Workspace
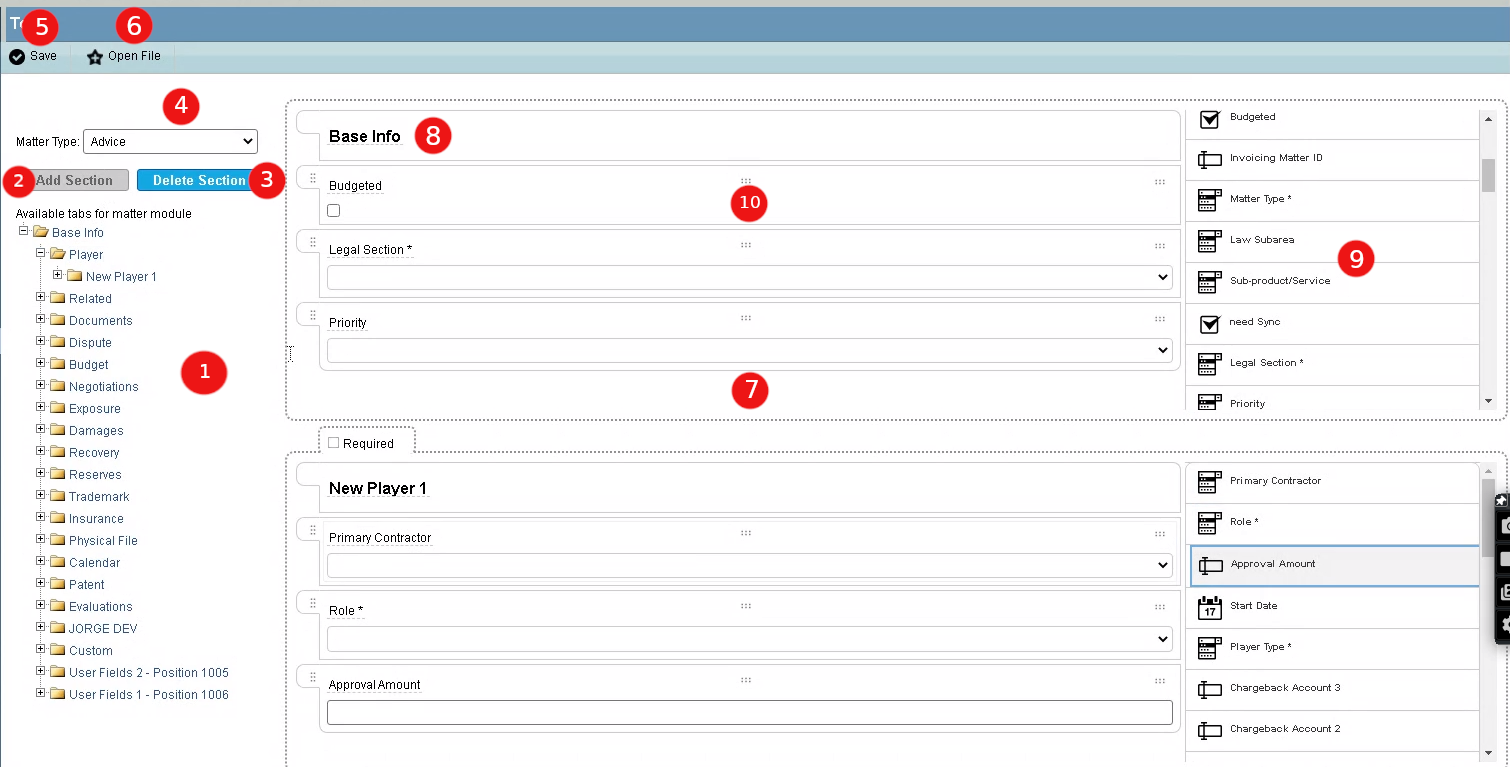
The New Matter Wizard (NMW) workspace is divided into sections or tabs as follows:
-
The left panel with the matter module tabs.
-
The Add Section button.
-
The Delete Section button.
-
The Matter Type dropdown list.
-
The Save button
-
The Open File button.
-
The main panel. It contains the Base Info and New Player forms.
-
The Base Info form, where you enter the matter information.
-
Available matter attributes that you can add to Base Info.
Enable the New Matter Wizard in Suite Manager
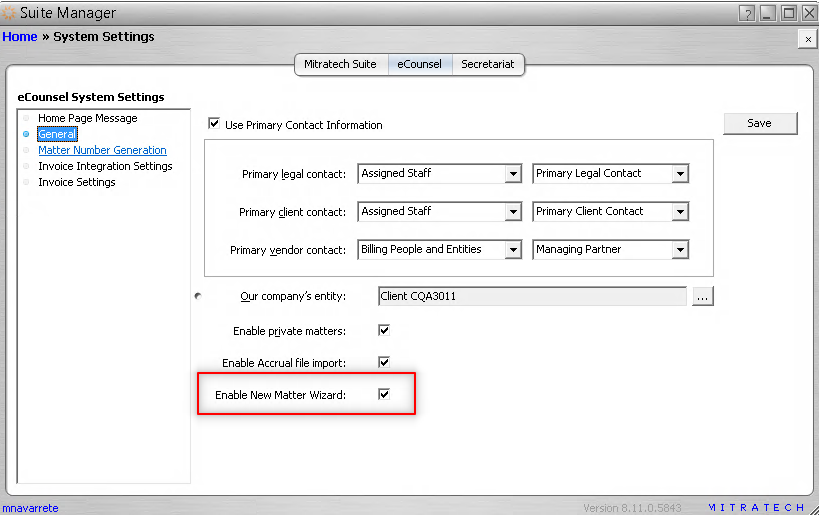
Before you start to use NMW in eCounsel, you need to enable it in Suite Manager.
-
Log in to Suite Manager.
-
Go to Systems Settings > eCounsel > General.
-
Check the Enable New Matter Wizard box and click Save.
Create a Custom NMW Template
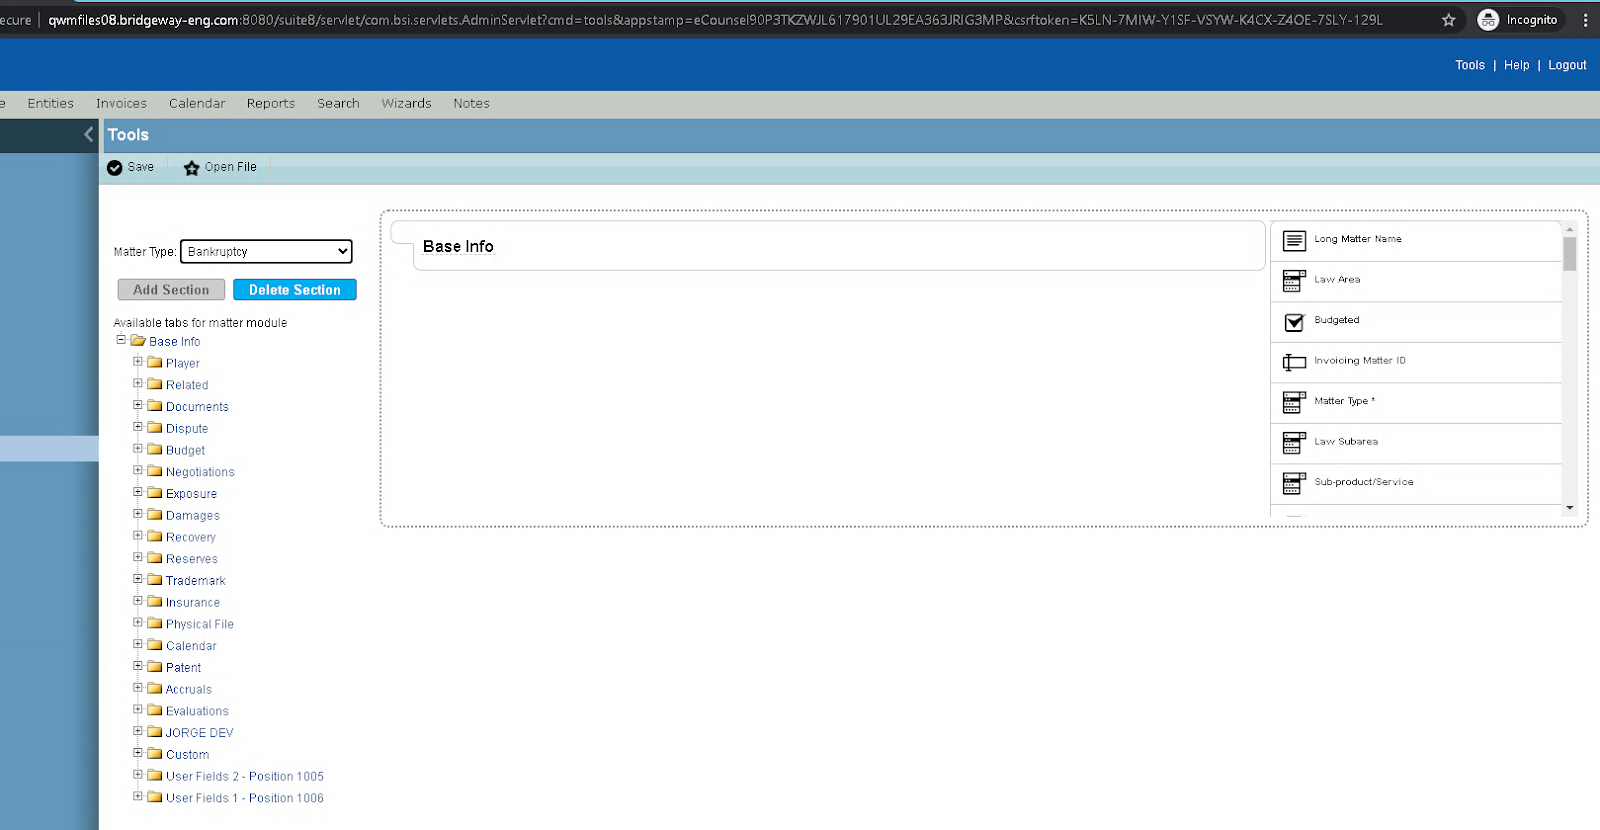
Add a New Section
-
Log in to eCounsel or Secretariat.
-
Select Tools (top right) > New Matter Wizard Tool (left panel).

-
Choose a matter type from the dropdown list.
Note: By default, the Base Info section is displayed each time that you run NMW.
-
Choose a tab from the available tabs in the matter module.
-
Click on Add Section.
-
A new section is displayed, with the section title and a list of fields that can be added to the main section panel.

Note: The section title can be edited.
Conditional Sections
Some tabs are conditional sections. They appear only after adding certain fields to Base Info. The following table lists the main fields with their respective dependent tab.
|
Main field in Base Info |
Conditional tab |
|
Litigated field |
Dispute |
|
Budgeted field |
Budget |
|
Insured field |
Insurance |
|
Accrue Cost |
Accruals |
Sorting Sections
You can move sections up and down as needed by using the arrow buttons that appear when you add more than two sections.
Note: Base Info always remains at the top of the template.

Required Sections
You can classify a section as required by checking the Required box on the upper left corner.

The Required box sets all fields in that section as mandatory. Users can save a new matter only if the entire section is filled.
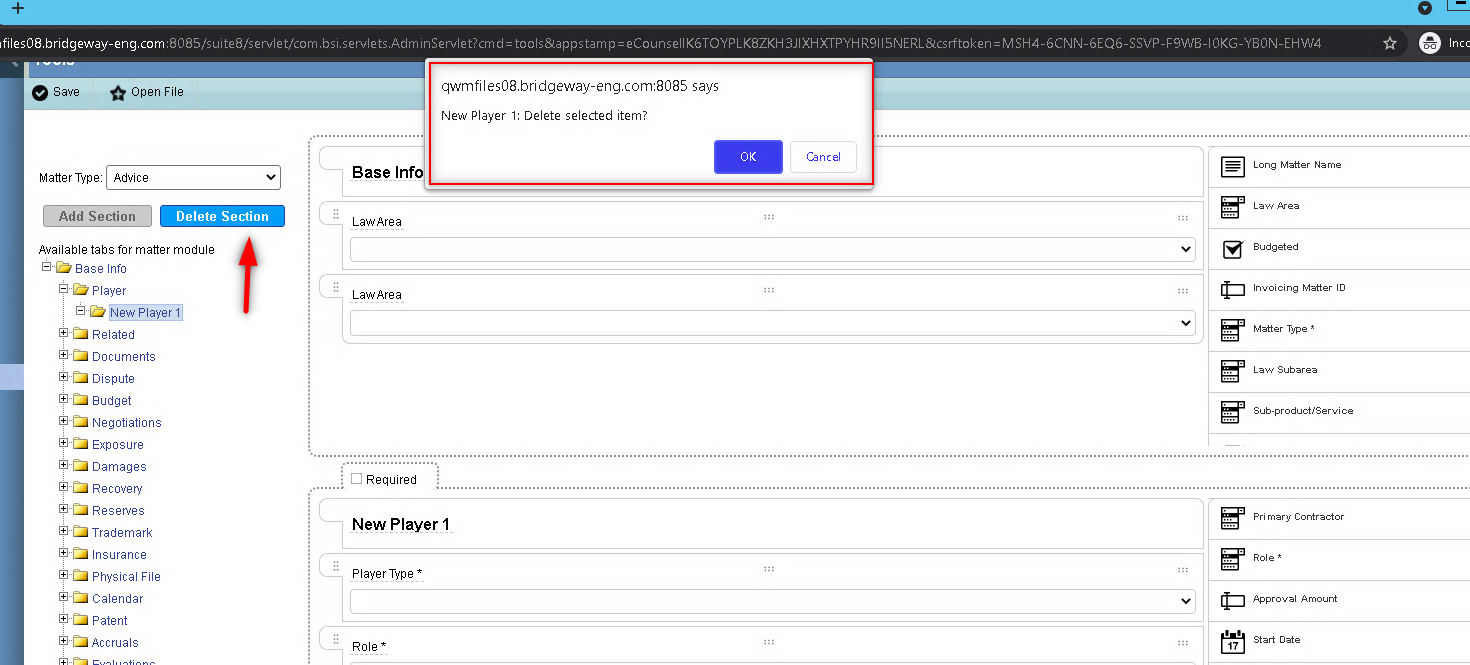
Delete a Section
-
Select a tab in section Available tabs for matter module on the left and then click on Delete Section.
-
Click OK in the confirmation message.
How to Edit the Matter Type
When you edit a template before you change the Matter Type under Base Info, you delete the sections added previously. If you need to edit a template, including Matter Type, follow this sequence:
-
Click Load Template.
-
Edit the Matter Type.
-
Save the changes and click OK on the warning message.
-
Edit the rest of the sections. Save and close the wizard.

Add New Fields to the Main Panel
To add new fields to the main panel:
-
Double-click on the field.
-
Drag and drop the field to the main panel.
Edit Attributes as Read Only
You can edit the attributes of the new field:
-
Move the mouse to the six dots located to the right of the field.
-
Select the options that you want to add to the field.

-
To display the available attributes, click on the pencil icon (Edit button). You can enable the field as Read Only and add attributes.


-
Click on Save and close the window.

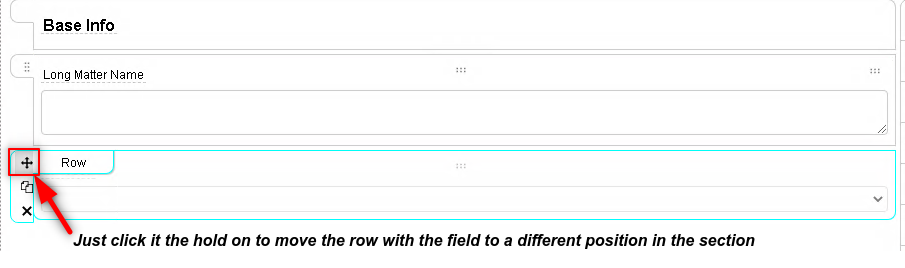
Move Fields to a Different Position
You can move fields to a different position.
-
Move the mouse to the six dots located to the left of the field.
-
With the menu expanded, use the + sign to move the field to another position.
Copy a Field
To copy a field:
-
Move the mouse to the six dots located to the left of the field.

-
Click on the copy icon to duplicate the field as illustrated in the image.

Delete a Field
To delete a field:
-
Move the mouse to the six dots located to the left of the field.
-
Click on the x button.
Set a Default Value
To set a default value, fill the text field with the default value.

Set a Default Date Value
To set a default date value, select a date from the date picker.

Set a Default Value in a Checkbox Field
To set the default value, check or uncheck the checkbox.

Set a Default Value in a Dropdown Field
To set a default value in a dropdown field, follow these steps:
-
Move the mouse to the six dots located to the right of the field.
-
Click on the pencil icon.

-
Click on the + sign to display default value options for the dropdown field.
-
Choose a default value.
Note: The default value must be one of the available options for the dropdown field.

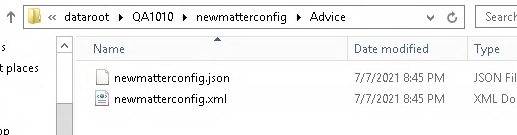
Save a New Template
Click on Save to keep the changes to the template. When the template is saved, a JSON file and an XML file are created in the dataroot/newmatterconfig directory. The JSON file loads the template to the New Matter Wizard and the XML file describes the template.

Create a New Matter Using the NMW Template
To create a new matter by using the NMW template, follow these steps:
-
Go to eCounsel and click on the matter’s module.
-
Click the New button.
-
In the pop-up window, select the matter type of the template created in NMW.
-
The new matter form displays with the same layout of the template.
-
Fill the required fields and then click on Save.
-
The Base Info webpage loads with that information.


Edit a Template in the NMW
To edit a template follow these steps:
-
Select the matter type to edit.
-
Click the Load Template button.
-
Edit the template as needed and click on Save.
