Configuring Universes
Overview
A specific naming convention is required when exporting the universe to the BusinessObjects server. The universe name must include the universe name, Suite product, and unique database identifier. For example, for eCounsel a universe may be named as follows:
Matter Invoice – eCounsel – Suite8
where Matter Invoice is the name of the universe, eCounsel is the name of the Suite product, and Suite8 is the unique database identifier.
A sample universe name for Secretariat may be as follows:
Entity – Secretariat – CorpSecr
where Entity is the name of the universe, Secretariat is the name of the Suite product, and CorpSecr is the unique database identifier.
Remember, the universe must be named and exported to the BusinessObjects server as stated above in order for the universe to appear within eCounsel or Secretariat.
Importing Universes in BusinessObjects BI Platform 4.2
Before importing the universe, you need to place the LCMBIAR file provided by Mitratech Software in the repository using Promotion Management in the Central Management Console.
- Open the Central Management Console
- Select Promotion Management from the drop-down menu.
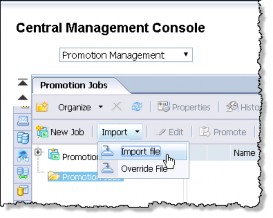
- Click Import and select Import File.
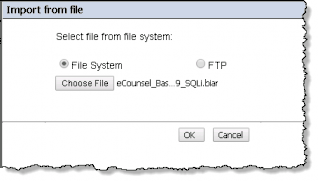
- Select the LCMBIAR file from the file system.
- Type the name for the job. Select a destination and when prompted, log into the destination system.
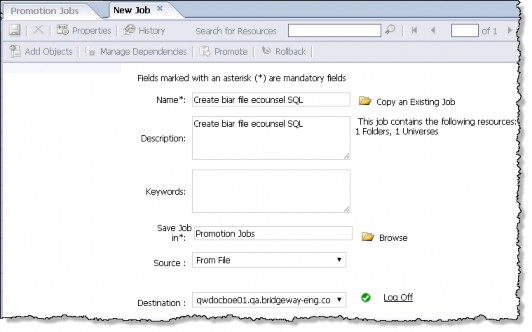
- Click the Create button.
- The job now appears in the list. Click the Promote button on the dashboard.

- Click the Promote button in the Promote dialog box.
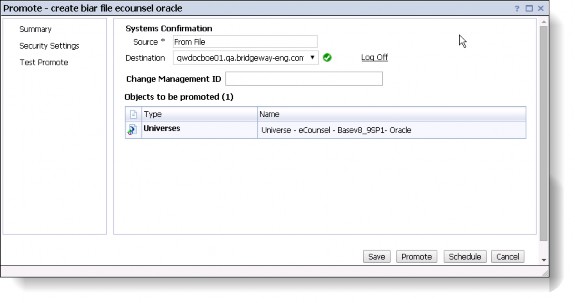
You are now ready to import the universe using the Universe Design Tool.
When launching the Universe Design Tool, you will be prompted for credentials to the BusinessObjects server. The login credentials must provide access rights to upload a universe to the BusinessObjects server. Custom universes can be requested as a Mitratech service.
To Import a Universe:
- Open the Universe Design Tool.
- On the User Identification dialog box, select the name of the BusinessObjects server to which the universe is to be imported from the System drop-down list. Provide a user name and password for a BusinessObjects user account with permission to edit a universe, and click OK.
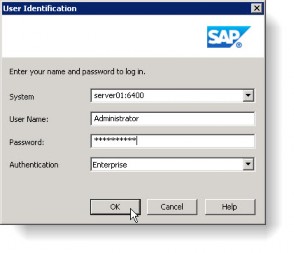
- If the Quick Design Wizard displays, click Cancel.
- Click the File menu and select Import.
- On the Universe Design Tool window, click the File menu, and select Import.
- On the Import Universe dialog box, click the Browse button. On the Select a Universe Folder dialog box, select the appropriate folder, and then click OK.
- Select the universe to import from the Available Universes list, and click OK.
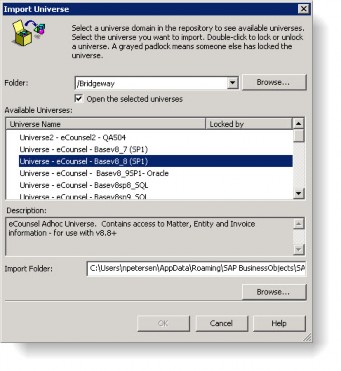
- Click OK on the “Universe successfully imported” message box.
- On the Universe Designer window, click the File menu, and select Parameters.
- On the Universe Parameters dialog box, change the value in the Name field to
<UniverseName> - <Product> - <DatabaseDisplayName>, where
- <UniverseName> is the name of the universe,
- <Product> is either eCounsel or Secretariat, and
- <DatabaseDisplayName> is the value retrieved from the Suite Database Properties Administrator page for the Suite database to which the universe will connect.
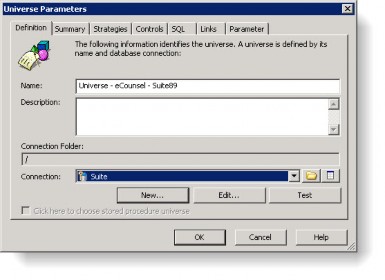
- If a connection to the appropriate Suite database exists already, select it from the Connection list, click OK, and go to Step 18 to export the universe. Otherwise, click New and continue to the next step.
 You must have separate connections for eCounsel and Secretariat if you have universes for both
 - On the Welcome to the New Connection Wizard screen, type a name for the connection, and click Next.
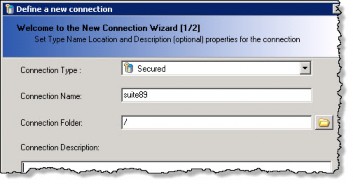
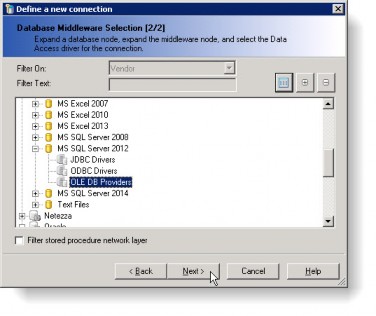
- On the Database Middleware Selection screen, select the appropriate driver for the Suite database, and click Next. Valid options include:
- Microsoft > MS SQL Server 2012 > OLE DB Providers
- Oracle > Oracle 11 > Oracle Client
- Oracle > Oracle 12 > Oracle Client
 You must install the client database driver appropriate for your database type prior to performing this step.
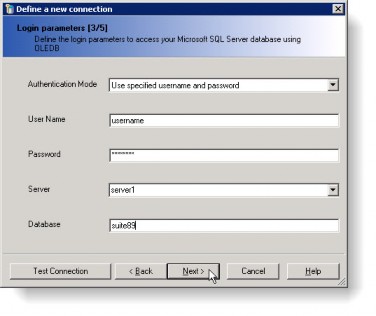
- On the Login Parameters screen, enter or select the user name and password, as well as the server and database (for SQL Server) or service (for Oracle) name for the Suite database in the appropriate fields, and click Next. Click Test Connection to verify the connection.
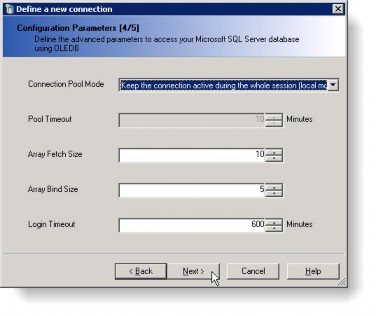
- On the Configuration Parameters screen, select Keep the connection active during the whole session (local mode) from the Connection Pool Mode list, then click Next.
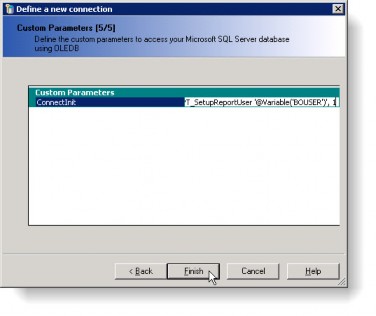
- On the Custom Parameters screen, enter the appropriate value for the application universe and database as specified below in the ConnectInit text box, and then click Finish.
|
Product |
Database |
Command |
|---|---|---|
|
eCounsel |
SQL |
exec RPT_SetupReportUser '@Variable('BOUSER')', 1 |
|
eCounsel |
Oracle |
BEGIN RPT_SetupReportUser ('@Variable('BOUSER')', 1); END; |
|
Secretariat |
SQL |
exec RPT_SetupReportUser '@Variable('BOUSER')', 2 |
|
Secretariat |
Oracle |
BEGIN RPT_SetupReportUser ('@Variable('BOUSER')', 2); END; |
- On the Universe Parameters dialog box, click Test to test the connection. When the test has completed successfully, click OK to close the Test the Connection dialog box and click OK to close the Universe Parameters dialog box.
- The universe is now ready to be exported. In the Universe Designer Tool, click the File menu and select Export.
- On the Export Universe dialog box, click OK.
- On the Warning message box, click Update to update the existing universe. Updating the universe ensures that any saved reports imported with the universe are associated with the newly updated universe.

- Click OK on the “Universe successfully exported” message box.
- Close the Universe Design Tool.
Updating Custom ORACLE Universes
![]() This procedure only applies to ORACLE databases when you are upgrading to Suite 8.5 or higher from Suite 8.4 or lower.
This procedure only applies to ORACLE databases when you are upgrading to Suite 8.5 or higher from Suite 8.4 or lower.
To Import the Universe:
- Click the Start menu, select All Programs, select SAP Business Intelligence, select SAP BusinessObjects BI Platform 4 Client Tools, and select Universe Design Tool.
- On the User Identification dialog box, select the name of the BusinessObjects server to which the universe was imported from the System list.
- Provide a user name and password for a BusinessObjects user account with permission to edit a universe, and click OK.
- If the Quick Design Wizard displays, click Cancel.
- On the Universe Design Tool window, click the File menu, and select Import.
- On the Import Universe dialog box, click the Browse button next to the Folder selection field. On the Select a Universe Folder dialog box, select the appropriate folder that was previously imported, and then click OK.
- Select the universe to import from the Available Universes list, and click OK.
- Click OK on the “Universe successfully imported” message box.
To Remove Table Qualifiers:
- On the Universe Design Tool window, click in the tables diagram then press <Ctrl>+A on the keyboard to select all.
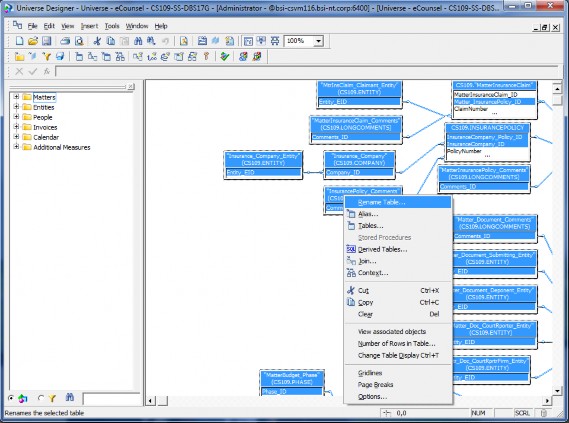
- Right-click on any table and select Rename Table.
- On the Rename Tables dialog box, click OK (do not enter any text in any fields).
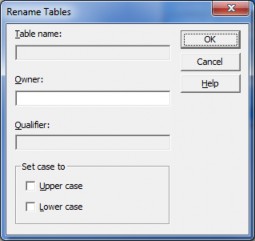
- All table qualifiers will be removed from all tables.
To Remove Table Qualifiers from Derived Tables:
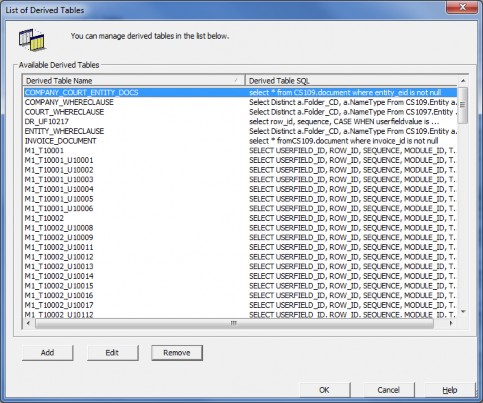
- On the Universe Design Tool window, click the Tools menu and select List of Derived Tables.
- On the List of Derived Tables dialog box, click the Edit button for the first derived table to remove the table qualifiers.
 This procedure must be repeated for each derived table in the list.
- On the Derived Tables dialog box, locate and highlight the table qualifier in the SQL expression, and press the <Delete> key on the keyboard to remove it.
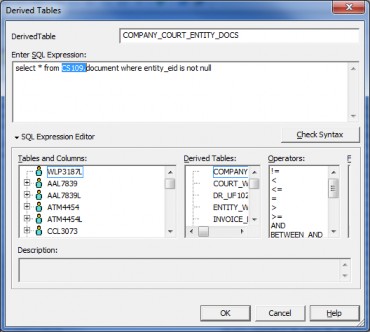
- Click the Check Syntax button.
- On the confirmation message box that the syntax has been verified, click OK. If you receive an error, click Cancel, and make sure that only the table qualifier has been deleted (deleting a space either before or after the qualifier will result in an error), then repeat Step 4.
- On the Derived Tables dialog box, click the OK button.
- Repeat Steps 2-6 for each derived table in the list.
To Export the Universe:
- On the Universe Design Tool window, click the File menu, and select Save to save the changes to the universe.
- Click the File menu, and select Export.
- On the Export Universe dialog box, click OK.
- Click OK on the “Universe successfully exported” message box.
- Close the Universe Design Tool.
Updating Analysis Center Reports for ORACLE Databases
 For saved Analysis Center reports, additional steps must be taken if you are using an ORACLE database. (If you are using a Microsoft SQL Server database, no changes must be made to saved Analysis Center reports.)
Saved Analysis Center reports contain cached SQL expressions from the universe, which will generate errors when run against the updated universe. Once the ORACLE universe is updated, you will need to edit each saved Analysis Center report in BusinessObjects BI Launch Pad and re-save it.
To Update Saved Analysis Center Reports:
- Log into BI Launch Pad.
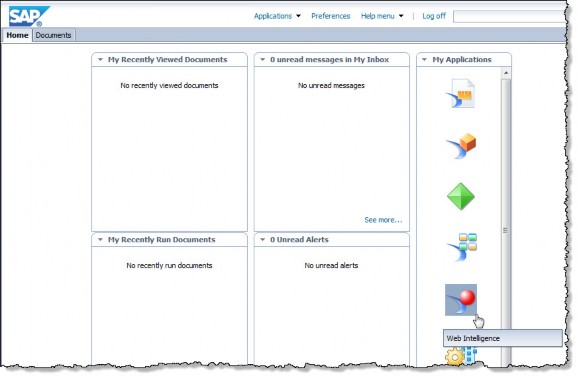
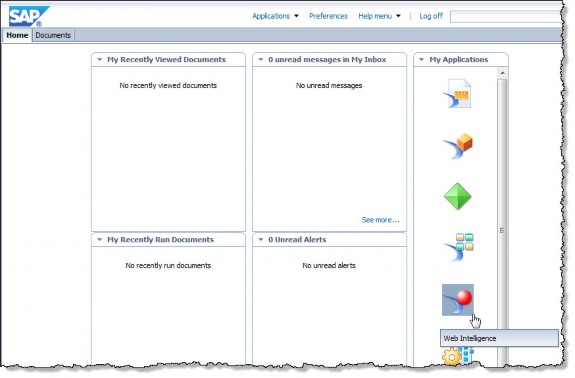
- On the Home page, click the Web Intelligence icon.
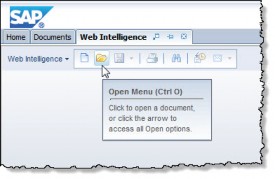
- Click the Open Menu icon.
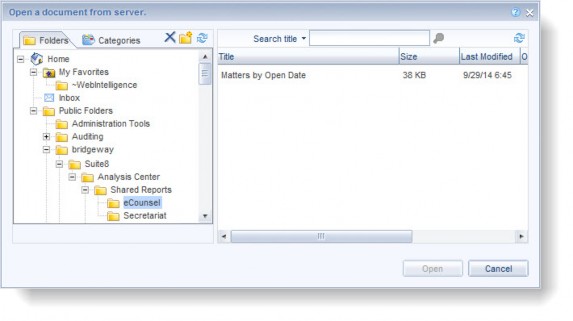
- In the Open a document from server dialog box, locate the folder containing the saved reports. Note that Analysis Center reports may reside in a nested directory structure following these conventions:
- The root folder as defined by the Root BO Directory value in the Suite Manager BusinessObjects system settings (for example, bridgeway)
- A subfolder of the root folder from above matching the unique database identifier as defined by the Database Identifier value on the Database Properties Administrator page for Suite (for example, Suite8)
- A subfolder of the previous folder named Analysis Center
- A subfolder of the Analysis Center folder matching either the user’s Suite login name (for private reports) or Shared Reports (for public reports)
- A subfolder of the previous folder matching the Suite application (either eCounsel or Secretariat)
- Double-click a report to open it.
- Click the Design button, and then click the Edit button that appears. The Query Panel dialog box appears.

- On the Query Panel dialog box, click the View Script button.
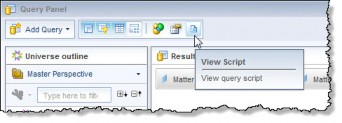
- On the Query Script Viewer dialog box, verify that the current SQL expression contains table qualifiers (once the procedure is completed, these table qualifiers will be removed).
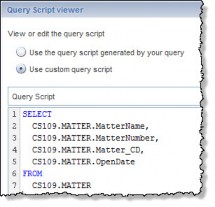
- Click the Close button on the Query Script Viewer dialog box, and then click the Close button on the Query Script Viewer dialog box. If asked if you want to save the changes, chose Yes.
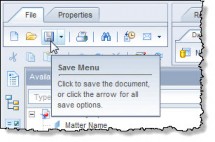
- Save the changes to the report by clicking the Save button on the main dashboard.
- Click the Edit button on the main dashboard and then click the View Script button on the Query Panel dialog box to verify that the table qualifiers have been removed. Once verified, click the Close button.
- Repeat these steps for each saved report.
Updating Universes
If you are updating a universe with a new .biar file provided by Mitratech, you must re-import the universe using the name of the existing universe, then export the universe to the BusinessObjects server, replacing the existing universe. This procedure is necessary to update any universe created prior to Suite Version 8.5.
Creating the AnalysisCenterTemplate
In order to open BI Launch Pad correctly, an Analysis Center Template needs to be created and saved to the BusinessObjects server.
To Create the Analysis Center Template:
- From eCounsel or Secretariat, open Analysis Center and click Open BI Launch Pad.
- On the Home tab, select the Web Intelligence icon from the My Applications group.
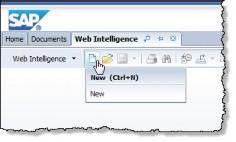
- Click New.
- Select No data source.
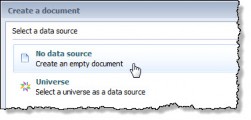
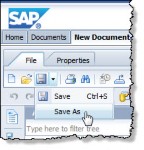
A new document is created that contains no data. - Select Save As from the File tab.
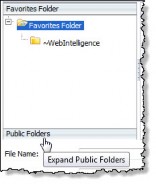
- Click the Public Folders tab.
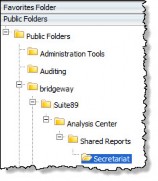
- Save a copy of the template eCounsel and/or Secretariat folder inside the Shared Reports folder within the universe and save the document with the name AnalysisCenterTemplate.
To Apply Read Only Access to the AnalysisCenterTemplate:
- On the BusinessObjects server, log into the Central Management Console.
- Navigate to the folder where the AnalysisCenterTemplate object is located.
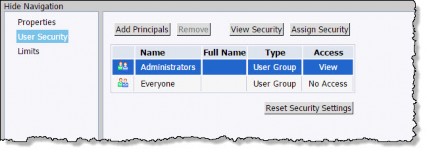
- Right-click the AnalysisCenterTemplate object and select User Security. A list with all the Principals (Users or Groups) and the access levels set for this object appears.
- Click the access level link for the principal for which you want to set the report as read only and click the Assign Security button.
- Select the View access level in the Available Access Levels column and click the right arrow to add it to the Assigned Access Levels column.
- Verify that the Inherit From Parent Folder and Inherit From Parent Group checkboxes are unchecked to avoid inheriting security access rights from either the parent folder or parent group that might override this settings.
- Click the Apply button to apply the settings.
- Click the OK button to close the assign security dialog.
- Verify that the Access Level is set to View for the selected group.
- Click the Close button to close the User Security dialog.

