Configuring HotDocs
Configuring HotDocs
The purpose of this section is to provide instructions for installing and configuring HotDocs with the default templates included with Suite. A single license for HotDocs Developer is included with the Secretariat license. It is optional and separately licensed for eCounsel. Contact Mitratech Support for licensing information.
Deploying HotDocs
In order to generate documents in Suite, access to a HotDocs Server must be configured. Mitratech provides a HotDocs Server in a hosted environment or you can purchase a HotDocs Server license from Mitratech.
To Deploy HotDocs:
- Contact Mitratech’s Customer Support department to create an account on the hosted HotDocs Server (888- 664-0005 or support@bridge-way.com).
- Configure the Document Assembly settings in the System Settings component of Suite Manager with the HotDocs server information.
- When your HotDocs server account is created, import the templates from the installation media for Secretariat.
- Install HotDocs Developer on the computer (see below) of a user who will be creating and publishing templates.
Installing HotDocs Developer
To create and publish templates in HotDocs, HotDocs Developer needs to be available from each user’s computer who will be creating, testing, and publishing the templates.
To Install HotDocs:
- Run the HotDocs Developer installation.
- Click Next on the HotDocs splash screen.
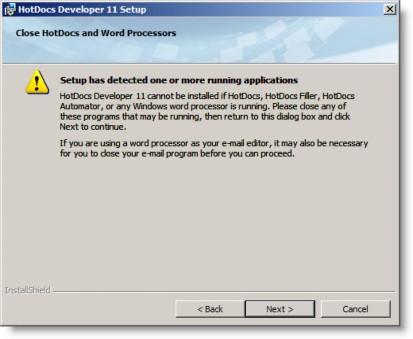
- A warning will display reminding you to close all open programs, particularly any Microsoft Office programs. Follow the instructions on the screen, then click Next.
- On the Software License Agreement screen, scroll down to view the entire agreement and click I accept the terms in the license agreement, then click Next.

- On the Select Setup Type and HotDocs Program Files Folder screen, click Next to accept a Typical installation and the default location.

- On the Select Supported Word Processors screen, select the appropriate program(s), and click Next. This identification allows integration between HotDocs templates and the word processor.

- On the Ready to Install screen, verify that the information is correct and click Install to continue or clickBack to change a setting.

- On the last screen, click Finish. Clear the Register checkbox, if desired; registration is not required.

Configuring Document Assembly
Generating documents in Suite is done through HotDocs. Access to a HotDocs Server must be available. Mitratech provides a HotDocs Server in a hosted environment. A single license for HotDocs Developer for template creation and modification is included with the Secretariat license. It is optional and separately licensed for eCounsel. Contact Mitratech’s Support department for licensing information.
To Configure Document Assembly:
- Open Suite Manager.
- On the Suite Manager control panel, click on the
 System Settings component in the System Configuration area.
 - On the Mitratech Suite tab of the System Settings window, click on the Document Assembly settings.
- Enter the following HotDocs server settings (provided by Mitratech after an account is created on the hosted HotDocs server):
- Type the Uniform Resource Locator (URL) to the Suite document assembly application.
- Type the URL to the HotDocs Server.
- Type the path to the directory that contains the .RTF files for temporary storage of HotDocs templates in the physical file path for templates on the HotDocs server text box. Include the slash at the end of the path.
- Type the default directory where newly created documents will be saved in the physical file path for documents on the HotDocs server text box. Include the slash at the end of the path.
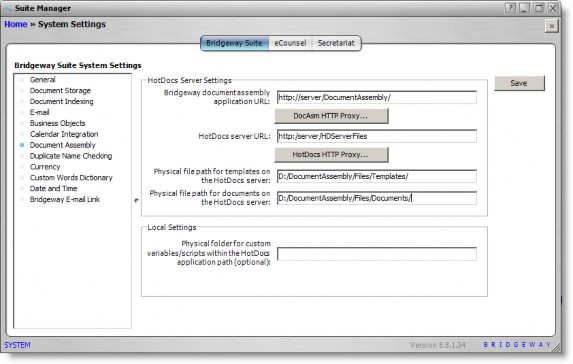
- Optionally, type the name full path to the directory in which the customvariables.xml file and any custom script files are stored in the Physical folder for custom variables/scripts (optional) text box.
Mitratech recommends creating a folder in the data root for any custom variables and scripts for document assembly.
- Click Save.
Importing Secretariat Standard Templates
The Template Import component of Suite Manager installs the document assembly templates into the database and uploads these templates to the Mitratech hosted HotDocs Server. Mitratech provides standard templates that can be used for generating documents through the Reports and Wizards modules in Secretariat.
To Import Standard Templates:
- Open Suite Manager.
- On the Suite Manager control panel, click on the
 Template Import component in the Tools & Utilities area.
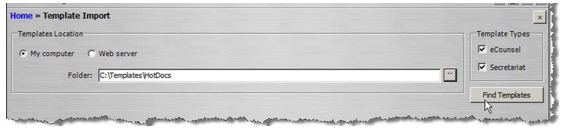
 - On the Template Import window, select the Web server template location.
- Click the menu and select the http://host1.bridge-way.com/template...ents/templates location.

- Click the checkbox next to the Secretariat application.
- Click Find Templates.

- On the Templates to Import dialog box, it is recommended that all the default Suite templates be installed. Click the Select All button, or, if you prefer, select the appropriate checkbox(es) to indicate which templates you want to install.
- Click the Import Selected Templates button. A progress meter will display. You can abort the installation at any time by clicking Cancel. If any errors are encountered, they will display at the bottom of the dialog box.
- Click the Close
 button to exit the Templates to Import dialog box.
Importing Custom Templates
The Template Import component of Suite Manager also can be used to bulk import custom document templates into either Secretariat or eCounsel. In order to update Suite with information about the document template, an additional XML file must be created with information that is written to the database. The contents of the XML file are as follows:
<report>
<!—The value of the Output ID is the same as the HDTemplate_ID -->

<Output_ID>13000</Output_ID>

<OutputName>Name of Document</OutputName>

<!—Values are matter=1,people=2,entity=3,invoice=4 -->

<OutputCategory_ID>3</OutputCategory_ID>

<!-- The value must be "Documents" -->

<OutputType_CD>Documents</OutputType_CD>

<OutputFileName>template_name.rtf</OutputFileName>

<!—The value must be "server side HotDocs/HotForms" -->

<OutputFileType>server side HotDocs/HotForms</OutputFileType>

<OutputPath/>

<NamingConvention/>

<Description>Comment that appears in the Reports module.</Description>

<Required>T</Required>

<OutputTemplate_ID/>

<!-- This node is required -->

<HDTemplate_ID>13000</HDTemplate_ID>

<!—Values are suite=0,ecounsel=1,secretariat=2 -->

<Program_ID>2</Program_ID>

<!-- This node is required -->

<HD_FileName>template_name.rtf</HD_FileName>

<!-- This node is required -->

<HDComponent_ID>13000</HDComponent_ID>

<!-- This node is required -->

<OutputType_CAT>46</OutputType_CAT>

<!-- This node is required -->

<TaskDoc_ID/>

<Switches/>

<OutputCategory_Desc>Entities</OutputCategory_Desc>

<VERSIONNUMBER>2</VERSIONNUMBER>

<VERSIONDATE>3/5/2014</VERSIONDATE>

<SECRMINVERSION>8.8.1</SECRMINVERSION>
</report>
To Create the XML File for Custom Templates:
- Copy the contents of the XML sample above and paste in a new file in a text editor.
- Replace the following:
- Output ID: Type the next available identifier. Check with your DBA to assure that the number is unique.
- Output Name: Type the name of the document.
- Output Category ID: Type “1” for eCounsel matters, “2” for eCounsel or Secretariat people, “3” for eCounsel or Secretariat entities, or “4” for eCounsel invoices depending on the select parameter in the template.
- OutputFileName: Type the name of the RTF template file.
- Description: Type the comment that will appear on the Documents tab of the Reports module for the template.
- Program ID: Type “1” for eCounsel and “2” for Secretariat.
- HD File Name: Type the name of the RTF template file.
- Output Category Desc: Type the name of the category in eCounsel or Secretariat where the template should appear.
- Version Number: Optionally, type the version of the template to track revisions.
- Version Date: Optionally, type the date the template was last modified.
- Secretariat Min Version: Type the version number of the product with which the template is compatible.
- Save the file using the same name as the template name with a .XML extension.
- Copy the file to the same directory as the RTF, CMP, and RTF.MANIFEST.XML files.
To Import Custom Templates:
- Open Suite Manager.
- On the Suite Manager control panel, click on the
 Template Import component in the Tools & Utilities area.
 - On the Template Import window, select the My computer template location.
- Navigate to the subdirectory in which the RTF, CMP, RTF.MANIFEST.XML and XML files are located.
The subdirectory can be named anything, but all four files must be in the same folder for the import to work.
- Click the checkbox next to the Secretariat or eCounsel application depending on the product for which you are importing templates.
- Click Find Templates.
- On the Templates to Import dialog box, click the Select All button, or, if you prefer, select the appropriate checkbox(es) to indicate which templates you want to install.
- Click the Import Selected Templates button. A progress meter will display. You can abort the installation at any time by clicking Cancel. If any errors are encountered, they will display at the bottom of the dialog box.

- Click the Close
 button to exit the Templates to Import dialog box.
Making a Document Available from a Tab
After creating a custom tab or when modifying a default tab (provided by Mitratech), you can configure which documents can be accessed from the tab by clicking the Reports button on the tab. Any document template can be made accessible from a tab within any module.
For the Summary page of all modules, add the tab-specific report(s) to the Base Info tab of the module. For matter-specific analysis on the Invoices module Summary page, add the tab-specific report(s) to the Matter tab of Invoices in eCounsel.
To Make a Document Template Available from a Tab:
- Open Suite Manager.
- Import the document template to be made available if it has not been imported.
- On the Suite Manager control panel, click on the
 Modules/Tabs component in the System Configuration area.
 - On the Modules/Tabs window, select an application and module from the list.
- Select a tab from the list, then click Configure.
- On the Tab Configuration dialog box, click on the Tab-specific Documents tab.

 If no documents appear or the document you want is not in the list, you must import the document template into Suite Manager.
 - Select a document from the list of available documents, and click the
 button to add the document to the list of documents that can be accessed from the tab. Click the
  button to move all available documents to the list of included documents. To remove a document from the list of included documents, select the document and click the
  button.
 - Click Save.
Troubleshooting Document Assembly
Why am I receiving a JavaScript error when testing my template in a browser?
Because Secretariat/eCounsel uses the browser functionality of HotDocs (and not the Microsoft Windows functionality) to assemble documents, it is necessary to test every new template or modification in a browser in HotDocs Developer prior to uploading to Secretariat/eCounsel. If an error occurs during this procedure, the template will not be useable in Suite.
If a template returns JavaScript errors when tested in a browser, highlight a section of the template in Microsoft Word and click the ![]() Assemble button on the HotDocs ribbon. If an error occurs for that section, any issues are in that section. By highlighting each section of the document, the problematic section can be determined.
Assemble button on the HotDocs ribbon. If an error occurs for that section, any issues are in that section. By highlighting each section of the document, the problematic section can be determined.
One possible issue that may occur is if a variable name uses a reserved word (such as “size”) that is used for a HotDocs command or function.
Why don’t I see changes in a reimported HotDocs template?
Typically, if a reimported HotDocs template does not have changes that were just uploaded, the problem is either from the Java application server caching the files or your browser caching the files. Clear the browser cache after the reimport of any template and prior to generating the document again.
Why can’t I prepare a document in Internet Explorer?
If you are using Internet Explorer 10, and cannot view the interviews screen properly, follow the steps below:
- In Internet Explorer, press the <F12> key on the keyboard.
- At the bottom of the page, select Internet Explorer 9 for the Browser Mode and Internet Explorer 9 Standards for the Document Mode.

Why aren’t dates showing in the format selected in HotDocs?
If you added a Secretariat or eCounsel date variable to a HotDocs template and changed the format for the date in the HotDocs Component Manager (such as “YYYY/MM/DD”), the date will appear in “M/d/yyyy” format on the HotDocs interview screen, but will be formatted as specified in the assembled document.