
Adding a Rate Card
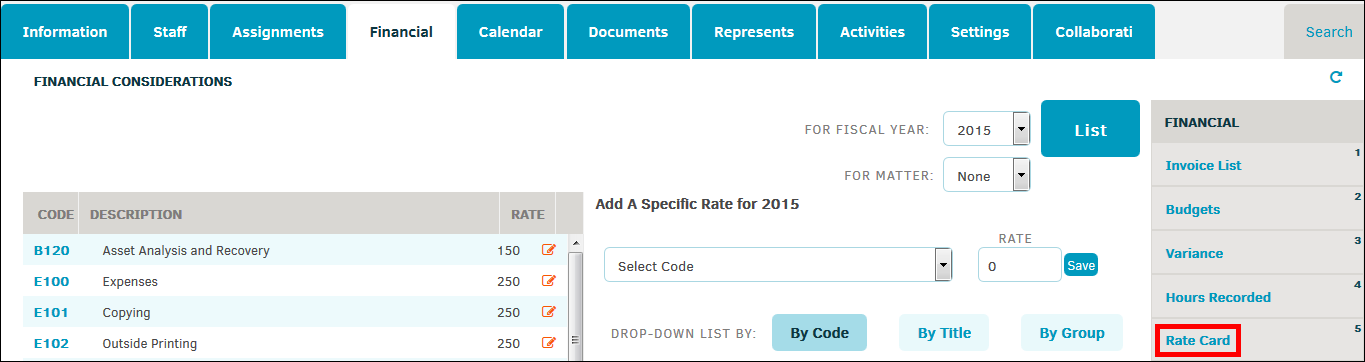
From a vendor or law firm record, you can see a list of rate cards for the company under the Financial tab by clicking Rate Card in the right-hand sidebar.
Add a New Firm Rate Card
To add another rate card to the list, complete the following steps:
Note: Adding rate cards is an administrative function.
- Open the vendor or firm record.
- Select the Financial tab.
- Click the Rate Card link on the right side of the screen.
- If necessary, select a different fiscal year from the "For Fiscal Year" drop-down list and click List. Leave the "For Matter" drop-down list at "None".
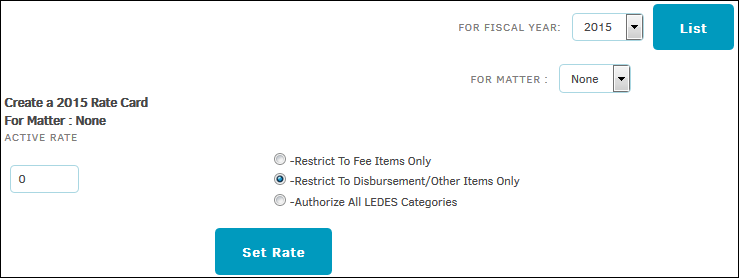
- Enter the active rate for the firm/vendor.
- Select restrictions by choosing one radio button.
- Click the Set Rate button.
To edit a rate card, click ![]() next to the rate.
next to the rate.
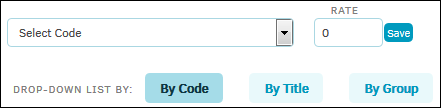
Add an individual rate to the existing LEDES codes rates using the drop-down list under Add a Specific Rate for [Fiscal Year]. Use the buttons By Code, By Title, and By Group to change the options that are generated in the drop-down list. After making a selection and typing a rate in the "Rate" text box, click Save.

Once the rate cards are established, they’ll have a three-fold relationship with every incoming LEDES invoice:
- Fiscal Year
- LEDES Code
- Timekeeper ID
All three of these items must match the invoice, and the rate on the invoice must be equal to or less than the approved rate for that task or expense code in order for the LEDES invoice to complete processing through the system.
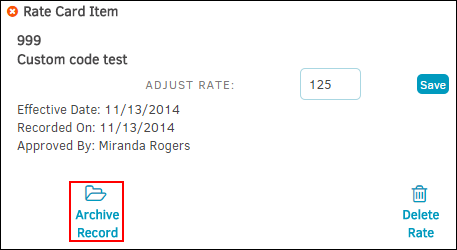
Select the Archive Record icon to save the rate to your archive.
Note: Once a rate is archived, you will not be able to adjust the rate. Select Reinstate Record (which replaces Archive Record once selected) to make the rate adjustable again.

Archived rates are displayed under the Code column with a red hyperlink.
Delete individual rates by clicking Delete Rate.
Add a Rate Card at the Matter Level
Note: Matter-level rate cards are fully supported by Collaborati.
- From the Financial tab within the firm/vendor profile, click Rate Card on the right sidebar.
- Select a fiscal year from the "For Fiscal Year" drop-down list.
- Select either "All" or "New" from the "For Matter" drop-down and click List.
- Select "All" to apply the rate card to all matters assigned to that firm/vendor.
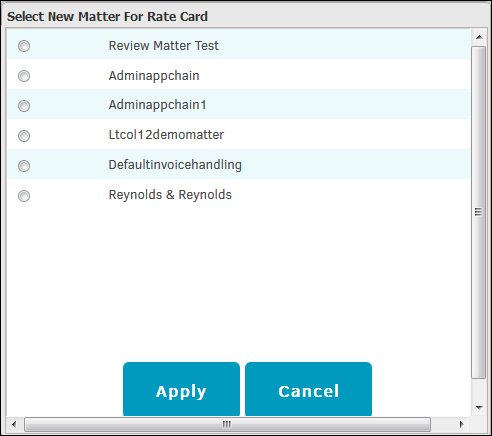
- Select "New" to generate a pop-up window listing all matters assigned to that firm/vendor; choose one matter by clicking the corresponding radio button and click Apply.
- Enter the active rate for the firm/vendor timekeeper.
- Select restrictions by choosing a radio button ("Restrict to Fee Items Only", "Restrict to Disbursement/Other Items Only", or "Authorize all LEDES Categories").
- Click the Set Rate button.
To edit a rate card, click ![]() next to the rate.
next to the rate.
Add an individual rate to the existing LEDES codes rates using the drop-down list under Add a Specific Rate for [Fiscal Year]. Use the buttons By Code, By Title, and By Group to change the options that are generated in the drop-down list. After making a selection and typing a rate in the Rate text box, click Save.
Once the rate cards are established, they’ll have a three-fold relationship with every incoming LEDES invoice:
- Fiscal Year
- LEDES Code
- Timekeeper ID
All three of these items must match the invoice, and the rate on the invoice must be equal to or less than the approved rate for that task or expense code in order for the LEDES invoice to complete processing through the system.
Select the Archive Record icon to save the rate to your archive.
Note: Once a rate is archived, you will not be able to adjust the rate. Select Reinstate Record (which replaces Archive Record once selected) to make the rate adjustable again.
Archived rates are displayed under the Code column with a red hyperlink.
Delete individual rates by clicking Delete Rate.