
GovNoticeIDP: A Step-by-Step Guide to Automated Notice Management
This guide provides detailed instructions for using GovNoticeIDP. It explains how to leverage GovNoticeIDP to automate the processing of government notices, enhancing efficiency and accuracy.
For information about GovNoticeIDP and the benefits it offers, refer to this article.
A. GovNoticeIDP Workflow

Pre-Requisites to Subscribe to GovNoticeIDP:
A firm must be subscribed to ‘Unlimited Storage’ and should be enabled with ‘New Receipt Management’ to subscribe to GovNoticeIDP. Before getting started with GovNoticeIDP, we recommend getting familiar with the New Receipt Management interface.
Subscriptions and Role Management:
Firm Admins should subscribe to GovNoticeIDP and assign roles and privileges to GovNoticeIDP users. GovNoticeIDP Administrators handle the configuration of GovNoticeIDP settings. For detailed guidance on subscriptions, role management, and settings configuration, refer to this Administrator Guide.
Supported Notices:
GovNoticeIDP supports USCIS Receipt, Premium Processing Receipt, and USCIS Approval notices. Unsupported notices won't be successfully processed but will still count against your subscription.
B. Getting Started: Uploading Notices and Creating a Batch
-
Navigate to INSZoom > Settings > GovNoticeIDP and click ‘New Batch’. Users require ‘View and Edit’ access privilege to create batches.

-
GovNoticeIDP allows users to upload scanned notices in two ways:
a. Single PDF (Multiple Notices): Upload a single file containing multiple scanned notices. GovNoticeIDP will split the file into individual notices, using the receipt number for separating notices.
i. File Size Limit: Up to 100 MB in size
ii. Page Count Limit: Up to 250 pages
iii. Allowed file types: PDF
b. Separate Files: Upload individual files for each notice.
i. File Size Limit: Up to 50 documents, each up to 10 MB in size
ii. Page Count Limit for PDF files: Up to 5 pages each
iii. Allowed file types: PDF, JPEG, and PNG
-
Choose the desired option and click ‘Proceed’.

Before uploading notices, ensure the notices meet the guidelines outlined in the 'Guidelines for Scanning and Preparing Notices for Upload to GovNoticeIDP' section for optimal processing results.
-
Optionally, users can change the default batch name to a custom name of their choice.
-
Select and upload the scanned notices using ‘Browse’.

-
Once the selected files are uploaded, click ‘Create’ to create the batch.

-
Upon batch creation, an on-screen confirmation is displayed. During this phase, GovNoticeIDP's intelligent processing engine automatically extracts key information from government notices in the batch and categorizes them for user review.

C. GovNoticeIDP: Efficiently Categorizing Scanned Notices
-
After extracting critical information from notices, GovNoticeIDP uses the following methods and identifiers to match records in the INSZoom database.
I. Receipt Match: Receipt Number
II. Beneficiary Match: Name, Alien Number, Date of Birth
III. Case Match: Form ID
Note: When a notice with multiple beneficiaries is uploaded, GovNoticeIDP picks only the first beneficiary in the notice and finds the match in INSZoom records.
-
Once the record matching routine is complete, GovNoticeIDP intelligently categorizes the notices based on matches found in INSZoom. Here's how the categorization works:
I. Unsupported Files: Notices with unsupported notice types or poor scan quality.
II. Unmatched Files: GovNoticeIDP detected a supported notice type but could not identify a unique beneficiary and case record in INSZoom using the data extracted from the notice.
III. Matched Files: GovNoticeIDP successfully identified a unique beneficiary and case record in INSZoom using the data extracted from the notice.
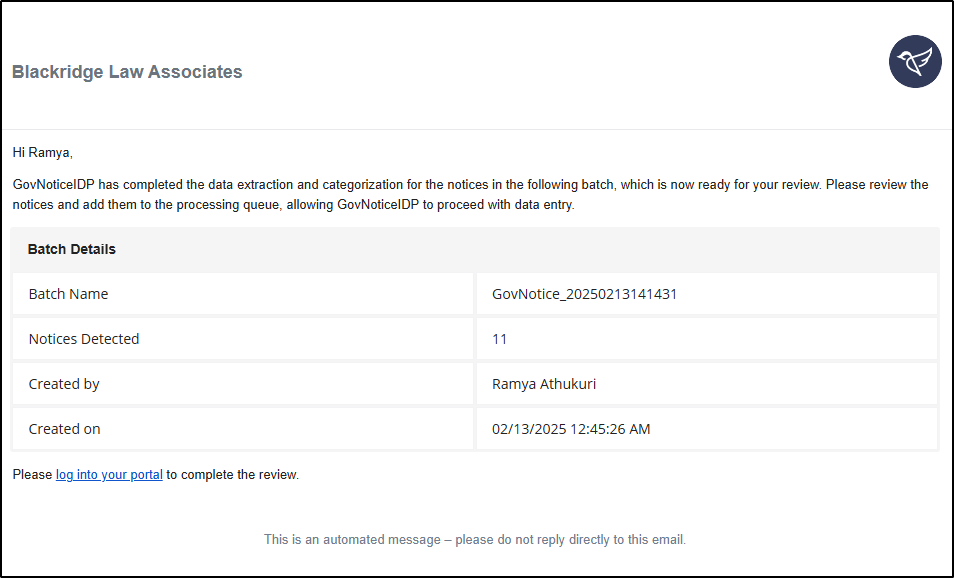
D. GovNoticeIDP: Notification Upon Categorization and Ready for Review
-
GovNoticeIDP ensures timely communication by notifying key stakeholders when data extraction and categorization of notices in a batch are complete. Notifications are sent to:
-
Batch Owner: The user who created the batch, enabling them to review the categorized notices.
-
GovNoticeIDP Administrator: To ensure administrative oversight and prompt support if needed.
-
E. User Actions: Accessing a Batch Ready for Review
-
Upon receiving the notification that a batch is ready for review, navigate to INSZoom > Setup > GovNoticeIDP.
-
When GovNoticeIDP is launched, users are redirected to the most recently accessed batch. Alternatively, choose ‘All Batches’ to view the list of available batches and follow the steps below.

-
Use the filter options to locate the desired batch quickly. Select the batch.

-
Details of the selected batch will be displayed on the right.
-
Click ‘View Batch’ to view the notices in the batch.
F. User Actions: Reviewing Matched Files
After navigating to the batch ready for review, click on ‘Matched Files’ to review the notices for which GovNoticeIDP identified a matched beneficiary and case record in INSZoom.

-
The Match Type column in the grid indicates whether the match identified is a Unique Match or a Potential Match. This column also displays a tag if the match was manually adjusted by the user.
a. Unique Match - This indicates that the matching process has identified a unique record match in the INSZoom database.
b. Potential Match - This indicates that the matching process has identified records that partially align with the match criteria. For example, the receipt number may match, but the beneficiary name does not, or the matching process results in more than one potential match, and GovNoticeIDP uses additional logic to select the closest matching record.
c. Manual Match - This indicates that the notices are manually matched by the user or adjusted after review.
2. Hover over the match type tag assigned for the notice to view the match criteria considered and the number of matches resulting from the matching process.
a. Green indicates the check passed and displays the number of matches found.
b. Red indicates that there are no matches with the criteria.
c. Black indicates the check was not performed because a match was already found using other criteria in the matching process.

-
Click ‘View Notice’ to access the matched record details, OCR data, and a copy of the scanned notice for reference.

-
Review the details and make any necessary edits.

-
Once the review is finished, add the notice to the processing queue. The notice will then be queued for data entry into the case record in INSZoom by GovNoticeIDP.
G. User Actions: Reviewing Unmatched Files
All the notices for which GovNoticeIDP couldn't identify a matched beneficiary or case record in INSZoom are categorized as unmatched files.
-
While in the batch view, click ‘Unmatched Files’ in the left pane to review them.

-
Click ‘View Notice’ to view OCR data and a copy of the scanned notice for reference.

-
Users can manually match a notice to the INSZoom record through either of the following methods:
a. Match using client and case details
b. Add using the receipt number

-
To manually match the notice using the receipt number, choose ‘Add Notice to a Case Receipt using Receipt Number.’ This option is used when a receipt notice with the same receipt number already exists in INSZoom, and users want to add additional notices to the same receipt number.

a. Search using the receipt number.

b. From the search results, select the appropriate case. It’s important to carefully choose the correct case, as the receipt will be added to the selected case.

c. View the receipt details. The receipt information is fetched from the existing case receipt. It is read-only, as the notice will be added to the existing receipt without altering the receipt details.
i. Receipt Details: This section displays important information, such as the receipt number, case type, form, and basis for filing. These details are read-only because they are part of the existing receipt and will not change when a new notice is added to the existing receipt.

ii. Notice Details: This section shows information specific to the notice being added, such as the notice type, notice date, approval dates, etc. These details will be added in the next step when associating the notice with the receipt.
d. GovNoticeIDP prepopulates the notice details extracted from the scanned notice. The fields displayed in this step depend on the notice type. For example, an approval notice includes I-94-related fields. Add/edit the notice details as needed.

e. Review the details and click ‘Confirm’.

-
To manually match the notice using the beneficiary record and then to a case record, choose ‘Match using Beneficiary and Case details’.

a. Search the beneficiary using the corporation or beneficiary name, file number, and employee ID. Search by a corporation(s) to select beneficiaries within that corporation, or directly search by the beneficiary’s name.

b. Once the beneficiary is selected, all cases where the beneficiary is either the main applicant or a co-applicant are displayed. These cases are retrieved directly from the INSZoom database. Select the appropriate case carefully, as the receipt will be added to the selected case.
i. Cases can be filtered by status to narrow down the search results and quickly locate the desired case.
ii. Hover over the ‘Case Forms’ option to view a list of forms associated with each case. This provides a quick overview of the forms within the case, aiding in accurate selection.

c. Choose whether to add the notice as a new receipt or link to an existing receipt previously added to the case.

d. GovNoticeIDP prepopulates the receipt notice details extracted from the scanned notice. Add/edit the details if needed.

e. Review the details and click ‘Confirm’.

-
After manually matching the notice with an INSZoom record, users are presented with two options before the notice can be queued for processing. If the notice is ready for automated data entry, it can be promoted directly to the processing queue for seamless integration into a case record within INSZoom. Alternatively, the notice can be moved to the matched files category, allowing users to add it to the processing queue later.

H. User Actions: Reviewing Unsupported Files in the Batch
GovNoticeIDP supports USCIS Receipt, Premium Processing Receipt, and USCIS Approval notices. Any other notice types are categorized as Unsupported Notices and will not be processed successfully. Notices with poor scan quality are also included in this category.
-
While in the batch view, click ‘Unsupported Files’ to review them.

-
Click ‘View Notice’ to review the scanned notice.

-
If the scan quality is poor, click the ‘Mark for Rescan’ option to flag the notice. This optional step moves the notice to the 'Requires Attention' category, where the flagged notices can be exported for offline review.

-
Add comments and click ‘Mark for Rescan’.

-
If a supported GovNoticeIDP notice type is found within the Unsupported Files category during review, it can be manually matched to the correct beneficiary and case record in INSZoom. The steps for manual matching are outlined in Section F (steps 4–8).

-
Data from notices other than receipt, approval, and premium processing notices is not extracted. For such notices, users can manually select the notice type as 'Other' to match the notice to a foreign national and promote it.

Note: When these notices are selected for data entry from the processing queue, they are simply uploaded as documents to the foreign national's record without any data entry being performed.
I. User Actions: Interacting with the Notice Grid View
GovNoticeIDP provides an intuitive interface that enables users to efficiently review categorized notices before the extracted information is automatically entered into the INSZoom Case record, ensuring data accuracy and integrity. Additionally, users can review processed notices after the automated data entry is complete.
From the Batch View, selecting a specific category from the left menu opens a grid interface where users can interact with categorized notices. This interface includes the following features:
-
Search and Filter Options: Quickly locate specific notices in the grid using robust search and filter tools.
-
Customizable Grid View: Click on ‘View Columns’ to show or hide specific columns, tailoring the grid to the user’s preferences.

-
Mark for Rescan: Flag notices with poor scan quality by using the ‘Mark for Rescan’ option.
-
Add to Processing Queue: Select notices and click ‘Add to Processing Queue’ to include them in the data entry queue. (Note: only available for Matched Files.)
-
Export Options: Export data using the ‘Export’ function. Users can choose between:
-
Scanned Receipts: Download scanned notices as a PDF.
-
Grid Data: Export the data displayed in the grid as a file.
-
-
Delete Notices: To remove a notice, use the delete option at the top of the page, or hover over a notice to reveal the delete icon.
J. User Actions: Reviewing Notices in the Processing Queue (Notices Pending Processing)
Notices that users have reviewed and added to the processing queue are included in this category. GovNoticeIDP will process these notices during the next scheduled data entry session. Depending on the overall notice volume across all firms subscribed to GovNoticeIDP, some notices may be deferred and processed in subsequent schedules.
-
In the batch view, click ‘Queued for Processing’.

-
Click ‘View Notice’ to access the matched record details, OCR data, and a copy of the scanned notice for reference.

-
If there is a need to remove a notice from the automated data entry process, select the notice and click ‘Remove’. The notice will be removed from the processing queue and moved to the Matched Files category. However, if processing has already started for the batch, the notice might be locked and cannot be removed from the queue.

K. GovNoticeIDP: Automated Notice Data Entry to INSZoom Records
GovNoticeIDP automates notice data entry for INSZoom Case and Foreign National (FN) records. It processes notices in batches queued for scheduled processing, streamlining multiple related tasks alongside core data entry. Key actions automated by GovNoticeIDP include:
• Capturing Notice Data to INSZoom Case Receipt Numbers
• Uploading scanned notice copies to INSZoom records.
• Capturing and updating priority dates.
• Updating Government / Status Documents in FN records, such as EAD/APD, I-797, and I-94 documents.
These automations significantly reduce manual effort and enhance efficiency in notice management. Details regarding these automations are discussed below:
I. Capturing Notice Data to INSZoom Case Receipt Numbers
When processing notices from the queue, GovNoticeIDP automates the entry of critical data extracted from government notices. Using the previously matched foreign national record and their corresponding case record in INSZoom, the system automatically completes the data entry. The notice is captured under Case Receipts of the matched case record as discussed below:
-
New Receipt Addition: If the receipt number is not already present in the corresponding INSZoom case receipts, the notice is added as a new receipt.
-
Existing Receipt Update: If the receipt number already exists in the corresponding INSZoom case receipts, a new notice is added to the existing case receipt.

II. Uploading Scanned Notice Copies to INSZoom Records
The scanned copy of the processed notice is uploaded as an attachment to the corresponding Case Receipt in INSZoom for future reference. These scanned notice copies can also be accessed and viewed under Case > Documents in INSZoom, where they are tagged for easy identification.
-
For a Receipt notice, the ‘Receipt’ tag is added to the scanned notice copy.
-
For an Approval notice, ‘Receipt’ and ‘Approvals’ tags are added to the scanned notice copy.
-
For Premium Processing Receipt notice, ‘Receipt’ and ‘Premium Processing’ tags are added to the scanned notice copy.

III. Capturing Priority Dates (if applicable) in INSZoom Cases
As part of notice processing, GovNoticeIDP captures priority dates from applicable USCIS notices. Specifically, if the system detects notices for case types I-130 and I-140, it extracts the priority date and adds it to the INSZoom case under Details/Dates > Visa Priority Date Info/AOS Date Info.
When this information is captured in INSZoom, the following data points are included:
• Priority Date: This is captured directly from the USCIS notice.
• Country of Chargeability: This is determined based on the country of birth listed on the notice.
• Visa Category: This is determined using the Preference Classification from the USCIS Receipt or Approval Notice, cross-referenced with the INSZoom visa category mapping table (shown below).
|
Case Type |
Preference Classification in USCIS Receipt/ Approval Notice |
INSZoom Visa Category Mapping |
|
I-130, Petition for Alien Relative |
201 b INA Spouse of USC Spouse of a U.S. Citizen 201 b INA Parent of USC Parent of a U.S. Citizen 201 b INA Minor Child of USC |
Not applicable |
|
203 a1 INA Adult Child of USC |
Family-1st |
|
|
203 a3 INA Adult Child of USC |
Family-3rd |
|
|
203 a4 INA Sibling of USC |
Family-4th |
|
|
203 a2A INA Spouse of LPR 203 a2A INA Minor Child of LPR |
Family-2A |
|
|
203 a2B INA Adult Child of LPR |
Family-2B |
|
|
I-140, Immigrant Petition for Alien Worker |
Alien of Extraordinary Ability, Sec. 203(b)(1)(A) |
Employment-1st |
|
Outstanding Professor or Researcher, Sec. 203(b)(1)(B) 203 B1B PROF-RESEARCHER |
Employment-1st |
|
|
Multi-national Executive or Manager, Sec. 203(b)(1)(C) 203 B1C MULTI NTL EXEC-MNGR |
Employment-1st |
|
|
Mem of Profession w/Adv Deg, or of Exceptin’l Ability, Sec. 203(b)(2) 203 B2 ADV DEGREE-EXC ABILITY |
Employment-2nd |
|
|
Skilled Worker, Sec. 203(b)(3)(A)(i) Professional, Sec. 203(b)(3)(A)(ii) |
Employment-3rd |
|
|
Other Workers, Sec. 203(b)3)(A)(iii) |
Employment-3rd |
|
|
Indiv w/Adv Deg or Exceptional Ability in the National Interest 203 B2 NATL INTEREST WAIVER |
Employment-2nd |

IV. Updating Government / Status Documents in INSZoom FN Records
In addition to core notice data entry, GovNoticeIDP can automatically update government/status documents (specifically EAD/APD, I-797, and I-94) in INSZoom FN records for certain approval notice types. This automation is optional and configurable by the GovNoticeIDP administrator. To learn more, refer to the administrator guide.
Important Note: GovNoticeIDP's status document update feature requires firms to use INSZoom’s out-of-the-box (OOTB) status templates. If a firm has customized its status templates using the Knowledge configuration, these automated updates will not be processed by GovNoticeIDP.
1. Capturing EAD/APD in INSZoom FN Record > US Immigration Info
When GovNoticeIDP processes Approval Notices for I-131 (Application for Travel Document) or I-765 (Application for Employment Authorization) case types, the corresponding EAD (Employment Authorization Document) or APD (Advance Parole Document) section within the INSZoom FN record (US Immigration Info) is updated with validity dates from the notice.
• For I-131 Case Types: The APD section in FN > US Immigration Info is updated with the notice validity dates.
• For I-765 Case Types: The EAD section in FN > US Immigration Info is updated with the notice validity dates.
2. Capturing I-797 and I-94 in INSZoom FN Record > US Immigration Info
When GovNoticeIDP processes an Approval Notice for the case types and classes listed in the table below, the following sections within the INSZoom FN profile (US Immigration Info) are updated:
• Current Arrival/Departure Info (I-94): This section is updated only if I-94 information is available in the notice.
• I-797 and I-797 History
|
Case Type |
Class in Notice |
|
I-129 - Petition for Nonimmigrant Worker |
E2, E3, H1B, H1B1, L1A, L1B, O1A, O1B, TD, TN1, TN2 |
|
I-129S - Nonimmigrant Petition for L-1 |
L1A, L1B |
|
I-192 - Application for Advance Permission |
U1 |
|
I-539 - Application to Extend/Change Nonimmigrant Status |
H4, TD, U1, E-1S, E-1Y, E-2S, E-2Y, E-3S, E-3Y, L-2S, L-2Y |
|
I-918 - U Nonimmigrant Status |
U1 |

L. GovNoticeIDP: Stakeholder Notification Upon Notice Processing and Data Entry
This section describes the email notifications sent to stakeholders after GovNoticeIDP processes notices.
Important Note: Case events triggered by actions related to receipts aren’t supported at this time.
I. Email Notifications to Internal Stakeholders (Firm Users)
-
When GovNoticeIDP completes processing a batch of notices, firm users will receive an email notification summarizing the batch details, including the number of files successfully processed, failed, and pending.

-
This email notification prompts firm users to log in to the INSZoom application to review the completed data entry and take any necessary actions on the cases.
-
These notifications are sent based on the 'Notify when GovNoticeIDP completes processing' settings configured by the GovNoticeIDP Admin.
II. Email notifications to External Stakeholders
-
After GovNoticeIDP completes processing and data entry to INSZoom Case Receipts, external stakeholders will receive an email notification with relevant notice details.
-
These emails are sent to recipients configured by the GovNoticeIDP administrator in the settings and may include a copy of the scanned notice if this option is enabled.

M. User Actions: Reviewing Processed Notices
-
Notices successfully processed by GovNoticeIDP, with their data entered into INSZoom are categorized as ‘Processed Files’.
-
While in the batch view, click ‘Processed Files’ to review them.

-
Click ‘View Notice’ for a detailed view of the data extracted from the notice entered into the corresponding INSZoom record.

N. User Actions: Reviewing Notices Requiring Attention
Notices that require attention are categorized as ‘Requires Attention’. To review these notices:
-
In the batch view, click ‘Requires Attention’ to review these notices.

-
The ‘Requires Attention’ category includes:
a. Notices that failed processing for any reason.
b. Notices marked for rescan by GovNoticeIDP users.
3. The ‘Attention Type’ column in the grid indicates whether a notice is marked for rescan or failed processing.

-
The ‘Details’ column in the grid provides additional information, such as comments added by the GovNoticeIDP user when marking a notice for rescan, or details about processing failures.
-
Notices marked for rescan can be exported for offline review.
O. User Actions: Archiving or Deleting a Batch
This section describes how to archive or delete a batch in GovNoticeIDP.
I. To Archive a Batch
-
Click the ellipses menu (three dots) next to the batch name in the top left corner.
-
Select ‘Archive Batch’.

-
Archived batches are then accessible under All Batches > Archived. When a batch is archived, GovNoticeIDP users cannot perform any further actions on the batch or its notices; the batch becomes read-only for reference.


II. To Delete a Batch
-
Click the ellipses menu (three dots) next to the batch name in the top left corner.
-
Select ‘Delete Batch’.

-
Deleting a batch permanently removes the batch and all associated notices from GovNoticeIDP. This action cannot be undone.
P. Guidelines for Scanning and Preparing Notices for Upload to GovNoticeIDP
These guidelines outline the requirements for scanning and preparing notices for upload to GovNoticeIDP. Following these guidelines will maximize the success and accuracy of data extraction and processing
I. Scanning Requirements
-
Resolution: Scan documents at a resolution of 150 dots per inch (dpi) or greater. A resolution of 300 dpi is optimal for best results.
II. Photographing Documents (If Scanning is Unavailable)
If you are photographing documents instead of scanning them, please adhere to the following guidelines:
-
Complete Image: Ensure the entire document is captured in the image, with no edges or corners cut off.
-
Level Surface: Place the document on a flat, level surface.
-
Lighting: Avoid strong shadows and flashlight glare. Use even lighting to minimize shadows.
-
Focus: Ensure the image is in focus and free of blur.
-
Original Images: Upload original, unedited images. Do not apply any filters or alterations.
III. File Requirements
Before uploading files, ensure they meet the following size and type limits:
1. Single PDF (Multiple Notices)
-
File Size Limit: Up to 100 MB
-
Page Count Limit: Up to 250 pages
-
Allowed File Type: PDF
-
Ensure that all pages of a notice are grouped together in the correct order before merging multiple notices into a single PDF. Review the file to confirm proper sequencing before uploading.
-
Avoid including notice types other than USCIS Receipt, Premium Receipt, and Approval in the single PDF, as it impacts the splitting of notices and only data from supported notice types is extracted.
2. Separate Files (One Notice per File)
-
File Count Limit: Up to 50 documents per batch
-
File Size Limit: Up to 10 MB per document
-
Page Count Limit (PDFs): Up to 5 pages per PDF
-
Allowed File Types: PDF, JPEG, PNG
-
While GovNoticeIDP supports JPEG and PNG files, we recommend uploading scanned PDFs from a scanning machine to ensure consistent quality and quicker performance to ensure better and more accurate outcomes. Image files are usually much larger in size, and take much longer to upload and process when compared to their PDF counterparts.
Note: GovNoticeIDP only supports receipt and approval notices that were originally received as physical notices. Electronic notices received from USCIS (i.e., via email) are not currently supported as they are considered courtesy communications and cannot be used as valid evidence of status. Additionally, since emailed notices must be manually converted to PDFs, they often result in inconsistent formatting and reduced image quality, which can impact processing accuracy.
IV. Billing Considerations
Please note that GovNoticeIDP billing is based on the number of pages uploaded, including blank pages and unsupported notice types (such as those other than USCIS Receipt, Premium Receipt, and Approval).
Tip: Review your scanned documents carefully before uploading to avoid unnecessary charges. Uploading only supported notice types and pages with critical data for automated data entry will minimize costs.
Glossary
-
Batch
A group of scanned notices uploaded together in GovNoticeIDP for processing. -
File
A scanned document containing one or more notices. These can be uploaded individually or as part of a batch. Supported formats include PDF, JPEG, and PNG. -
Open Batch
A batch currently active and under review or processing in GovNoticeIDP. Users can perform actions on notices within an open batch. -
Archived Batch
A batch that has been archived for reference. Users have read-only access and cannot perform any actions on the batch or its notices. -
Categorization
The process by which GovNoticeIDP extracts data from notices and intelligently categorizes them into one of three categories—Matched Files, Unmatched Files, and Unsupported Files—based on matches found in INSZoom. Here's how the categorization works:
a. Unsupported Files: Notices with unsupported notice types or poor scan quality that prevent data extraction.
b. Unmatched Files: Notices for which GovNoticeIDP could not identify a unique beneficiary and case record in INSZoom using the data extracted.
c. Matched Files: Notices for which GovNoticeIDP successfully identified a unique beneficiary and case record in INSZoom using the data extracted.
-
Processed Files
Notices for which the data entry into INSZoom is complete.
Frequently Asked Questions (FAQs)
1. Why don’t I see the GovNoticeIDP menu?
-
Answer: Ensure your firm is subscribed to GovNoticeIDP and you have the necessary access rights. Contact your firm admin to verify your subscription and permissions.
2. Why don’t I see the ‘New Batch’ option in GovNoticeIDP?
-
Answer: You may only have ‘View’ access to GovNoticeIDP. To create a new batch, you need 'View and Edit' access. Contact your firm admin to update your permissions.
3. Why can't I create a batch after uploading scanned documents?
-
Answer: Ensure the uploaded files meet the following requirements:
-
Correct file type (PDF, JPEG, PNG).
-
File size is within the allowed limit (up to 100 MB for single PDFs or 10 MB per individual document).
-
4. What if the scanned notice isn’t a supported notice type?
-
Answer: If the notice is not a supported type (e.g., a non-USCIS document or poor-quality scan), it will be categorized as Unsupported Files by GovNoticeIDP. Depending on the situation, these notices can be reviewed and either marked for rescan or deleted.
5. Will I receive notifications when the data extraction and categorization are complete?
-
Answer: Yes, email notifications are sent to you when GovNoticeIDP completes data extraction and categorization. You can begin reviewing or acting on the notices.
6. What are unsupported notices?
-
Answer: Unsupported Notices include documents outside the scope of USCIS receipt notices, premium processing receipts, or USCIS approval notices. This also includes non-standard formats like handwritten documents or government forms that GovNoticeIDP cannot process effectively.
7. Why am I not able to take any actions on the notices in the batch?
-
Answer: You may only have ‘View’ access to GovNoticeIDP. To take any actions, you need ‘View and Edit’ access. Contact your firm admin to update your permissions.
8. What happens if a notice is marked for rescan?
-
Answer: The notice will be moved to the ‘Requires Attention’ category, and you will need to upload a clearer scan in a new batch.
9. How can I view the extracted data from a matched notice?
-
Answer: Navigate to the Matched Files section, select the notice, and click ‘View Notice’ to review the OCRed data and verify the match criteria.
10. Can I manually match unmatched files to a case record?
-
Answer: Yes, you can manually match unmatched notices by selecting the ‘Add Notice to a Case’ option, either using the Receipt Number or Beneficiary and Case details to find the correct match in INSZoom.
11. When are the files in the processing queue picked for processing?
-
Answer: The files in the ‘Queued for Processing’ are picked for data entry during scheduled processing cycles. You can view the next schedule in the Queued for Processing category. Notices in this queue will be processed in the next available data entry schedule, and any remaining files will be processed in subsequent schedules.
12. How do I know if a notice has been processed correctly?
-
Answer: After processing, notices will be promoted to ‘Processed Files’. You can review them in the batch and verify that the data has been correctly entered into the INSZoom case and beneficiary records.
13. What is the difference between an open and archived batch?
-
Answer:
-
Open Batch: An active batch that is under review or processing. Users can still perform actions such as categorizing, reviewing, or acting on notices within an open batch.
-
Archived Batch: A batch that has been archived for reference. Once archived, the batch is read-only, and no further actions can be performed on the notices within it. It is simply available for future reference.
-
14. Can I delete a batch once it’s completed?
-
Answer: Yes, batches can be deleted permanently by selecting ‘Delete Batch’ from the ellipses menu. Once deleted, the batch and its associated notices will no longer be available in GovNoticeIDP.
15. Where does GovNoticeIDP process and store data?
-
Answer: GovNoticeIDP currently only supports processing data in the U.S. - which means customers currently hosted in our INSZoom Canada instance who process U.S. immigration and want to take advantage of this solution will need to understand data submitted to GovNoticeIDP will be processed and temporarily stored (up to 14 days) in the U.S.
15. Is GovNoticeIDP completely automated and error-free?
-
Answer: Though GovNoticeIDP is a highly accurate and reliable solution powered by intelligent document processing - it is not perfect and was intentionally designed with human in the loop checkpoints that allow users to enforce quality control over the data extraction process and ensure data integrity prior to upload into the core INSZoom application.