
How to Create an Agreement
This article describes how to create agreements, assign a team and a
counterparty, and assign roles to users.
EraCLM has three types of agreements:
- Document
- Record
- Request
Each agreement is created differently:
| Agreement Type | Description |
|---|---|
| Document | Create an agreement based on a framework and edit the draft in the Contract Editor. |
| Record | Create an agreement from a PDF file and keep it as a record. |
| Request | Request someone to create an agreement. Give instructions to create an agreement and assign it to a drafting queue. |
Documents can be created from a framework or from a third-party paper. A third-party paper is an agreement template that originates from the counterparty. EraCLM lets you map the third-party paper to a similar framework so that you can use the rules and the negotiation workflow already configured in the framework. This mapping can be done manually or automatically by using the Clearlaw integration.
Also, agreements can have a parent-child relationship. Children agreements stem from a base agreement and share a workflow.
Prerequisites
- Permissions to use a framework.
- Your team members emails. All team members must be users in EraCLM.
- The counterparty email. The counterparty must be a user in EraCLM.
- For requests, you must have queue dispatcher permissions.
How to Create a Document
The following procedure creates an agreement of type document. Note that depending on the rules set at framework level, some of the steps described might not apply to your framework.
-
On the top menu, click Agreements > + New Agreement > Document.
-
On the Start New Document pop-up window, enter the following information:
-
The agreement name
-
A description (optional)
-
Document source: use framework
-
Counterparty Company
-
Allow offline edits: yes
-
-
Click Next.
-
Select the framework.
-
Answer the questions, if applicable. This step is called conditional drafting.
Note: If you only have one framework assigned, EraCLM sets that framework to use. Conditional drafting is set at framework level and an optional feature.
- In Collaboration Settings > How will you work? select the
option that applies.
| Option | Result |
|---|---|
| I will work alone | EraCLM redirects you to the Contract Editor. You can edit the agreement and set team 0 later. |
| I will work with an existing team | 1. In the dropdown list, select a team from previous agreements. 2. Click Next. 3. EraCLM redirects you to the Contract Editor. |
| I will create a new team | Click Next and see How to Create a New Team. |
How to Create a New Team
To create a new team, follow these instructions. For more information about teams, see user roles.
-
Enter the user email in the box next to


-
In the dropdown list, select the option that applies.
| Option | Result |
|---|---|
| View all sections | Make all sections visible to the user. The user can make comments but cannot edit anything in the agreement. |
| Negotiate all sections | The user can see, edit and make comments on the agreement. |
| Custom assignment | 1. Click Next. 2. Click Yes to save the changes and go to How to Configure Custom Assignment. |
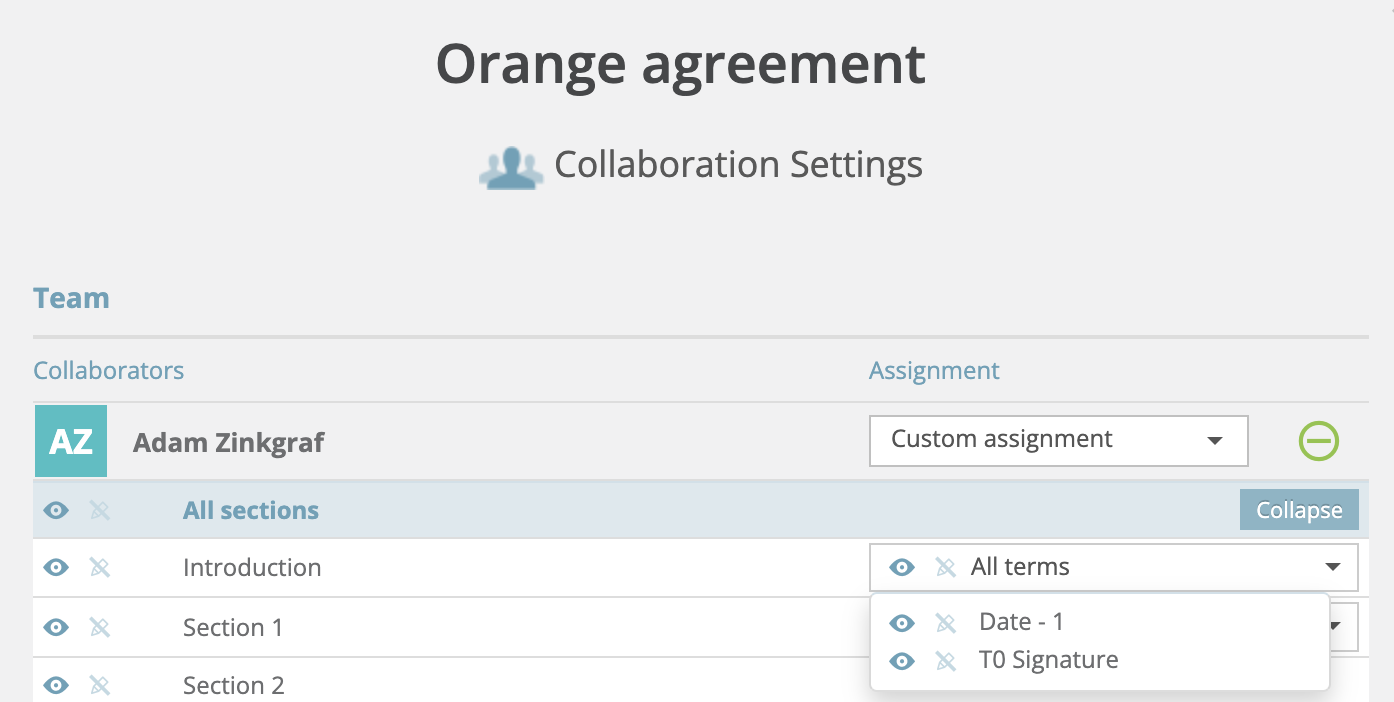
How to Configure Custom Assignment
To configure custom assignment, follow these instructions.
-
Click

 > Edit My Team.
 -
Click Expand.


-
Configure the customized permissions for the user. The following table describes all available permissions and how to set them.
| Permission | Steps |
|---|---|
| View a section | 1. Select the eye icon next to the section. 2. Deselect the pencil icon.   |
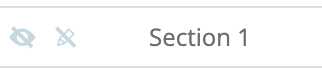
| Hide a section |
Deselect the eye icon next to the section. |
| Edit a section | Select the eye and pencil icons next to the section.  |
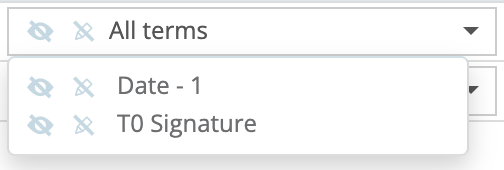
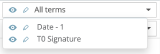
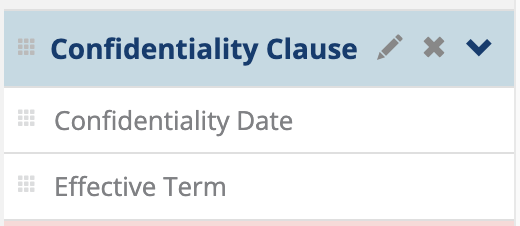
| View a tag |
1. Set permissions to view the tag's section.
|
| Hide a tag |
1. Set permissions to view the tag's section.
|
| Edit a tag |
1. Set permissions to view the tag's section.
|


How to Assign a Communication Owner
A communication owner acts as an intermediary between the counterparty and team 0. By default, the controller is the communication owner. The communication owner role is available for frameworks with that option enabled. Follow these instructions to configure a communication owner.
-
Click
> Edit Communication Owner. -
On Reassign Communication Owner, select the option that applies.
| Option | Result |
|---|---|
| From my team | You can assign the role of communication owner to anyone in your team |
| Add manually | Enter the email of the communication owner. The email doesn’t need to belong to an account in EraCLM. |
- Click Reassing.
How to Create a Third-Party Paper Manually from a Microsoft Word File
A third-party paper is an agreement template that originates from the counterparty. It can also be an agreement template stored in DOCX format that can be mapped to an existing EraCLM template. By mapping an agreement in DOCX format to an EraCLM template, you can use the existing rules and negotiation workflow configured in a framework.
The following procedure imports an agreement of type document from a Microsoft Word file. When using this method, you must manually map the framework sections and tags to the framework. To import manually a third-party paper, follow these instructions.
-
On the top menu, click Agreements > + New Agreement >
Document. -
On the Start New Document pop-up window, enter the following
information:-
The agreement name
-
A description (optional)
-
Document source: Upload Microsoft Word File
-
Counterparty Company
-
Allow offline edits: yes
-
-
On Uploading Document, drop or browse the file.
-
On Document Sections Mapping, select Manual Mapping.
-
Select the framework upon which to do the mapping.
-
Continue on How to Assign Sections to the Third-Party Paper Manually.
How to Assign Sections to the Third-Party Paper Manually
After you import the Word file, map the sections manually to sections in the original template. You can perform the following actions.
| Agreement item | Actions |
|---|---|
| Section | - Add new sections - Change the text in sections - Delete sections |
| Tags | - Add new tags - Edit existing tags |
The following videos explain how to import a third-party paper:
- Starting an agreement with third-party paper
- Setting sections in third-party paper review
- Setting tags in third-party paper review
The following table provides instructions to set sections in your imported agreement. Select the options that apply.
| Option | Steps |
|---|---|
| Map a section of the agreement to the framework |
1. On the left panel, hover over the section and click on the pencil icon.
|
| Change the text of a section |
1. On the left panel, hover over the section and click on the pencil icon.
|
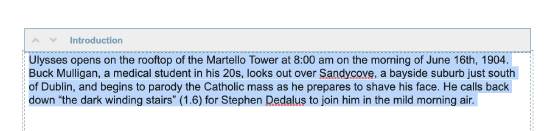
| Add a new section | 1. Click + Add Section. 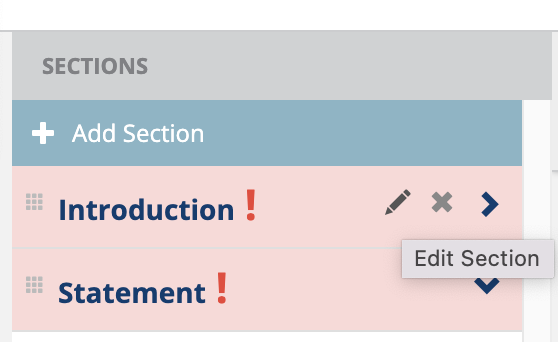 2. Add the following information: - Section name - Editable by - Category - Section ID  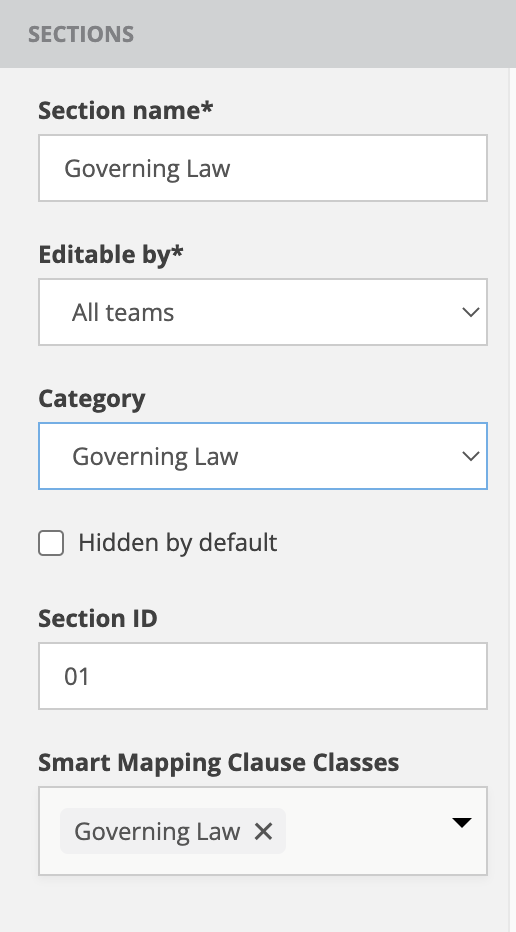 3. Click Next. 4. Click Highlight section text and then select the text from the agreement. 5. Click Save. |
| Delete a section | 1. On the left panel, hover over the section and click on the x icon. 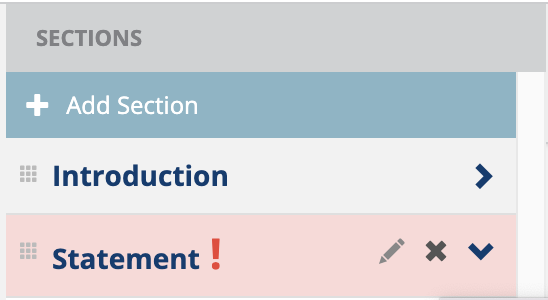 2. Click Yes on the modal to confirm. |


The following table provides instructions to set tags in your imported agreement. Select the options that apply.
| Option | Steps |
|---|---|
| Assign tags |
1. Hover the mouse over the waffle to the left of the tag.
|
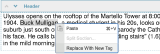
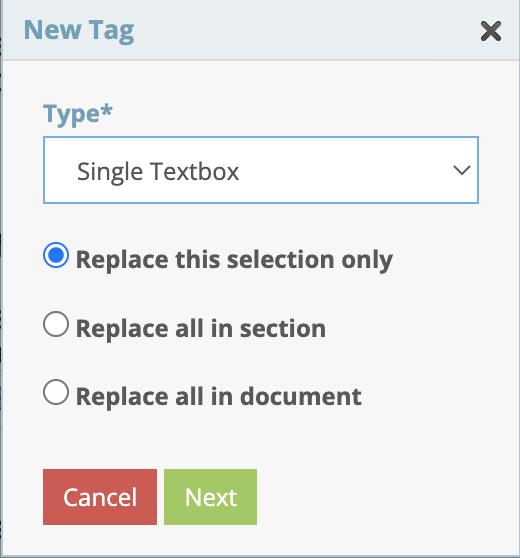
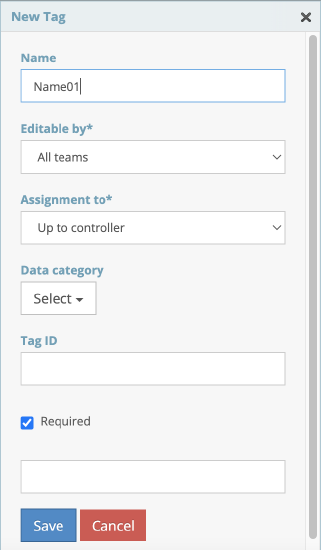
| Create new tags |
1. Select the portion of text to convert to tag.
|
 2. When the cursor changes to
  by
by 


Note: If you only have one framework assigned, EraCLM sets that
framework to use.
After the agreement is imported, set the collaboration settings. In Collaboration Settings > How will you work? select the option
that applies.
| Option | Result |
|---|---|
| I will work alone | EraCLM redirects you to the Contract Editor. You can edit the agreement and set team 0 later. |
| I will work with an existing team | 1. In the dropdown list, select a team from previous agreements. 2. Click Next. 3. EraCLM redirects you to the Contract Editor. |
| I will create a new team | 1. Click Next. 2. Continue with How to Create a New Team. |
How to Create a Document from an Existing Agreement
The following procedure creates a document from an existing agreement.
Note that depending on the rules set at framework level, some of the
steps described might not apply to your framework.
-
On the top menu, click Agreements > + New Agreement > Document.
-
On the Start New Document pop-up window, enter the following information
-
The agreement name
-
A description (optional)
-
Document source: Duplicate an existing agreement
-
Counterparty Company
-
Allow offline edits: yes
-
-
Click Next.
-
Select the agreement.
-
The Contract Editor opens with an exact copy of the agreement with the team 0 and counterparty included.
How to Create a Record
The following procedure creates an agreement of type record. Records are
agreements done outside of EraCLM.
-
On the top menu, click Agreements > + New Agreement > Record.
-
On the Start New Document pop-up window, enter the following information.
-
The agreement name
-
A description (optional)
-
Counterparty Company
-
Data capture options: Enter Use framework.
-
-
Click Next.
-
On the next window, drop or browse the file. Click Next.
-
On Upload Documents Completed Offline, click Next.
-
Select a framework.
-
On the Agreement from a record window > Do you verify that this
record is fully signed?- Enter yes to set the record status as Verified.
- Enter no to set the record status as Closed.
-
Click Ok.
How to Create a Request
The following procedure creates an agreement of type request. Note that depending on the rules set at framework level, some of the steps described might not apply to your framework.
Note: You need queues configured for your user and your team. Ask a platform admin (support) for assistance.
-
On the top menu, click Agreements > + New Agreement > Request.
-
On the Start New Request pop-up window, enter the following information.
-
The agreement name
-
A description (optional)
-
Counterparty Company
-
Allow offline edits: yes
-
-
Click Next.
-
Select the framework.
-
Answer the questions, if applicable. This step is called
conditional drafting.
Note: If you only have one framework assigned, EraCLM sets that framework to use. Also, questions are optional.
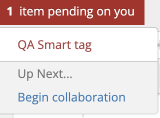
- In the Contract Editor, complete any items pending on you then Begin Collaboration. The agreement will go to a drafting queue
for someone in your group to complete.

-
On the next window, enter:
- View agreements to exit the wizard.
- Create new request to restart the wizard.
Creating a Child Agreement
EraCLM has the functionality of creating Agreements derivative from previously created Agreements. These Agreements, known as Child Agreements, inherit the values entered in the tags of the original Agreements, known as Parent Agreements.
You can create a Child Agreement to follow a workflow when executing related Agreements with the same tags and to speed up the negotiation process.
Note
Only users with Platform Admin privileges can enable the function to create Child Agreement. As a Platform Admin, you can enable this function at framework level. To know more, refer to the Admin Guide.
You can only create a Child Agreement after your Agreement is being negotiated.
To create a Child Agreement:
-
Click the Agreements tab on the navigation bar located on the top of the page. The system displays a list of all the Agreements in which you have collaborated.
-
Find the Agreement for which you want to create a Child Agreement. You can manually search the Agreement on the Search bar.
-
Select the row where your Agreement is located (without clicking the name of the Agreement). The system now displays a new green button on the Agreement toolbar, named New Child.
-
Click the New Child button and select Document from the options displayed. The system displays the Start New Document dialog box.
-
In the Start New Document dialog box:
- Fill the Name field.
- Add an optional description.
- From Document Source, select Use Framework to use one of your available templates to draft the Agreement, or select Upload MS Word or text file to use a Microsoft Word or a text file to draft the Agreement. For more information on creating an Agreement with a Microsoft Word Document or text file as a template, refer to the Creating an Agreement Using a Microsoft Word Document or a Text File as a template section.
- From Allow offline edits select if you want to edit this Agreement outside of the platform.
Click Next to go to the Framework Selection Screen
-
Choose the framework to use as a template for your Agreement.
Note
If you only have one Child Agreement framework associated with the framework of your parent Agreement, the system sets that framework as default. Continue to the next step. -
Complete the Document Assembly Assistant. This process is called Conditional Drafting. The request is pre-filled accordingly.
Note
If you don't have Conditional Drafting options configured in your framework, ignore this step. EraCLM redirects you to the Contract Editor. To see all the options available in the Contract Editor, refer to the Contract Editor section. Click Next. The system displays the Collaboration Settings dialog box.
- In the Collaboration Settings dialog box, choose if you want to work alone, create a new team or collaborate with an existing team, and click Next.
Note
If you choose to work alone, EraCLM redirects you to the Contract Editor.
If you select I will work with an existing team, select from the dropdown list the Agreement where you worked with the team you want for this new Child Agreement. Click Next. The system adds this team to your new Agreement.
Confirm the members of the existing team and their assigned actions. Modify if needed and click Next. The system displays the Collaboration Settings dialog box.
Note
To know more about team creation, refer to How to Create a Negotiation Team.
-
Enter the email of your counterparty, click Next. Confirm the email, click Next. Enter the company of the counterparty who will be receiving this Child Agreement and click Next. The system displays the Contract Editor.
-
Review your generated Child Agreement. The system prefills the tags configured from the parent Agreement. Edit text from your Agreement according to your needs.
Note
When you finish drafting, the system highlights the Next icon in red (indicated with an arrow).
- Click the Next icon. The system displays the Begin collaboration dialog box. Add a comment if needed and click Send.
After you complete these steps, the system sends the Child Agreement via
email to the counterparty you previously designated.
Note
You and your counterparty need to complete the Child Agreement so you can complete the parent Agreement.