CMO - How to use the User Import tool when importing Superior Users
To solve the issue of when a customer uses the Import tool to create / update the Superior User field
Goal - How to use the import tool to create and/or update Superior User of a User
The steps provided in the article is performed by the Administrator of the CMO Application as the settings require the access to the Admin module.
- Begin by opening up Microsoft Excel and creating these 6 columns and filling the column(s) with new / updated user(s) details.

- The Superior Users field requires the Login Name of the User.

- Next save the file
- Log into the CMO Application
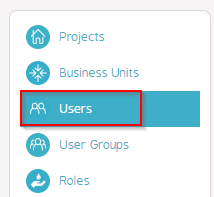
- Go to the Admin Module

- Go to Users

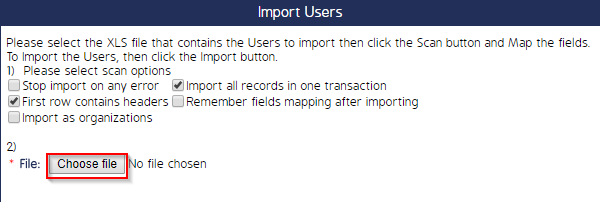
- Go to Import

- Click on Choose File

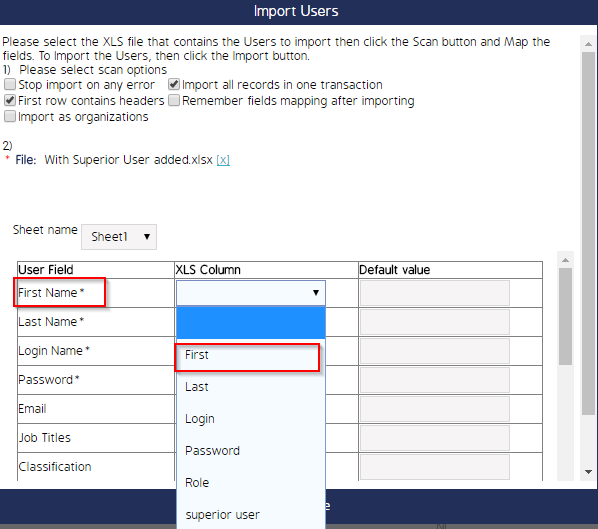
- You will be presented with this screen, click on the XLS Column next to First Name and a dropdown will appear.
- Choose First from the dropdown menu for First Name, you will need to do this for Last Name, Login Name, Password and Roles as these are Mandatory fields within the Import tool.

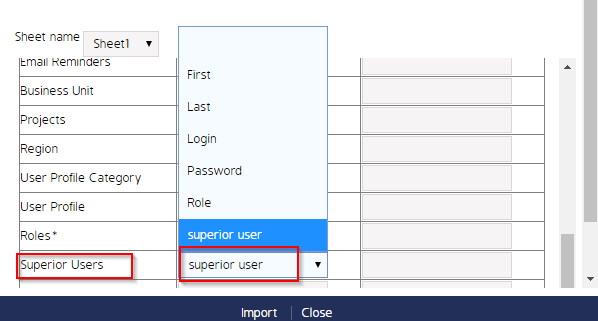
- Next choose Superior User in the dropdown menu.

- Click on Import.

- You will be shown the below once the Import has completed.

- To check that the Superior Users field has populated correctly, go to Admin - Users and type in the Users name in the search bar. Prior to this make sure that you have used the Clear Filter button.
- Click Search

- Click on the Users name.

- You will see the users profile scroll down until you reach Superior Users and you will be presented with the Superior User(s) you added.

See also
Video Guide
Coming soon...

