
How To Import Users
Importing Users
Importing Users directly into CMO from an outside source is an efficient way to bring in multiple new users without the need to manually create each one in the user interface.
How To Import Users
Before you begin, your Roles, User Groups, Classification and Job Titles will need to be in place before you import your users. These must all be entered manually– there is no import for them. Once they are entered into the system you can then use them in your user import sheet.
Review your xlsx Entity import data sheet. Make sure you only have 1 row for headers above your data. If you are starting with the CMO Configuration Data Worksheet, you will need to delete all rows above the header row (rows 1-5). For the Org Unit, Entity, and/or User Group Assignments to import, these columns must be complete in the import sheet. If not , add these columns into your import sheet and complete them as needed. See the example below:
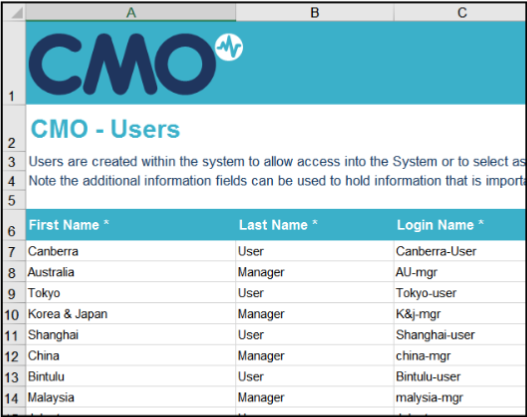
NOTE: The performance of the system will be much better if you use User Groups for multiple Entity assignments instead of individual Entity assignments. On the other hand, if a user is only assigned to 1 entity, individual entity assignments are better than User Group assignments.
Next, login to CMO. Go to Admin > Users and click on Import at the top of the screen.
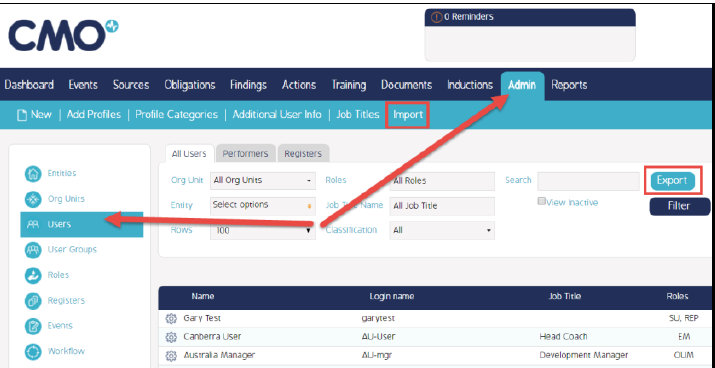
NOTE: If needed, you can click the Export button and then use the exported sheet as a template for importing (make sure you have at least 1 user created before you click Export).
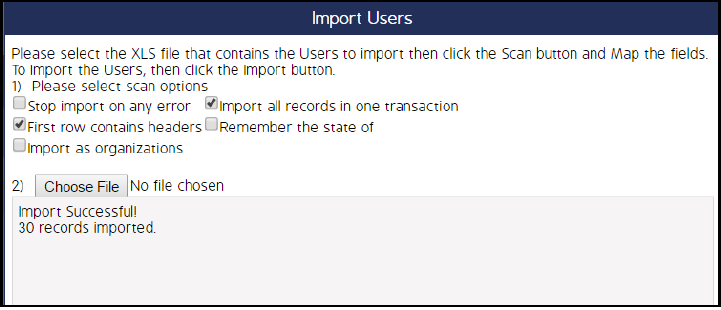
Click the Choose File button and choose your file. In the Sheet Name field select your sheet. Map your columns (XLS Column) to the system columns in the User Field column. You may put a Default value in place of a column in your import sheet. For some values, such as Email Reminders “Yes” or blank would be the default values. Click Import at the bottom of the screen.

If the import works you will see a message informing you of how many records imported successfully, as shown below.
Video Demo
Coming soon...