
Create Invoice
Creating an Invoice
-
From the Home Page, select
 within the Your Invoices information box, OR, navigate to the Invoices Navigation link and select Create Invoice.
 -
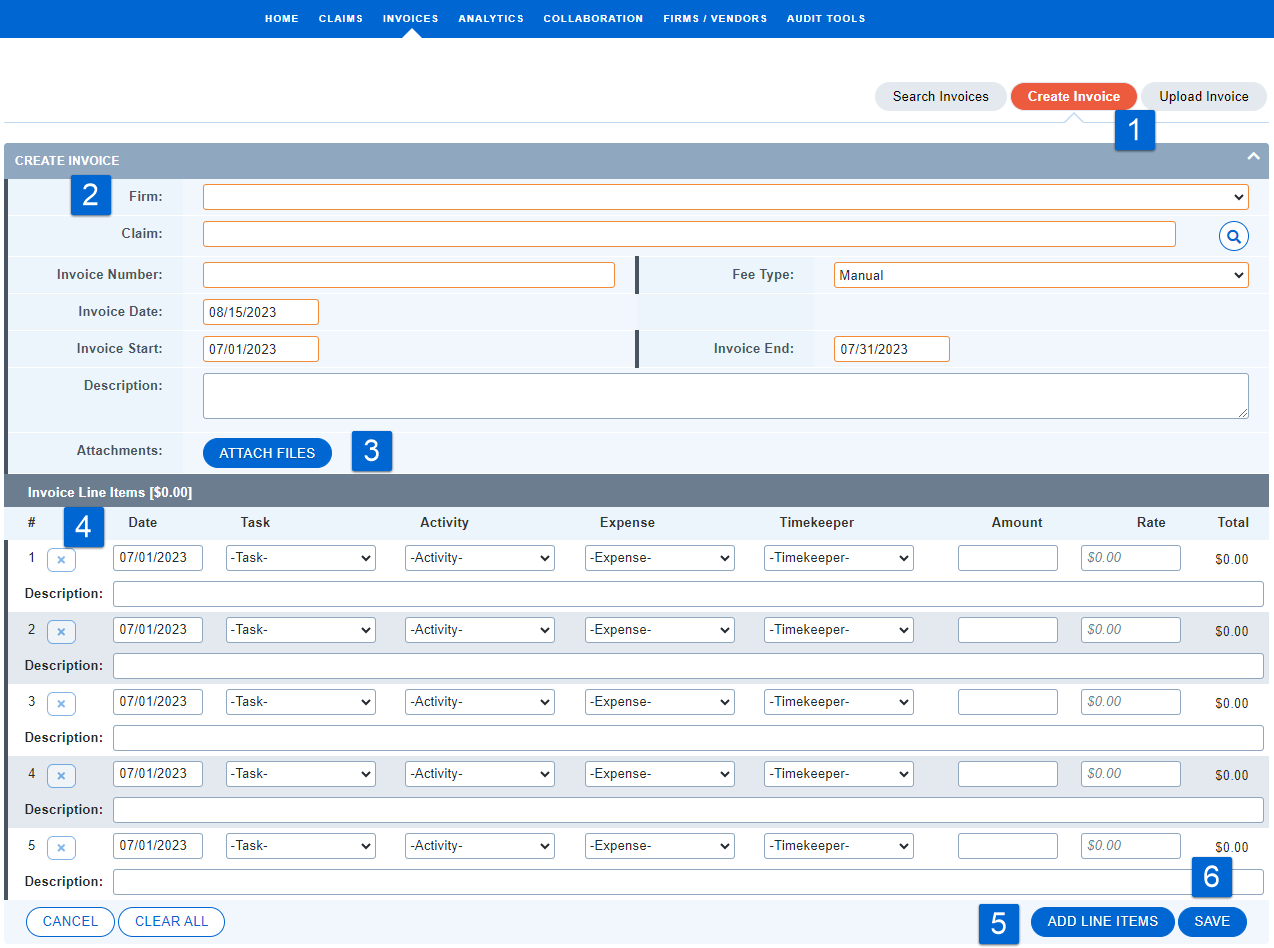
Complete the profile data.
-
Begin typing your Matter Name, or use
 to search for your matters.
 -
Enter the Invoice Number, Fee Type, Invoice Date, and Invoice Service Period Dates
-
Add a Description if needed.
-
Add Invoice Attachments if needed.
-
Enter Line Item data.
-
For fee lines, you will use a Task Code, an Activity Code, and a Timekeeper. Your timekeeper rate information will populate automatically when a timekeeper is selected.
-
For expense lines, you will use an Expense Code only. These lines will not require a timekeeper to be selected.
-
For both fee and expense lines, you will need to enter an Amount (the number of units, such as hours or numbers of copies) and a Rate (the cost per unit, in the currency selected for the invoice). Acuity will calculate the line item total based on these two values.
-
-
Add additional line items as needed.
-
Click Save to create the invoice. You will be moved directly to the Invoice Profile.
-
Your invoice will be in a Draft status. For more information on Invoice statuses, see Invoice Statuses
If your invoice contains any critical exceptions, you will need to resolve them before submitting the invoice for approval. See more on Exceptions here.
For more information on invoice statuses, see Invoice Statuses.