Create Invoice
Creating an Invoice
-
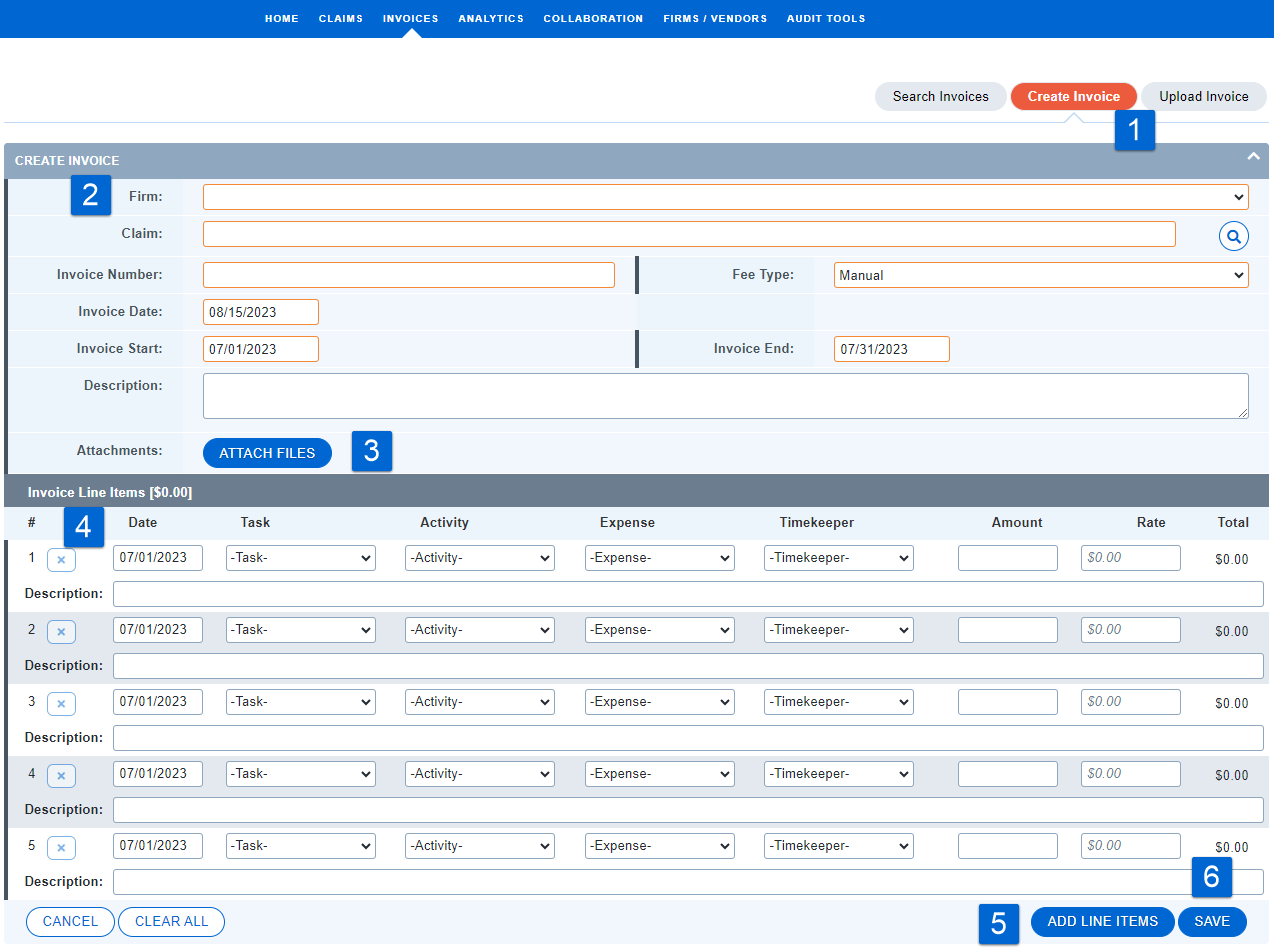
From the Home Page, select
 within the Your Invoices information box, OR, navigate to the Invoices Navigation link and select Create Invoice.
 -
Complete the profile data.
-
Begin typing your Matter Name, or use the magnifying glass
 to search for your matters.
 -
Enter the Invoice Number, Fee Type, Invoice Date, and Invoice Service Period Dates
-
Add a Description if needed.
-
Add Invoice Attachments if needed.
-
Enter Line Item data.
-
For fee lines, you will use a Task Code, an Activity Code, and a Timekeeper. Your timekeeper rate information will populate automatically when a timekeeper is selected.
-
For expense lines, you will use an Expense Code only. These lines will not require a timekeeper to be selected.
-
For both fee and expense lines, you will need to enter an Amount (the number of units, such as hours or numbers of copies) and a Rate (the cost per unit, in the currency selected for the invoice). Acuity will calculate the line item total based on these two values.
-
-
Add additional line items as needed.
-
Click Save to create the invoice. You will be moved directly to the Invoice Profile.
-
Your invoice will be in Draft status. For more information on invoice statuses, see Invoice Statuses


