Data Download
What is Data Download?
Acuity Data Download provides the ability for users to configure custom data queries and download them to Excel or CSV. This article will provide you a step by step walkthrough of the Acuity Data Download’s user interface and reporting capabilities.
For video instructions on using this reporting tool, see How to Use Data Download
Locating Data Download
-
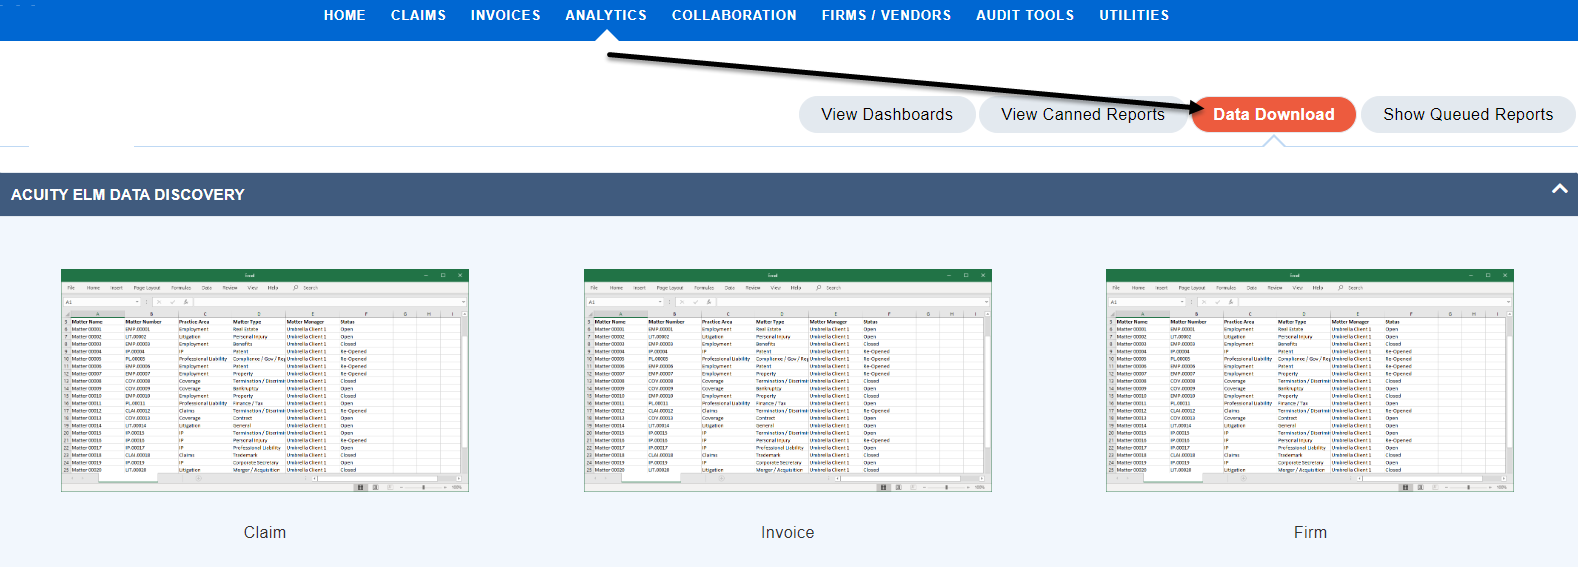
Click on ANALYTICS in your top navigation, then Data Download
-
Click on the desired report theme to configure that type of report:
Configuring Your Report
There are three main steps to using the Data Download feature; 1. Select your filters. 2. Select and order your fields. 3. Review your preview and initiate your report. In the below example, we have chosen the Invoice theme.
-
Selecting your filters.
-
The data download tool provides a variety of filters and criteria that can be used to isolate the exact subset of data that needs to be returned.
-
The filters will differ based on the report theme (Matters/Claims, Invoices, Firm).

-
Select and order your fields.
-
Available Data Fields are displayed on the left and the Order of Selected Data fields are listed on the right. Users can select fields from the left and populate them to the right in the following ways:
i. Double clicking on the desired field.
ii. Highlighting the field and clicking the Add button.
iii. Dragging and dropping the field to the right side.
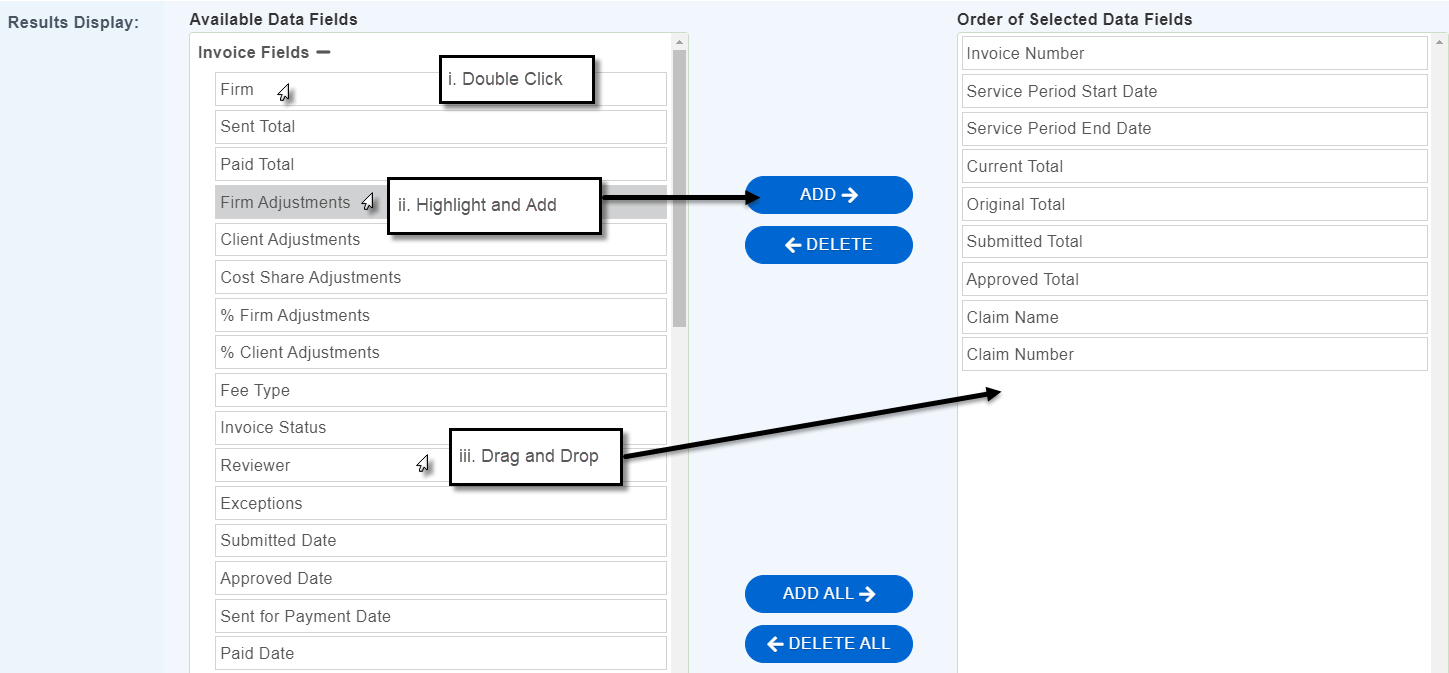
- You can reorder the fields you have selected by dragging and dropping them in the desired order.
- When fields are in the desired order, hit Search to generate your preview.
-
Review your preview and initiate your report.
-
If any changes need to be made, return to the Results Fields and make any needed additions or edits. Hit Search again to update the preview.
-
When you are satisfied with your report preview, click Initiate Download.
-
If you would like to save your report criteria and results fields to use later on, you can select the Save Search option.

-
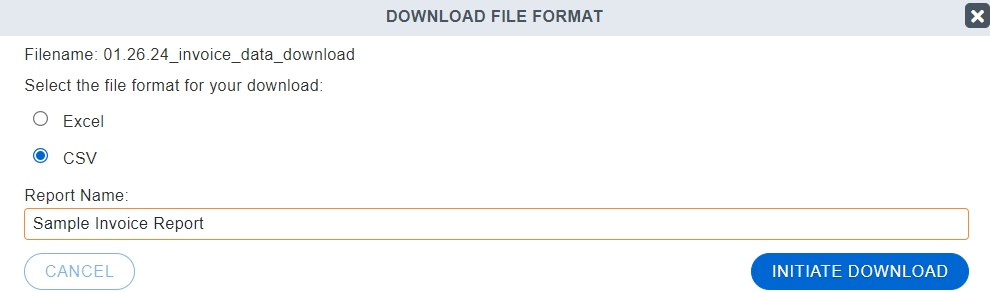
A popup will appear that asks you to choose your file output and name your report
-
Note: If your report is too big, it will default to CSV format.
-
Choose your format, name your report, and click Initiate Download.
-
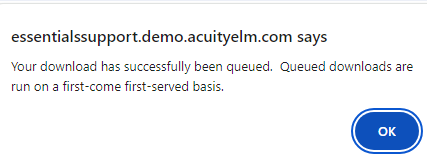
Once you initiate your download, you will receive a popup message informing you that your report has been queued.
-
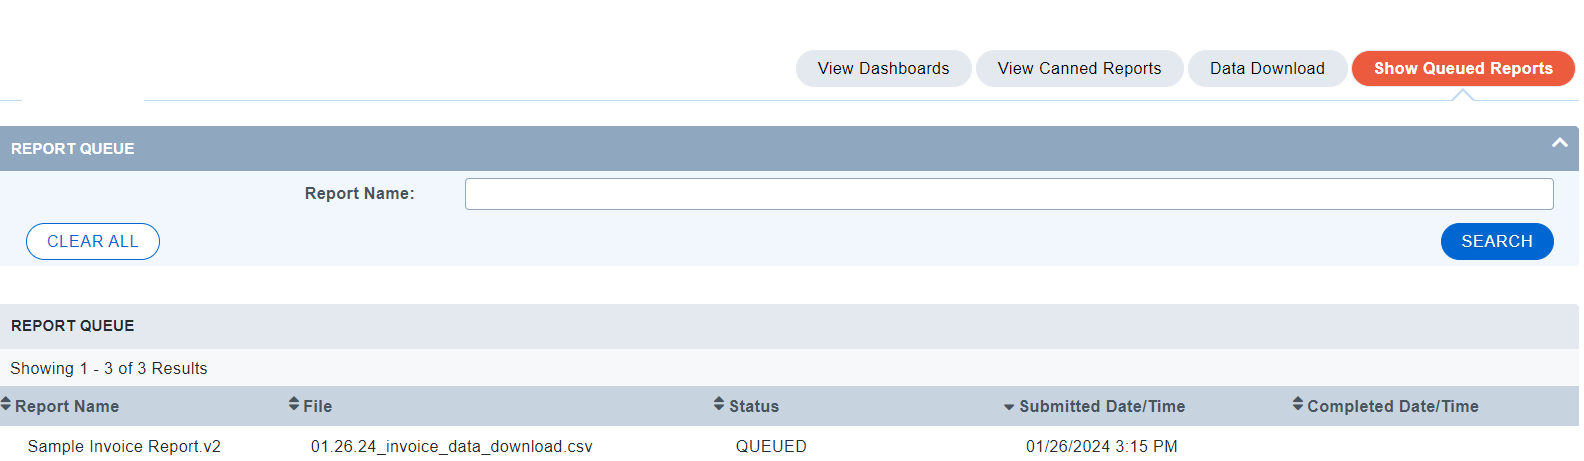
After clicking OK, you will be taken to your queued reports. The queue shows you the status of reports that you have initiated.
-
Note: This queue is a list of your reports from the past week. After seven days, your reports will fall off of this list.
Downloading Your Report
After initiating your report download, your report will be queued and processed. You will receive an email when your report has been generated. The email will contain a link to the Report Queue.

When you sign back into your queue, the report file will be changed to a blue hyperlink.
Click the hyperlink to download your report.

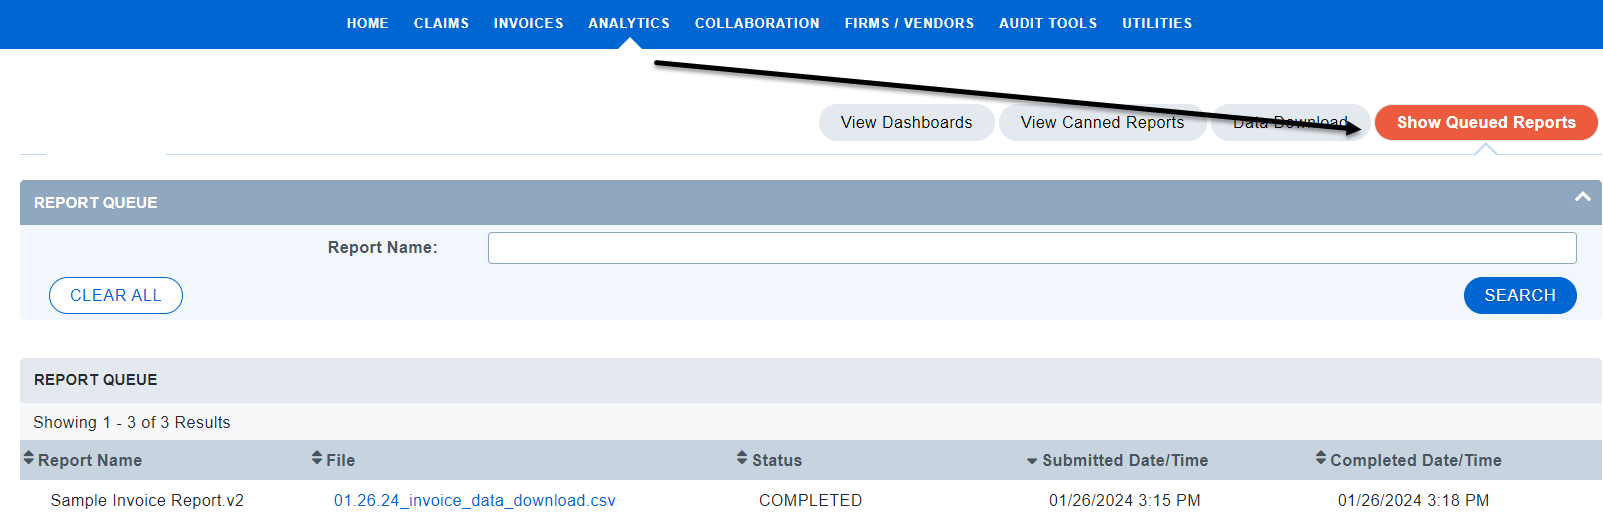
Note: There are four different report statuses in the Report Queue:
-
Queued – This report is waiting for the system to begin processing
-
Processing – This report is actively being queried by the database
-
Completed – This report is done and can be downloaded
-
Failed – This report query failed to complete or produce any results
You can navigate back to your queue at any time to view your reports from the past seven days by clicking the ANALYTICS navigation link, then selecting the Show Queued Reports sub-navigation.