
Working with Tab Bar Contents
Other tabs, such as Finance, are associated with multiple navigation items. TeamConnect cannot know in advance which item the end user is interested in, so when he clicks such a tab, he sees the available navigation items displayed as sub-tab links in the lower portion of the tab bar. Clicking on one of these sub-tab links then takes him to the linked page.
Only these two forms of navigation are available. You cannot add a navigation item, then add another navigation item as a child of the first item. All items are children of the tab itself.
You can change the navigation items that are associated with a tab in several ways.
To add a new navigation item to a tab
- Click on the tab that you wish to alter.
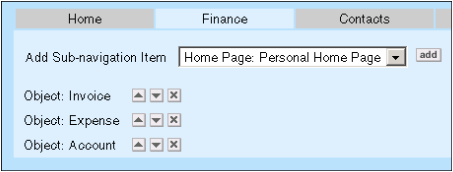
- Click on the Add Sub-navigation item drop-down list and choose a navigation item. The types of items available are system objects, custom objects, home pages, and custom tools.
- Click Add.
-
Click Save or Save and Close.
To reposition navigation items
- Click on the tab that you wish to alter. The existing navigation items are arranged vertically. The topmost item corresponds to the leftmost link in appearance in the lower part of the tab bar; the bottom item in the list is the rightmost link in the tab bar.
- Click on the up-arrow button to move the item higher, or the down-arrow button to move the item lower.
- If more than one item needs repositioning, repeat steps 1 and 2 for each item.
- Click Save or Save and Close.
To delete navigation items
- Click on the tab that you wish to alter. The existing navigation items are arranged vertically. The topmost item corresponds to the leftmost link in appearance in the bottom of the tab bar; the bottom item is the rightmost link in the tab bar.
- Click the delete ("X") button next to an item name.
- In the confirmation message pop-up window, click Yes.
- Click Save or Save and Close.