
TeamConnect Outlook Documents and Emails Version 3.1+
Introduction
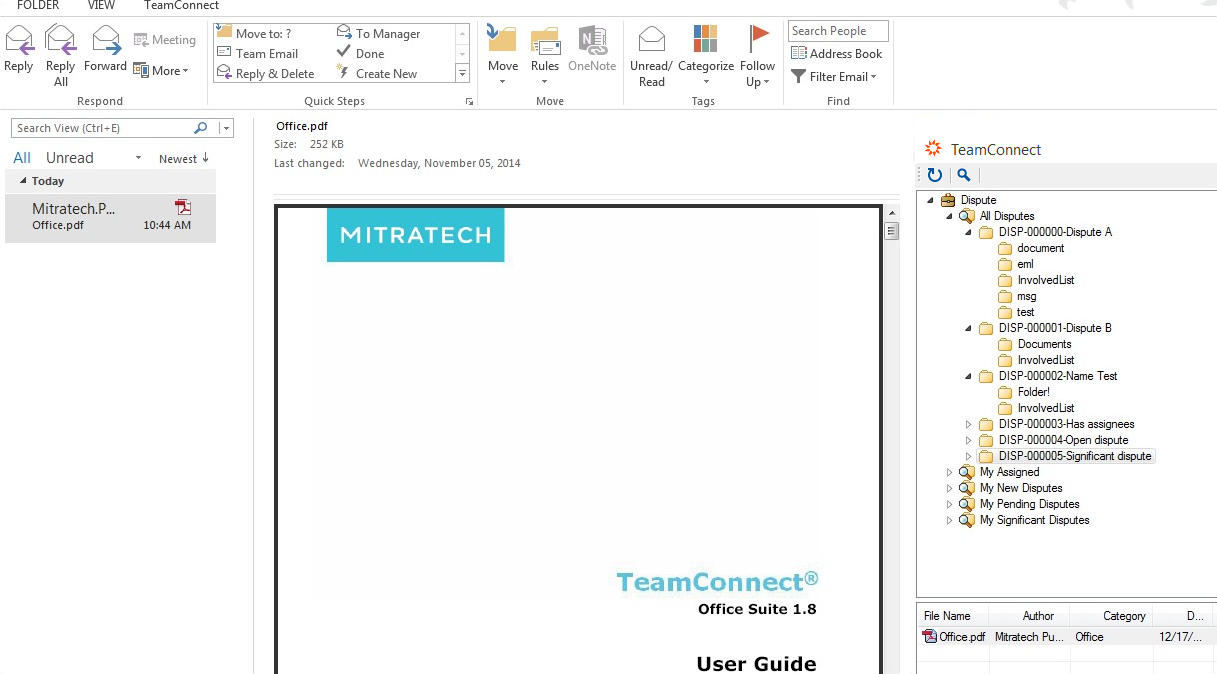
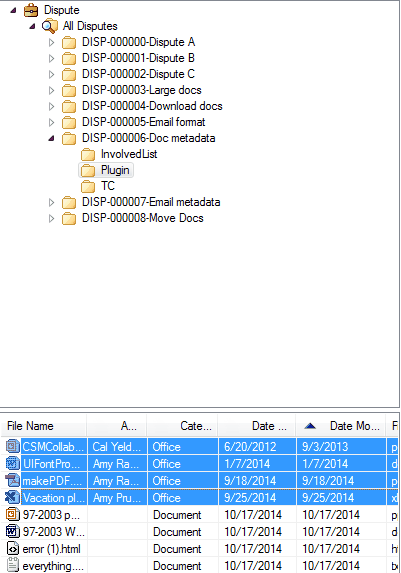
With the TeamConnect add-in in Outlook, users can easily view their documents in TeamConnect from the Matter Folders & Document Pane. The ability to view matter folders and documents from TeamConnect within Outlook eases the process of communication with clients and outside counsel who refer mostly to email. Documents and disputes can be pulled from the Matter Folders & Document Pane and inserted easily into emails, or in between folders.
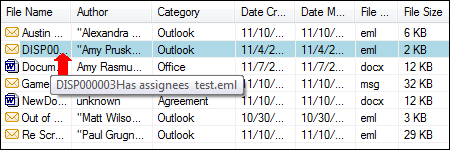
Hover over a cell in the Matter metadata pane to see the full contents of the document detail.
To open a document or email, double-click the item from the list. Note: You may need to expand the folder to view sub-folders.
Metadata Population
Documents can be uploaded via the Outlook add-in, and metadata is automatically extracted and placed into the appropriate fields. This visible data will make locating and identifying documents easier.

TeamConnect extracts the following metadata from documents and emails:
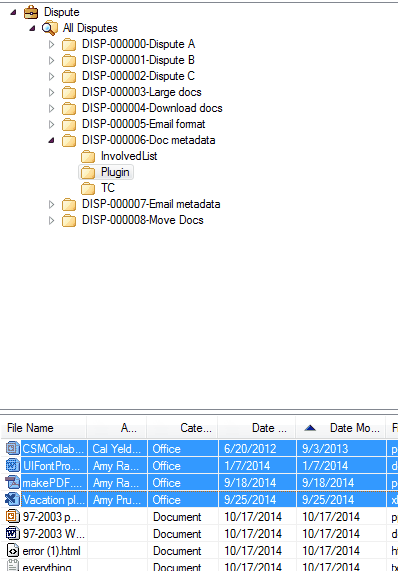
| Extracted Data | Conversion Description |
| Document Name | File Name |
| Document's Creator | Author |
| Document Category | Category |
| Document Creation Date | Date Created |
| Document Last Modified | Date Modified |
| Document Extension | File Type |
| Document Size | File Size |
Emails will be reflected in the main TeamConnect instance with the above metadata when provided.
Note: If the Document's Creator cannot be extracted, the description will be left blank. If Creation Date cannot be extracted, the current date will be used. If Last Modified cannot be extracted, Creation Date will be used.
Setting Metadata Display
Metadata can be configured to display the most important and relevant information to end users in the TeamConnect Documents Pane.
The first time the Settings window is opened, the fields for Author, Category, Date Created, Date Modified, File Type, and File Size will appear with all boxes checked by default. Note: File Name cannot be modified, as it would increase the difficulty of identifying documents.
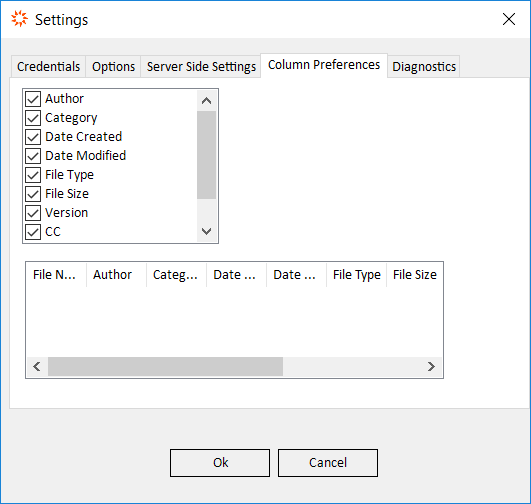
The metadata fields that have been checked will match the columns at the bottom of the TeamConnect add-in in Outlook.
Important Note: When updating to a newer version of the Outlook or Office add-in, any adjustments made to these settings are preserved. If the newer add-in no longer has the settings that existed in the old version, the old settings are ignored or excluded while all other settings remain the same.
Editing Document Metadata
From any Office or the Outlook add-in, I can right-click on any document or email (in Outlook) in the TC Documents Pane and I have an option to Edit Document Metadata.
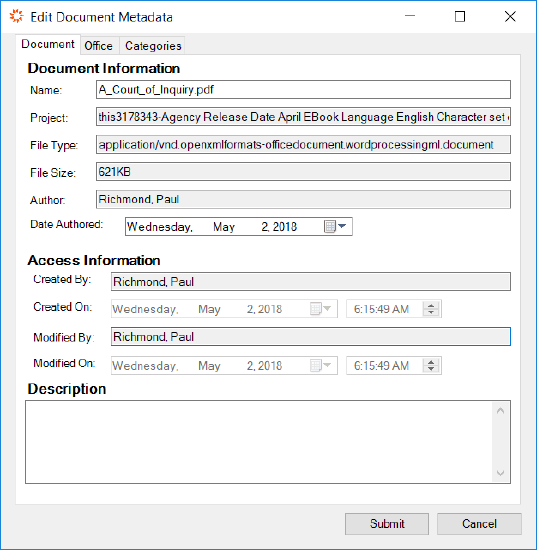
Users are able to change fields and document information that they would have access to change in the main TeamConnect application. Changes made to the document metadata here will be reflected both in the add-in as well as the main application.
|
Documents Tab The document tab contains the editable name and author date of the file as well as other non- editable information fields. Click Submit to finalize any changes to the name field or Date Authored field. While the File Type is not editable, users can change the extension via the Document Name field. Users will be prompted to click Yes after clicking Submit if they make changes to the extension. While the name will now reflect the new extension, your computer will still recognize the file as its original file type. Changes to the file type should be made in the main application. |
 |
|
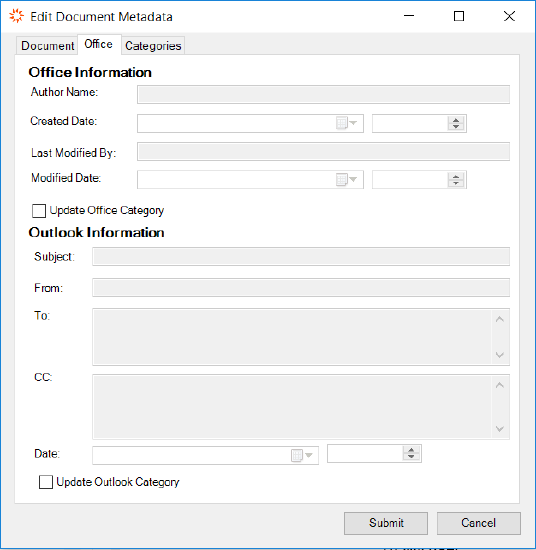
Office Tab Click the Update Office Category checkbox to make edits on the Office tab. These changes will be reflected in the document file bank in the add-in but not in the Document tab. |
 |
|
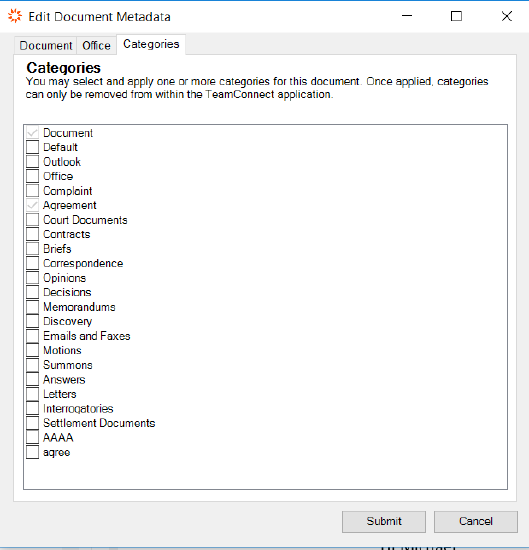
Categories Tab The Categories tab allows for improved filtering and document management. Click the checkbox next to the desired categories to add that category. Categories inherited from TeamConnect cannot be removed from the add-in. Likewise, categories added in the add-in itself cannot be removed after clicking Submit. Categories can be removed in the main application. |
 |
Uploading Documents
Documents uploaded in TeamConnect will appear in the Matter Folders & Document Pane in Outlook.
Note: Documents uploaded in TeamConnect must be assigned to a dispute in order to be viewed in that Matter Folders & Document Pane in Outlook.
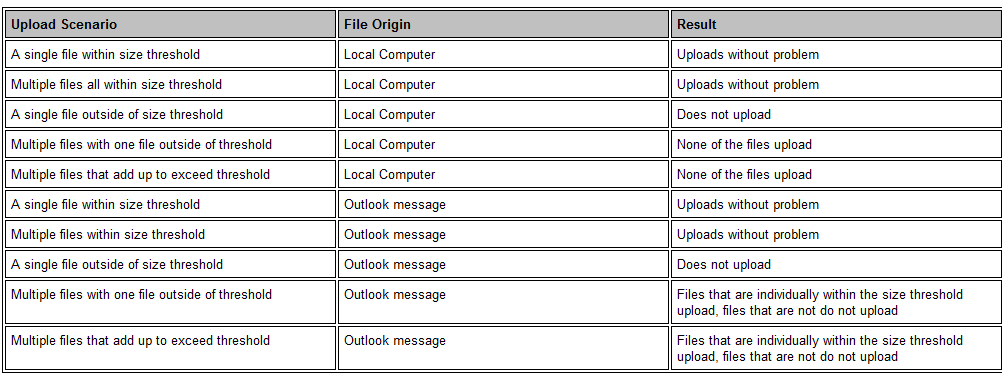
To upload a document to the TeamConnect document pane, simply drag one or more emails or document(s) from your email and drop it into the desired file. Note: If more than one document is selected to be uploaded and one of the documents exceeds the size threshold, only the documents that meet the requirements will show up in the pane to the right.
Note: If you wish to be able to move documents or emails with the same name without overwriting files, you will need to make sure that the automatic renaming feature is turned on. This can be found under the Office Suite Admin Settings.
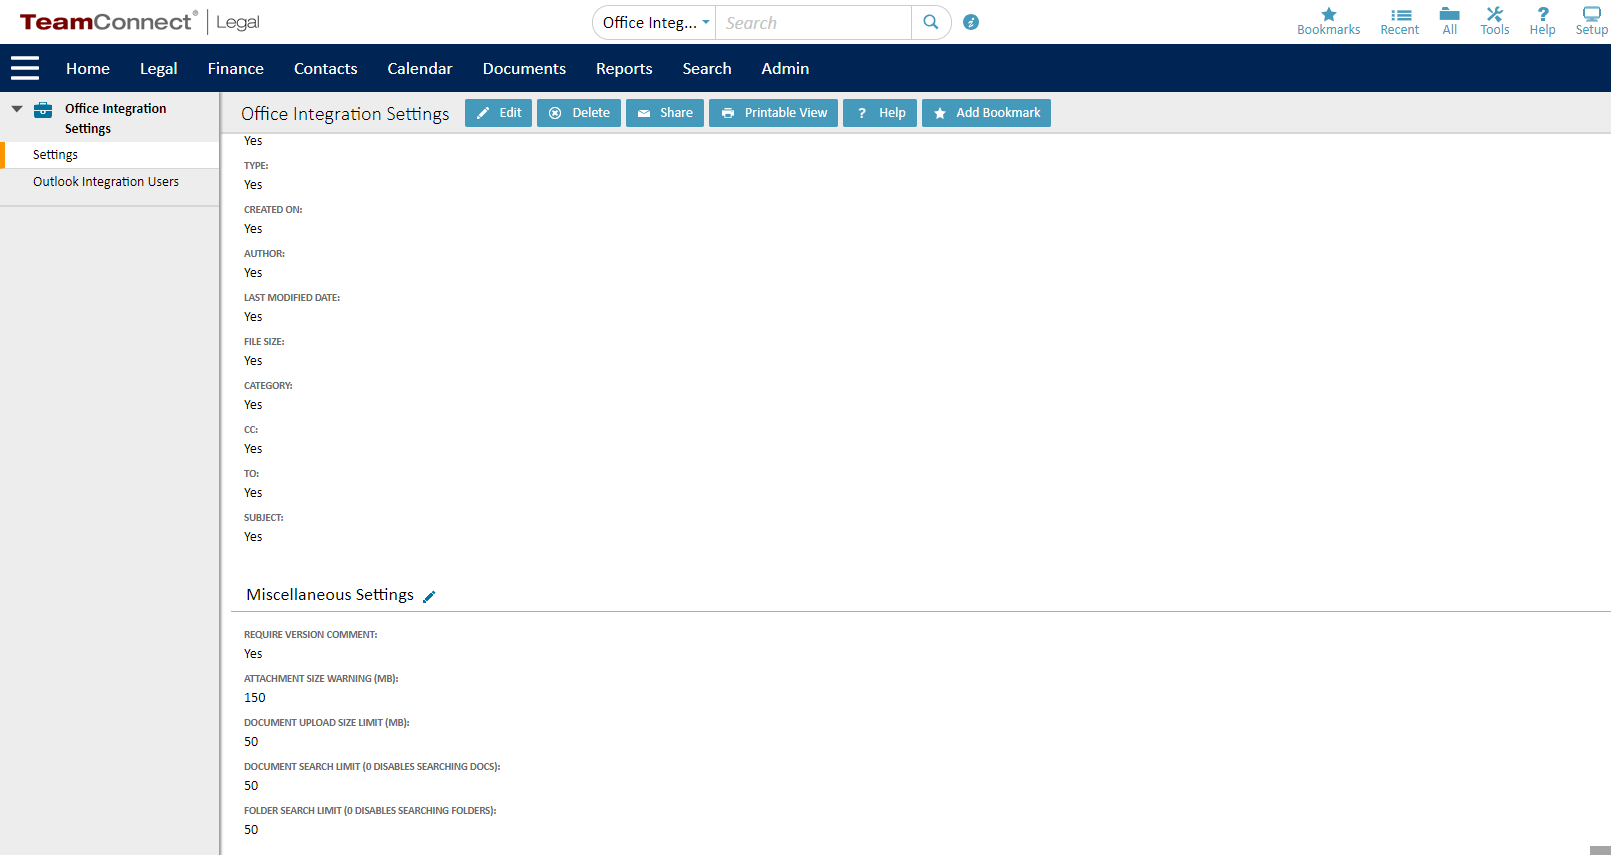
How to set a size threshold
As a TeamConnect administrator, you have the option to set a size threshold that will warn users of the Outlook add-in when they are trying to attach documents outside of TeamConnect that exceed the maximum amount. This will save users from wasting time downloading temporary copies of documents that Outlook will ultimately reject for being too large.
From the TeamConnect Home page, click on the Admin tab, Admin Settings, Office Suite.
Under Miscellaneous Settings, click on the box next to Attachment Size Warning (MB) or Document Upload Size Limit (MB) to change the amount.
Note: The value of the Attachment Size Warning must always be less than or equal to the Document Upload Size limit. Click on Update to apply your new settings.
Note: Any attempt to upload a document to a file or attach a file to an email that exceeds the threshold limit will result in the following notice:
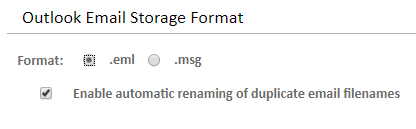
Outlook Email Storage Format
Emails uploaded into TeamConnect via the Outlook add-in can be uploaded as .msg or .eml files in order to use the format most suitable for your organization's needs. This option is accessible to all users who have permissions to access the Outlook/Office add-in settings area.
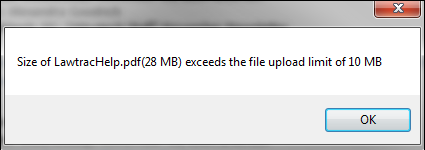
From the TeamConnect website, select Office Integration Settings from the All tab.
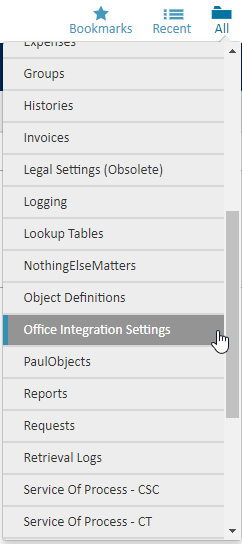
In the new page, click the pencil Edit icon to select the desired format under Outlook Email Storage Format. Note: The format is defaulted to .eml. Click Save & Close to confirm, then in your Outlook add-in, click  to refresh your TeamConnect pane.
You can see the format of uploaded documents in the File Format column.

Attaching Documents
Documents can be quickly and easily attached to and from the Outlook TeamConnect add-in, sparing users the necessity of switching back to the main TeamConnect application.
When one or more documents are selected, they will be highlighted as a visual indication that further action (i.e. saving or deleting) can be taken. Users can select multiple documents by holding down the CTRL button while clicking the files.

Attach any selected document(s) to an email by right-clicking and selecting Attach to New Email from the pop-up context menu, or drag the selected files and drop them into a pre-existing email composition window. Note: Files from different folders can be attached to the same email.
Opening Documents
With the TeamConnect add-in in Outlook, users can easily view their documents in TeamConnect from the Matter Folders & Document Pane.
To preview a document or email, double-click the item from the list and the file will preview within the Outlook window. You may need to expand the folder to view sub-folders.
Note: Documents should be opened via right-click+Open rather than double-clicking the previewed item.
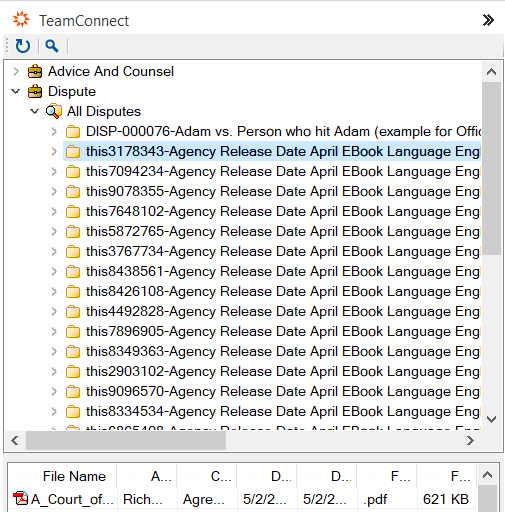
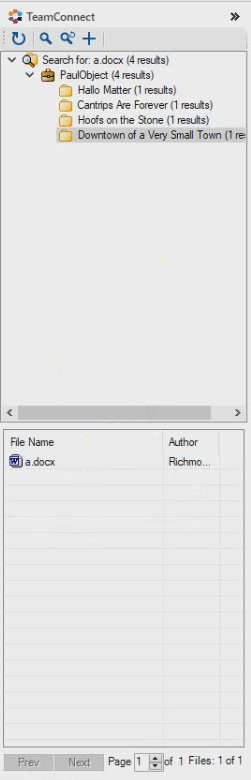
Searching Documents
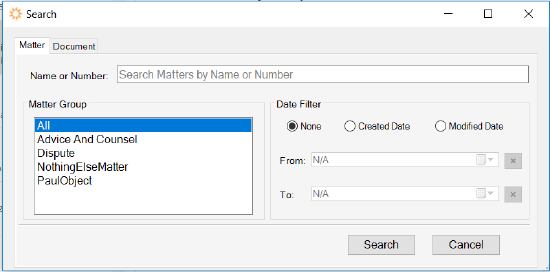
Matters can be quickly searched from the TeamConnect add-in within Outlook, saving users from scrolling through hundreds or thousands of Matter folders. You can search by clicking the Magnifying Glass icon in the TeamConnect add-in pane.
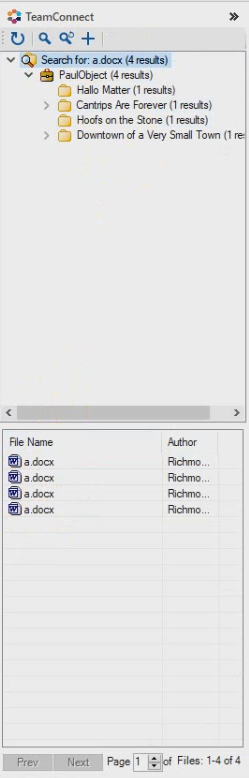
Enter your query into the Search text box. You can also filter by Created or Modified Date. Click Search and the search results will populate in the TeamConnect add-in pane. The documents and the action is the same as when you interact with documents in the standard TeamConnect document pane.
Note: Search results will remain until the Refresh button is pressed. This is located next to the Search button.
New to 3.1.1
Click search results will now highlight the folder that the document was in, showing the matter. If a file exists in multiple matters, clicking the file located at the bottom will show the folder for that file.
After selecting the file from the list:
Note: The matters will not necessarily be in the same order as the files shown in the results.
For more information on searching and adjusting the parameters for how your team can search, please see Search Filtering.
Opening Office Documents in Outlook
Users opening Office documents in Outlook should use right-click+Open to open the documents rather than double-clicking.
Upon launch in the native application, the Document Check-In and Check-Out options will be unavailable. Users should save the document using the Save to TeamConnect button.
Saving to the same folder as a document with an identical file name will cause an error message. However, clicking the exact identical file and saving to it will allow versioning.
After saving, the document will then be checked-in and sent to TeamConnect.
Moving Documents
To move one or more document(s) in the TeamConnect Outlook add-in, click on a document within the pane and drag the file up to the desired folder. You can also right-click the file and select Cut or Copy in order to open a different folder and paste it there. Alternatively, click on the document, press CTRL+C, open a new file and click on a document in the that file and press CTRL+V.
Note: When dragging a document from one file to another, a ![]() will appear in the place of the mouse indicator if the file cannot hold the document. If a file is willing to accept a document, a
will appear in the place of the mouse indicator if the file cannot hold the document. If a file is willing to accept a document, a ![]() will appear next to the mouse indicator.
will appear next to the mouse indicator.

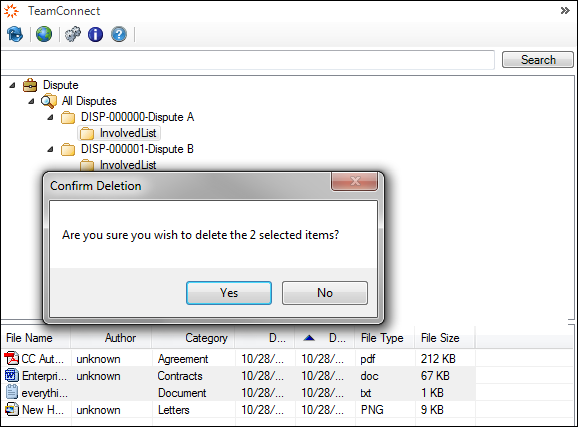
Deleting Documents
Documents can be quickly and easily deleted from the Outlook TeamConnect add-in, sparing users the necessity of switching back to the main TeamConnect application.
When one or more documents are selected, they will be highlighted as a visual indication that further action (i.e. saving or deleting) can be taken. Select multiple documents by holding down the CTRL button while clicking the files.
Click the Delete icon or right-click any selected file and choose Delete from the pop-up context menu to save your file. Selecting Delete will prompt a window to pop-up to confirm the action.
Note: The numbers of files that have been selected to be deleted will appear, but not the file names.
If a file cannot be removed, a notification will pop up stating the cause of the issue.
Overwriting Documents
Users are able to overwrite and version documents moved within the add-in and documents moved in from emails. See Version Control for further details.
To overwrite with a document from an email:
- Drag and drop the desired document from the message to the file you want to overwrite.
Note: If you drag the file to the folder instead of to the file itself, you will encounter an error message. - If the folder already contains that file name, the file will overwrite.
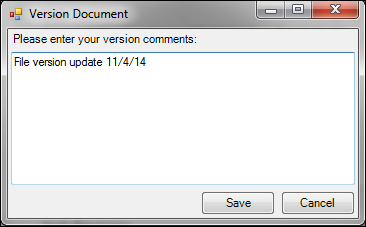
- Enter a Version Comment, if desired.
- Click Ok to finalize the overwrite.
To overwrite with a document from within the add-in
Users are not able to drag and drop a file from within the add-in to another folder with an outdated file of the same name. This action throws an error and will not overwrite the old document or move the new document.
In order to overwrite from within the add-in, users must first delete the old file before moving the new file to the intended location.
Version Control Overwriting
Versioning of documents and email messages is improved in Office Suite 3.0. Users are able to drag-and-drop new files onto an existing target file.
These are the following scenarios users may encounter when versioning documents:
| Action | Target | Result |
| Dropping a file from an email onto an existing file within the TC add-in (see below) | File of same type (.eml or .msg for emails) that is not checked out |
Pop-up window requests version comment. Save will version the targeted file and Cancel will cancel the versioning. Both choices close the new window. |
| Dropping a file from an email onto an existing file within the TC add-in | File of a different type | Prompts a warning message that notifies you of extension mismatch. Click Yes to proceed with the versioning or No to cancel |
| Dropping a file from an email onto an existing file within the TC add-in | File that is currently checked out | Prompts a message stating that you cannot version a checked out file. This message includes the name of the user who has checked out the document. Provides an option to save a copy with a unique added identifier (sample.doc -> sample(1).doc) instead. |
| Dropping one or more local documents into the add-in directory | Hovering over individual file | Cannot upload or version |
| Dropping one or more local documents into the add-in directory | Hovering over folder or subfolder | Uploads or begins versioning process as planned |
Versioning Files
Dragging files directly from an email to a file in the document bank can provide direct versioning. The file will always take the name of the destination file in the document bank. Clicking the file in the document bank twice (not double-clicking it) will open up the version history. Users can also version a file with a document of a different extension.
For example, users can drag a .docx file to a .doc file for versioning. The file extension will still be
.doc for TeamConnect or locally downloaded files, but this feature can allow users with legacy files better version control. Users can also version an entirely unrelated file type, such as adding a .pptx file over a .pdf. TeamConnect will attempt to open the file as a .pdf and locally downloaded versions of the .pptx.pdf file will have errors.
Note: Version history will display in order of the most recent version first, having the most recent version on top. If document versioning is not turned in in TeamConnect, the document version will always display 1 regardless of updating the versions.
Saving to Local Machines
Documents can be quickly and easily saved to a local machine from the Outlook TeamConnect plug- in, sparing users the necessity of switching back to the main TeamConnect application.
When one or more documents are selected, they will be highlighted as a visual indication that further action (i.e. saving or deleting) can be taken. Select multiple documents by holding down the CTRL button while clicking the files.
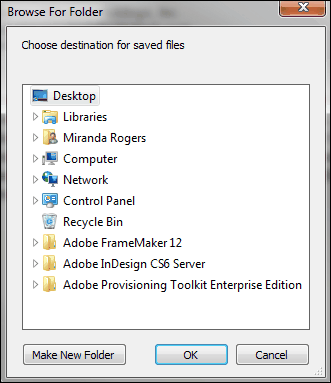
Click the Save icon or right-click any selected file and choose Save from the pop-up context menu to save your file.
Choose a destination in which to save the file. Note: File names will remain as they appear on the server, but duplicate names must have a numeric identifier appended in order to provide uniqueness in the file system.
Tags recommended by the template: article:topic