
End User Guide for TeamConnect O365 Add-In 4.1
Please watch the following video for a detailed understanding of the migration process from the Plugin to the Add-In.
After watching the video, please refer to the below end-user guide for additional details and instructions.
Introduction
The following is a comprehensive user guide for End Users who will facilitate the migration of appointments from the Outlook Plugin to the Outlook Add-in. This migration process is a coordinated effort between the TeamConnect Admin, the Office Suite Admin (permissions described below), and the End User. Before diving in, if you have not done so, we suggest acquainting yourself with the O365 Add-In 4.0 released with TeamConnect 7.1 (November 2023).
- To learn more about the reasons behind the transition from the Office Suite Plugin to the Outlook Add-in, refer to O365 Outlook Plugin Vs Add-in.
Please avoid concurrent usage of the Office Suite Plugin and Add-in. It is vital that users stop using and uninstall the Office Suite Plugin (for Outlook) after the datastore file has been uploaded and before end users start using the Add-in. Concurrent usage will cause data issues such as duplicate appointments, deletion of data within appointments, etc. Other noteworthy things include:
- Appointment migration from Plugin to Add-in is only supported for versions beyond TeamConnect 7.1 PB1, and is only applicable if users were using appointments in the Outlook Plugin
- Due to browser issues beyond our control, the Add-in does not work with Safari, please use an alternative web browser. Please note the Add-in is compatible with desktop environments on both Windows and Mac operating systems.
- If you accidentally use the Plugin again, stop using it and generate/upload another datastore file in the Add-in.
- Please note that file check-In/check-Out is supported in the Outlook Add-In, rather than in Word, PowerPoint, and Excel. Users can efficiently manage files through Outlook Add-In or directly through TeamConnect for seamless file handling.
Appointment Migration from Plugin to Add-in: How to upload DataStore file?
A TeamConnect Admin will assign you to the new permission group called "Office Suite User," which will grant you the required permissions to initiate the migration of your appointments from the Plugin to the Add-in. The group's ID is "OfficeSuiteUser," if you do not have this permission group or are unable to see any of the below screens, please contact your IT administrator for assistance.
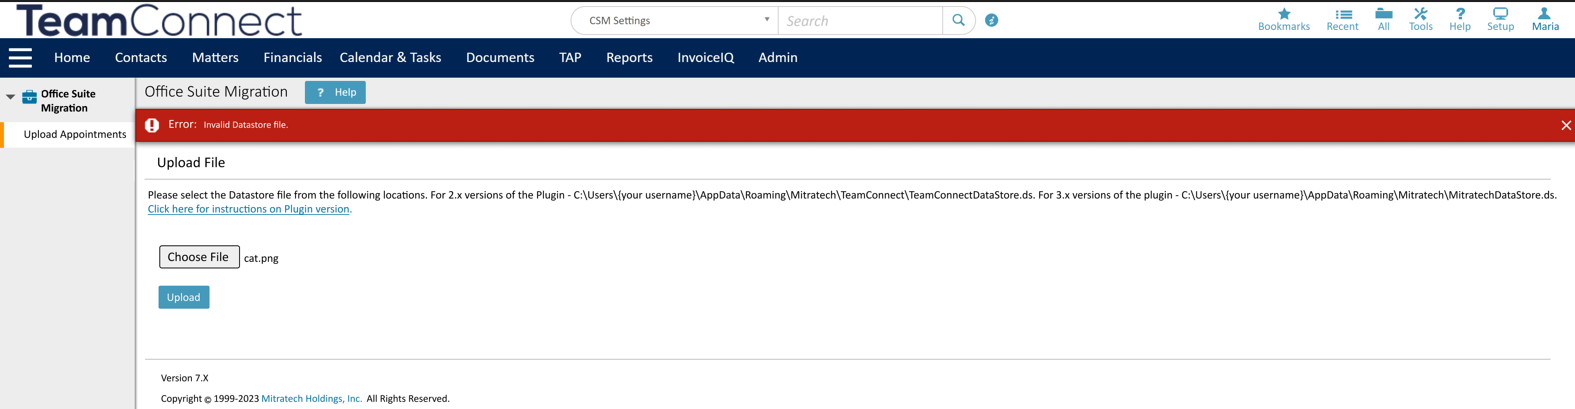
The migration process begins by uploading the datastore files. These files contain essential data that needs to be transferred to the new system.
To ensure a smooth migration, it's crucial to follow the correct procedure for uploading these files:
| Instructions | Screenshot for Reference |
|---|---|
|
 |
|
 |
Please note the datastore file location varies depending on which Plugin Version you are on.
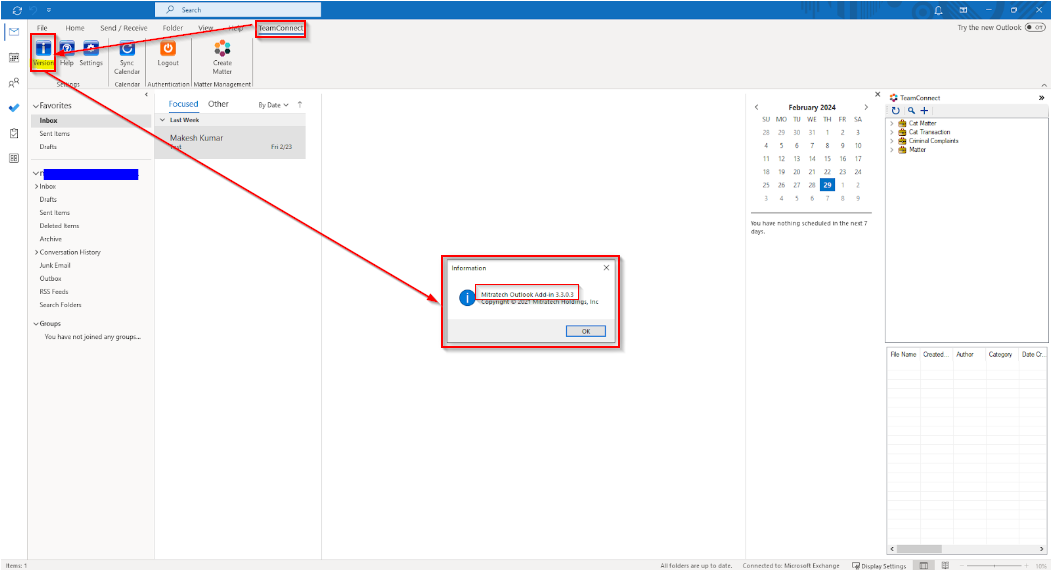
How to identify your Plugin Version?
2.x and 3.x Versions
To identify the version of the Outlook Plugin you're using, refer to the Outlook interface. Follow the below instructions to determine the Plugin version:
-
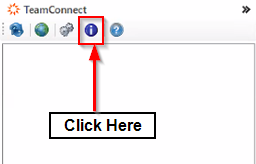
Navigate to the TeamConnect task pane or tab on the Home Page → Click on the info icon
or the version icon
.
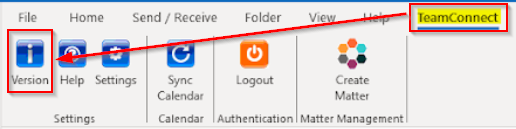
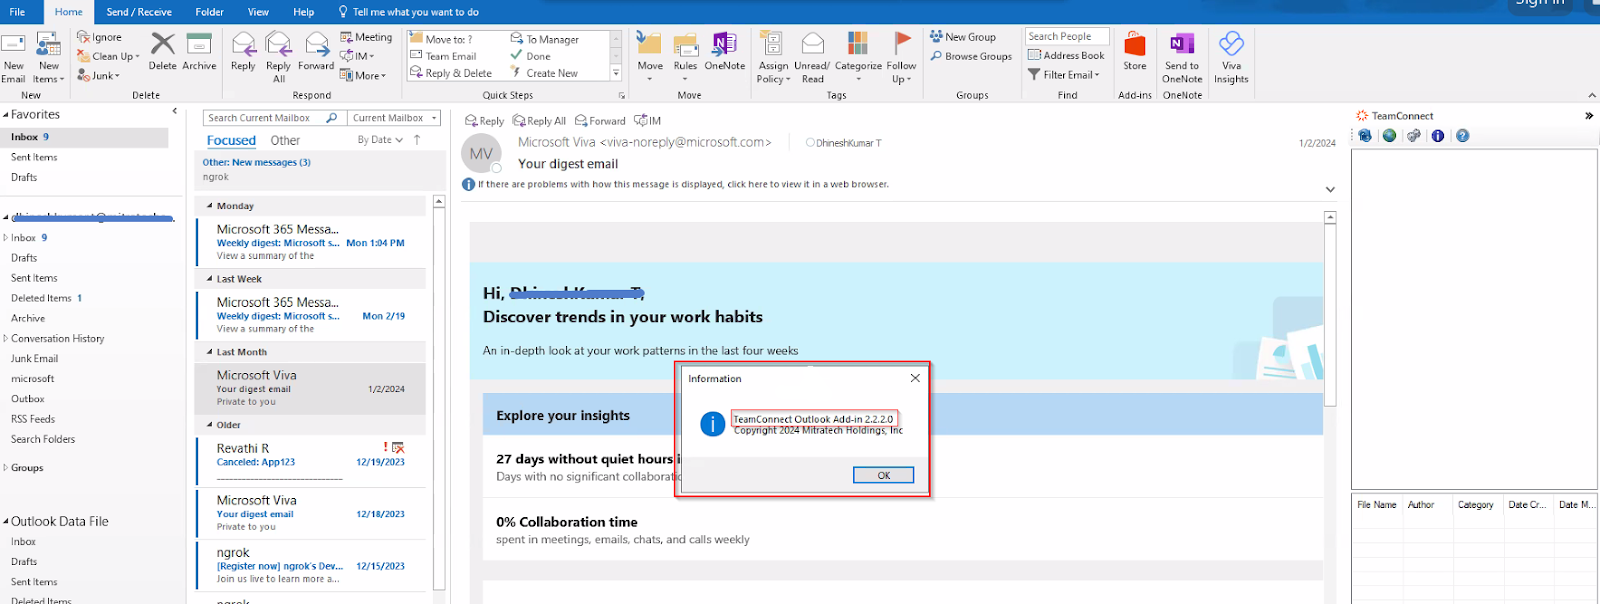
-
A dialog box with the Current Plugin Version will be displayed as shown below.
|
 |
|
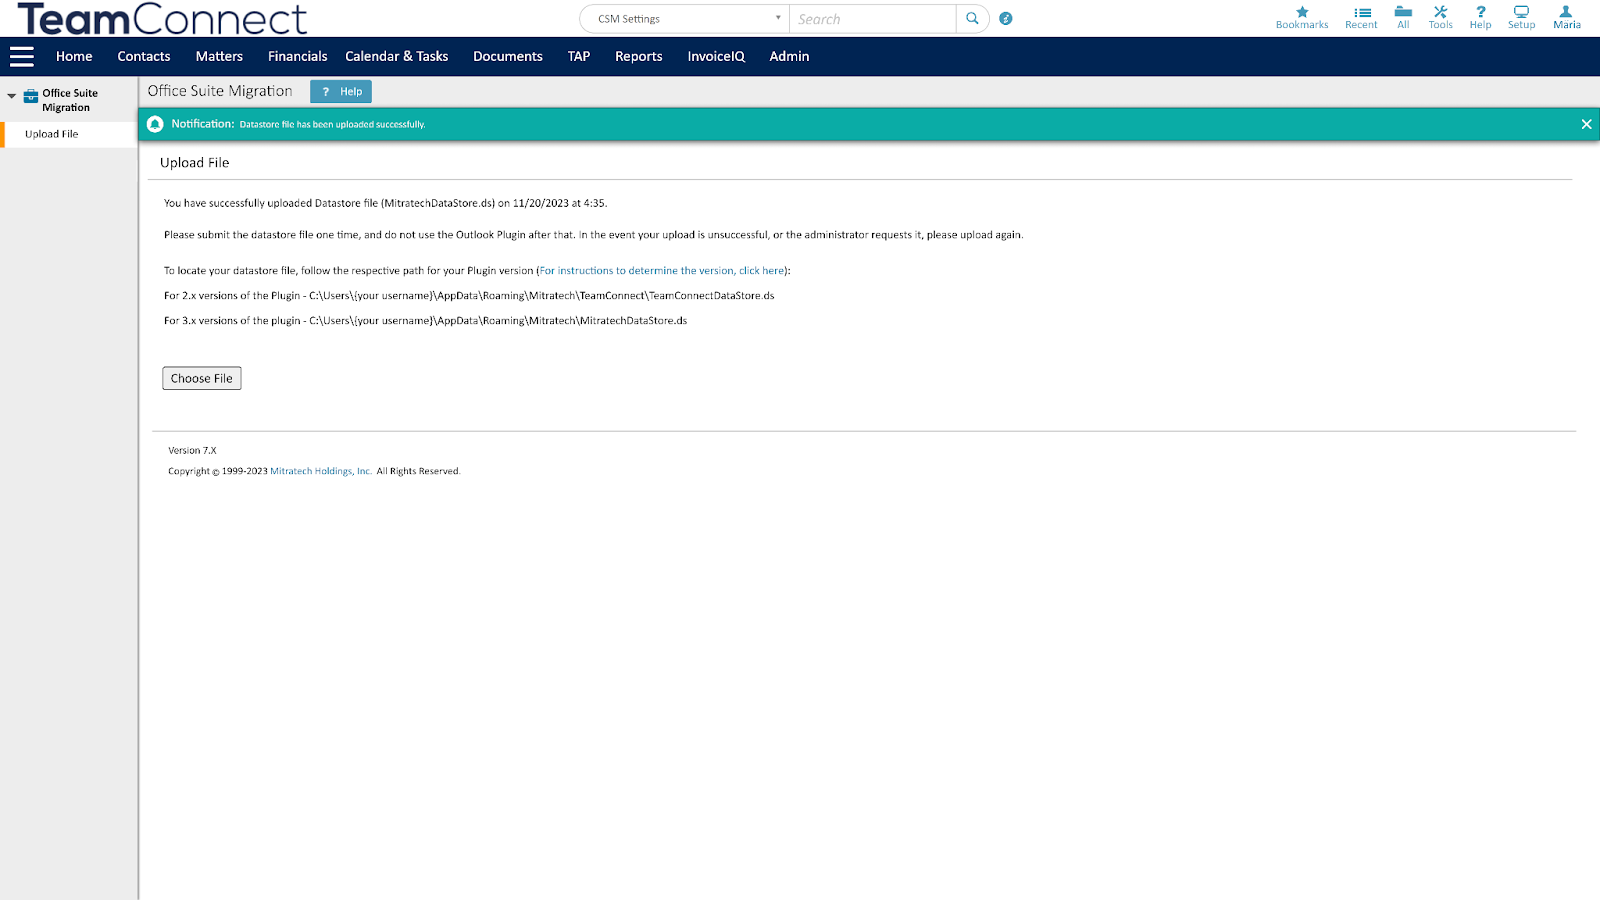 |
IMPORTANT WARNING: Once you have uploaded your datastore file please DO NOT use the Plugin again, you should use the Add-in.
-
If new appointments are created in the Plugin after you have uploaded your datastore file, a new file and upload must occur.
-
Upload only one file
Monitoring Appointment Migration Status in Office Suite Module
The migration process will be handled by the Office Suite Admin on behalf of you (the end user). You can easily track the status of the Appointment Migration progress from the Office Suite module where/how do they navigate. Upon uploading the dataStore file, users receive immediate feedback and the upload time and migration status.

However, when there is a "Failure" or "Partial Failure" during migration, the "Upload" button reappears, and the users need to upload a new DataStore file and initiate the migration process again.
Permission Handling and Notifications After Upgrading to TeamConnect 7.1 PB10
(Introduced in TCE 7.1 PB10 release)
-
Grant Permissions During Login
- After logging in to the O365 Add-in for the first time post-upgrade, users must provide consent for specific permissions required by the Add-in (calendar access).
Note: No specific permissions are required for document management. - If permissions are denied, an error message will appear in the Add-in, and access will be restricted until consent is granted.
- Login Scenarios Based on Enabled Features If calendars are enabled, users will encounter a calendar-specific screen at login.

-
If permissions were not accepted during the initial login, users must review the permissions and provide consent before accessing the respective features in the Add-in.

- Re-authentication: If a user has been inactive for an extended period or not logged in for a while, they are prompted to log in again.
- New Objects: When admins enable new settings (appointments), users must re-authenticate to grant access to these objects.