Making the Invoice Primary Key Visible
AP Link offers two different options for the match on the return payment input feed: the combination of Vendor Name, Invoice Number and Invoice Date or the Invoice Primary Key. The Invoice Primary Key is not exposed in a way that allows the tool to map to it for the output. Therefore, it is necessary add a custom field and have a pre-population rule that sets it.
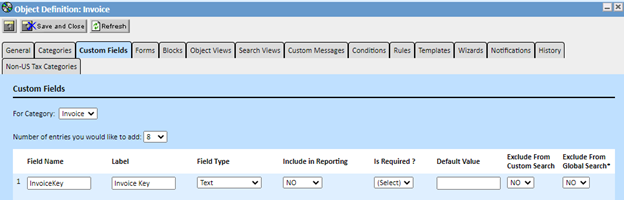
Step 1 – Add a custom field for Invoice Key. Select Setup in the top right > Go to... dropdown > Object Definitions > Invoice > Custom Fields tab. Fill out the fields and select Add Item.
Step 2 – Create a pre-population rule to populate it. In the Invoice object, select the Rules tab. Fill out the fields as shown below. Make sure to check the box "This Rule is Active".

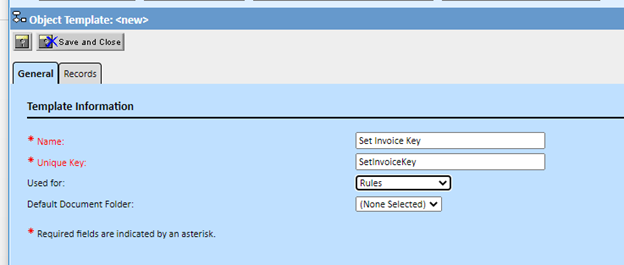
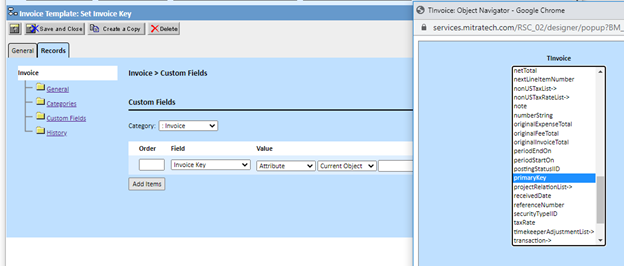
Step 3 - Create the template for the rule. Under the Invoice object, select the tab Templates > Create New Template. Fill out the fields as shown below.
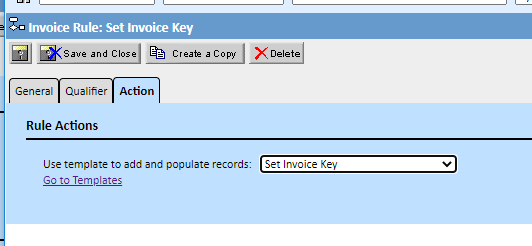
Step 4 - Use this as the template for the rule by going back to the tab Rules > select the new rule "Set Invoice Key" > select Action tab. In the dropdown for "Use template to add and populate records, select the new template "Set Invoice Key". Save and Close.