
TCBI - Report Manager
The Report Manager is an advanced UI-based report scheduler with highly-flexible scheduling capabilities including event-driven triggers. You can set up and enable customized reports and send them to a wide range of audiences. The centralized view allows you to receive live status updates, perform bulk operations, and more.
Note: Users need to know the following terms while working with Report Manager:
- Dashboard is a collection of widgets.
- Report is a scheduled action of sending the dashboard to users.

Installing the Report Manager
The Report Manager is installed as a Sisense add-on. When you install the Report Manager, the following are installed:
Add-ons Client Side:
- Report Manager: This add-on generates all the UI pages displayed in Sisense, including the Report Manager page, the Reports list page, and the Create/Edit report.
- Hide Report Schedule: This add-on removes the option to schedule reports through the Share Dashboard window.
Add-ons Server Side:
- Report Manager: After logout, if a user tries to browse the Report Manager, this add-on redirects the user to the Login page.
Microservices:
- Rest API – Data manager: Adds another Report Manager route to the Sisense REST API list under the V1 version.
- Engine: Exports reports and sends them to recipients. If it fails, all reports that were in the middle of export will be set to not running with a server error message.
- Scheduler: Manages the report execution time based on priority and capacity. In case of failure and going up again, it will be set to ‘no running’.
- Messaging: Sends report update messages from the server to all logged-in users. If it fails, all sent messages are not stored and will not be sent after the service is restored. In this case, your users will need to refresh the page to see the updated data.
Every microservice has a log file under the Sisense logs directory. For Multi-node installation logs will be written on one node at a time. To see the full execution logs, all logs from all nodes should be reviewed.
Installation of the Report Manager depends on how you deployed Sisense.
For single-node deployments, select Full installation.
For multi-node deployments, the installation type you choose depends on which node you are installing the Report Manager on. The Report Manager must be installed on all nodes, but the installation type you choose depends which node you are installing it on.
For Build nodes, select Full Installation.
For Application-query nodes, select AppNode install.

To install the Report Manager:
- Download the Report Manager add-on.
- Install the Report Manager on each node in your deployment.
- After you have installed the Report Manager on all the relevant nodes, you need to configure the reports.
- Restart the sisense.reportManagerEngine Windows service on all the Sisense nodes.
- For archiving reports, ensure that the “sisense.reportManagerEngine” service is running with an authorized user.
- Log in to Sisense as Admin/Designer and click Report Manager in the top menu bar.

Note: If reports are not executed, restart the Report Manager services
Configuring the Report Manager
After the Report Manager has been installed on your machine in single-node deployments or on the build node in multi-node deployments, you need to configure it and define your email template that is sent when you send a report.
To configure the Report Manager:
- Open the Configuration Manager from your browser at http://localhost:3030.
- Click the top left corner five times to open the full list of services configurations on the left. (refer the below screenshot)

- Configure the following settings in the ReportManagerExportEngine:

a) Report Manager general configurations
- reportManager.adminAPIToken: This is the Admin user that will be used to generate Sisense users token for export purposes. To generate the user token use the /authentication/login as described here.
- reportManager.deleteExportedFiles: Select to delete exported files on report compilation. When enabled, all temporary report files are deleted on report compilation.
Note: This feature does not affect archived files. Archived files will not be deleted by the application unless the “overwritten” flag is selected.
- reportManager.localExportPath: The local server path to save the exported files to. The path will be created if it does not exist.
- reportManager.maximumExportRetries: The number of times that the engine will try to export a report in case of failure.
- reportManager.nonSisenseUserAPIToken: The token of the user that will be used to export reports to non-Sisense users.
- reportManager.nonSisenseUserEmail: The email of the user that will be used to export reports to non-Sisense users. This address must match the nonSisenseUserAPIToken.
Note: When using a version below 8.2.1.10078 Active Directory user tokens cannot be used as the Report Manager Admin user or the non-Sisense user.
b) Configure the CSV date format if needed. The CSV day date format will be translated based on these configurations. There are default date format values configured. The configured date format will be used for all the report recipients. In case no format is selected, the date is presented as stored in the datasource.

4. Create an email template. The first email template that is created will be used as the default email templates.
a) In your browser, open the Sisense REST API: [yourSisenseDomain]/app/dev/#
b) Open the Report Manager section.

c) Click the POST report_manager/templates endpoint to add an email template. Below is the email template code for reference:
<html><h2><%= recipient %>, </h2><p>You have received one or more scheduled report(s) from TeamConnect.</p><% if (links && links.length > 0) {%><h3>See the link(s) below: </h3><%for (var i = 0; i < links.length; i++) { %><h3><%= links[i] %></h3><% }%><% }%></html>
Template parameters:
- Links: Array of dashboard links. A list of all the report dashboard links. Applicable only if the report has a dashboard link selected on the Files Format.
- Recipient: String of the recipient’s first and last name.
Adding Reports
After you have installed and configured the Report Manager, you can begin to add reports.
To add a report:
- In Sisense, click Report Manager in the top navigation bar.
- In the Report Manager, click Add New Report.
- Enter the following information:
| Field | Required | Description |
|---|---|---|
| Report Name | V | Unique name of the report per owner. |
| Dashboard | V | Select the dashboard the report is based on. |
| Priority | Is presented only for Admins. Normal by default.
Take into place when there are a few reports that should be exported at the same time and there is not enough capacity to export all due to concurrency settings. In this case, the Scheduler will export the High priority reports first. |
|
| Format | V | Select the format of the report, CSV, Excel, PDF, or a Link to the dashboard. You can select one or multiple formats.
CSVs are generated only for Pivot and Table widgets. Excels are generated only for Pivot widgets. Each widget is exported into a separate file. Note: CSV and Excel reports generated using Report manager will have Database names instead of Friendly names. |
| Archive to | Required if recipients are not specified.
This is a shared folder location where the expected value is a valid UNC path. You must ensure that the server has access to this path. All exported files will be saved to this location with the file name: ‘ReportName_YYYY_MM_DD[identifier]‘ If Overwrite existing files is selected, the last identifier part is not added to the file name and old files with the same name will be overwritten. If recipients are not specified, the report will be archived with the report owner permissions. |
|
| Recipients | Required if Archive to is not specified.
Enter one or more recipients. As you begin to type, the relevant Sisense users’ email addresses are displayed. Select the relevant users. Sisense groups are not supported. There is autocomplete for Sisense users, but groups and active directory users are not supported. For the report to be sent to a Sisense user, the dashboard MUST be shared with that user through the dashboard ‘Share’ option otherwise the report cannot be exported. Non-Sisense users will use the credentials of the user that was provided on the Configuration Manager. |
|
| Send error notification to | Recipients that will get an email in case there was an export error | |
| Schedule | V | Select either Event or Time..
Event: Enter a list of event names separated by a comma. All the events should be triggered after the report was last executed for the report to be executed again. To trigger an event use the '/report_manager/events' end point in the REST API. Time Based: Select a frequency:
|
4. Click Done. The report is added to the Report Manager page.
Managing Reports
After you have added some reports to the Report Manager, you can manage them from the main page of the Report Manager.
Go to Report Manager on Sisense Web Portal (OR go to the Edit Script screen via the TC GUI).

The Reports table displays a list of reports and the following information:
- Report Name: The name of the report.
- Dashboard Name: The name of the dashboard the report is based on.
- Owner Email: The name of the owner of the report.
- Last Run: The date and time the report was sent. The icon indicates if the report was sent successfully.
- Priority: The priority of the report, High or Normal.
- Status: The current status of the report., Not running, Pending, or Running.
- Enabled: Indicates if the report is scheduled to be exported or not.
For each of these fields, you can sort or filter the information displayed. Click  or
or  in the field’s title to see the available sorting and filtering options. In addition, at the end of each row you can open the report’s menu that includes the following options:

- Edit: Edit the report. This opens the same screen as the Add New Report button, but with your current report’s details.
- Duplicate: Create a copy of the report. The copied report has (1) added to the report name and is disabled by default.
- Delete: Delete the report.
- Turn subscription on/off: Turn the subscription on or off. Turning a subscription off does not stop running reports, only prevents future reports from being sent. Reports that are turned off will be deleted from the pending queue.
- Send Report/Cancel Report: Activate or cancel the report. This changes the status to Running/Not Running.
- Reports on hold: Set all reports to on-hold if you want to stop sending all reports and clear your queue. Reports will not be sent until this option is disabled.
You can delete multiple reports, modify multiple subscriptions, or send and cancel multiple reports from the Reports table in a single action. When you select a report by clicking the checkboxes on the left side of the table, additional options are displayed above the table.

Select the relevant reports and then click the action you want to perform on all the selected reports.
Administrator Settings
Sisense Administrators have additional settings for controlling how many reports can be sent simultaneously and where error notifications are sent to. The Settings icon is displayed for Administrators next to the Reports on Hold switch.

When you click the icon, the Settings window is displayed.

The Number of simultaneous reports is the amount of reports that you can run at the same time. The Default error email(s) are the email addresses where error notifications are sent when no specific email address has been defined for the report in the Send error notification to field when the report was created. You can add a list of email addresses, separated by a comma of both Sisense and non-Sisense users.
Note: If the Engine exceeds the capacity, new reports will be sent to the pending reports queue.
Setting Permissions
Your permissions determine what reports you can see and what actions you can perform. You can manage your users’ permissions through the REST API report_manager/permissions end points (GET and POST).

You can set your users’ permission by setting the boolean values below to true or false:
- edit: Allows the user to edit a report.
- edit all: Allows the user to edit all reports including reports made by other users.
- create: Allows the user to create reports.
- display all: Allows the user to view all system reports.
- delete: Allows the user to delete logged in user reports.
- delete all: Allows the user to delete all reports including reports made by other users.
- run now: Allows the user to run logged in user reports.
- run now all: Allows the user to run all system reports including reports made by other users.
- high priority: Allows the user to set reports as high priority.
- cancel: Allows the user to cancel logged in user reports.
- cancel all: Allows the user to cancel all reports including reports made by other users.
- report manager access: Gives the user role access to the Report Manager.
Note: If the basic level permission of the action is false, even if the extended permission is true the user cannot access this report. For example, in case ‘edit’ is false, but ‘editAll’ is true, the user cannot edit any report.
Note: Only Administrators have access to modify role permissions.
Rebranding
You can rebrand the Report Manager through Sisense’s REST API and the Report Manager theme CSS file.
Rebranding is supported for:
- Application logo, favicon and title - using the REST APIs
Note: White Labeling must be enabled in your license. - Theme colors - using the theme CSS file. CSS changes will affect only the Report Manager tab.
Note: Updating the theme colors is available to all licenses.
Editing the theme CSS file:
The theme.css file is located in the plugins folder /reportManager/theme.css.
The file is splitted into 3 main parts:
- Main Theme - all the yellow elements that are not a confirm or a cancel button, for example:
Add New Report button:

Tab underline and report recipient circle:

Reports on hold:

- Confirm Buttons - affects all the confirm buttons, for example:
Create a new report:

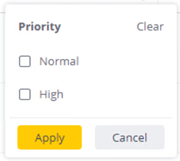
Priority filter selection:

- Cancel Buttons - affects all the cancellation buttons, for example:
Cancel report creation:

Priority filter cancellation:
Note: for each section you can also specify the color on user hover.
Additional Information
- Configuring an Alias: If you have implemented an alias, it must be configured
- Using SSL: The Report Manager do not work if the SSL certificate is not valid.
- Time Zones: The server uses UTC time zone to log the report creation date and update date.
- All time based reports that are recurring (not once) are saved with a CRON format. For more information read this: http://crontab.org/
- Trigger event based reports: To trigger event-based reports, you should use the ‘/report_manager/events’ POST REST API endpoint:

The endpoint body is an array of strings. Each string is the name of an event.
Above you can see an example where two events are triggered: event_1 and event_2.
When this endpoint is triggered the request time is saved as the last triggered time of the relevant event. An event-based report is exported only after all its events are triggered. An event is considered as triggered if it was triggered after the report's last execution date.
Limitations
- When adding/removing/updating users, the Report Manager Engine Service should be manually restarted.
- When using a version below 8.2.3, Active Directory user tokens cannot be used as the Report Manager Admin user or the non-Sisense user in the configuration page.
- When exporting to CSV, special characters on the pivot widget or table widget title are not supported.