
Thank-You Pages
What is a Thank You Page?
Each time a TAP form is submitted, a popup displays to thank the user. You can customize this page! This popup is called a Thank You page, and you can change it’s look and feel at the relationship level.
The Thank You Page relationship property allows a user to configure a custom thank you page for that will be applied to that relationship only. This allows a user to configure different thank you pages based on the relationships that the workflow progresses down, and allows them to deliver different content to different users.
The thank you page relationship property is configured the same way as the form level thank you page property. It is an html editor which allows a user to create a custom thank you page that can include text, images, and links. CSS can also be applied to the thank you page in order to update the look of it.
To set up a Thank You page:
Thank you pages can be set up in two ways:
A. In the workflow designer on relationships
- Select the relationship that follows the webform.
- Click the
 Thank you page button in the Workflow Page toolbar.
- The Thank You Page Editor displays.
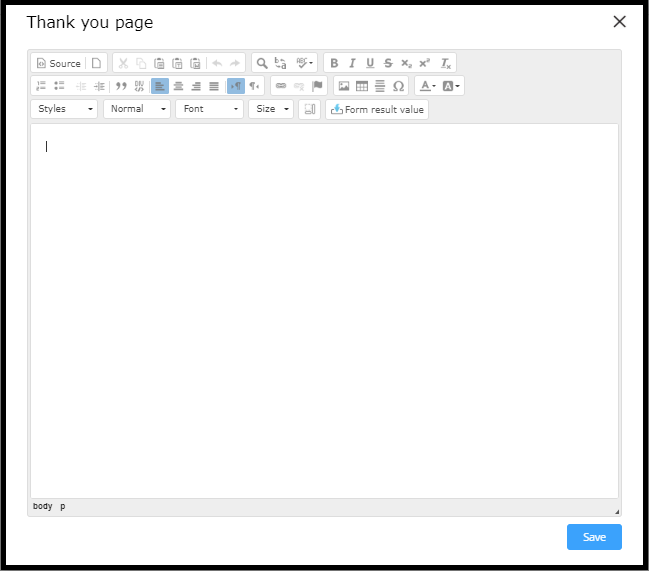
- The Thank You Page Editor displays.
- Use the Editor to design and format the text and images you wish to display in the Thank You page popup.
- Use the
 Form result value button on the Thank You Page Editor to include “dynamic” information (taken from the previously submitted webform) in the Thank You page.
- Use the
- Click the Save button to save your changes and return to the workflow.
B. Alternately you can set the Standard Thank-You page for all relationships in the form designer
1. On the form editor go to thank you page from the drop-down menu.
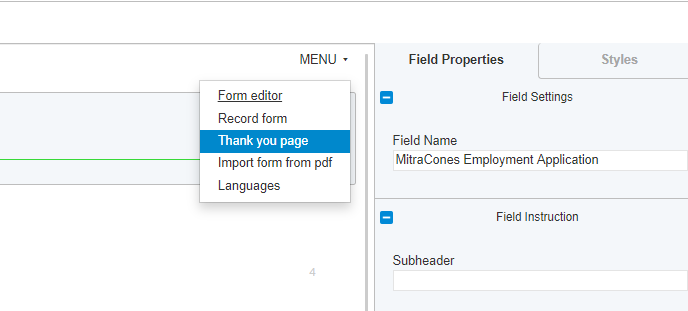
2. Set thank you message for all relationships.
note: relationship thank-you pages will override generic thank you pages
Use Cases
-
Create custom thank you pages for different relationships within a workflow.
-
Deliver different content and messaging to a user after they submit a form, based on what step was just submitted.
-
Link to other resources such as the TAP dashboard directly from the thank you page.