
External API
What is the External API Property?
The External API property is a relationship level property that enables a workflow to send information to a particular location and in a particular way. By using the External API property, TAP can communicate with other applications and "do" certain things to them. To learn more about what an API is, click here.
How do I set up an External API with TAP?
TAP has out-of-box Salesforce, Team Connect, and e-Signature integrations, which means that the API has already been set up and is within the infrastructure of TAP. If you want to integrate with another software that is not out of box, you can do that with an external API by following the instructions below.
- First, navigate to the workflow builder in the designer tool, and select the relationship at which you would like to communicate with another application.
- After selecting the relevant relationship or stage, click on the
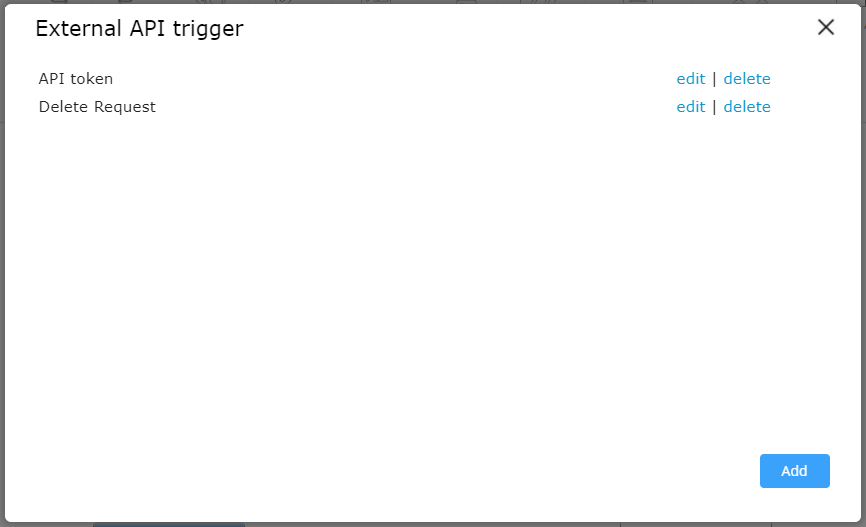
 External API icon. A dialog box will appear.
 - To create a call, click the 'Add' button in the bottom right-hand corner.

Each stage/relationship can have multiple API calls configured. At the stage level, calls will be triggered according to the parameters set within the configuration. At the relationship level, all calls will proceed in series once the stage has been submitted.
You can set up multiple calls at relationship level. For instance, one call to collect the API token and other to GET files or upload documents using POST method. All these calls will be displayed in the External API main screen as labels.
At the stage level, there is a limit to add API calls which is dependent on the setting 'TriggerCountThreshold'.
Follow the steps listed in each section to correctly set up an external API.
Main Info
- In the Configuration Name box, type the API configuration name which will appear as label on the External API screen.
- Select an option for the Trigger field drop-down options.

- In the API URL box, type in the API endpoint.
- In the Method drop-down, select the type of API call you wish to make, whether a GET request, POST request, etc.
- Select the checkbox for Prevent workflow submission if response is invalid if this fits in with your business needs. This setting ensures that a bad call prohibits further movement in the workflow.
- Click the Add button to add headers, which provide metadata within the request. This is not required but it is encouraged.

Automatic Retries for API Call Failures
(v1.20 and above)
TAP automatically retries most outbound API calls upon encountering an error, improving the chances of a successful response in the event of transient issues. This applies to the Relationship Ext API, Stage Ext API, External Datasource, and the External Grid Datasource.
A retry will be automatically triggered in the following cases:
- 408 - Request Timeout
- 500 - Internal Server Error
- 503 - Service Unavailable
- 504 - Gateway Timeout
- Any exception encountered while calling the API endpoint
- Transient errors
Each failed request is retried up to three times using exponential backoff:
|
Attempt |
Delay (seconds) |
|---|---|
|
1 |
2 |
|
2 |
4 |
|
3 |
8 |
Request
For POST, PUT, DELETE, HEAD, OPTIONS, PATCH, and MERGE methods the 'Request' tab becomes available.

You can add form fields to the request by using the icon in the right-hand corner (black rectangle with blue arrow). This icon will allow you to tag form result values into your request. It will also allow you to map documents into the request. These documents must be either associated with an eSign relationship, a doc builder/doc field document, or an upload field.
Supported Request Body Formats
|
Supported Formats |
MIME Type |
|---|---|
|
JSON |
application/json |
|
Raw Binary |
application/octet-stream |
|
Form URL Encoded |
application/x-www-form-urlencoded |
|
SOAP XML (raw) |
text/xml or application/soap+xml |
| multipart/form-data |
application/octet-stream application/pdf image/png image/jpeg application/msword |
Not Supported Formats
- multipart/mixed
- GraphQL multipart requests
- gRPC / Protobuf (HTTP/2)
- NDJSON, Avro, Thrift, MessagePack, EDI
File Upload Support
The External API allows you to send files along with additional information in a single request. This helps you connect TAP with other systems that require document uploads or form submissions.
Uploading a file
When uploading a file, your request can include:
- The file you want to upload
- Additional details about the file, such as an identifier, tags, or related information
You do not need to perform any special formatting on the file before sending it.
After a successful upload, the system returns a confirmation along with a document identifier that you can use for future reference in TAP.
Required information
Make sure all required fields are completed before submitting your request. For example:
- Document identifier
- Any other required details specific to your setup
If any required information is missing or incorrect, the system returns an error message indicating what needs to be fixed.
Existing integrations
If you already use External API integrations, no changes are required. This capability is an enhancement and does not affect your current setup.
Security
All file uploads follow TAP security standards. The system:
- Validates file type and size
- Performs authentication and authorization checks
- Ensures that file content is not stored in system logs
Need help?
If you need help setting up or troubleshooting file uploads, contact your Customer Success Manager or Mitratech Support.
Response
The response is used when you need to return information to a TAP field. For example, if you have an authorization call and receive a token, you can return that token into a TAP field. Then, you can set up a second API call to push that information forward.
- Select the text field into which you would like to parse your data. Use the ID of the response in the Use Formula Calculation.

Response Handling
- TAP considers any HTTP status code in the
2xxrange as a successful response. - Response bodies in JSON format can be parsed and mapped to workflow fields.
- Error responses (
4xx,5xx) are logged and surfaced to the workflow error context. - It is possible customize what TAP considers a valid response dynamically by adding custom rules.
Aliases
When you get a response from an API it has it's own formatting. With the Aliases function, you can rename that response whatever is most helpful for you.
Note: You only need to do aliases if you're going to refer to them in your responses.
- The Alias key is the value you want to return.
- Body identifies where in the response you will display this value.
- Object navigation is the untouched response from the API call.

Validations and Security Rules
Validation allows you to set up custom error messages.
- Add a custom message in the Custom error message box.
- Click the Add new condition rule to attach conditions to the error message or validation.
- URL Validation: Only https:// schemes are allowed.
- Content-Type Enforcement: JSON requests are normalized to application/json; charset=utf-8.
- Anti-XSS Protection: Automatic input validation is applied to form data, query strings, and cookies to detect dangerous patterns such as <script>, javascript:, or inline event handlers (onerror=, onload=).

Authorization
Authorization allows you to set up authorizations. You may choose no auth, basic, Oath 2.0, or use existing from another relationship. Form field results may used to pull in values when using basic auth.
Available Authorization Options
TAP supports four authorization types:
-
No Auth
Select this option when the external API does not require authentication. -
Basic Auth
Use this for APIs that require a username and password.
- TAP sends credentials encoded in the
Authorizationheader. - Form field results can be mapped to populate authentication values dynamically.
-
OAuth 2.0
Choose this option when the API uses industry-standard OAuth 2.0 authentication.-
Supports Client Credentials and Authorization Code grant types.
-
-
Use Existing
Select a previously configured authentication setup from another relationship within the workflow. -
API Key Authentication
For APIs that use API keys instead of login-based authentication.-
Keys can be sent through a custom header or as a query parameter.
-

Files
If part of your API response sends a file, setting up files allows you to return those files into your TAP form.

Click Save when finished.
Compression
TAP automatically decompresses HTTP responses encoded with gzip or deflate. Requests are always sent uncompressed. Other encodings (e.g., br, zstd) are not supported at this time.
HTTP/2
HTTP/2 protocol is not supported. All External API communications are performed over HTTP/1.1 secured with TLS.
Size Limits
|
Limit |
Default Value |
Notes |
|---|---|---|
|
Max request size |
100 MB |
Includes headers and body. |
|
Max binary file size |
476 MB |
May vary by tenant configuration. |
Error Handling
For any external API failures, select the checkbox ‘Notify selected roles when an API call fails, including the call details, error code, and message’ in the Error Handling tab to receive email notifications. Select the roles from the dropdown that should receive email notifications. When an error occurs, all selected roles will receive an emailed error message.

Rate Limiting
TAP currently does not apply rate-limiting or throttling policies. Any rate control must be handled by the target API.
Security
Whitelisting and Anti-SSRF
TAP blocks all requests to private or reserved IP ranges by default, allowing only public IP addresses. This prevents Server-Side Request Forgery (SSRF) attacks.
TLS Support
|
Protocol |
Status |
|---|---|
|
SSL 3.0 |
Obsolete – not recommended |
|
TLS 1.0 / 1.1 |
Deprecated – not recommended |
|
TLS 1.2 |
Recommended |
|
TLS 1.3 |
Not supported yet |
Stage Level API Calls
The stage level external API must always be triggered by a form field, usually a button field. Users can configure a variety of call types that utilize a variety of different formatting. Up to 5 calls can be configured per stage, and these calls can be triggered in sequence, or separate of each other.
NOTE: When a stage level call is linked to a field that is not a button field, the user must add a value to that field and then click out of the field in order to trigger the associated call. When a stage level call is linked to a button field, the user must simply click the button in order to trigger the associated call.
Use Cases
-
Sending information from TAP to a third party system.
-
Pulling in information from a third party system that is used to populate a form.
-
Initiating new TAP records as part of a workflow process. API calls can be setup within a workflow to use TAP's own endpoints and initiate a new workflow record as part of a step in the workflow process. The advantage of using this over the Child Workflow functionality is that workflows initiated through the API will have the first stage of the workflow submitted. When a workflow is initiated using Child Workflow functionality the first stage is created and assigned, but is not submitted.