Document Library
You can access the Document Library module at any time by clicking the  icon in the TAP Toolbar.
The Document Library module gives you access to the following functional areas:
-
Documents Library
Provides access to all uploaded document templates in a central repository
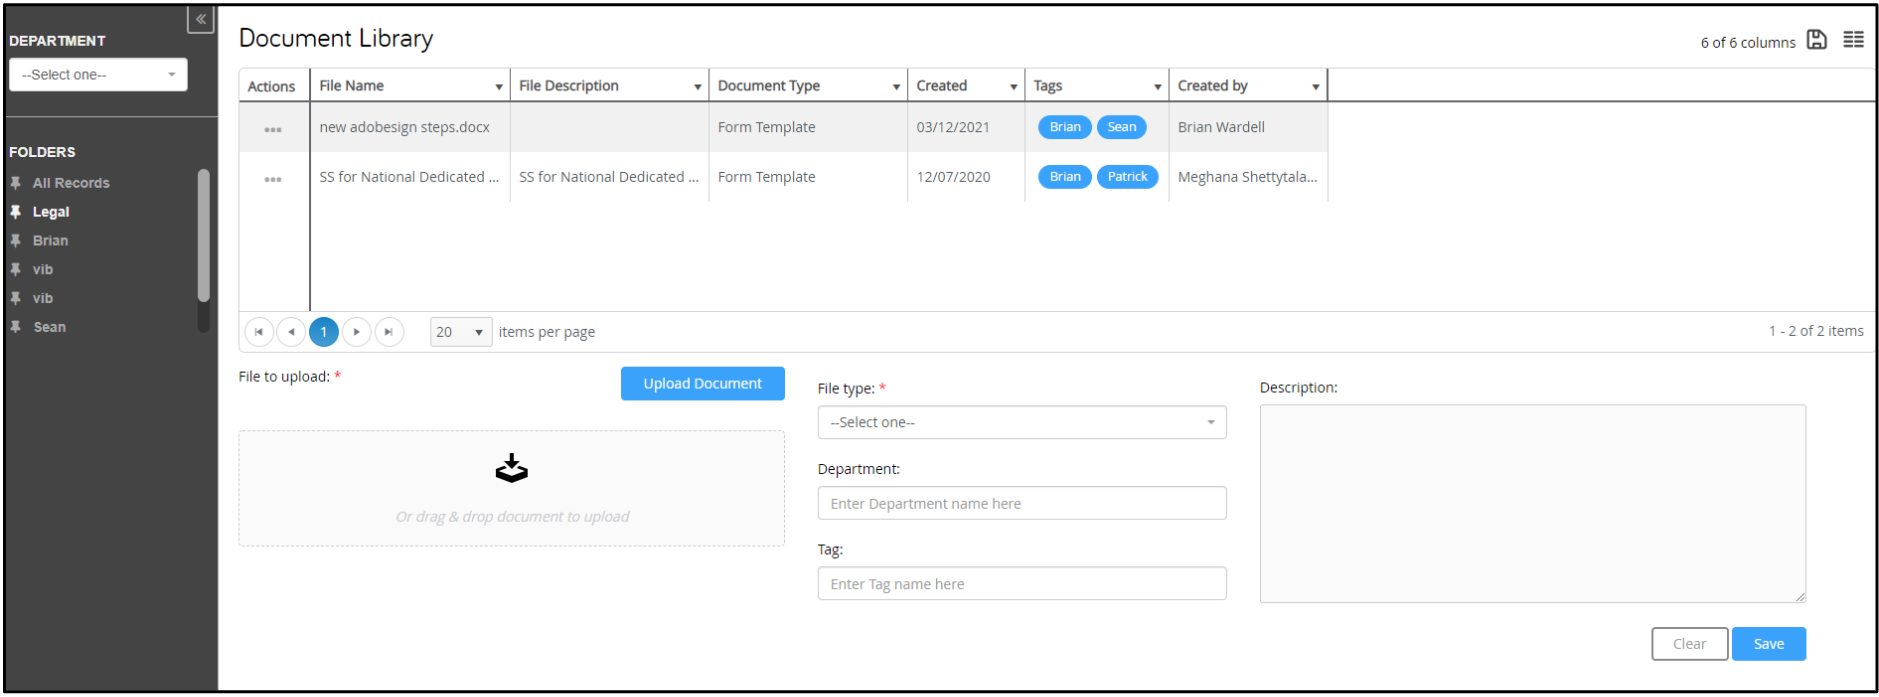
- When uploading a document use the Tag feature by beginning to type out a tag or by typing out a new tag
- Once created, documents can be filtered by one or many tags
- Filters can be saved as folders by using the Save icon in the top right (To edit the name of the filter select the columns icon (3 lines) to rename)
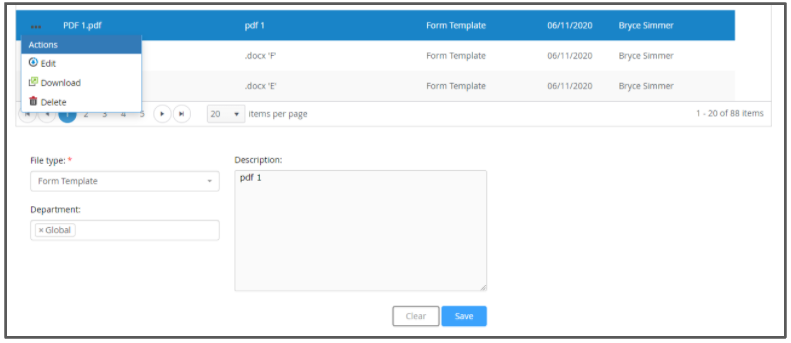
- The File type, Department and Description of the uploaded document can be modified using the "Edit" option from the Actions menu. However changes cannot be made to the content of the document from within the Document Library
-
Signature Repository
Contains a list of all eSignature Transactions along with the current status
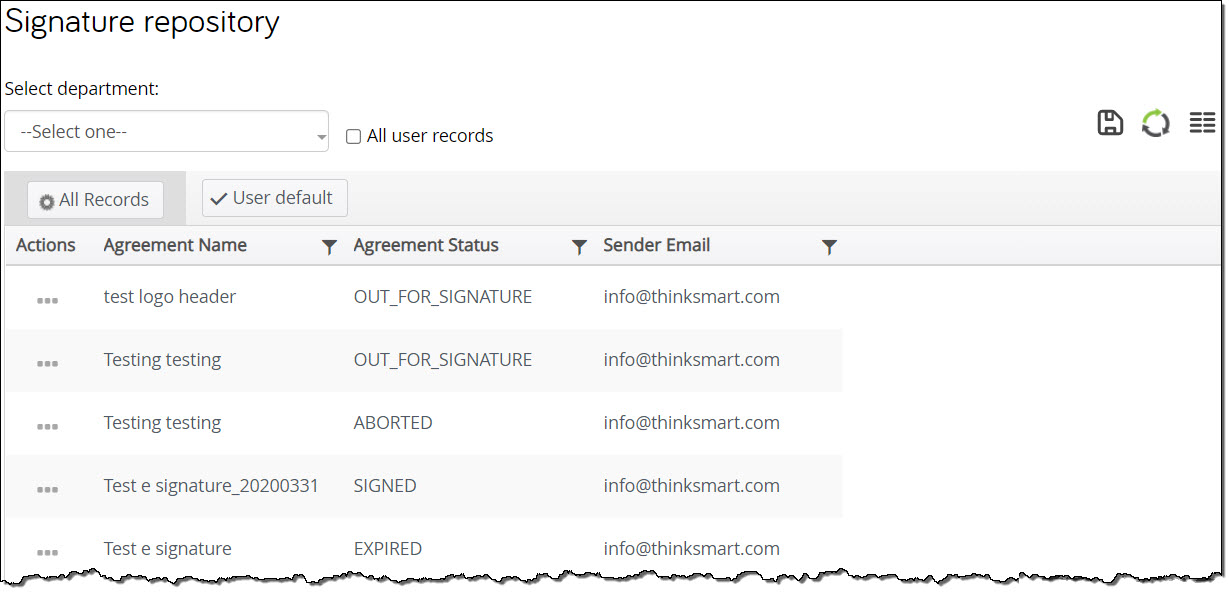
Currently TAP is configured in such a way not to show the next signer information within the UI by default, but that information can be pulled from the Signature Repository under the "Next Recipient Email" column
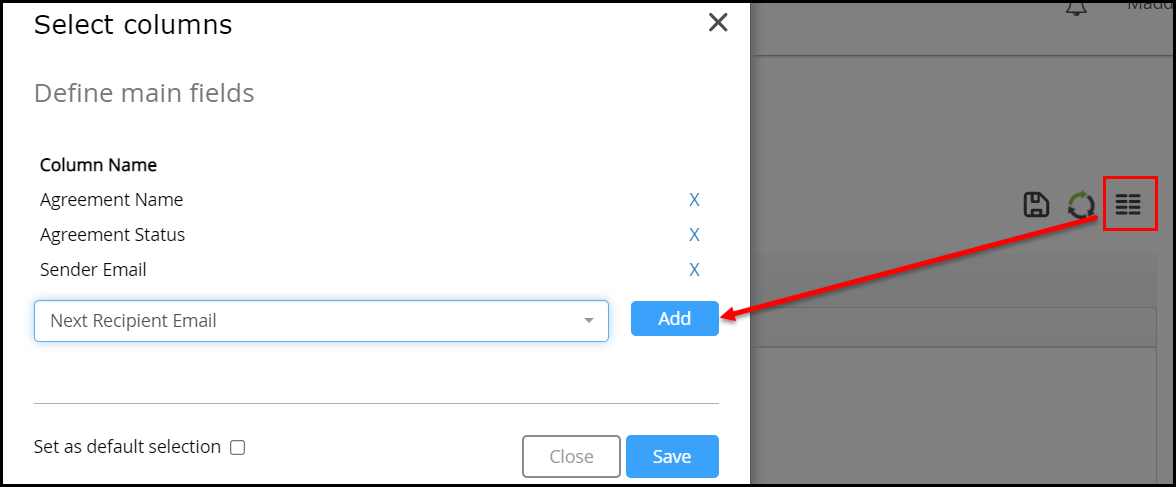
Note:- Sometimes the Select department dropdown might be missing under Signature Repository as shown below.

This happens if the logged in User has only one department assigned under their User profile. Assign one more department and you should be able to see the Select department dropdown.
-
Document Repository
Provides access to all of the uploaded documents and e-signature documents that have passed through the TAP system
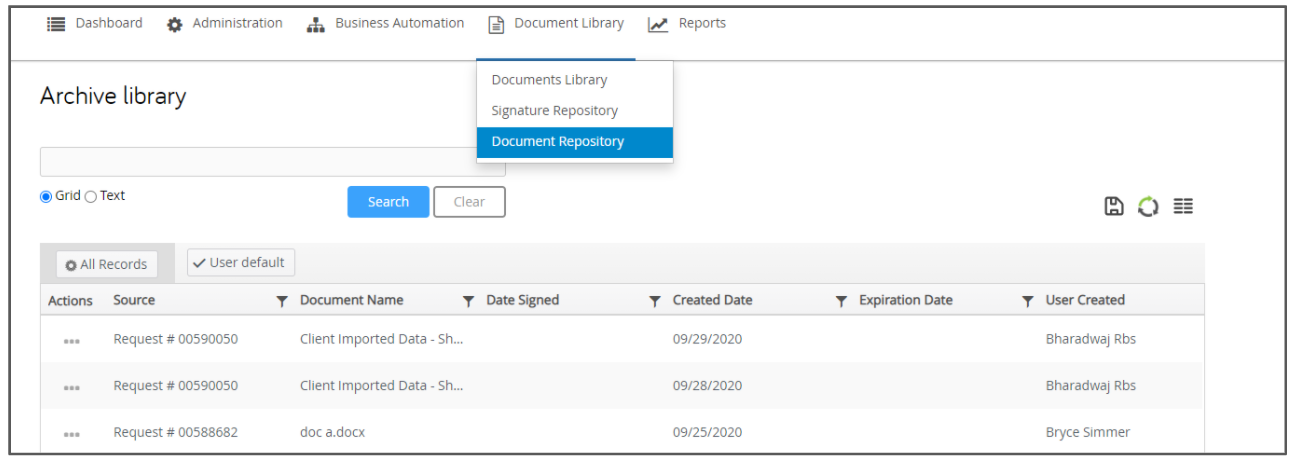
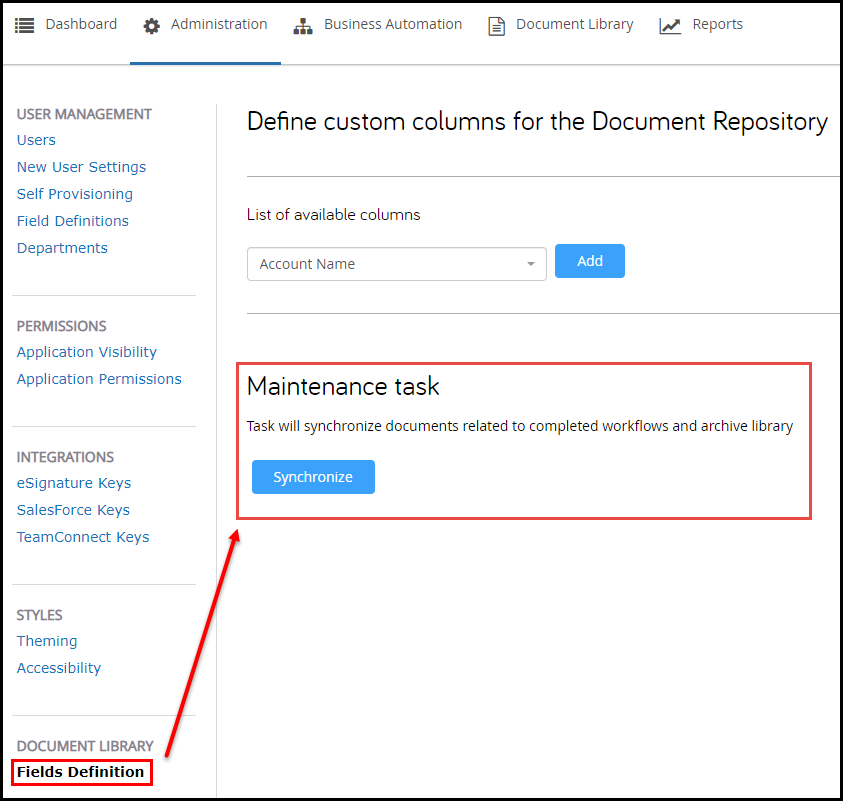
Note: If there are no documents appearing in the Repository or you do not see an expected file, a user with access to the Administration section will need to run the Maintenance Task found here:
Administration | DOCUMENT LIBRARY > Fields Definition | Maintenance Task > Click Synchronize
Review this video to see the new document library features in TAP.
Editing the columns
How to add and remove columns from the document library,signature repository, and document repository.
Document Library
- Go to the URL for the TAP Environment showing the 'Generic Grid Configuration'
"<Application_URL>/prod/Portal/genericgridconfiguration" - for TAP Prod Environment
"<Application_URL>/default/Portal/genericgridconfiguration" - for TAP Staging Environment
As an example, in our Training Prod Environment the URL will be "https://training.tap.thinksmart.com/...dconfiguration"
- In the list of Configurations, select 'Document Library' to Edit columns in Document Library. Click Select for the specific Configuration.

- Scroll down on the page which will show the selected Configuration Data. Please refer below screenshot.
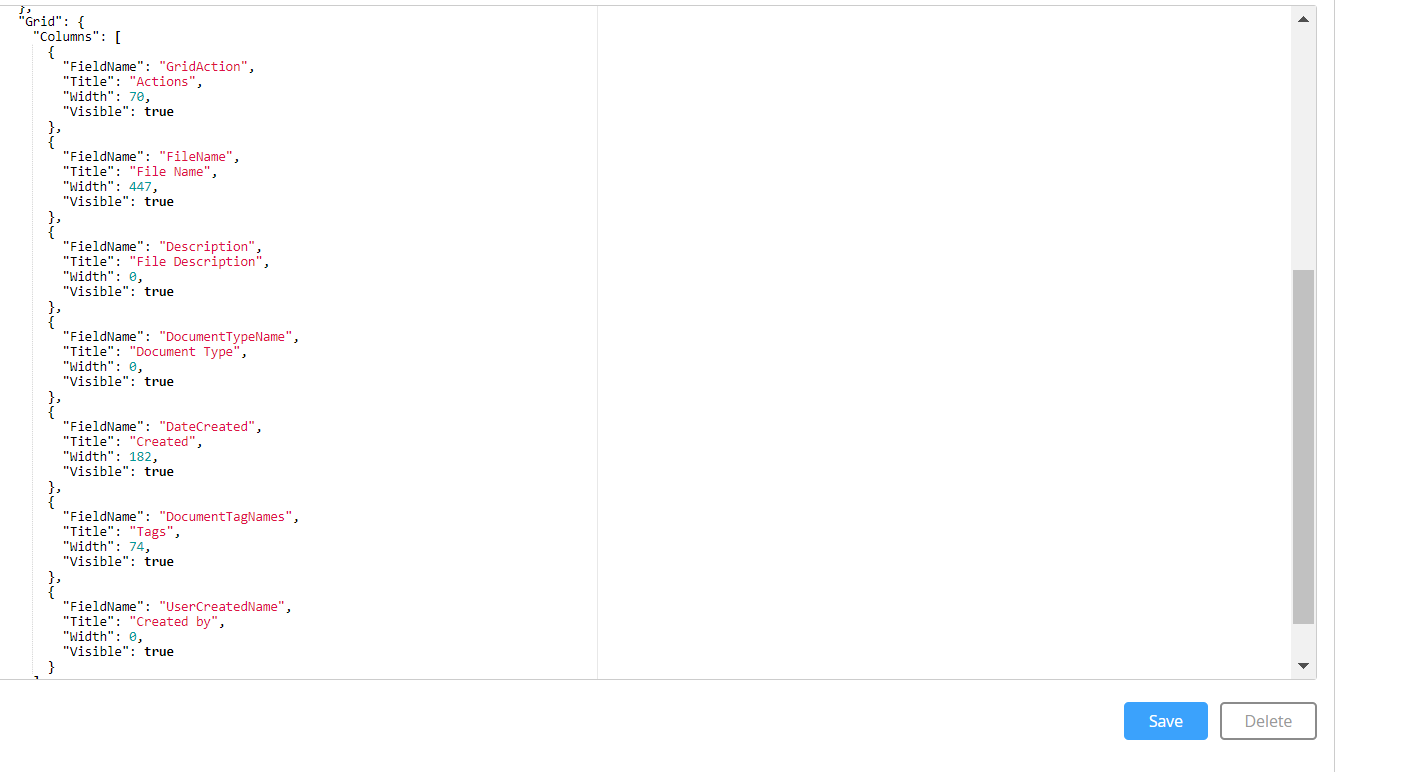
- To display all columns, the Width value associated with of each fieldname should have a non-zero(preferably a value above 70) . If the width associated with any fieldname is 0, that column with that fieldname will be hidden in the document library folder. In the below screenshot , the fieldnames Description, DocumentType and UserCreatedName have width value 0.
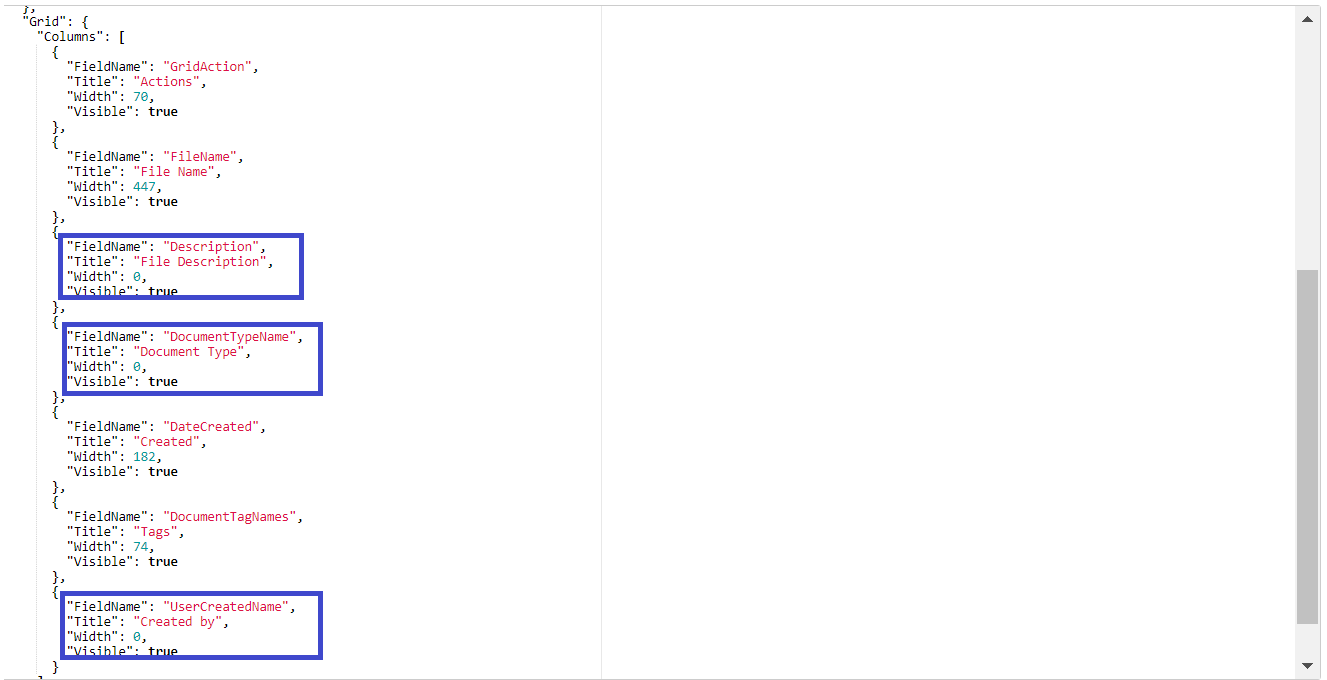
Based on above screenshot configuration, document library looks like the below screenshot. All 4 fieldnames with width value 0 is hidden from display. So, to hide any column in the document library, width associated with it's fieldname should be set to 0

When none of the fieldnames have width 0, document library looks like below

Signature Repository
To add or remove columns in signature repository, click on the  symbol

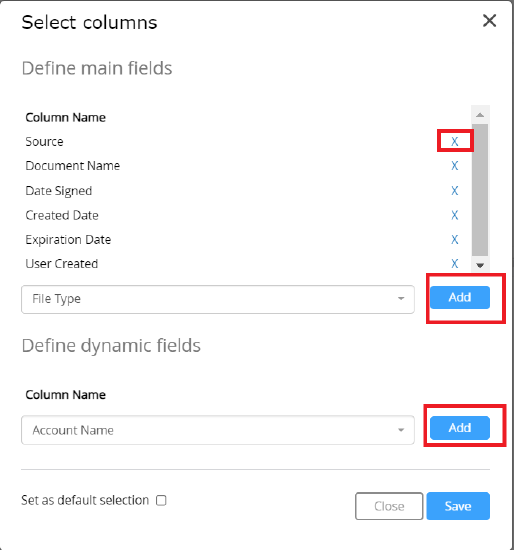
- To add columns , click on the drop down, make a selection from one of the main fields and click on Add. Click save. Please note that we cannot add dynamic fields to signature repository,
- To remove columns click on the x against the column name and click save

Document Repository
To add or remove columns in Document Repository/Archive Library, click on the  symbol
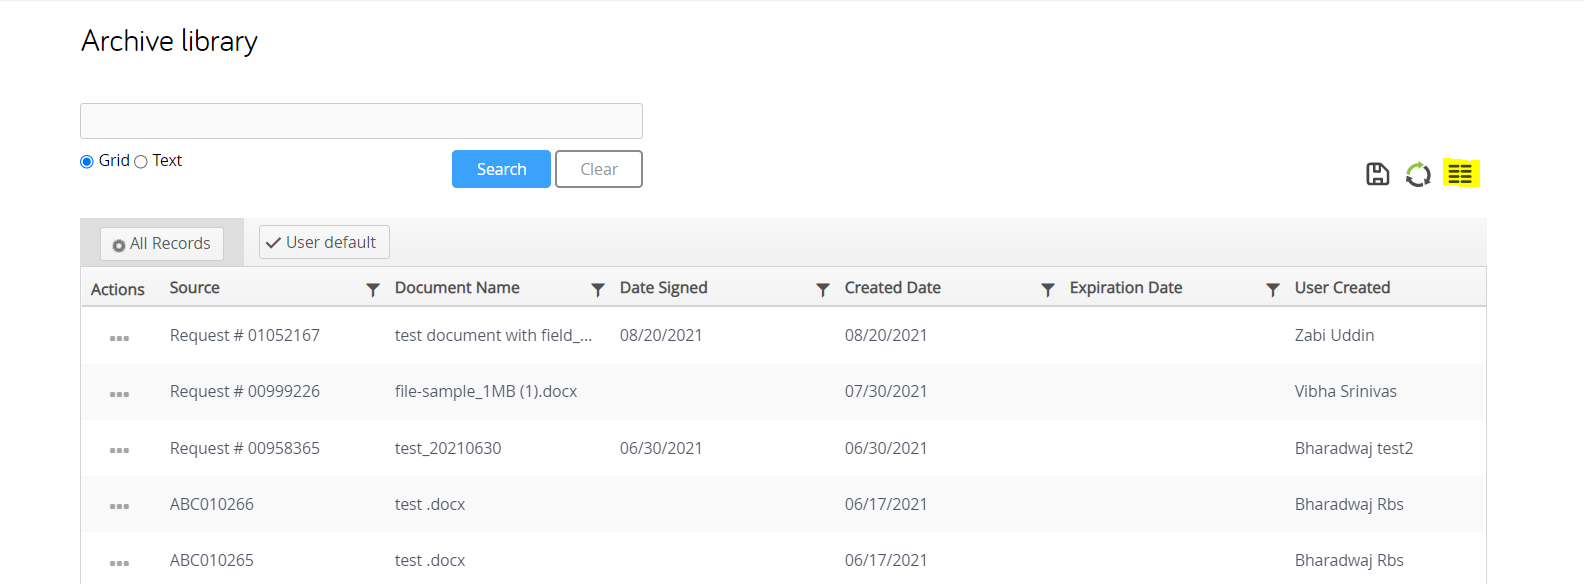
- To add main field columns ,click on the drop down, make a selection from one of the main fields and click on Add. Click save.
- To add dynamic field columns ,click on the drop down, make a selection from one of the dynamic fields and click on Add. Click save.
- To remove columns click on the x against the column name and click save
