
DocuSign Integration Setup for TAP Application
Overview
This page provides a comprehensive guide on how to set up DocuSign integration with the TAP application. It includes detailed instructions for creating a new app and key in DocuSign, configuring necessary settings, and integrating the app with TAP.
Steps to Add a New App and Key in DocuSign for Integration with TAP
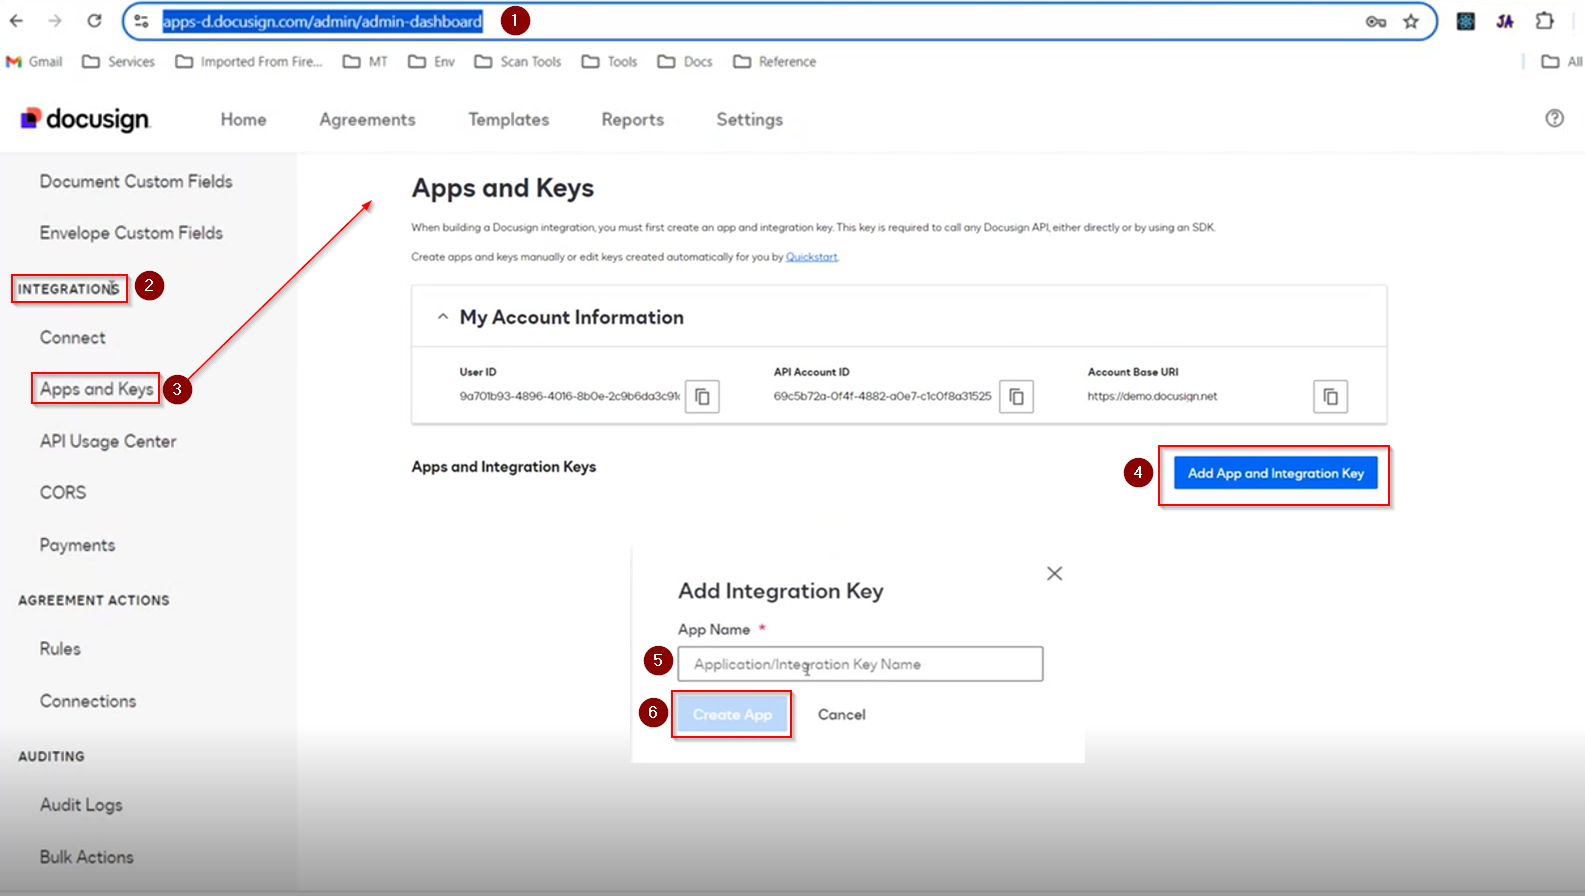
- Login to your DocuSign account.
- From the Admin Dashboard, go to Integrations → Apps and Keys.
- Create a New App
- Enter a name for your app and click the Create App button.
-
A new page with basic settings will appear. Fill in all the required information.
-
Configure Additional Settings
- On the same page, enable any necessary additional settings by adding the URIs.
- To ensure the status of a signed document is synced and displayed in TAP, provide a redirect URL. Enter this URL in the appropriate field, then save the settings.
- Integrate the App with TAP
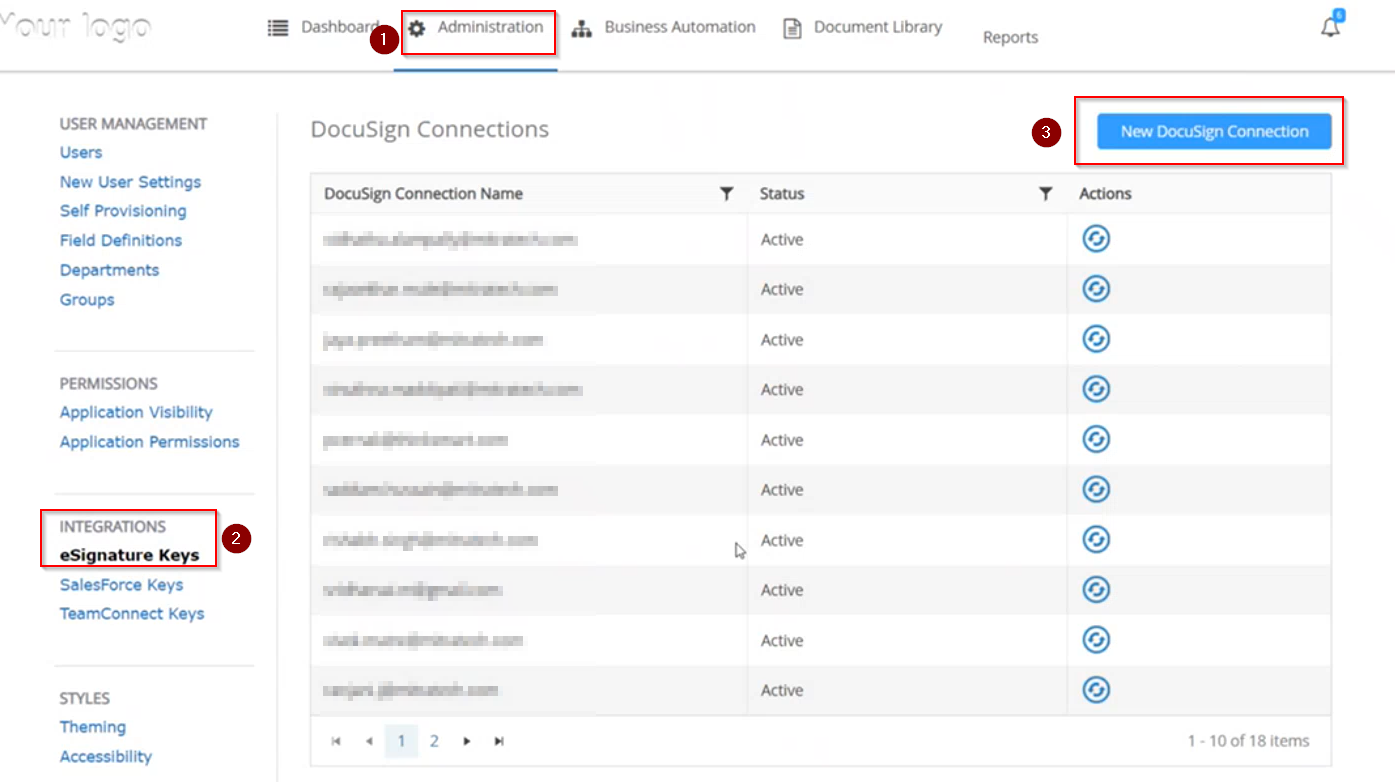
- Log in to the TAP application.
- Navigate to Administration→> Integrations → eSignature Keys → New DocuSign Connection.
-
DocuSign Configuration for TAP
- Note that each tenant can have only one configuration, either Adobe Sign or DocuSign; both cannot be configured simultaneously.
- A page labeled Administrator DocuSign Account will be displayed.
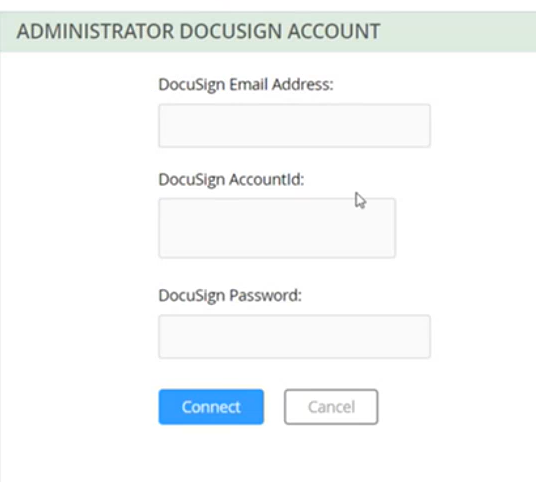
- Enter the email address associated with your DocuSign account.
- Enter the DocuSign Account ID, which can be found under My Account Information on the Apps and Keys page.

-
Enter the password used to create the DocuSign account.
-
Complete the Integration
The new DocuSign account will now be listed under eSignature Keys in TAP.
To integrate DocuSign with the TAP application, specific administrative and user permissions must be configured. The following section details the necessary steps and permissions required for a successful setup.
Configuring Administrative and User Permissions for DocuSign Integration in TAP
-
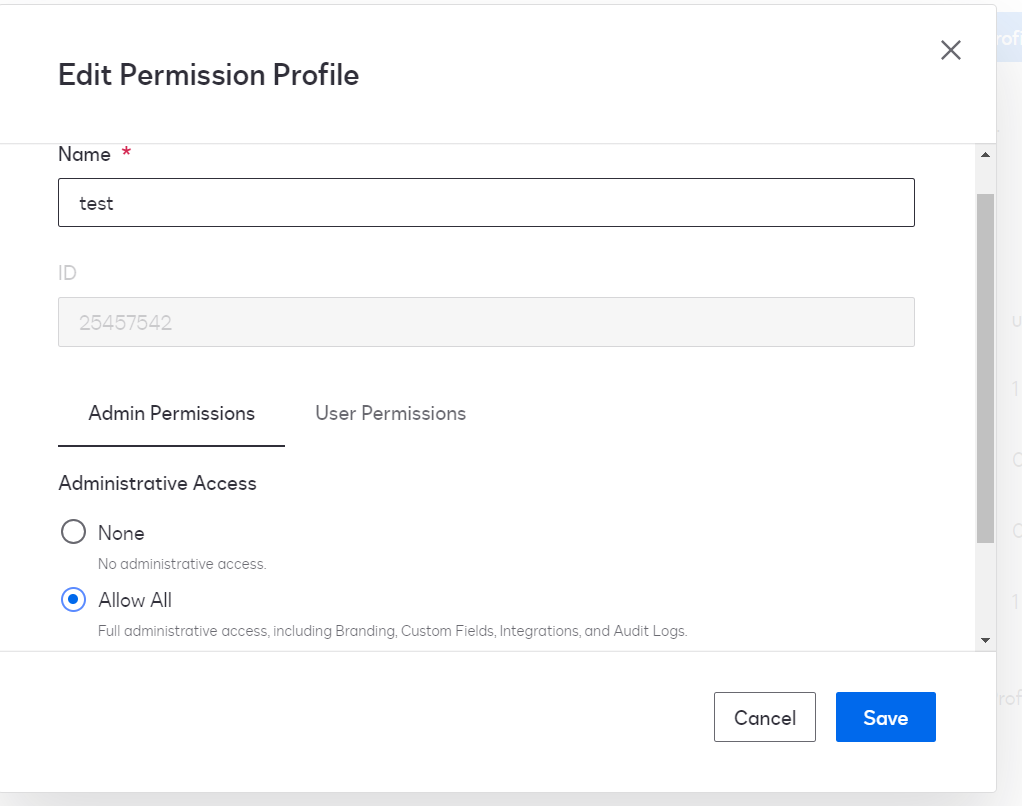
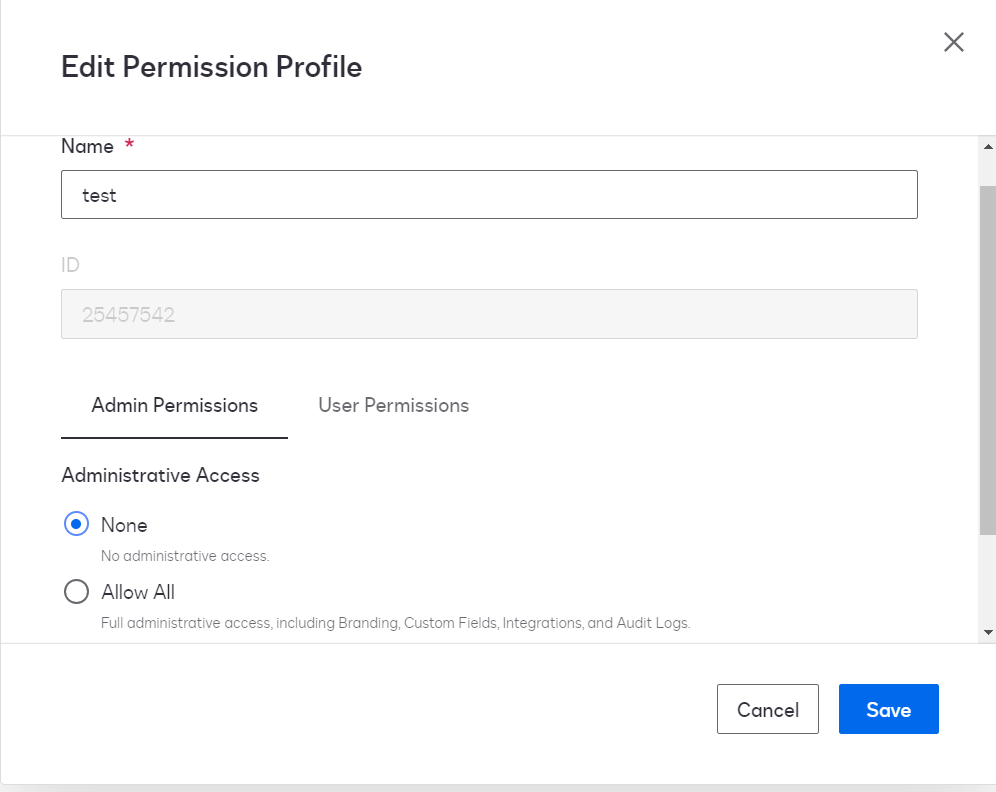
Enable "Allow All" Administrative Access in “Permission Profiles”
To add a new DocuSign key to the TAP application, you must first enable "Allow All" administrative access. This step is mandatory.
- Log in to the DocuSign Admin Console.
- Navigate to the Administrative Settings.
- Enable "Allow All" Administrative Access.
- Save the configuration.
-
Change Administrative Permissions in “Permission Profiles”
After adding the eSign key, you can change the administrative permissions back to "None".
- Navigate to the Administrative Settings.
- Set Administrative Access to "None".
-
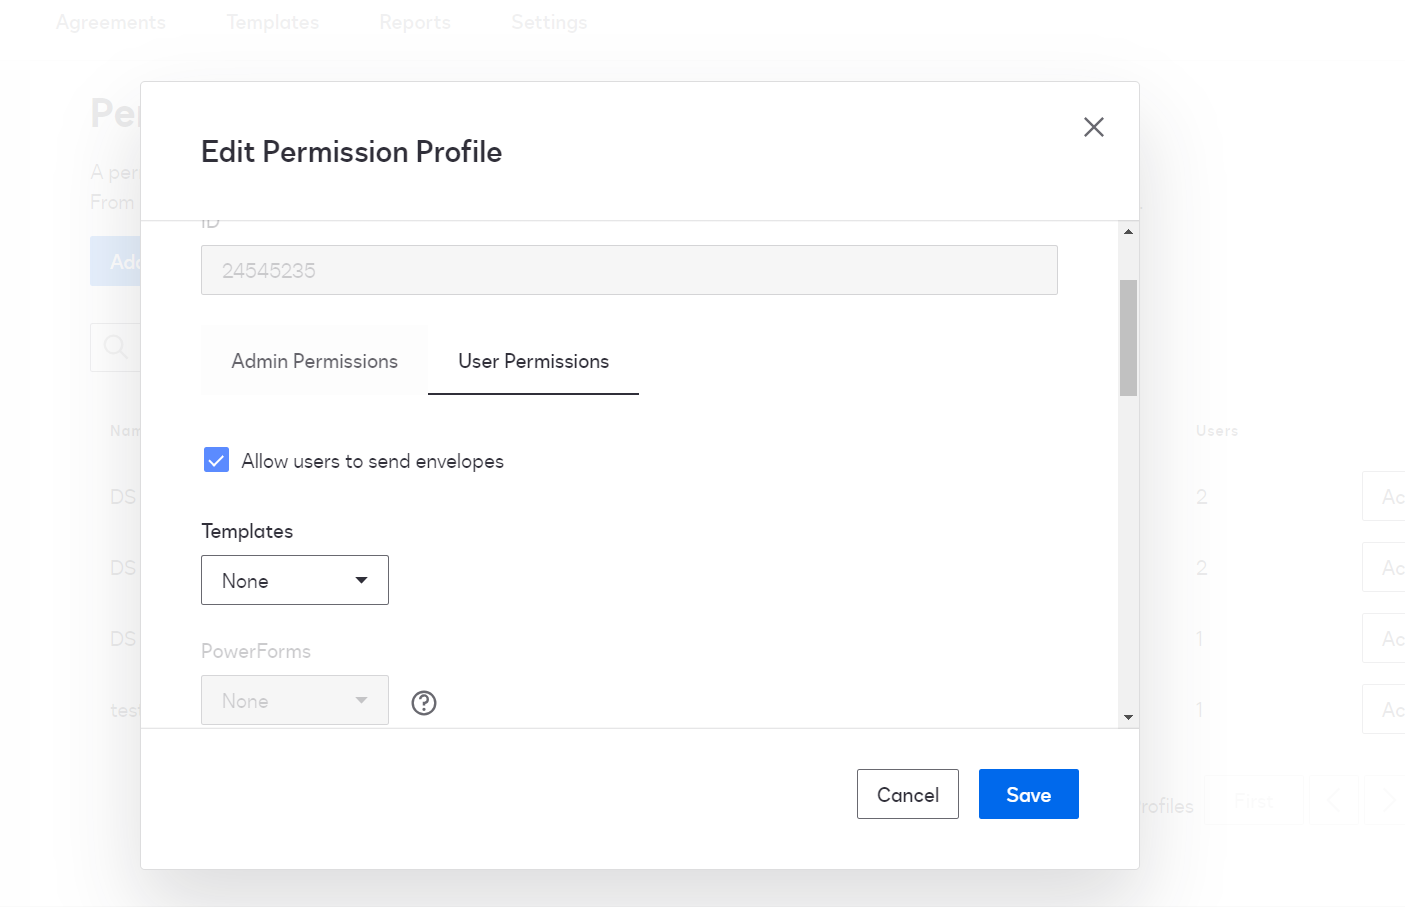
Configure User Permissions in “Permission Profiles”
Under the "User Permissions" tab, enable the following permissions. These are the minimum required permissions to use DocuSign within the TAP application.
- Enable "Allow users to send envelopes".
- Enable "Allow view and manage envelope rights through API".
- Enable "Allow send on behalf of other users through API".
-
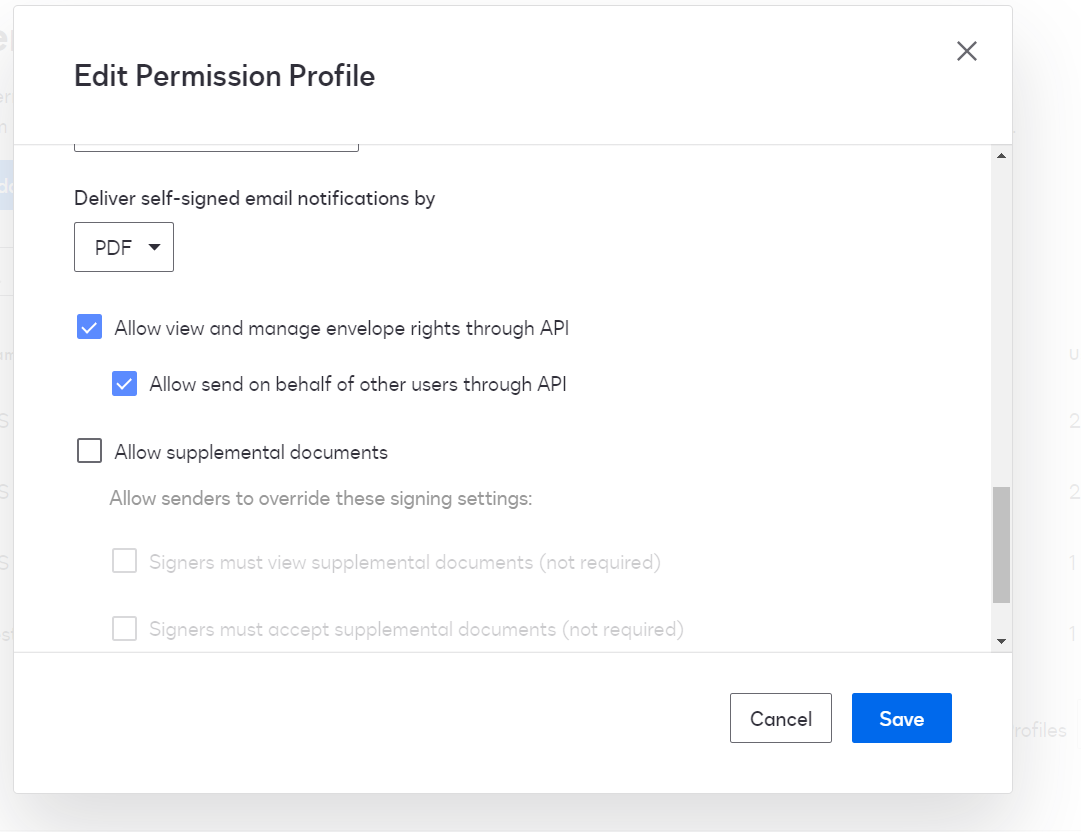
Steps to Enable User Permissions:
- Log in to the DocuSign Admin Console.
- Navigate to the User Permissions tab.
- Check the boxes next to the following permissions:
- "Allow users to send envelopes"
- "Allow view and manage envelope rights through API"
-
"Allow send on behalf of other users through API"
Uses of DocuSign Integration with TAP
The DocuSign integration within TAP can be utilized in the following scenarios:
-
Enabling e-Signature Support in a Workflow
-
When setting up a workflow with two stages, select e-Signature Support for the relation between the stages.
-
-
Check the Enable e-Signature Support checkbox.
-
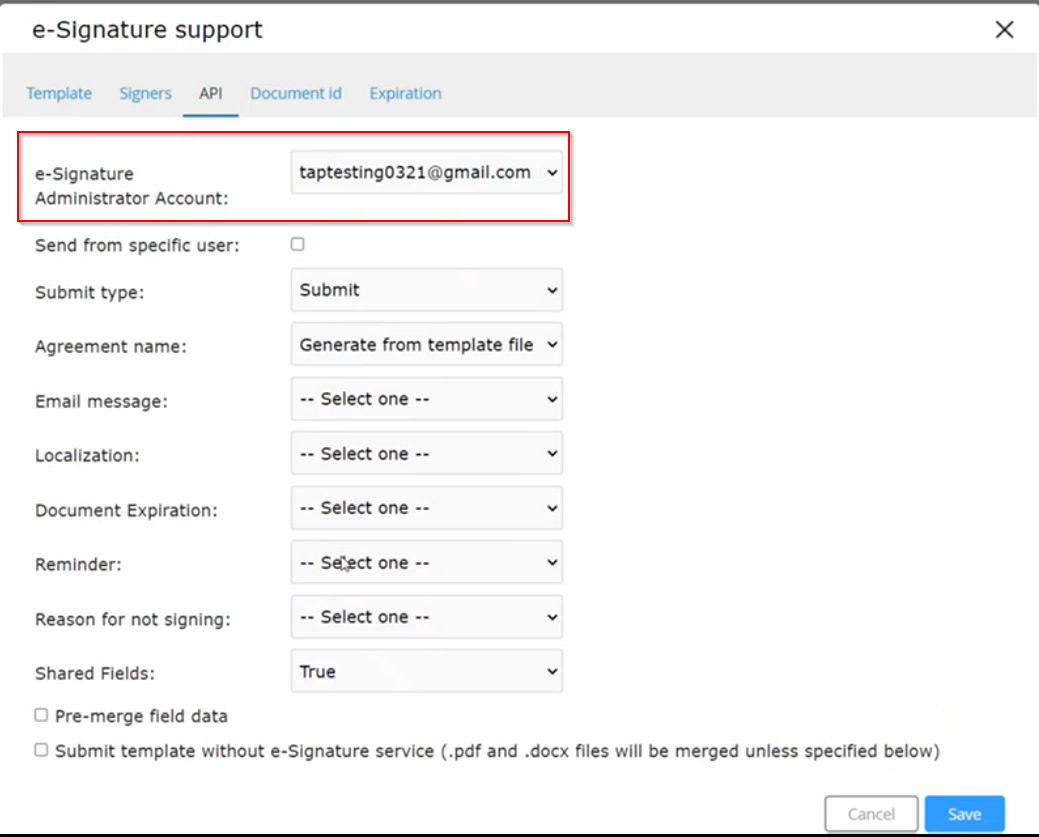
Assigning the DocuSign Account
- Navigate to the API tab in the workflow settings.
- The DocuSign account you created will be available in the e-Signature Administrator Account dropdown.
-
Adding DocuSign Connection to a User
-
Go to Administration → Users → Edit Workflow.
-

-
Scroll down to find the option to add a DocuSign connection administrator account.
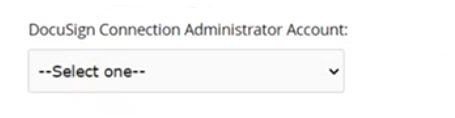
-
The newly created DocuSign account will be available in this dropdown.