Using Alternative Languages in TAP
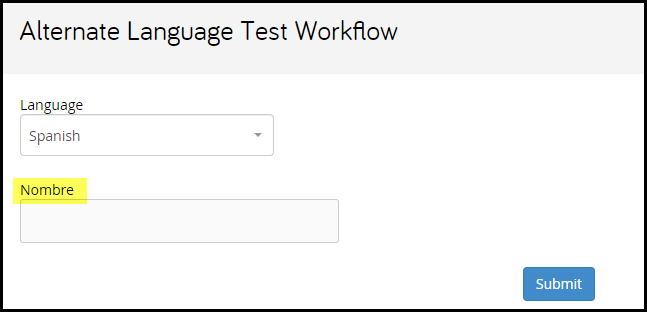
We name form fields in the Form Builder. However, in some cases we may wish to give a certain form field a variety of names, which are shown or hidden under different circumstances. This would be the case if we wanted to give our end users the ability to select the Language (formerly known as text sets) for the form. The end user would want to select their language preference, and then see the form display the field labels shown in the selected language. The form field stays the same, but the way in which it is identified changes.
How to Configure Languages
Languages are simple to configure. We need to do three things in order to complete the set up: First, we need to define the languages: how many languages are we offering and what are they? Second, we need to give the end user the ability to select a particular language – to choose between English, French and Spanish, using a drop-down or radio buttons. Third, we need to give each form field multiple labels which correspond with each possible language.
So let’s jump in!
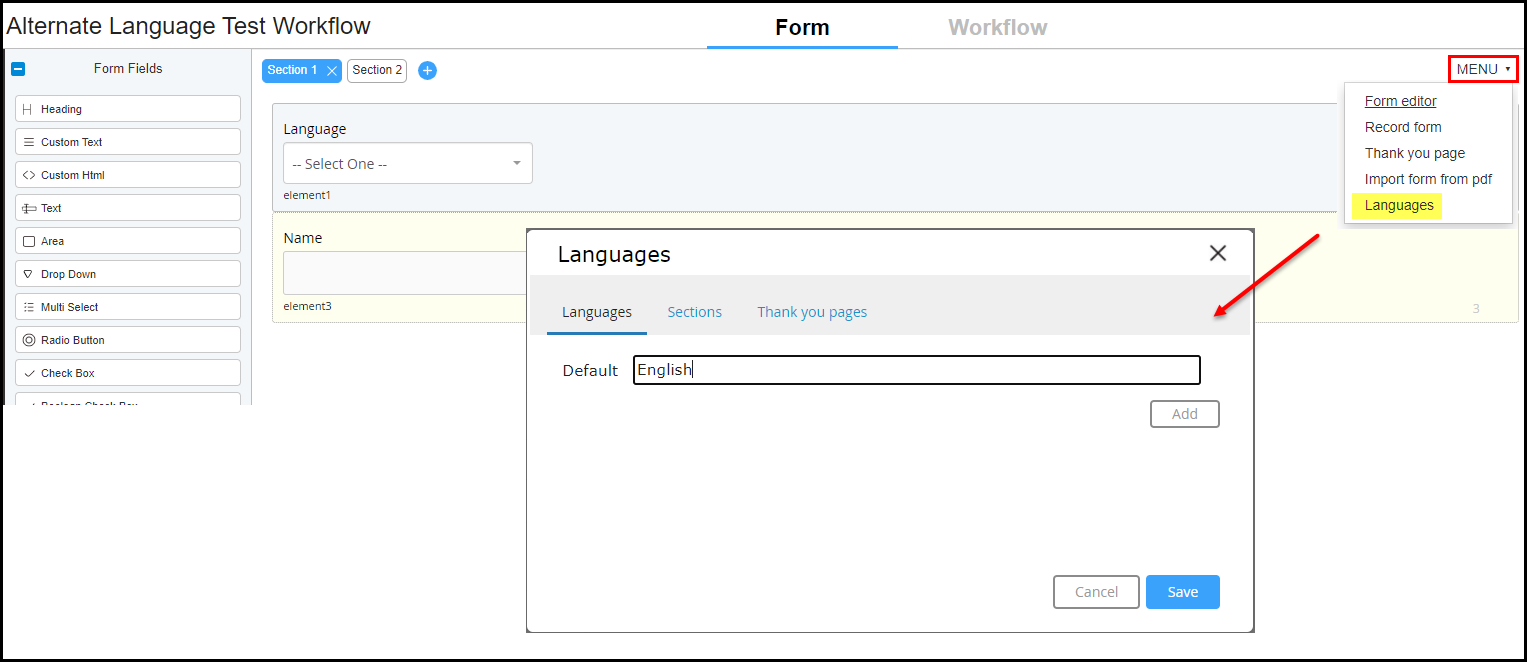
- The first step in configuring Language options is to identify the possible types. To do this, click the MENU on the Designer Form tab, then choose Languages.
- The Languages window displays:
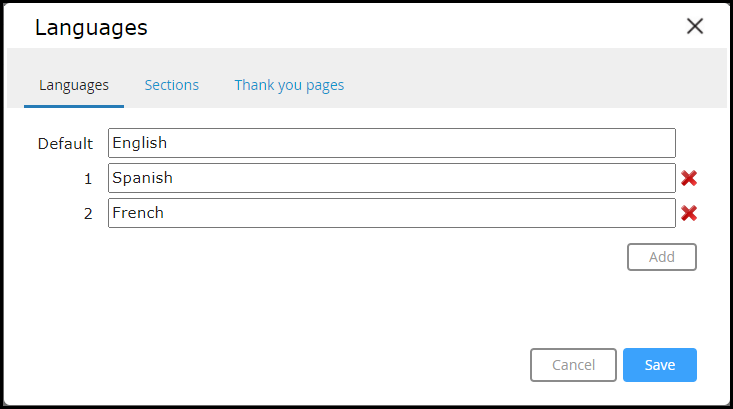
- Identify the languages you want to include; in this case English, Spanish and French. Click Add as needed to add additional values.
- When all values have been entered, click the Save button. You’ve now successfully identified and labeled the possible types.
- The next step is to give the end user a means of selecting the desired Language. Add a Drop Down or Radio Button form field to the form by dragging and dropping the desired field into the Editor Window.
- Select the field, then click the Options icon under Field Properties – Additional Settings.
- The Configure options window displays.
- Select Languages from the drop-down menu, then click the Save button.
- When options are configured for Languages, the Drop Down or Radio Button form field populates with the values you entered into the Languages window in steps 2 and 3.
- Finally, you need to build additional labels for each form field. Since each form field label will change depending on the value selected from the Language drop down, you need to configure all of the possible label options for each form field.
- To configure additional labels for a form field, click the field you wish to configure, then click Alternative Languages under Field Properties - Additional Settings.
- The Alternative Languages window displays:
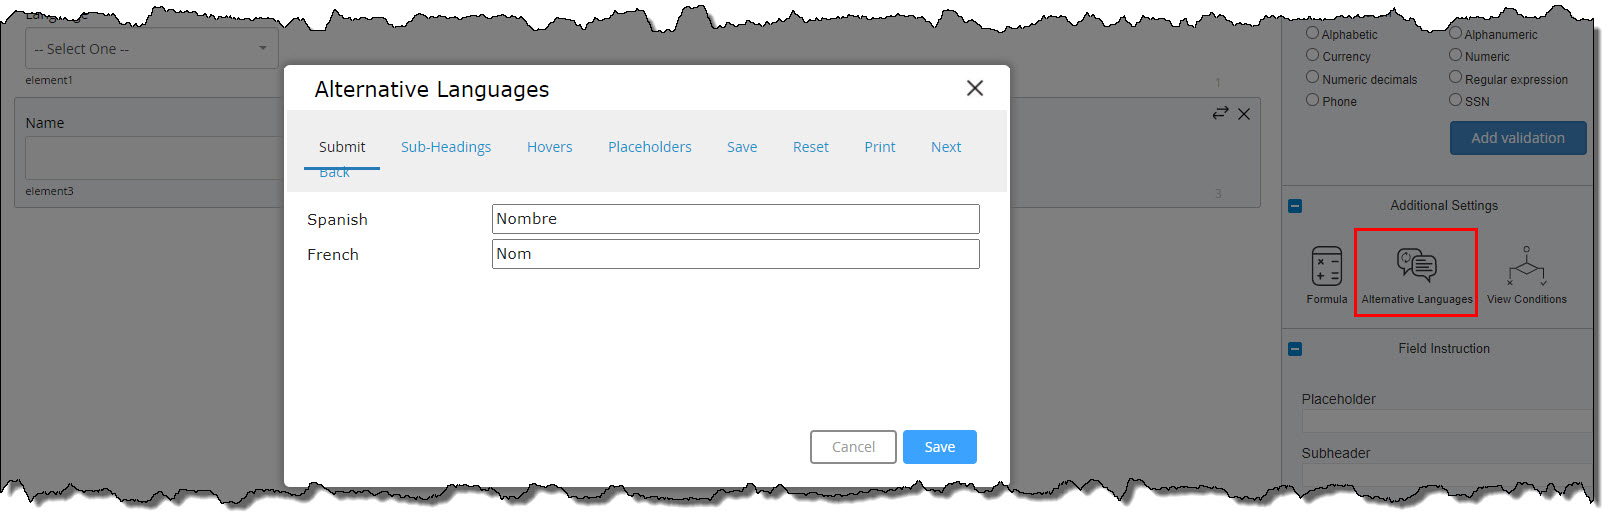
- Enter the Labels to correspond with each Language
- You can include other information as well; Sub-Headings, Hovers, and Placeholders, etc.
- When all values have been entered, click the Save button to save your changes, save and then preview your workflow.