Adding a Tab to a Module
Custom tabs can be added easily to a module to meet your organization’s needs. The first step to creating and configuring a custom tab is to create a new tab for an application module.
To Create a New Tab for a Module:
- Open Suite Manager.
- On the Suite Manager control panel, click on the
 Modules/Tabs component in the System Configuration area.
 - On the Modules/Tabs window, select an application and module from the list. Selecting a module from the Suite Common heading are modules that are available for both eCounsel and Secretariat and do not have tabs available by default.
- Click the New button and select New Tab to create a tab. To create a subtab for the selected tab, click the New button, then select New Subtab.

You can create a subtab only for an on-demand tab.
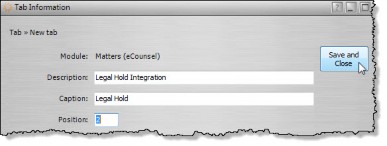
- On the Tab Information dialog box, type a comment concerning the tab in the Description field, then type the name that will appear in the module for the tab in the Caption field.

- Type a number to indicate where the tab will appear in the list of tabs for the module in the Position field. If this field is left blank, the new tab will be placed at the top of the list.
Note: that any new tab automatically will display with the On-Demand Tab checkbox selected by default and this selection cannot be changed. - Select the Allow Multiple Records checkbox to allow multiple entries in a field. The information will display in a table format. If the checkbox is not selected, only one record is retained and fields will display separately (not in tabular format).
- Click Save and Close.

