Creating a New HotDocs Template
HotDocs Developer, which must be available on your computer in order to edit document templates, is needed to test and compile the template for upload into Suite.
 If the macro security setting in your word processing program is set to high, you will not be able to edit a HotDocs template. Change the setting to medium. Ask your System Administrator or IT department if you need instructions.
To Create a New Library:
The first step in HotDocs Developer is to create a library that will contain all the templates files.
- Create a folder on your computer to temporarily hold the template files.
- Open HotDocs Developer .
- On the HotDocs Developer window, click the
 New Library button.

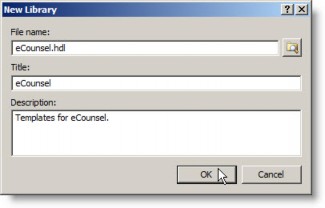
- On the New Library dialog box, type a name in the File Name field (such as “eCounsel”), then press the <TAB> key twice to add the library extension to the filename and populate the Title field. Click OK.
To Create a New Template:
Next, a new template can be created that will reside in the library.
- On the HotDocs Developer window, click the
 New Template button.

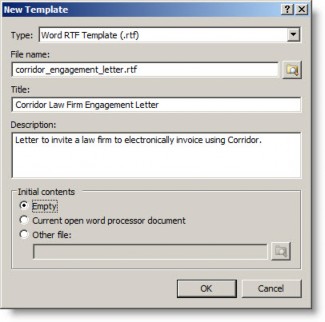
- On the New Template dialog box, change the type to Word RTF Template (.rtf).
- Type a file name, and then press the <TAB> key twice. Replace the title if needed, and type a description.
- Leave the initial contents as Empty unless you have a current file to use.
- Click OK. Microsoft Word will open a new document with the file name specified.
To Create Variables for the Template:
When creating variables for Secretariat, use the HotDocs Variables for Secretariat Document Assembly technical note for a list of available variable names. Also, any custom variables created for your company can be added using these steps.
- On the HotDocs Developer window or HotDocs ribbon for the new template file in Microsoft Word, click the
 Component Manager button.

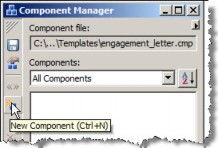
The first variable that must be created is a select variable that is used with Secretariat to allow the user to select a record on which the output is based. Available variables include SelectSecretariatEntity and SelectSecretariatPeople. Each of these will open a list dialog box to select an entity or person, respectively. - On the Component Manager dialog box, click the
 New Component button.
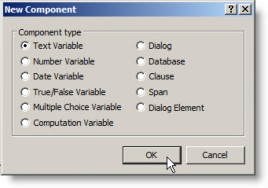
- On the New Component dialog box, leave the Component type as Text Variable, and click OK.
- On the New Text Variable dialog box, type “SelectSecretariatEntity” as the variable name, and then type “Select Entity” as the title (this text appears on the dialog box when preparing the document in Secretariat). Optionally, type the text that will appear as a tooltip when running the template. Click OK.
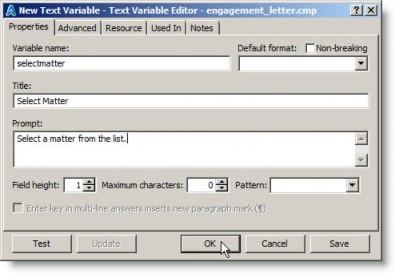
The new variable will appear in the Component Manager dialog box. - Repeat Steps 2-4 for each variable that you want to use.
 All variables provided by Mitratech are text variables with the exception of any variable that ends with “_datetype”. For variables ending with “_datetype”, select the Date Variable component type.
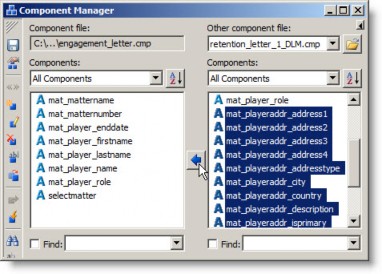
 For subsequent templates, copy the variables from a component file by clicking the right arrow in the upper-left corner of the Component Manager dialog box. This button expands the dialog box and allows you to open a component file to select variables to copy.
 - Select one or more variables from the existing component file, then click the left arrow to move them to the new component file.
- Click
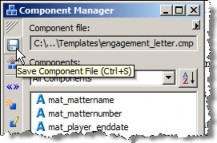
 Save to save the component file.
To Add Variables to the Template:
Once you have created the variables, it’s just a matter of dragging-and-dropping the appropriate variable onto the Microsoft Word document.
- In the template file in Microsoft Word, first drag the appropriate select variable from the Component Manager dialog box onto the template.
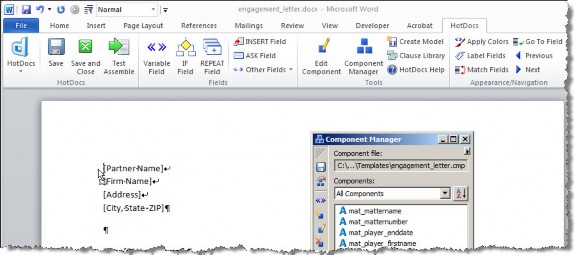
- Next, type the text that you want to appear in the finished document.
- Where needed, drag additional variables onto the template file.
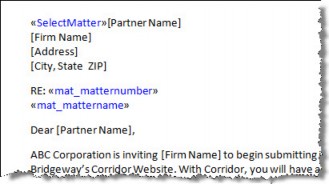
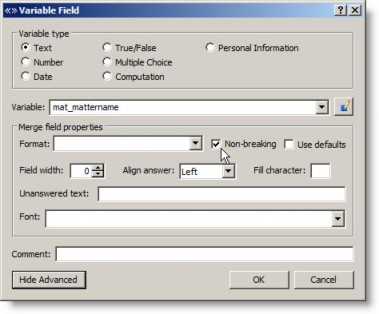
 To change properties of a Mitratech-provided HotDocs variable, simply double-click the variable name in the word processor to open the Variable Field dialog box. From this dialog box, you can change the formatting for the value.
For example, if a variable includes a forced return as part of the variable, you can specify to remove the forced returns. On the Variable Field dialog box, click the clear the checkmark from the Use default checkbox and click on the Non-breaking checkbox to select it.
![]() Do not change the Variable Type of any Mitratech provided variable. Doing so will cause a data type mismatch and render the template unusable.
Do not change the Variable Type of any Mitratech provided variable. Doing so will cause a data type mismatch and render the template unusable.
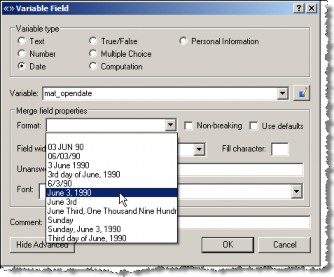
To change a date format, clear the Use default checkbox, and select a format for the date.
To Create REPEATS and IF Statements:
In order to return multiple records in the document, you must use a REPEAT field. Within the REPEAT field, you also can specify an IF field to filter the data that is returned.
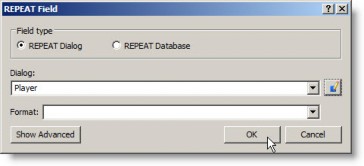
- In the template file in Microsoft Word, click the REPEAT field button on the HotDocs ribbon.

- On the REPEAT Field dialog box, leave the field type as REPEAT Dialog.
- Click the
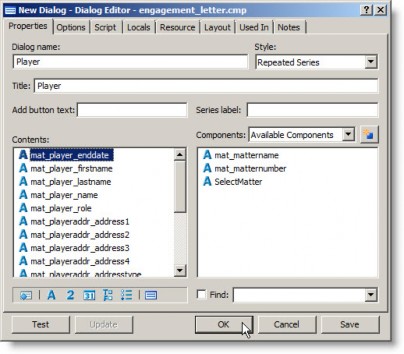
 New Dialog button to the right of the Dialog menu.
 - On the New Dialog dialog box, type a name for the dialog variable, drag-and-drop any components to the contents list box, and click OK. Note that any field used in an IF field to filter the results must be included in the dialog.
- Click OK.
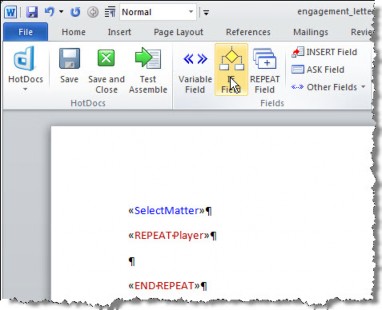
- In Microsoft Word, place the cursor between the REPEAT and END REPEAT statements, and click the IF Field button on the HotDocs ribbon.
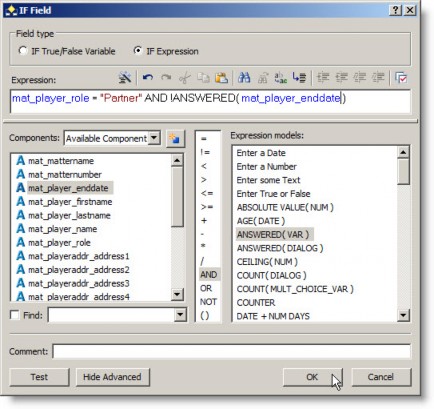
- On the IF Field dialog box, click on the IF Expression option. Create an expression that can be used to filter the results by dragging and dropping items onto the text box. Click OK when finished.
- In Microsoft Word, place the cursor between the IF and END IF statements. Add the variables that you want to appear in the completed document. If multiple variables are placed on the document, make sure to include any punctuation to be included.

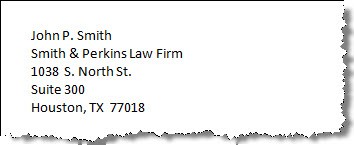
 Multiple IF statements can be specified as criteria for the results by using an AND or OR operator within the IF statement. For example, the following statements return a player name and primary address for a player with the role of “Partner” with no end date specified (notice that the additional lines of address only appear if they have data):
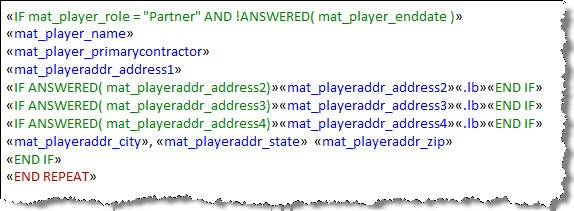
This construct returns the following with test data:
To Retrieve Data from User Fields:
For people and entities in Secretariat, you can include user fields in your assembled documents provided you construct your HotDocs template to retrieve the applicable values for the user field. The Mitratech provided variables include a “_userfieldprofileid” variable for each of the modules. The profile identifier can be determined in the User Fields component of Suite Manager as follows:
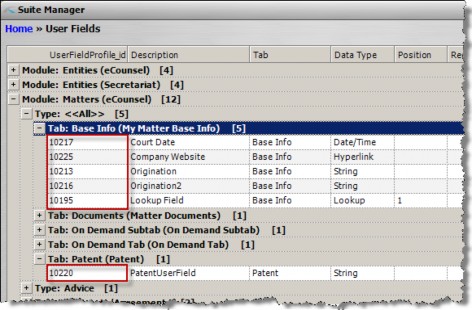
For tabs with single record (such as the Patent tab above), the HotDocs template need only contain an IF statement to specify the user field to return the value and the variable for the value itself.

For multiple record tabs, the HotDocs template must be constructed carefully to only return the user field values that are applicable. For example, retrieving data for a particular player on a matter would require a more complex series of IF statements to ensure that the user field value being returned is the data for the player.
To Save the Template:
- When you have finished editing the template in Microsoft Word, click the
 Save button on the HotDocs ribbon. Do not save the document using the Microsoft Word save functionality.
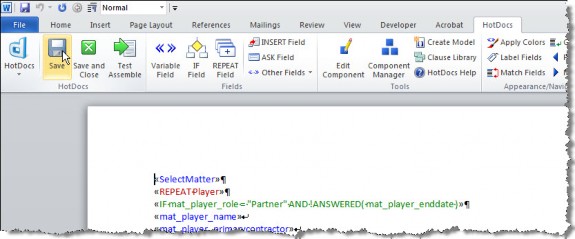
- Close the document; again using the
 Save and Close button on the HotDocs ribbon not the word processor ribbon.

To Prepare the Template for Upload:
- On the HotDocs Developer window, click the
 Component Manager button.

- On the Component Manager dialog box, click the
 Properties button.
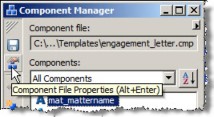
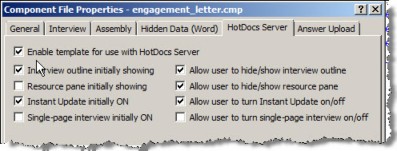
- On the Component File Properties dialog box, click on the HotDocs Server tab, and verify that the Enable template for use with HotDocs Server checkbox is checked. If not, click in the checkbox to enable it. Click OK.
- On the Component Manager dialog box, click the
 Save Component File button.
 - Close the Component Manager dialog box.
To Test the Template:
- Right-click on the template in the left pane of the HotDocs Developer window, select Test in Browser from the popup menu, and select JavaScript.

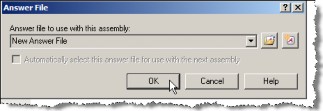
- On the Answer File dialog box, click OK.
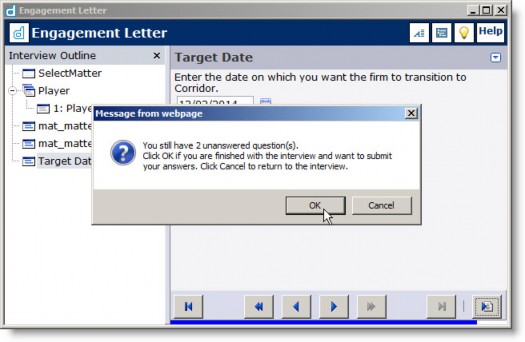
- The Interview wizard will start. This wizard prompts the user for information for template variables that it was unable to fill from the database. At this time, do not enter any information; click
 Finish.
 - Click OK on the message box that unanswered questions remain.
- Click Don’t Save on the message box asking to save changes to the answer file.
- The document will open again. Close the document without saving.
To Publish the Template:
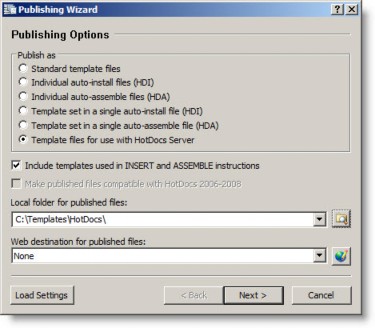
- On the HotDocs Developer window, click the Tools menu and select the Publishing Wizard menu command.
- On the Publishing Wizard dialog box, click the Template files for use with HotDocs Server option.
- Browse to a location to create the published files or enter a location in the Local folder for published files text box, and click Next.
 Do not use the location of the templates for publishing but create a new subdirectory.
- 4. On the File Security screen, click Next.
- On the Additional Files screen, click Finish.
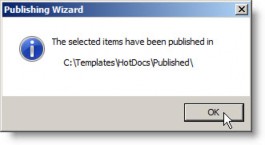
- On the confirmation message box, click OK.
- Locate the new files created from the steps above (<NewFileName>
.CMP, <NewFileName>.RTF, and<NewFileName>.RTF.MANIFEST.XML). These files should reside in the directory specified in Step 3.

