
Working with Grids
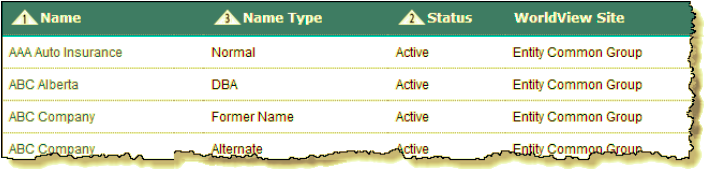
Grids are prevalent in Suite. These grids can display filterable lists of records in a module or key information for a particular area. Use the vertical and horizontal scrollbars to view the entire contents of the grid. The order of the list may be changed as detailed below.
To Show/Hide Columns:
-
Click the
Options button.
-
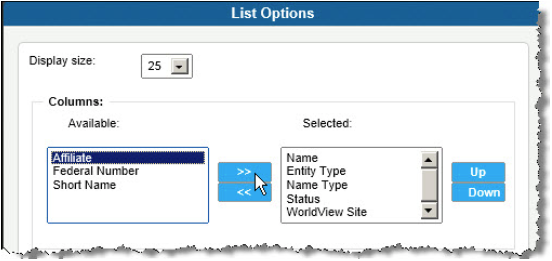
On the List Options dialog box, the following functionality can be performed:
-
To add a column to the grid list, click on a column name in the Available list and click the >> button to move it to the Selected list.
-
To remove a column from the grid list, click on a column name in the Selected list and click the << button to remove it from the Selected list.
-
To reset the columns to the default columns, click Reset to Default.
-
To reset the columns in all grids in all modules to the default columns, click Reset All Lists to Default.
-
- Click OK.
To Rearrange Columns:
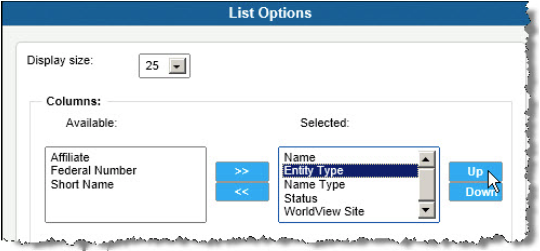
To move a column to a different position, click the Options button, click on the column name in the Selected list, then click the Up or Down buttons. Click OK.
To Refresh Information:
To display the most current information in a grid, press the <F5> key.
To Sort Columns:
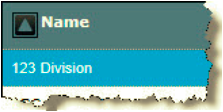
Click the column heading to sort the grid column. An up arrow appears in the column heading to indicate a primary ascending sort sequence. Click a second time in the same column heading to reverse the sort.
To sort by a secondary column, click the Options button, select the column name in the Then Sort By field, then select Ascending or Descending for the type of sort. Click OK.
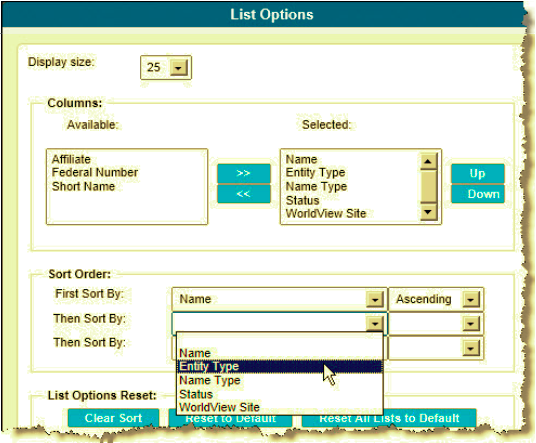
You can sort by up to three columns. Multiple sort orders are indicated by a number next to the sort indicator.
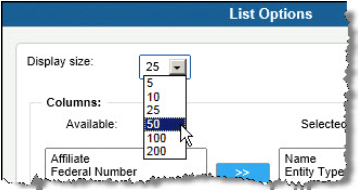
To Select the Number of Records Shown:
Click the Options button, and select the number of records to be displayed on a page from the Display Size field. Click OK.
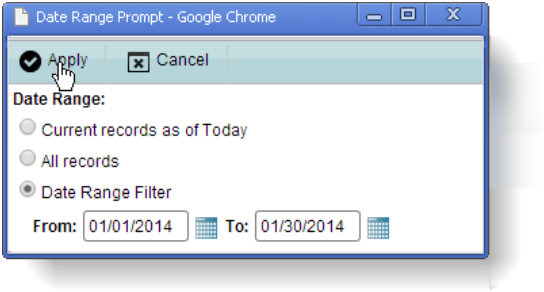
To Change the Date Range of Records:
-
Click the
All records, Current records as of Today, or Date range filter button.
-
On the Date Range Prompt dialog box, select an option to retrieve records as follows:
-
Current records as of Today – This option displays all active records that are current for today’s date.
-
All records – This option displays all records regardless of whether the record is active.
-
Date Range Filter – This option allows you to select a date range to display all records that were “active” at some point in the selected date range. A record is considered “active” in a time period if no start date and/or end date is specified.
-
-
Click
Apply.
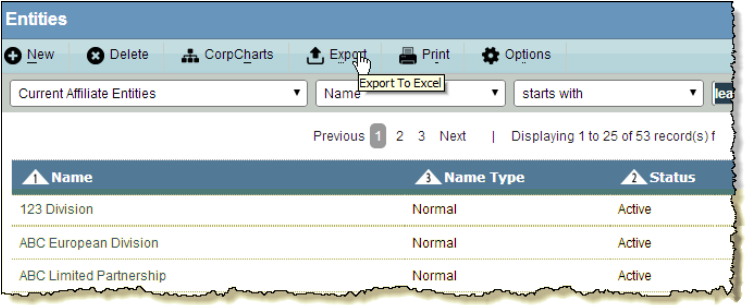
To Export to Microsoft Excel:
You can export up to 2,000 records from a grid at one time.
-
Click the
Export button.
-
Either click Open to open the file in Microsoft Excel or click Save to save the Comma Separated Value (CSV) file to a default location. Click Save and select Save As to save the file to a location you specify. Navigate to a directory in which to save the file, enter a new name if needed (the default is temp.csv), then click Save on the Save As dialog box.

In Microsoft Excel, all dates will display using the settings from the Regional and Language Options applet on the Control Panel. Make sure these settings match the date/time settings in your Secretariat preferences.
To Create an Instant Report:
You can create a report of up to 2,000 records from a grid at one time.
- Click the
Print button.
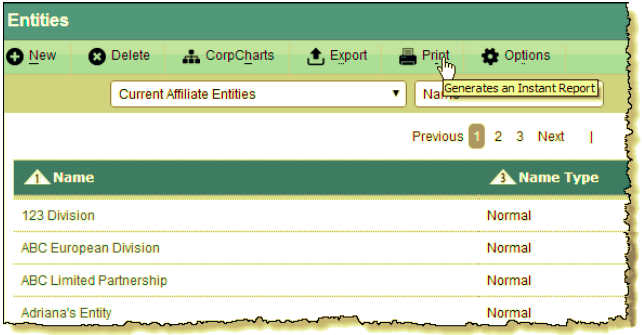
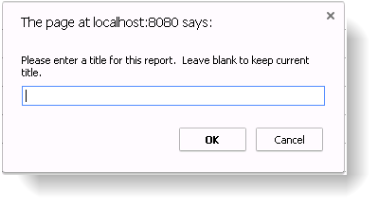
-
On the Report Title dialog box, type a title to appear on the report or leave blank to accept the default title.
-
Click OK.
-
On the Print dialog box, select printer settings, then click Print.
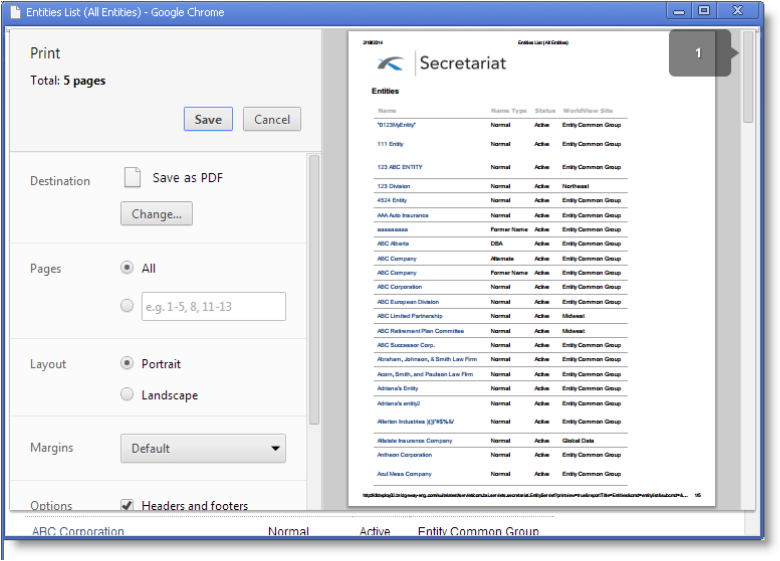
The appearance of the Print dialog box depends upon the browser, operating system, and printer driver. -
Close the report window by clicking the
 Close button.