Home Page
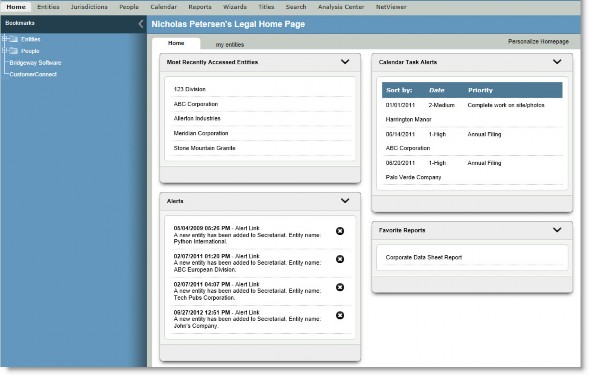
Suite applications offer a home page for quick access to frequently opened records and reports, a list of pending appointments and tasks, pending invoices, and company-wide messages. The look-and-feel of the home page is customizable by user, but some functionality is restricted based on settings configured by your System Administrator.
If your site has implemented home page templates via Suite Manager, you may not have the ability to customize the home page by adding widgets and/or tabs. See your system administrator for more information.
Bookmarks
The left panel on the home page contains any bookmarks that you have set to access records quickly and easily. Bookmarks are similar to Favorites in Microsoft Internet Explorer—they are quick links to pages or, in the case of Suite, to records or external URLs (Uniform Resource Locators).
Links to external URLs are subject to the restrictions of your company’s security policies.
Bookmarks also can be accessed from most modules. To collapse the panel so it is not viewable, click the
![]() icon. To restore it, click the
icon. To restore it, click the ![]() icon. When you collapse bookmarks, the menu of tabs on the left of some pages is not visible. You need this menu to perform many tasks within Secretariat.
icon. When you collapse bookmarks, the menu of tabs on the left of some pages is not visible. You need this menu to perform many tasks within Secretariat.
To Create a Folder to Contain Bookmarks:
- Open the home page.
- Right-click in the Bookmarks panel, and select the Add folder menu command.
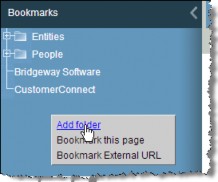
- On the Add a new folder dialog box, type a name for a folder, then click Save.

To Create a Bookmark:
- Open the record in Suite that you want to bookmark.
- Click on the Bookmarks tab in the left panel.
- Select the folder under which you want the bookmark to appear.
- Right-click and select the Bookmark this page menu command.
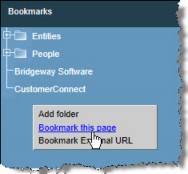
You also can drag-and-drop any record from the home page or a selection list page to the bookmark panel to add a bookmark.
To Create a Bookmark to an External URL:
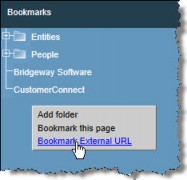
- Right-click on the Bookmarks tab and select the Bookmark External URL menu command. To create a bookmark within a folder, right-click on the folder first.
- Type the label that will appear for the link (such as Mitratech Software).
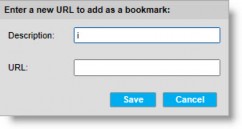
- Type the URL for the link (such as http://www.bridge-way.com). You must type the link in its entirety.
- Click Save.
To Delete a Bookmark:
- Open the home page or open the Bookmarks tab in the left panel of a module.
- Select the bookmark to be removed.
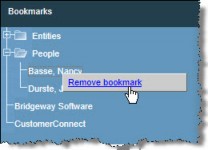
- Right-click and select the Remove bookmark menu command.
- Click OK to confirm deletion.
Message of the Day
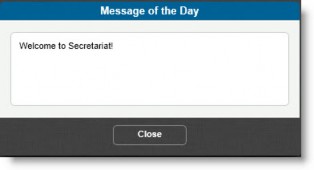
An announcement that displays on the home page of all users. It can be used as a reminder of important events, to distribute system-wide information, or as a daily greeting.
Widgets
The right panel on the home page can be opened by clicking on the Personalize Homepage menu to the right of the tabs and selecting Toolbox. This panel contains widgets that you can customize to search for information such as the most recently accessed people or entities. These widgets may be placed directly on the home page or on customized home page tabs that you can create. When placing widgets on a tab, the widgets can display in one or two columns.
If your site has implemented home page templates via Suite Manager, you may not have the ability to customize the home page by adding widgets. See your system administrator for more information.
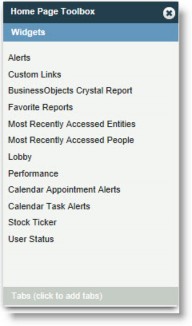
Your System Administrator can make the following widgets available on the home page:
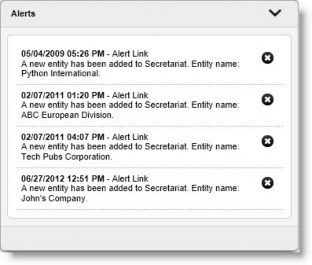
Alerts – New entities that are entered in Secretariat will display in this list until you open the record.
Business Objects Crystal Report – A dashboard-type view of reports that have been run using SAP Business Objects. The actual report graphics display within the widget on the home page.
Calendar Appointment Alerts – Your upcoming appointments.
Calendar Task Alerts – Your non-completed tasks (upcoming and overdue/incomplete). Tasks can be displayed by start, due, or reminder date.
Custom Links – A list of web page links configured by the System Administrator.
Favorite Reports – A shortcut to reports, documents, or forms that you regularly run. This list is taken from the Reports module. Click a link to generate the item.
Lobby – A list of notices that may require action within Suite. For example, a Restricted Entity Edits notice may prompt the user to review pending changes for an entity and approve the changes. The Lobby provides an area where each new notice appears to prompt the user to review the information and take action if needed.
Most Recently Accessed Entities – A shortcut to the records on which you have most recently worked. Click the link to open the record.
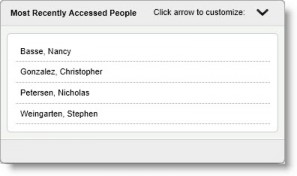
Most Recently Accessed People – A shortcut to the records on which you have most recently worked. Click the link to open the record.
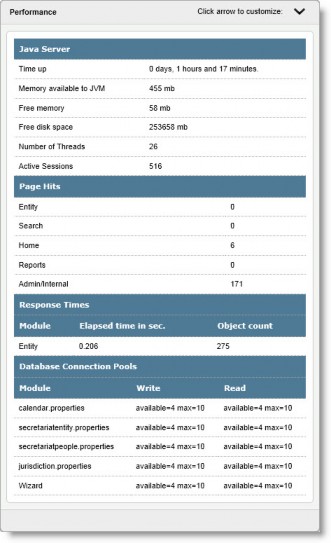
Performance – Information concerning program performance and the system in use.
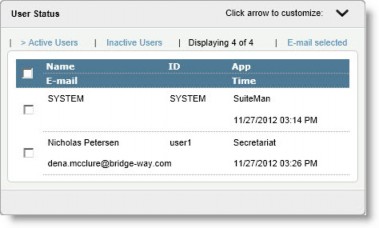
User Status (Administrators only) – All active and inactive users with last login application and date/time. Allows administrators to generate an e-mail to the selected users.
If one of these widgets is not available, contact your System Administrator.
To Create a Tab to Customize the Home Page:
If your site has implemented home page templates via Suite Manager, you may not have the ability to customize the home page by adding tabs. See your system administrator for more information.
- Open the home page.
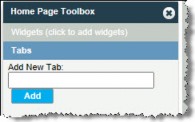
- Click on the Personalize Homepage menu to the right of the tabs and select the Add New Tab menu command.

- In the Toolbox, type the name of the new tab in the text box and click Add.
To Customize the Widgets on the Home Page or Custom Tab:
- If you want the widget to appear on a tab that you have created, click on the tab in the main panel of the home page. Otherwise, the widget will be placed on the Home tab in the main panel.

- Click on the Personalize Homepage menu to the right of the tabs and select the Toolbox menu command.

- In the Toolbox, drag-and-drop an available widget onto the right panel. When the widget is in an available area, the area will change color to indicate the widget may be dropped onto the area. If you want the widgets to display in one column, place the widget on the tab, then place any subsequent widgets underneath the existing widgets. To specify two columns, place any subsequent widgets in the second column.

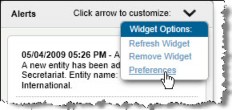
- For widgets, click on the down arrow next to the widget name and select the Preferences menu command.
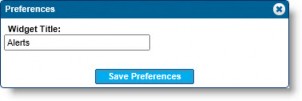
- Replace the name of the widget with any text and click Save Preferences.
To Delete a Widget:
- Click on the down arrow next to the widget and select the Remove Widget menu command.

- Click OK to confirm deletion.
To Delete a Custom Tab:
- Click on the tab you want to remove.
- Click on the Personalize Homepage menu to the right of the tabs and select the Remove Tab menu command.

Click OK to confirm deletion.
Alerts Widget
The Alerts widget displays a list of program-generated alerts based on the Rules Engine alerts rules.
Business Objects Crystal Report Widget
You must be able to run SAP Business Objects Business Intelligence Platform reports to use this feature.
The Business Objects Crystal Report widget provides an area where a report that has been run using Business Objects can be displayed on the home page. Whereas the Favorite Reports widget contains links to run reports, the Business Objects Crystal Report widget actually contains the results of a single report embedded in the widget. Multiple widgets can be placed on the page to view multiple report results. However, after placing a widget on the page, configure the preferences before adding another widget.
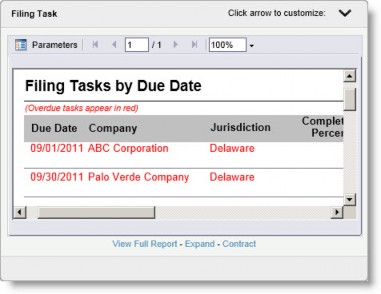
Only reports that have been designated as widget-compatible in the Reports module can be displayed in this widget. When importing Business Objects reports using Suite Manager, the report will be set to non-widget compatible by default.
To Configure a Report to Display in the Widget:
- Open the home page.
- Click on the Personalize home page link at the top of the home page.
- In the Toolbox, drag-and-drop the Business Objects Crystal Report widget onto the panel.
- On the Business Objects Crystal Report widget, click on the down arrow next to the widget name and select the Preferences menu command.
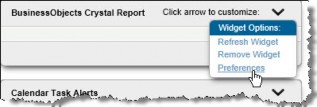
- Click on the report to display. Select any parameters for the report as needed.
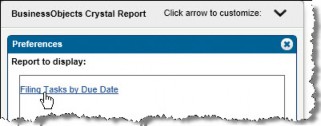
- Select the size of the report window and the default size of the report.
- Type a name for the widget.
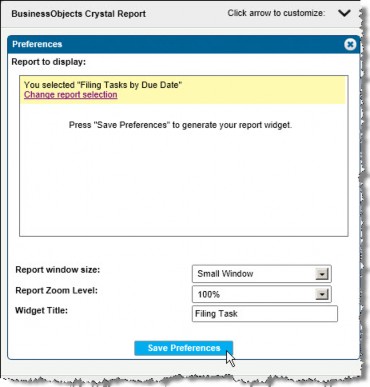
- Click the Save Preferences button.
Calendar Appointment Alerts Widget
The Calendar Appointment Alerts widget displays a list of upcoming calendar appointments assigned to the user. Clicking on the description of the appointment will open the Calendar dialog box for the appointment; clicking on the entity name will open the Base Info tab of the Entities page for the associated entity.
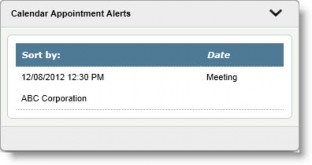
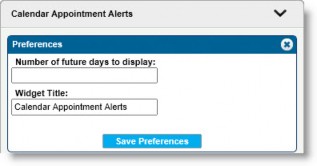
This widget contains user preferences. Click the down arrow in the upper-right corner of the widget and select Preferences. Make changes as needed and click Save Preferences.
Calendar Task Alerts Widget
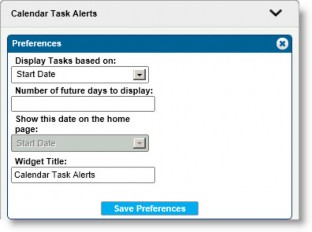
The Calendar Task Alerts widget displays a list of upcoming and overdue (incomplete) calendar tasks assigned to the user. Clicking on the description of the task will open the Calendar dialog box for the task; clicking on the entity name will open the Base Info tab of the Entities page for the associated entity.
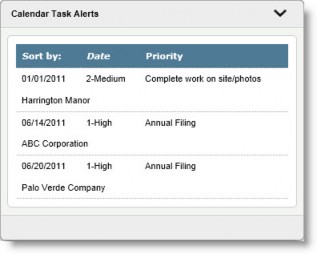
This widget contains user preferences. Click the down arrow in the upper-right corner of the widget and select Preferences. Make changes as needed and click Save Preferences.
Custom Links Widget
The Custom Links widget displays a list of Web page links configured by the program administrator. Links can be created or modified by editing the widget in Suite Manager.
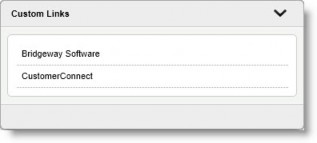
A user can create bookmarks for access to Web links that are not corporate-wide. However, any firewall or internal security may prevent a site from being opened.
Favorite Reports Widget
The Favorite Reports widget displays a list of reports marked as favorites by the user.
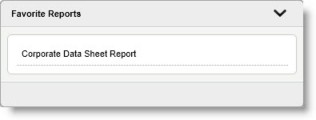
To designate a report as a favorite so it will appear on this widget, click on the Reports module, click on a report, then click Add to Favorites. This action moves the selected report to the list of favorites.
Lobby Widget
The Lobby widget provides an area where notices appear that may require action within Suite or approval before information is committed to the Suite database. Types of information that may appear in the Lobby include the following:
- Restricted Entity Edits – Changes to entity information that needs to be approved before being committed to the database in Secretariat.
- Service of Process notices that may trigger the need to create a new matter in eCounsel. Currently, CT Advantage and CSC service of process providers are supported.
The Lobby widget, as part of the home page, acts as a holding bin for these various types of data and provides an interface for performing the needed actions before and up to the point where the data should be officially imported into the appropriate data records within eCounsel or Secretariat.
To View Details of a Notice:
- Open the home page.
- On the Lobby widget, click the link for a notice (by default, notices are sorted by the last changed date/time). The link for each notice appears in a blue font, and the pointer will change to a select tool when you hover over the link.

To Delete a Notice:
- Open the home page.
- On the Lobby widget, click the
Delete button for a notice.
Deleting a notice only removes the notice from the Lobby widget; deletion does not permanently remove the notice from the system.
Most Recently Accessed Entities
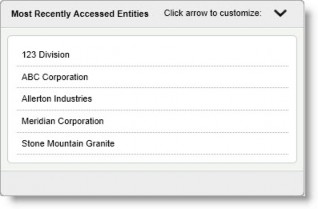
The Most Recently Accessed Entities widget displays a list of the most recently accessed entity records for the user. The number of records displayed is customizable by user. Click the Tools menu, click on Preferences, then click on the Entities tab. Enter the number of MRAs (Most Recently Accessed) stored in the database.
Most Recently Accessed People
The Most Recently Accessed People widget displays a list of the most recently accessed people records for the user. Click the Tools menu, click on Preferences, then click on the People tab. Enter the number of MRAs (Most Recently Accessed) stored in the database.
Performance Widget
The Performance widget provides data regarding program performance and system information.
User Status Widget (Administrators Only)
The User Status widget, which displays active and inactive users with last login application and date/time, allows administrators to generate an e-mail to the selected users.
