
Manage Reference Data
Reference Data items can be selected from the menu which is displayed when the mouse hovers over the option Reference Data on the Manage tab. Alternatively, click on Reference Data on the Manage tab to display buttons. Select the item you want to view.

To print the Reference Data for any item, select the appropriate item from the menu and click the Print List button (as shown below Action Codes).
Action Code
Select Action Code from the Reference Data menu to add a New Action Code, Edit and Delete Action Codes. If an Action Code is being used on any Risk, you will not be allowed to delete it.
Note: The information displayed on this page is determined by configuring the Action Code List on the Preferences tab. Please refer to the OpRiskControl Users’ Guide for more information.

Action Codes are a list of common Action measures. The Action Code description automatically populates the Risk Control or Action description where it may be edited to be specific to the Risk being controlled.
Likewise, if an Action Code has an attached document or web site link, this information is copied to the Risk Control or Action.
You may nominate the effectiveness of any mitigation type by a percentage or level reduction for Likelihood, Consequence or Risk transfer.
Click Select to edit an Action Code.
Click the New Action Code button to add a new Action Code.
Action Frequency
You may set up action frequencies (apart from Risk review frequencies) and nominate the number of days or months between actions.
The default setting for action frequencies is Monthly notifications. The system will alert you every month with this setting.
To change monthly action frequencies, select Edit for the Months frequency desired (annually, six monthly, etc.) then select Use Months tick-box and click Save to confirm. With months selected, the system will alert you on the same day of the month, depending on the frequency selected.
Note: Application software prior to version 5.4.0. The default setting for action frequencies was set to Days with Monthly notifications. The system alerted you every 30 days with this setting.
Assets
Select Assets from the Reference Data menu to add, change and delete records. If the reference data is being used on any Risk you will not be allowed to delete it.
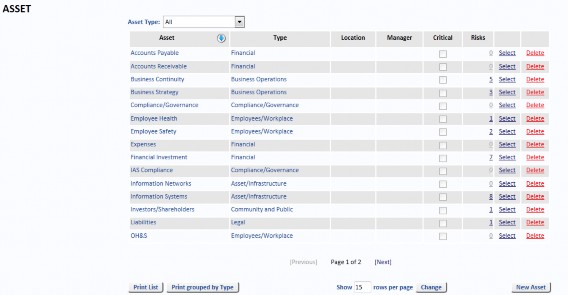
Assets may be real assets or intangible assets. They are the things that may be harmed if the Risk eventuates. They are not the hazards. For the hazards, refer to Risk Types and Risk Events below.
An Asset must have an Asset Type. Asset Types are often aligned exactly with the Consequence table descriptions.
The rest of the data items are optional and some are provided for very advanced reporting and analysis – they are not needed for basic Risk management. Only use the following data items as described:
- Use Location only when the asset is a physical asset. Do not use Location if the Asset is a general Asset, such as Employees, or an intangible asset, such as Revenue.
- Use Owner only when there is a single User responsible for the Asset.
- Use Current Phase and Due Date only when the Asset is a Project Phase (for example, Phase 1 through Phase 3).
- Use At Risk, Relative Value and Relative Value Note only after understanding Enterprise Rating.
Many Assets may be assigned a (monetary) value at Risk, but it is difficult to assign a monetary value to other areas at risk (e.g. patients, passengers, employees and children at risk). However, you may assign any of five Relative Values from Very Low to Very High against any Asset. The default is Medium.
When the system determines the Enterprise Rating of a Risk, it looks for the highest impact via Potential Loss or Relative Value combined with the Risk’s Likelihood. The Relative Value may be included in many reports, and may be specifically selected in the Dashboard and Risk Matrix report.
Project Risks are normally coded under the project name listed in the Initiative column (and Initiative may be renamed to Project to be more specific).
However, projects have phases such as Design, Construction, Testing and Production. Some Risks apply to only one stage and do not need to be managed early on in the project. These Risks can be closed when that stage has passed. This can be documented by assigning a phase to an Asset, and the date the phase will start. At the moment there is no automation related to these two data items.
Asset Types
Select Asset Types from the Reference Data menu to Add, Edit and Delete records. If the Asset Type is being used on any Risk, you will not be allowed to delete it.
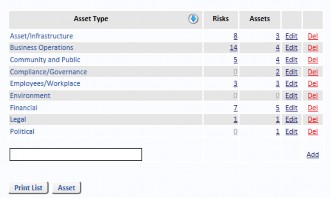
Asset Type is a higher level of classification for reporting purposes.
Departments
Select Departments from the Reference Data menu to Add, Edit and Delete records. If the Department is being used on any Risk you will not be allowed to delete it.
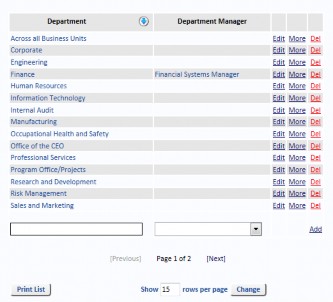
You can create an Objective for a Department by clicking on the More link text. The following form is displayed.

Note: A Department’s Objective can be displayed in some reports. See “Reporting” on page 22 for more information.
Divisions
Select Divisions from the Reference Data menu to Add, Edit and Delete records. If the Division is being used on any Risk, you will not be allowed to delete it.
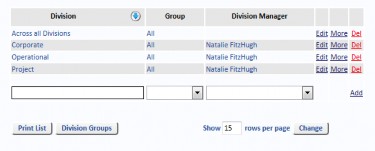
When editing Divisions you can also enter other information such as division objective. There are also three custom data items.
If a Division is configured so that it can been viewed by all Users, any Risk information for that Division can be viewed (but not edited) by all Users, regardless of Role Based Security.
Division Groups
Select Division Groups from the Reference Data menu to Add, Edit and Delete records. If the Division Group is being used on any Risk, you will not be allowed to delete it.
Exposure Periods
Select Exposure Periods from the Reference Data menu to Add, Edit and Delete records. If the Exposure Period is being used on any Risk, you will not be allowed to delete it.
Function
Select Function from the Reference Data menu to Add, Edit and Delete records. If the Function is being used on any Risk, you will not be allowed to delete it.
Enter the Function name and select the Function Manager from the drop-down list. Click Add to create the new Function.
History Types
Select History Types from the Reference Data menu to Add, Edit and Delete records. If the History Type is being used on any Risk, you will not be allowed to delete it.
Project
Select Project from the Reference Data menu to Add, Edit and Delete records. If the Project is being used on any Risk, you will not be allowed to delete it.
Enter the Project name, select the Project Manager from the drop-down list, enter a Work Breakdown Structure Code and select a Function from the drop-down list. Click Add to create the new Project.
Locations
Select Locations from the Reference Data menu to Add, Edit and Delete records. If the Location is being used on any Risk, you will not be allowed to delete it.
Responsible Parties
Select Responsible Parties from the Reference Data menu to Add, Edit and Delete records. If the Responsible Party is being used on any Risk, you will not be allowed to delete it.

Responsible Party is used to configure an external party who is responsible for an Action or ongoing control.
Review Frequencies
Select Review Frequencies from the Reference Data menu to Add, Edit and Delete records. If the
Review Frequency is being used on any Risk, you will not be allowed to delete it.
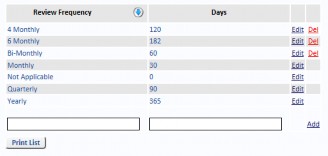
Four review frequencies cannot be deleted. Do not alter these four frequencies directly in the database. Use this form to translate the name, but it do not alter their meaning or the number of days for these four because the logic in the software expects them to be Not Applicable = 0, Monthly=30, Quarterly=90, and Yearly=365 days.
If others are added, ensure the Days are configured. Common additions are 4-Monthly=122 and 6-Monthly=182.
It does not make sense to have a Review Frequency equal to or less than the Risk Review Due Period in System Settings, otherwise the Risk is always due or overdue.
Review Frequency does not relate to how often the Risk is monitored. It refers to how often the Risk Rating is reviewed.
Risk Events
Risk Events define the Risks which have been identified for your business. Once a Risk Event has been defined, it can be used to define new Risks and can be used to create Risk Templates.
Select Manage, then select Reference Data and select Risk Events from the menu. You can add or edit Risk Events. Only Risk Events which have not been used (indicated by 0 in the Risks column) can be deleted.
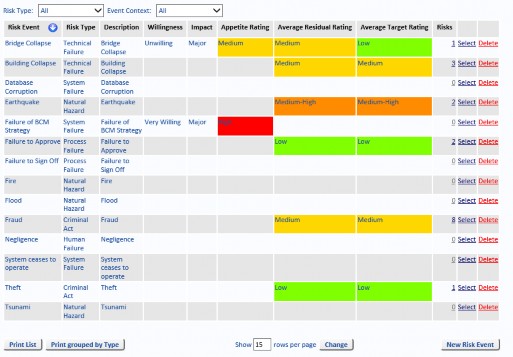
The Risk Event has a short title and a long description. To simplify the system, the Risk Event is a few words that combine the hazard with the possible event, such as:
- Bridge Collapse (the bridge is the hazard and collapse is the possible event).
- Database Corruption (the database is the hazard and corruption is the possible event).
- Fraud – subcontractor payments (fraud is the hazard and false subcontractor payments is the possible event).
Note: In the example above, the Willingness, Impact, Appetite Rating, Average Residual Rating and Average Target Rating columns are visible in the Risk Events page. These columns will not be visible if the Risk Appetite setting is not activated, see “Options Tab” on page 37 for further information.
-
Name – The name of the Risk Event which appears in the drop-down list of Event Types when creating a new Risk or when adding a new Risk Event to a Risk Template.
-
Type – The Risk Type groups similar Risks together. For example, you might have a Risk Type of Natural Hazard which groups the Risk Events Flood, Tsunami and Earthquake. The Type must be associated with a Risk Event for high level reporting.
-
Description – If required, enter a more detailed description of the Risk Event.
-
Default Likelihood – If you define a Risk Event which has a Likelihood of occurring that is unlikely to vary across Projects or Divisions, then you can select a default value from the drop-down list. However, the Likelihood of a Risk often varies between Projects, Locations, and so on so this is rarely used.
-
Default Consequence – If you define a Risk Event which has a Consequence of occurring that is unlikely to vary across Projects or Divisions, then you can select a default value from the drop-down list. However, the Consequence of a Risk often varies between Projects, Locations, and so on so this is rarely used.
-
Event Context – Default values are Internal, External and Internal/External. The Event Context is displayed as the Risk Group on the Risk Search form. See “Risk Events” on page 96 for more information on setting the Event Context for a Risk Event.
-
Acceptable Risk Level – May be allocated an Acceptable Risk Level which is merely an indicator of Risk tolerance. It does not control anything but will cause a message Risk level is not acceptable if a Risk’s residual Risk is higher than this setting, or Acceptable risk level not set if this value is not set.
-
Short Name – A short name for more succinct labels in the Chart Wizard.
-
Standard – If required, select the associated Standard from the drop-down list.
-
Current Risk Capacity – Lets you select a descriptions from the drop-down list which has been configured in “Risk Capacity” on page 102.
-
Custom Report Order – Custom Report Order is used if clients prefer to use other reporting tools (e.g. Crystal Reports, Cognos) and want to control the sequence of reporting rather than alphabetic order.
-
Reporting Channels – This is a “free-field” text area where you can enter information relevant to the Risk Event reporting channels.
-
Ownership – Displays the risk ownership details, configured in the Ownership and Dates tab.
-
Willingness – Lets you select one of the Willingness names from the drop-down list, see “Willingness” on page 65 for further information.
-
Override Average Residual Rating – With this selected you can override the Average Residual Rating for the Risk Event.
-
Impact – Lets you select one of the descriptions from the drop-down list, see “Impact” on page 66.
-
Average Residual Rating – This drop-down list lets you choose a Residual Rating for the Risk Event.
-
Risk Appetite – This is a “fixed field” that displays the Risk Appetite derived from the Willingness and Impact matrix, see “Appetite Matrix” on page 66 for further details.
-
Override Average Target Rating – With this check box selected you can override the Average Target Rating for the Risk Event. If the check box is not selected, the Average Target Rating can not be overridden.
-
Correlation to Strategy – Lets you select one of the descriptions from the drop-down list that are configured in “Correlation To Strategy” on page 102.
-
Average Target Rating – The field displays the Average Target Rating for the Risk Event. You can change the Average Target Rating by selecting the Override Average Target Rating check box which will activate a drop-down menu to choose a different Average Target Rating.
-
Correlation to Strategy Description – This is a “free-field” text area where you can enter a description of the Correlation to Strategy for the Risk Event.
-
Rationale – This is a “free-field” text area where you can enter the Rationale for the Risk Event.
-
Edit – When viewing a Risk Event, click the Edit button if you want to make changes to it.
-
Save – After editing a Risk Event, click Save to save the changes you made and return to the Risk Event Viewer.
-
Cancel – After editing a Risk Event, click Cancel to discard the changes you made and return to the Risk Event Viewer.
-
Back To List – Selecting this button returns you to the Risk Event Viewer.
-
New Risk Event – Selecting this button opens a blank Risk Event page, in Edit mode, to create a new Risk Event.
Other Classification
Risks can be assigned a Classification. The default Classifications are: Business Continuity, Strategic, Operational and Opportunity.
To edit an existing Classification, click the edit link text beside the Classification. You can then edit the name of the Classification.
To create a new Classification, enter the new Classification name in the text box and click the Add link text.
The Classification is displayed as Class. on the Risk Search form.
A Risk’s Classification is set on the Risk form, on the Context tab, in the Other Categories section of the form.
Event Context
Select Event Context from the Reference Data menu to Add, Edit and Delete records. If the Event Context is being used on any Risk, you will not be allowed to delete it.
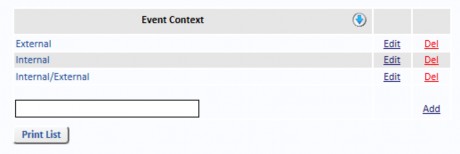
Risk Contexts (which may be named Risk Group in your system) are used in high level reporting, especially in the Risk List Report and Risk Action Report where Risk Context may be selected in the Sort Column or the Group By criteria.
Risk Types
Select Risk Types from the Reference Data menu to Add, Edit and Delete Risk Types. If the Risk Type is being used on any Risk you will not be allowed to delete it.
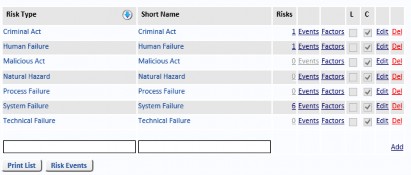
A Risk Type is the higher level of classification for hazards and is used for reporting purposes. Each Risk Type will have a number of Risk Events.
The L column shows whether Likelihood Factors have been created. The C column shows whether Consequence Factors have been created.
Manually Create Likelihood And Consequence Factors
To create Likelihood and Consequence Factors manually, select the Manage tab, select Reference Data and select Risk Types from the menu.
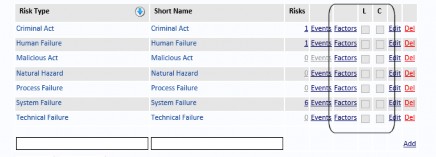
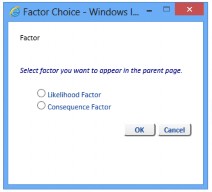
Click the Factors link text next to the appropriate Risk Type (for example, Criminal Act) and select either Likelihood Factor or Consequence Factor (if you need to configure both Factors for the selected Risk Type, they need to be configured one at a time).
By default, there are no Consequence Factors configured.
Click the Add Factor button to configure the factors, for the selected Risk Type (Criminal Act in this example). Enter a name for the factor (Financial, in this example) and descriptive text for each of the ratings: Very High, High, Medium, Low and Very Low.

Repeat these steps to add as many other Factors as required.
Then repeat these steps for other Risk Types for which you want to create Likelihood and Consequence Factors.
Standards
Select Standards from the Reference Data menu to Add a Standard, Edit and Delete records. If the Standard is being used on any Risk you will not be allowed to delete it.
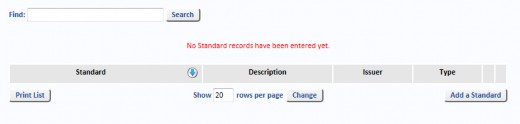
Add A Standard
Click the Add a Standard button to add a Standard document. Add a name for the Standard in the Standard field, a description, the name of the person issuing the Standard and then select a Type from the drop-down list. Click Save to save your changes, or Cancel to discard the changes.
Attach A Document To A Standard
Click on the name of the Standard. You are taken to the Document which is linked to the Standard. If no Document is linked to the Standard, you can attach a Document by clicking the Attach Document button. The Documents For Standards page is opened.

Click the Browse button to navigate to the required document. Click Open. If required, enter a Version.
The Created date defaults to today. Click the calendar to select a different date.
Attached By defaults to the User who clicked the Attach Document button. You can change the name by selecting a different User from the drop-down list.
Enter the name of the Author and a Security Class, if required. Select a date from the calendar for the Revised date, if required. If required, enter a Status.
Click Save to save the document details or Cancel to discard the changes. You are returned to the Documents For Standards page.
Timeframe
Timeframes are used on the Action Ownership and Dates tab. There are four default Timeframes:
- Existing
- Immediate
- Long-term
- Short-term
These can be Edited or Deleted. However, When a Timeframe has been used, it cannot be deleted. More Timeframes can be created by clicking the Add link text.
Categories
Categories are used on the Risk Description tab and on the Action Description tab. To add a Category, type a Category name in the Category Name text box. Each Category name must be unique. Select an owner from the Category Owner drop-down list. Setting the Category Owner is optional. Click Add to add the Category to the list. These Categories can then be added to Risks and Actions.
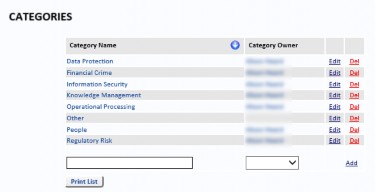
Select Edit or Delete to edit or delete the selected Category. If the Category is being used on any Risk or Action, you will not be allowed to delete it.
Risk Capacity
Risk Capacity is a measure of the extent to which a strategy can withstand negative events without jeopardising the achievement of goals. From this page a user is able to input descriptions for the Risk Capacity, which can then be assigned to “Risk Events” on page 96.
From the Reference Data menu, select Risk Capacity to add a risk capacity description.
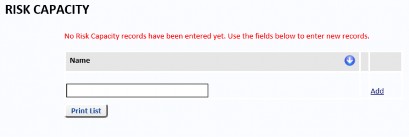
Enter a name for the risk capacity and select Add. The name will be saved.
Click Edit to change the name or Del to remove it. To print all Risk Capacity data, select the Print List button.
Correlation To Strategy
Correlation to Strategy is a way of measuring the relationship between strategies and their dependencies. This page lets a user input Correlation To Strategy descriptions, which can then be assigned to “Risk Events” on page 96.
From the Reference Data menu, select Correlation To Strategy to add a correlation to strategy description.
In the text field, enter a name for the correlation to strategy and select Add. The name will be saved.
Click Edit to change the name or Del to remove it. To print all the Correlation To Strategy data, select the Print List button.