Hold and Custodian Export Setup
How Does the Hold and Custodian Export Work?
The Hold and Custodian Export task allows you to schedule a Comma-Separated Values (CSV) file to be created at regular intervals to be uploaded to downstream systems in your business that need the latest active hold and custodian information. A single file is created at an File Transfer Protocol (FTP) location you select the first time you execute the task and subsequent executions update the file on the FTP location. Your external system can be configured to upload the file at regular intervals based on the schedule you configure for the LegalHold output file.
The first time the task executes, the CSV file created includes all active custodians on all active holds. Subsequent executions of the task only export incremental information, and any data with no change is not part of the subsequent export.
What Fields are Exported?
The default file, RecipientsHolds.csv, is created with the following fields from active holds only:
- Employee ID
- First Name
- Middle Name
- Last Name
- Email Address
- Employee Status
- Matter Name
- Matter ID
- Hold Name
- Hold ID
- Hold Status ( Active or Released)
- Custodian Status ( Active or Released)
You can configure the name of the file as needed, but ensure that the filename includes a .CSV extension. Each record contains a generated identifier for the row. The filename is automatically prepended with the date (in YYYY-MM-DD) format and an underscore character.
Automate the Process of Exporting Data
When the task is executed at the specified date/time, a new file is uploaded to the SFTP path set in the task. On subsequent executions of the task, data is updated in the CSV file based on the information in LegalHold for active holds.
Edit the Hold and Custodian Export Schedule
The instructions below detail how to edit the schedule that data is exported into a Comma-Seperated Values (CSV) file:
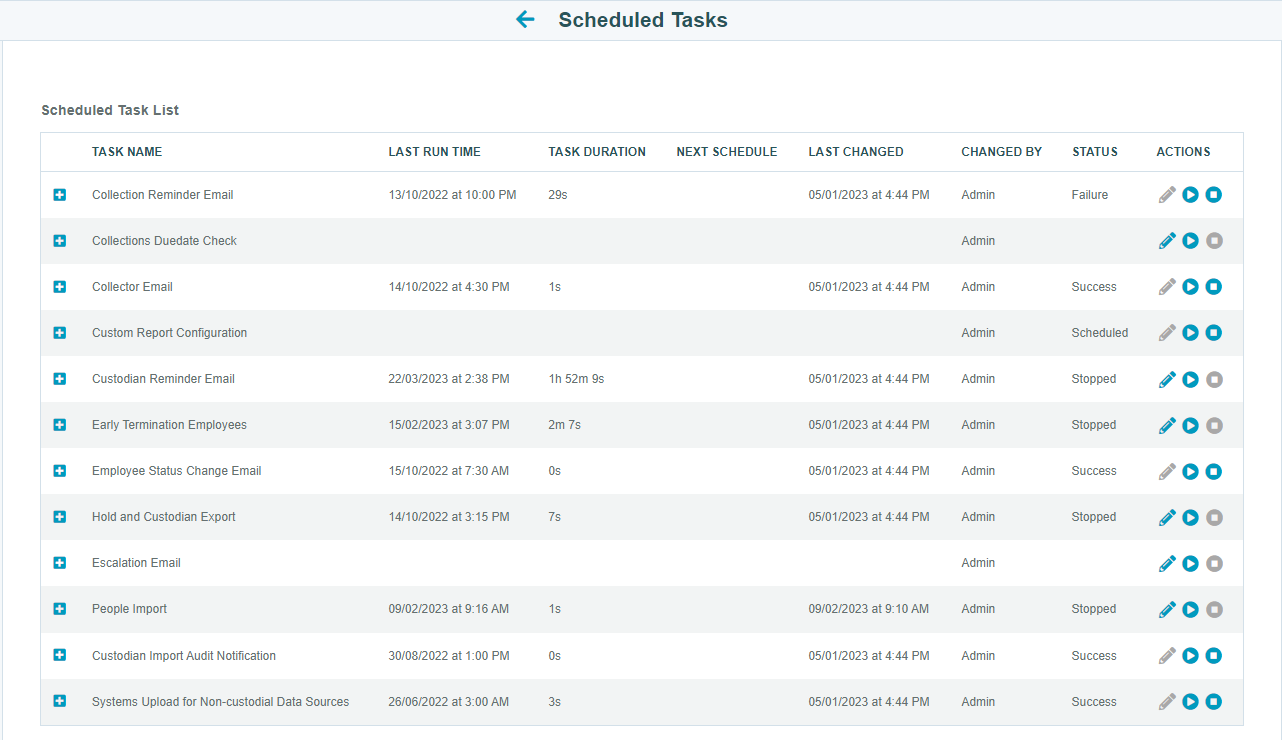
- From the Home page, select the Scheduled Task icon
- Find Hold and Custodian Export in the Task Name column, then click the edit icon in the Actions column.
Note: If the task is currently running on a schedule, you must stop the scheduled before you can edit it. Simply select the Stop icon in the Actions column, then select the Edit icon.
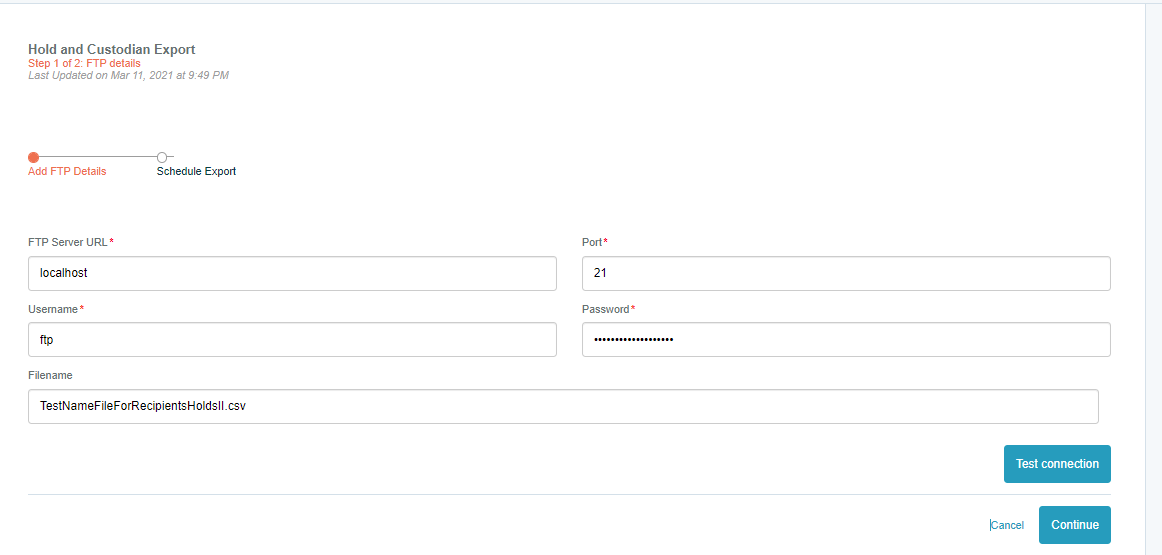
- Edit the FTP settings, and file name (remember to include the .CSV extension) and select Continue.
Configure the Hold and Custodian Export Schedule
To Configure the Hold and Custodian Export Schedule, Go to left pane options → Click Scheduled Tasks.
From the list of Tasks, click the pencil icon next to Hold and Custodian Export.
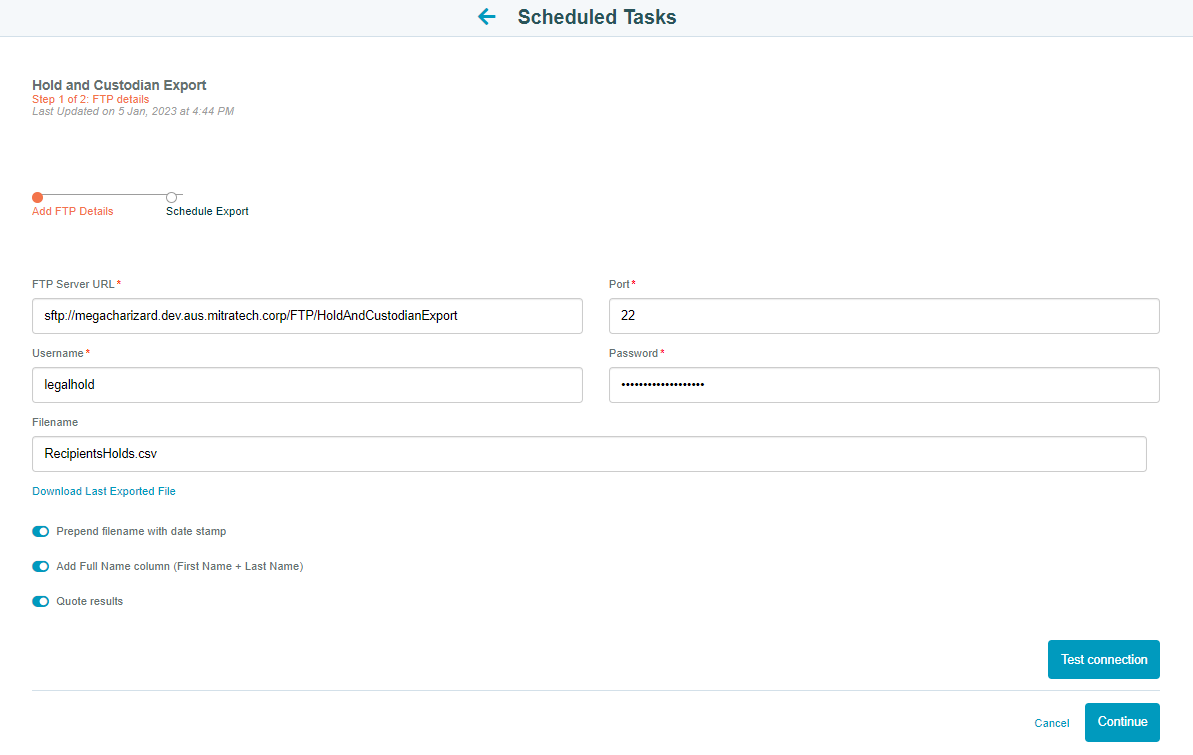
Here in this Add FTP Details page, fill the following fields along with the toggles as required:
- FTP Server URL: Enter FTP server Url
- PORT: Enter the port number
- Username: Enter the user name
- Password: Enter the password
- Filename: Enter the file name with .CSV extension
- Prepend filename with date stamp: With this toggle setting, you can enable or disable Prepend Filename with Date Stamp option, to add or remove a timestamp to the filename that the tasks generate.
- Add Full Name column (First Name + Last Name): Toggle setting Add Full Name column (First Name + Last Name) allows the user to concatenate the custodian name in the form First Name + Last Name and store the result in column Full Name.
- Quote results: Toggle setting Quote Results allows you to add or not to add quotes to each file column.
Click the Test connection button, to test the connection. And/Or click Continue to go to the Schedule Export page.
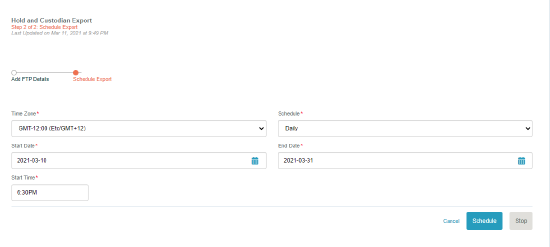
In the Schedule Export page, fill the following fields as required:
- Start Date: Enter the date when you want to start the scheduling
- End Date: Enter the date when you want to end the scheduling
- Schedule: Choose the appropriate schedule period.
- Start Time: Enter the time for scheduling
- Interval: You can choose the interval day
Click Schedule to complete the scheduling process.

Edit the schedule then click Schedule. All fields are required on this screen.