
New hold creation with M365 integration
How to set up an M365 integration connection?
| Steps to follow | Screenshots for your reference |
|---|---|
|
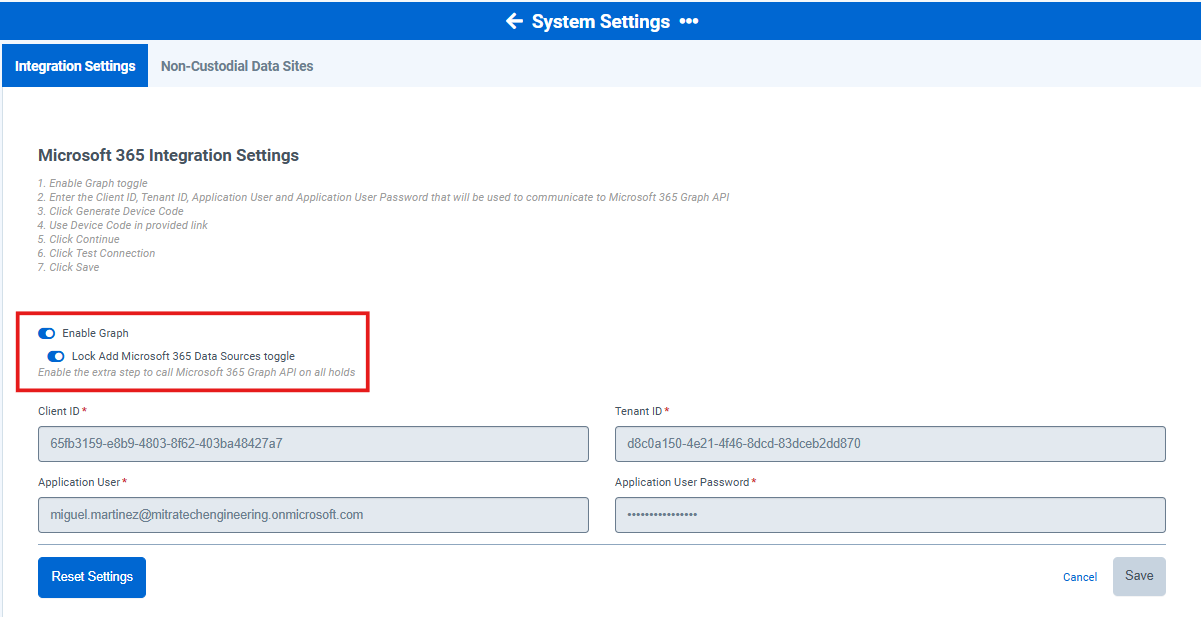
Go to System settings → Microsoft 365 integration settings Enter the credentials provided by the administrator and click Generate Device Code. |
 |
|
You’ll get to see a message as shown:
|
 |
|
Click the Test Connection button to test the connection.. |
 |
|
And click Save to save the settings. |
 |
How to configure non-custodial sites for M365 integration?
| Steps to follow | Screenshots for your reference |
|---|---|
|
Go to System settings → Microsoft 365 integration settings Click Non-custodial Data sites tab. |
 |
| Click Create New |  |
|
Fill the following details in the Page:
And click Save. |
 |
How to create a new hold with M365 integration?
|
To create new hold with M365 integration, Go to Manage Holds → Create New Hold Fill in the Hold Summary Step and click Save Continue to create a hold. |
 |
|
Once you click Save Continue, you'll get to see the Legal staff step. Go back to the Hold summary step, you’ll see the eDiscovery case name as shown;it has two parts: hold name and the hold number. |
 |
|
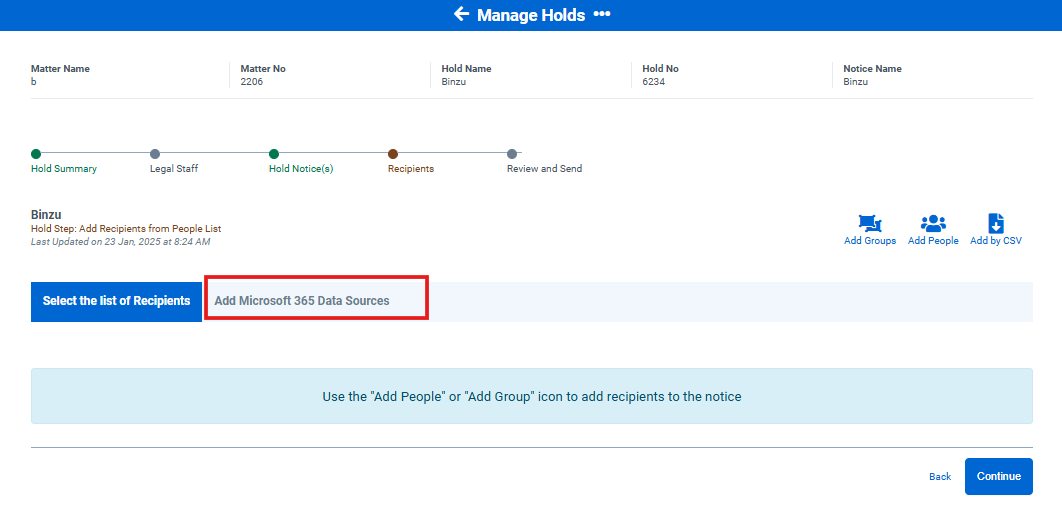
In the Hold notice step , you’ll see the message as shown: |
 |
|
If the toggle is turned on, you’ll get to see the new tab Add Microsoft 365 Data Sources. |
 |
|
You can send data sources to Microsoft by enabling the toggles Mailboxes,OneDrives, Teams and non custodial sites.Teams have separate toggles to add shared channels and private channels. Non custodial sites have separate toggle to add sub sites. Individual checkboxes for each person can also be utilized to choose individual data sources. Or Select all Data Sources button can be utilized to select all data sources at once. |
 |
|
To Add Sites:
|
 |
|
From the list of sites, search and select sites by using checkbox. Or click Select All Sites to select all available sites in the list at once.
|
 |
| After adding required sites, click Add Site. |  |
|
To remove sites: Click the delete icon that you'll get to see under actions column for each sites. Note: If a non custodial site is added to the list, further actions like modify and delete to the non custodial site is not allowed. |
 |
|
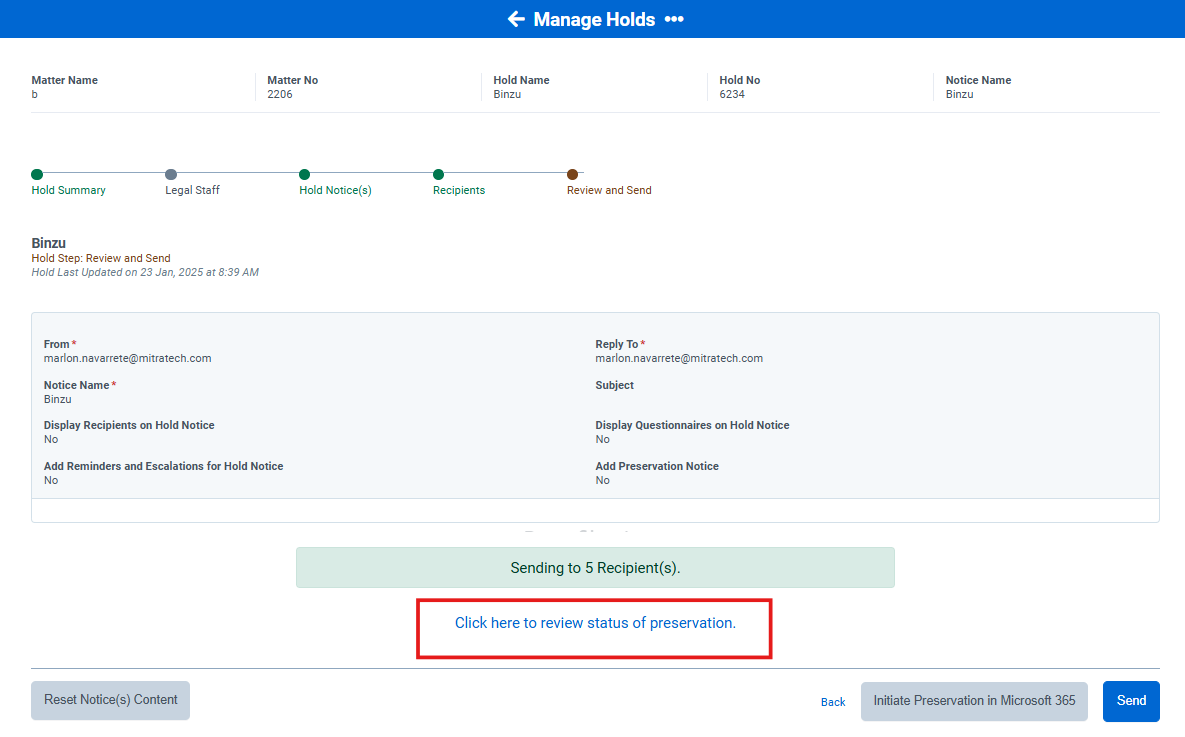
In the Review and Send step, you’ll get to see the recipient's count message that includes eDiscovery Custodians count as well. Click Initiate Preservation in Microsoft 365 to migrate the custodian data sources to Microsoft. |
 |
|
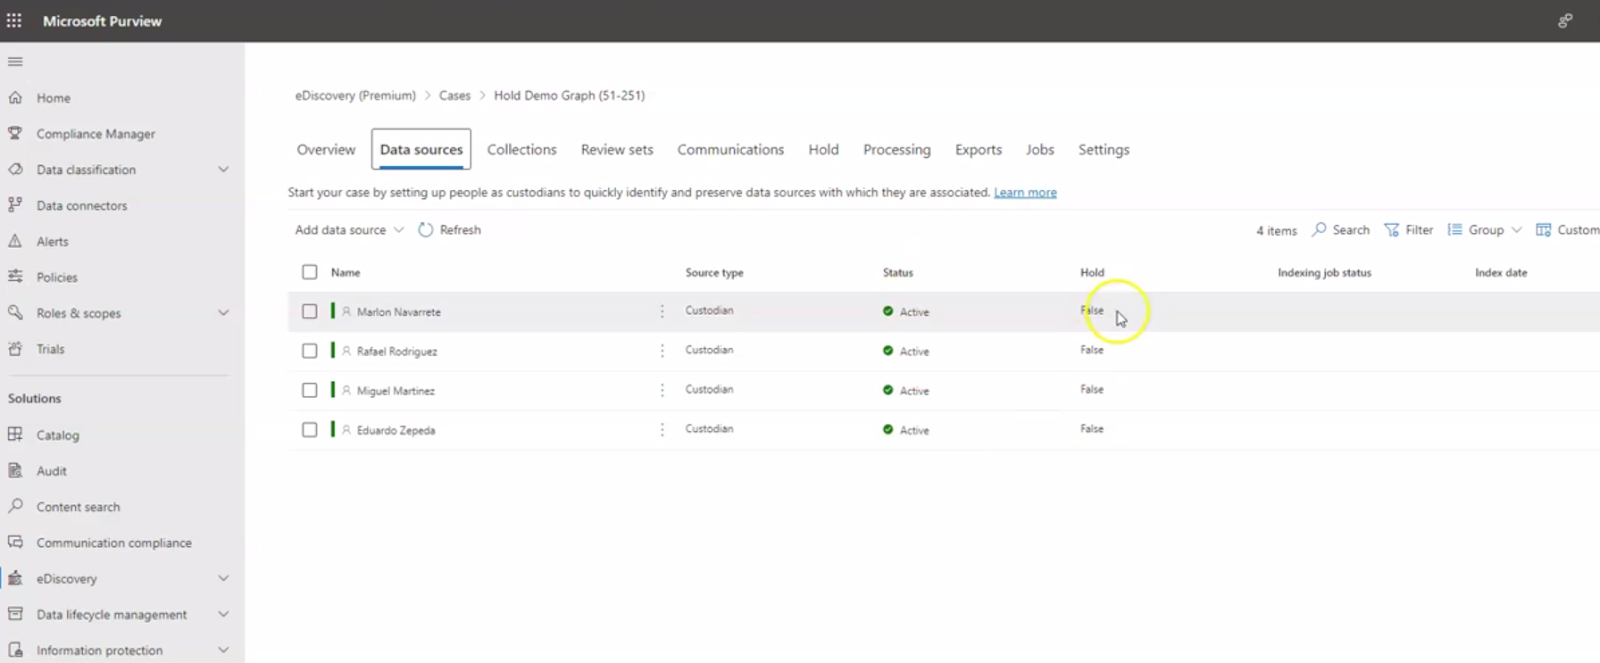
Sample M365 page is as follows: |
|
|
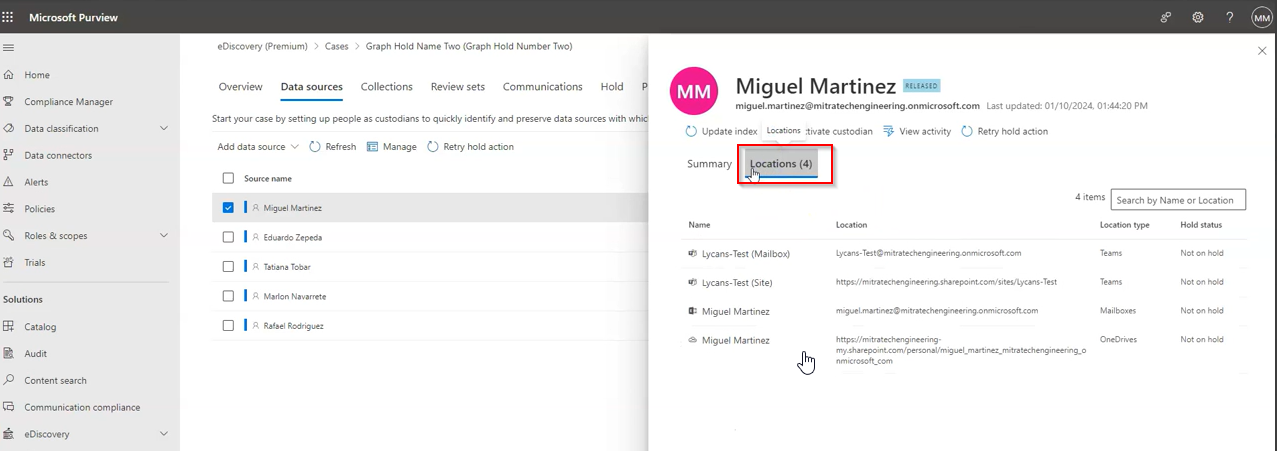
To see the assigned data sources for each user, select a user from the list and go to Locations tab. |
|
|
Once the M365 preservation is initiated, you’ll get to see a new option click here to review the status of preservation. |
 |
|
On clicking the option, you'll see the preservation status as shown: |
 |
|
And click Send to send the hold out, and put the custodians and data sources on hold in Purview. |
 |
|
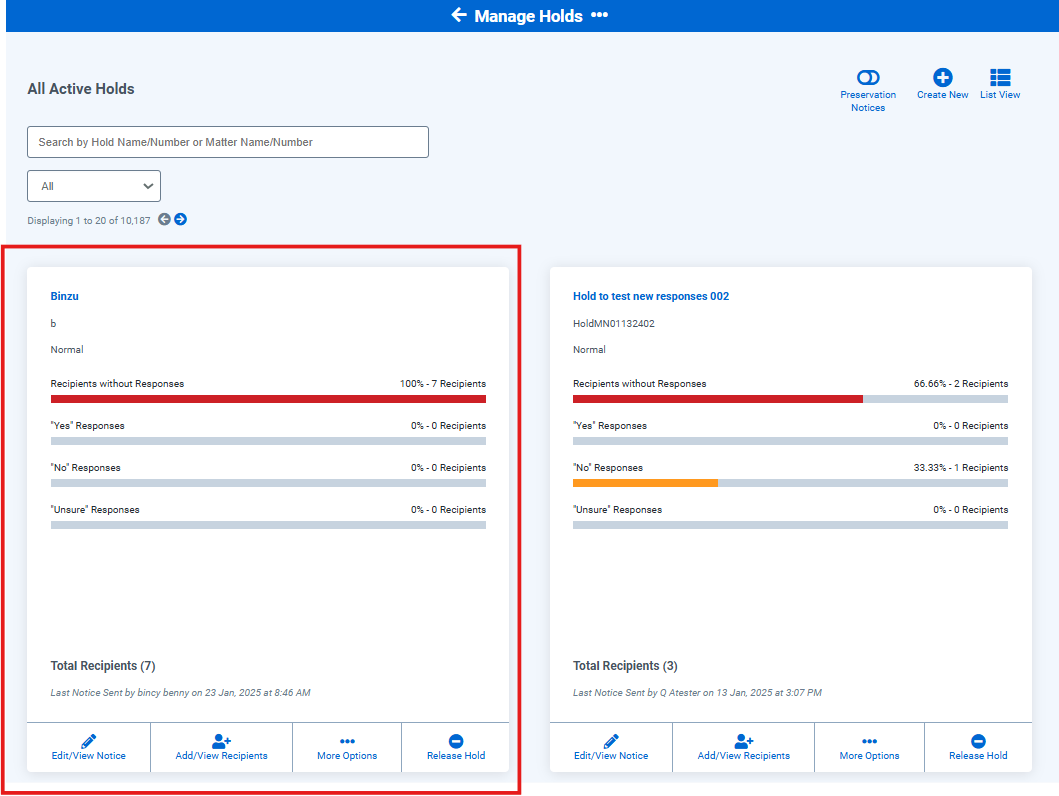
You’ll get to see the hold created as shown: |
 |
|
For more details click on Recipients without responses. |
 |
|
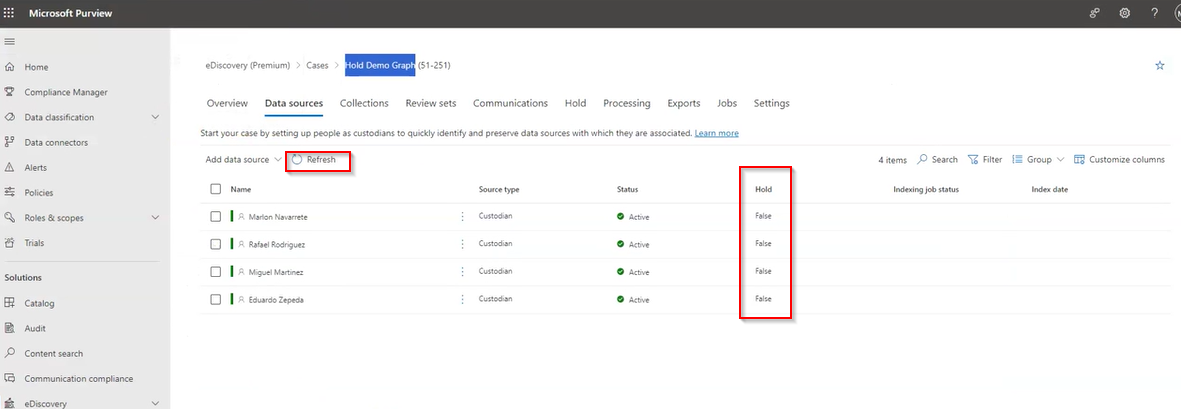
To see the updated Custodian data sources in M365, click the Refresh button. |
|
|
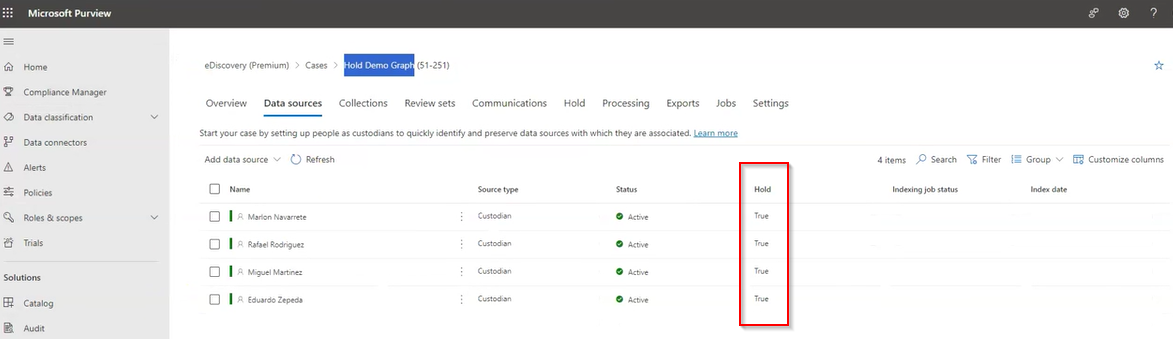
You can see the status is updated. |
|
|
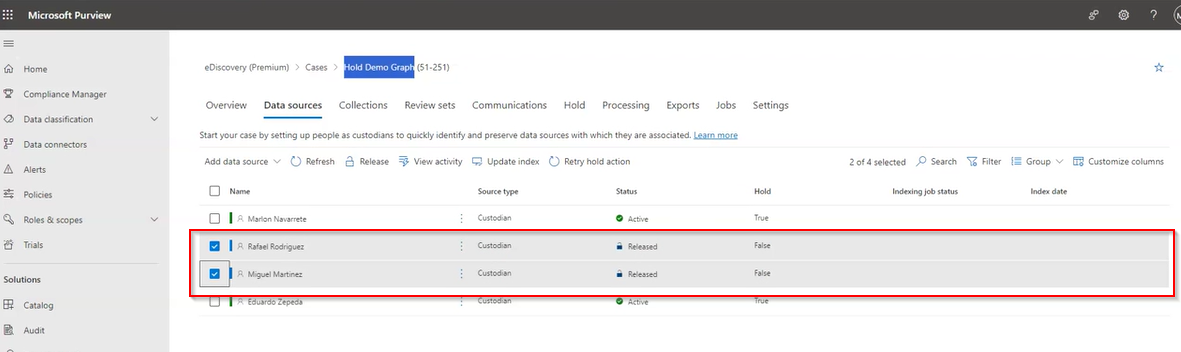
To release custodians, from the hold responses select the custodian items to release and click Release custodian(s). |
 |
|
In the page that appears, add the custodian release date along with comments. You can turn off the optional toggles, depending upon what you want to send when releasing a custodian. |
 |
| Fill the mandatory forms and click the Release custodian(s) button. |  |
|
In the popup window, click the Yes, release custodian(s). |
 |
|
Under Add Microsoft 365 DataSources tab, you’ll get to see this information as shown: |
 |
|
You can see these changes on the Microsoft page as well. |
|
Microsoft 365 integration settings
|
Go to System settings → Microsoft 365 integration settings
|
 |
| Click Reset settings to reset the old settings. |  |
|
Click the Yes, reset my settings. |
 |