
Create a Summary Invoice
If you are adding a summary invoice, the page that opens after assigning a matter record to the invoice is the Summary Invoice page. Unlike the detailed Invoice, a summary invoice has the option to add fees, disbursements, and adjustments amounts.
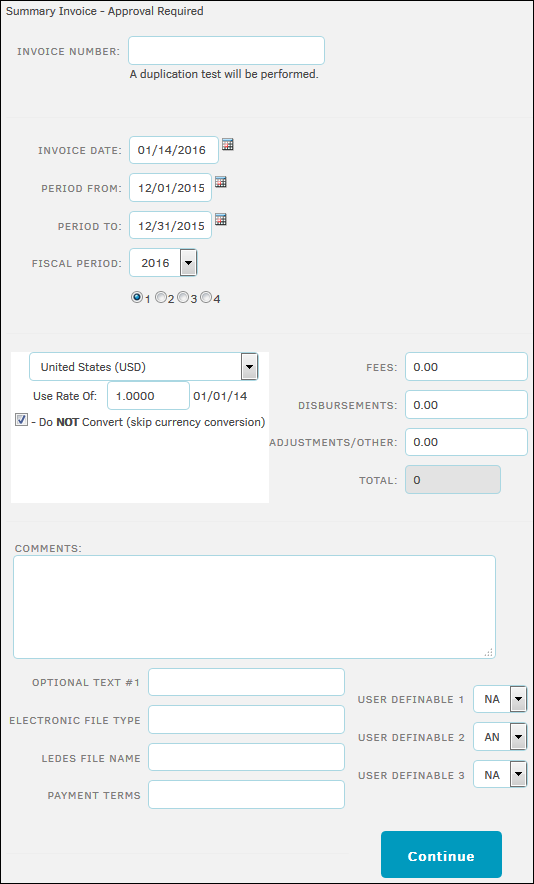
- Enter the Invoice Number into the text box. This number can be any combination of letters, numbers, and dashes, up to 35 characters.
- Type or select the
 icon to enter Invoice Date and billing period using the Period From and Period To fields. Review the default Fiscal Period and update if necessary.
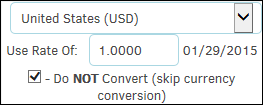
 - Review the currency information. The currency field defaults to the law firm’s currency, at the current exchange rate. If desired, select a different currency from the drop-down menu and enter the conversion rate in the Use Rate Of field. Check the Do NOT Convert box if you want to skip currency conversion.
- Enter the amount for "Fees", "Disbursements", and "Adjustments/Other". The total is calculated automatically.
- Enter "Optional Text", "Electronic File Type", and "LEDES File Name" in the designated fields.
- Fill out the optional user defined fields, add comments if desired. Indicate whether the invoice is paid by other parties using the drop-down lists.
- Click Continue.
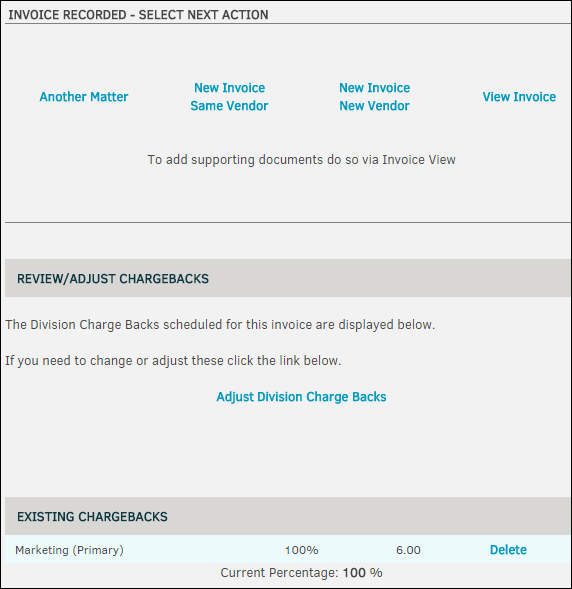
You now have several options:
- Add Another Matter to the same invoice
- Add New Invoice to the Same Vendor
- Add New Invoice to a New Vendor
- View the Invoice
- Adjust Division Charge Backs
- Delete existing Charge Backs
Adjust Division Chargebacks
By default, invoices are charged back to the matter’s current division/business unit, which displays in the Review/Adjust Charge Backs area. If you need to assign a different chargeback, you can do that before selecting one of the other options.
It is best to use this feature with pre-approved invoices, so that the reset chargeback functions available in several areas of the application do not overwrite your adjustment by resetting it to the matter’s division/business unit hierarchy.
If you see that the matter does not currently have a division/business unit assigned, update the matter, and then use one of the reset chargeback functions.
When you click the Adjust Division Chargebacks link, a selection area appears. Set the percentage amount and select the division and click Submit.
