Document Categories
The Document Categories hyperlink in the Application Administration | Document Bank sidebar allows site administrators and super users to set up categories/folders to organize electronic files (documents, images, etc.). This can simplify locating documents when needed, as some matter records may have a large number of various types of documents attached.
Edit Document Categories
- Click the name of the document category and type a new name in the "Edit Category Name" text box, then click Update.
- Under Subordinate Categories, click the colored switches to turn a second level category on
 or off
  .
. - Add a new subordinate category by typing a category name in the "Add New Subordinate Category" text box, then click Save.
- Edit existing subordinate categories by clicking on the name and typing into the text box that appears. Click Save.
- Click the
 icon to retire the category. Categories that have been retired can been displayed by clicking the Display Retired Categories at the bottom. Reactivate them by clicking Activate.
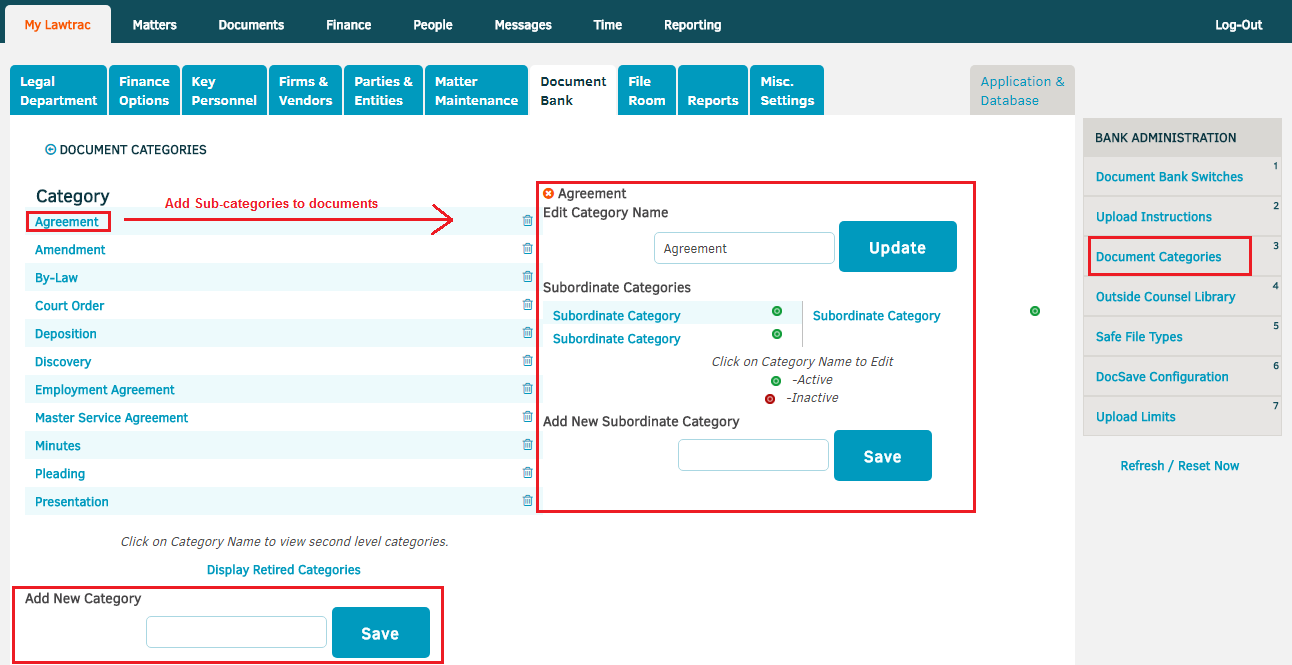
Add a Document Category
- Enter the new name in the "Add New Category" text box on the left.
- Click Save.
If you wish to include subordinate categories, you must make adjustments after it has been added.

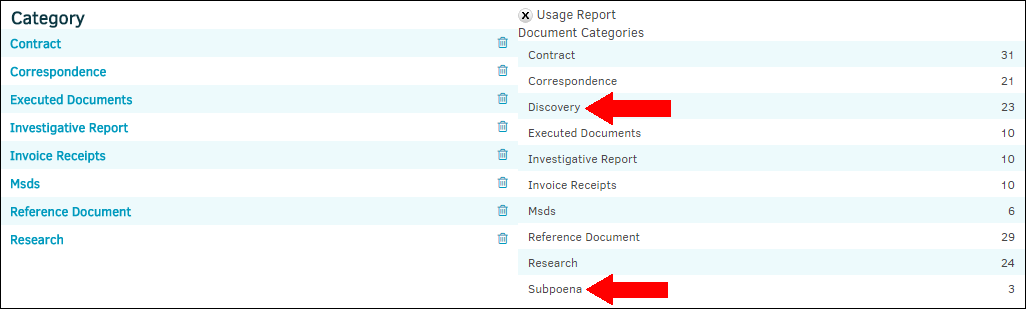
Usage Report
Click the Usage Report button to the right of the category list to view the number of documents in each category.
Note: If there are no documents within a category, the category can be deleted by clicking the  icon. Selecting the icon deletes the document categories from the Usage Report, AND deletes the category itself. Notice how Discovery and Subpoena show up in the Usage Report below, but not in the category list on the left side of the screen-shot. Additionally, clicking the
  icon in the regular category list deletes the category, but it still appears in the usage report if documents were uploaded to the category.