
Data Ribbon Buttons
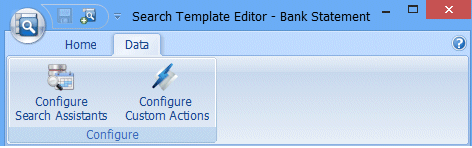
Note: Click on a button in the graphic above to go to the relevant topic.
Configure Search Assistants
Search Assistants can be created using various methods (SQL, C# and VB.) and can increase the searching capabilities.
Licence required: Search Assistants require a licence. If you do not see the options described here, contact support@mitratech.com about purchasing a licence.
About Search Assistants
Search Assistants provide a way to perform more advanced searches, using SQL, C# and VB scripts, to enhance the searching capabilities.
Note: C# executor, VB executor and SQL Search Assistants can enhance both the Search Request and the Search Results.
Search Assistants are resolved at search time and are therefore a solution for data that changes. A Search Assistant can consist of more than one script. The run order is determined by the order the scripts are displayed in the Currently Configured Search Assistants list.
The most straightforward Search Assistant is the Data Definition Name Search Assistant which is used to return the name of the Data Definition which was used to Index the data retrieved through a standard search.
Search Request: Example Usage
A Search Request script is used to enhance the search based on the value entered by the User
in the search field in Searching Client. Consider the following:
Company ABCD changes its name to WXYZ and its bank wants to create a Search Request script which states: When a Search User enters 'ABCD' in the search field Company Name, then search for the data for both company 'ABCD' AND 'WXYZ'.
Search Result: Example Usage
A Search Result script is used to enhance the search based on the value returned by Searching Client. Consider the following:
A Search Template contains Transaction fields based on bank accounts. A bank uses the Search Template to retrieve bank account information. Not all the bank account data is stored in DataStore®DSX – some of the information is stored in a database. A bank might want to create a search results script which states: When the search field Bank Account Type finds the value 'Mortgage' then return all the mortgage database information for the Company.
About Search Data Providers
Search Data Providers allow you to enhance search results with data extracted from an external view or table.
Note: Only users who are proficient in using SQL Server should attempt to configure Microsoft SQL Data Providers.
The executing Management Studio client makes the database connection directly – it does not proxy through the DataStoreDSX service. Therefore, the Windows user running the Management Studio client must have direct access to query the database server. This applies even when the user logs in to DataStoreDSX using a username and password. In addition, the DataStoreDSX service configuration for the database connection string must use a machine name / IP, etc., that is accessible from the Management Studio client machine – not localhost as this will cause the Management Studio client will try to connect to itself.
Microsoft SQL Data Provider Search Data Provider
Caution: Although it is possible to configure Search Assistants and Search Data Providers which use the same Search Template fields, it is not recommended unless you are sure it will produce the desired results. The order in which these are run is: Request Search Assistant, Search Data Provider and then Result Search Assistant.
- Click the Add Microsoft SQL Data Provider button.

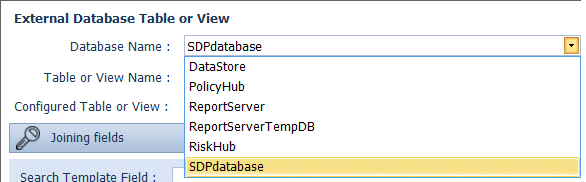
- Click the Refresh Databases button and then click the arrow to the left of it to display a drop-down list of available databases.

- Select the database which contains the required table or view.
- Select the required table or view from the drop-down list.
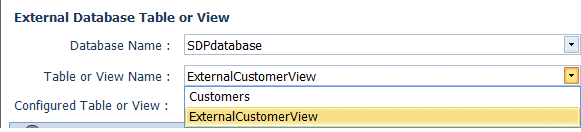
- The selected table or view is displayed beside Configured Table or View.

- When you click the Auto Map button, Management Studio searches for Search Assistant fields and puts them in the Joining fields section.

- A joining field provides the link between an Index field and a database column which is used to identify the extra data associated with that search result. The defined view defines the mapping between the database field and the Joining field’s External Column.
Note: If there is a search field name which includes ‘Id’ and it matches a column name, the search field and column name are mapped in the Joining fields. (Spaces in the names and capitalisation is ignored, so the search field Reference Number Id matches the column named ReferencenumberId.)
- Management Studio then searches for Search Assistant Fields and populates the Mapping Fields with those. The Mapped Fields are Search Assistant fields which take information from the configured table or view.
Note: Spaces in the names and capitalisation is ignored, so the search field Customer name matches the column named CustomerName
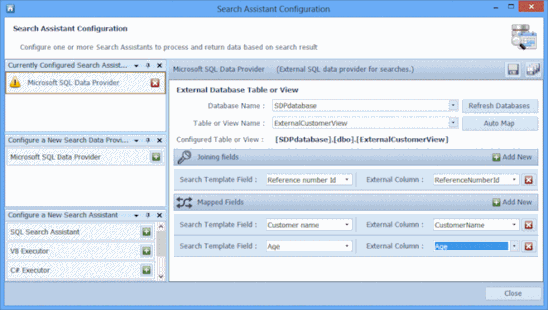
- Alternatively, click on the Add New button to add a new Joining field mapping. Click on the field to the right of Search Template Field and select the appropriate field from the drop-down list. Then click on the field to the right of External Column and select the appropriate column name from the drop-down list.
- Click on the Add New button to add a new Mapped Field. Click on the field to the right of Search Template Field and select the appropriate Search Assistant field from the drop- down list. Then click on the field to the right of External Column and select the appropriate column name from the drop-down list.
- Click the Save current Search Assistant button
 to save only this Search Assistant or the Save all Search Assistants button
  to save all the Search Assistants in the current Search Assistant Configuration pane.
Note: There is a one-to-one mapping between fields and columns. Once a search field has been mapped or joined once, it cannot be used again. The Search Assistant Configuration cannot be saved when a field is used more than once.
View Format
The configured View must follow the format described below. In summary:
- Every row must be identified by PK_idRow which can be either an Int or BigInt.
- Integers can be passed through.
- Floating point numbers need to be converted to “DECIMAL(28, 10)”
- DateTime fields must be split in the following way:
<ColumnName>
<ColumnName>_Date
<ColumnName>_Time
- Strings must be collated as Latin1_General_CI_AI.
- The database View must be on the same server as the DataStoreDSX database, but we advise it is in a different database.
Example:
‐‐ this is an example of a fronting view adapting an external table for
‐‐ use with a DataStore search
CREATE VIEW
vwCustomer
AS
SELECT
‐‐ every row must have a unique ID column with this name
ROW_NUMBER() OVER(ORDER BY c.[CustId]) AS [PK_idRow],
‐‐c.[CustId] AS [PK_idRow],
‐‐ integers can just pass through
c.[CustId],
‐‐ strings must be case‐insensitive
c.[CustName] COLLATE Latin1_General_CI_AI AS [CustName],
.[BankAcNo] COLLATE Latin1_General_CI_AI AS [BankAcNo],
c.[Address] COLLATE Latin1_General_CI_AI AS [Address],
‐‐ date/times must exist as‐is and must also be split into date and
‐‐ time components. ‘The split columns must be named with _Date and
‐‐ _Time suffixes
c.[Date] AS [Date],
‐‐ arithmetic to convert day part into YYYYMMDD
CONVERT(BIGINT, (10000 * DATEPART(YEAR, c.[Date])) +
(100 * DATEPART(MONTH, c.[Date])) +
DATEPART(DAY, c.[Date])) AS [Date_Date],
‐‐ arithmetic to convert time part into milliseconds since midnight
(3600000 * DATEPART(HOUR, c.[Date])) +
(60000 * DATEPART(MINUTE, c.[Date])) +
(1000 * DATEPART(SECOND, c.[Date])) +
DATEPART(MILLISECOND, c.[Date]) AS [Date_Time],
‐‐ decimals are represented using the same SQL data type as in the
‐‐ DataStore decimal value table
CONVERT(DECIMAL(28, 10), c.[Salary]) AS [Salary]
FROM
Customer c
Custom Search Assistants
Note: Custom Search Assistants are outside the scope of this Help. Mitratech can develop Custom Search Assistants based on customer requirements. Contact: support@mitratech.com to discuss your Custom Search Assistant needs.
Data Definition Name Search Assistant
- Click the Add Data Definition Name Search Assistant button.

- Enter a Name and if required, a Description (on the right) to make the new Data Definition Name Search Assistant easily identifiable.
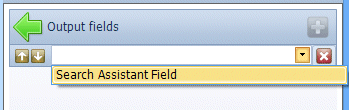
- Click the Add new Data Definition Name Search Assistant Output Field button.

- Select the Search Assistant from the drop-down list. This Search Assistant must be Text Search Assistant type.
- Click the Save current Search Assistant button
 to save only this Search Assistant or the Save all Search Assistants button
  to save all the Search Assistants in the current Search Assistant Configuration pane.
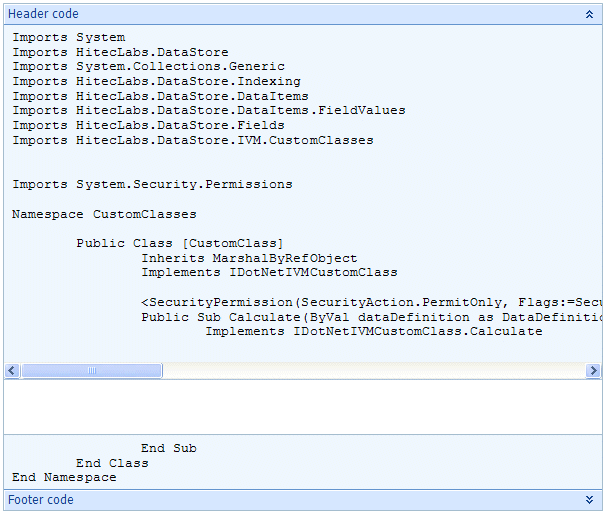
VB Executor Search Assistant
- Click the Add VB executor Search Assistant button.

- Enter a Name and if required, a Description (on the right) to make the new VB executor Search Assistant easily identifiable.
Request Query and Results Query Tabs
VB executor scripts can be configured for the query Request, for the Results of a query, or for both the query Request and the query Results. The configuration steps for the Request and the Results are the same. To learn more about Request and Result scripts, see “Search Request: Example Usage” and “Search Result: Example Usage”.
Configuration
Selecting the Configuration tab enables you to select the assemblies you want to use. Select an assembly from those listed and a drop-down list is displayed. Each item in the list has a tick box which is used to select the required assemblies.
Code
Selecting the Code tab enables you to enter the code to be used for the script. The Header code is shown at the top and the Footer code is shown at the bottom. Enter the required code in the area between Header and the Footer.
Test
Selecting the Test tab enables you to test the VB executor Search Assistant to ensure the code is correct. After you have written the code, click the Test Code button on the Test tab. Compile errors are listed in the Error list and the Compiler output is provided at the bottom of the pane. Click on the Code tab and correct any code errors and then click the Test Code button again.
Click the Save current Search Assistant button  to save only his Search Assistant or the Save all Search Assistants button
  to save all the Search Assistants in the current Search Assistant Configuration pane.
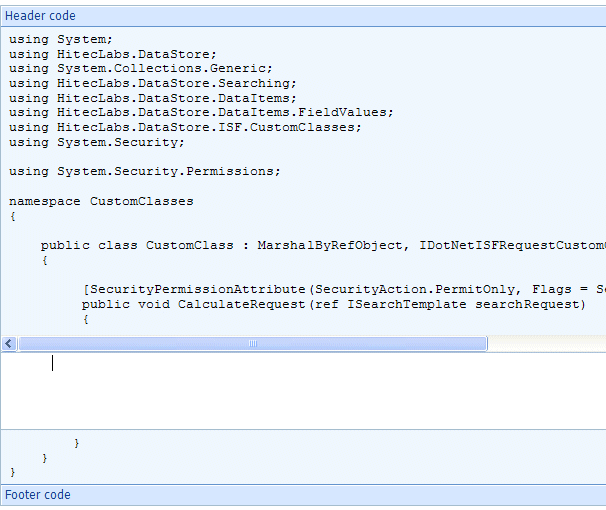
C# Executor Search Assistant
- Click the Add C# executor Search Assistant button.

- Enter a Name and if required, a Description (on the right) to make the new C# executor Search Assistant easily identifiable.
Request and Results Tabs
C# executor scripts can be configured for the query Request, for the Results of a query, or for both the query Request and the query Results. The configuration steps for the Request and the Results are the same. To learn more about Request and Result scripts, see “Search Request: Example Usage” and “Search Result: Example Usage”.
Configuration
Selecting the Configuration tab enables you to select the assemblies you want to use. Select an assembly from those listed and a drop-down list is displayed. Each item in the list has a tick box which is used to select the required assemblies.
Code
Selecting the Code tab enables you to enter the code to be used for the script. The Header code is shown at the top and the Footer code is shown at the bottom.
Enter the required code in the area between Header and the Footer.
![]()
Test
Selecting the Test tab enables you to test the C# executor Search Assistant to ensure the code is correct. After you have written the code, click the Test Code button on the Test tab. Compile errors are listed in the Error list and the Compiler output is provided at the bottom of the pane. Click on the Code tab and correct any code errors and then click the Test Code button again.
Click the Save current Search Assistant button  to save only this Search Assistant or the Save all Search Assistants button
  to save all the Search Assistants in the current Search Assistant Configuration pane.
SQL Search Assistant
- Click the Add SQL Search Assistant button.

- Enter a Name and if required, a Description (on the right) to make the new SQL Search Assistant easily identifiable.
- Select a Database provider from the drop-down list.
- Enter the required Connection string so that you can connect to the required database.
- Test the connection string by clicking the Test connection button. Status messages are displayed in the text box showing you the status of the connection attempt. If the connection fails, correct the Connection string and test it again.
- When part of a query uses a field reference that is missing, that part of the query is ignored. If, instead, you want the query to use <NULL> for the part of the query with the missing field reference, select the Use nulls for missing parameters option.
Request Query and Result Query Tabs
SQL queries can be configured to act on the search Request, for the search Results, or for both the search Request and the search Results. The configuration steps for the Request and the Results are the same. To learn more about Request and Result scripts, see “Search Request: Example Usage” and “Search Result: Example Usage”.
- Enter the SQL Query (see Example: SQL Query below) in the area provided, using the Insert field reference drop-down list to select the search field to use, as required.
- Click the Save current Search Assistant button
 to save only this Search Assistant or the Save all Search Assistants button
  to save all the Search Assistants in the current Search Assistant Configuration pane.
Example: SQL Query

In the above example:
ename is the database field name
<ename> is the index field name being mapped to ename. (Any value inside <> characters is an index field.)
emp is the table name we are looking in
empno is the field we are looking in, using the field value stored in the index field <empno>
Script Run Order
The run order of the Scripts is determined by the order in which they are listed under Currently Configured Search Assistants. The item at the top of the list is executed first. To change the order in which the scripts are executed, use the up and down arrows beside each script to move them to the desired position.
Deleting a Script
A script can be deleted by clicking the red delete button  next to the script in the Currently Configured Search Assistants list. You will be asked to confirm that you want to delete the selected script. Click Yes to delete the script or No to cancel the deletion.
Configure Custom Actions
It is possible to configure custom actions which are available based on the search results returned using the selected Search Template.
Click the Configure Custom Actions button to open the Custom Action Configuration window.
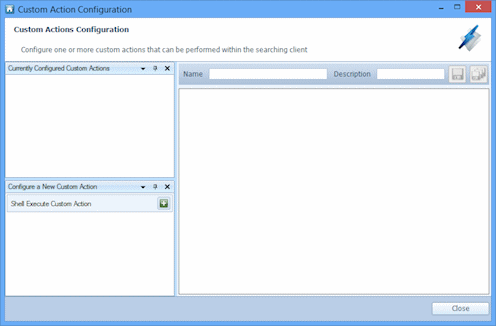
The options in this window are described in Table 96.
Table 96. Terminology: Search Template Editor – Custom Action Configuration
|
Term |
Meaning |
||
|---|---|---|---|
|
Currently Configured Custom Actions |
The Customs Actions which are currently configured for the Search Template are listed. Use the up and down arrows to reorder the Custom Actions. The order of the Custom Actions control the order the buttons are displayed in Searching Client, with the Custom Action which is at the top of the list appearing as the left-most Custom Action button and the Custom Action appearing last on the list appearing as the right-most Custom Action button. Click the red delete button to delete the Custom Action. |
||
|
Configure a New Custom Action |
The available Custom Actions are listed. Currently, Shell Execute Custom Action is available. Click the green add button to add a Custom Action. |
||
|
Name |
Enter a name for the Custom Action. This is used (with the Description) to create the Tooltip which is displayed when the Searching Client user hovers the mouse pointer over the button.
|
||
|
Description |
Enter a description for the Custom Action. This is used (with the Name) to create the Tooltip which is displayed when the Searching Client user hovers the mouse pointer over the button. |
||
|
|
Save the currently selected Custom Action. |
||
|
|
Save all the listed Custom Actions. |
||
|
Application |
Select Application if you want to open an application which will act on one or more parameters returned from a search. |
||
|
URL |
Select URL if you want to specify a web page which can be passed with one or more parameters returned from a search. |
||
|
Icon |
This is the graphic used on the button for the Custom Action. The default icon can be used. However, if you have more than one Custom Action button, it will make it clearer to the Searching Client user if the buttons are assigned unique icons. To change the icon, click Browse and navigate to the folder containing the image you want to use. Select the image and click Open to use the selected image.
|
||
|
File Name |
Click Browse and navigate to the application you want to open.
|
||
|
Args Format |
Enter the string and arguments indexes which will be passed to the application. For example, for the Viewing Client this would be -UDI:{0} where Argument index 0 is mapped to the UDI. (See Data, below).
|
||
|
URL |
Enter the URL and argument indexes you want to open. For example, to open Google Maps with a returned postcode, this would be Where Argument index 0 is mapped to the Search Field Postcode. (See Data, below). |
||
|
Add New |
Click the Add New button to define a new argument mapping. |
||
|
Argument Index |
The first Argument Index is numbered 0. If more Arguments are added, they are numbered consecutively. |
||
|
Data |
Click on the arrow in the Data field to display the drop-down list of the Search Fields in this Search Template, the UDI and the VIDI. Select the Search Field, UDI or VIDI whose value you want to be stored in the Argument Index. |
||
|
Mandatory |
When selected, the button is highlighted. The button for the configured Custom Action is displayed in Searching Client only when the search returns a value for the mapped field. When Mandatory is not selected, the Custom Action button is always available, regardless of whether the search returned a value for the mapped Search Field. |
||
|
|
Delete the mapping between the Argument and the Search Field, UDI or VIDI. |


