Using a Document Route
Only documents which have been stored after the Search Template (containing the Document Route) was saved can use automatic transitions.
Therefore, to use the Document Route you have just created, you must store some new documents using the Data Definition associated with the Document Route’s Search Template.
Once you have imported and indexed some documents using the appropriate Data Definition, you can open Searching Client and open the Search Template which you configured with a Document Route.
- Perform a search using the Search Template containing the Document Route.
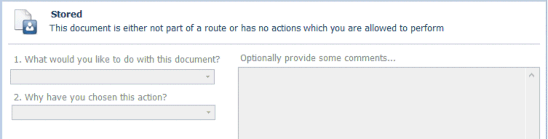
Note: If, when you open the Search Template containing the new Document Route, you see the following for all the search results, it might be because you have not stored any documents since the Document Route was last edited.
Store some new documents using the Data Definition associated with the Search Template and perform a new search using the Document Route’s Search Template.
This message is also displayed when you are logged in to Searching Client using a User account which is not a member of the Role (or Group) which has been given the authority to action the document in its current document state. Ensure your User account is a member of the correct Groups and Roles.
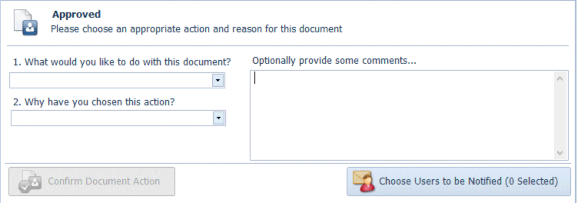
Select a search result. The Document Routing panels shows the state the document is currently in. In this example, it is in the state 500 or more, but under 10,000. It was automatically transitioned to this state because, in this example, the amount is 600.
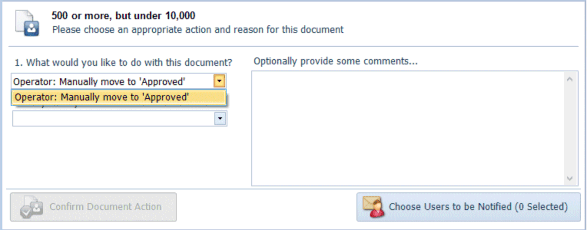
- Select an option from the What would you like to do with this document? drop-down list. In this example, the only option is Operator: Manually move to ‘Approved’. (This is the transition name configured in the Search Template.)
- Next, select a reason from the Why have you chosen this action? drop-down list. In this example, the only option is Operators approve amounts of 500 or more, but under 10,000. (This is the reason configured for the transition in the Search Template. If several reasons were configured, then you will see several options in this list.)
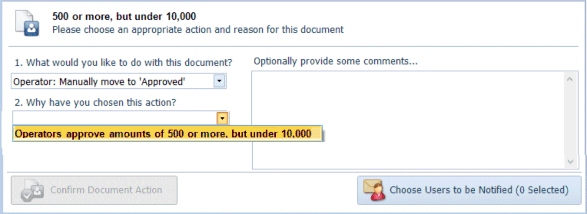
Note: When only one reason is available, it is selected by default.
- You can also enter comments in the Optionally provide some comments... text box, if required.
Note: The first 4000 characters of a comment are stored.
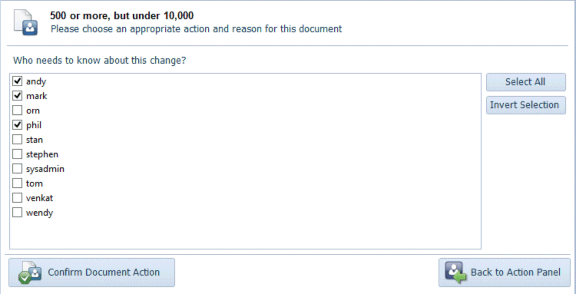
- Click the Choose Users to Notify button to select one or more Users belonging to the configured Members for the next transition (see “Create Manual Transitions with Members”) to be notified that the document is in a state which they can action. Select the Users you want to receive an email.
- Click the Back to Action Panel button to return to the panel which enables you to select a transition and a reason, or click the Confirm Document Action button to save the document transition.
- Click the Confirm Document Action button to complete the document transition. If the Confirm Document Action button is not available, make sure you have selected an option from the What would you like to do with this document? drop-down list and an option from the Why have you chosen this action? drop-down list.
- If you now perform a search with this Search Template and look at the same search result, the Document State will show it is in the Approved state.