
Create Groups
Learn how to create groups in Tree View.
- Create the Groups you need. Select Users and Groups in the tree view.
- Click on the New Group button.

Note: You must have Permissions configured to allow you to Manage Users & Groups. If your Permissions are not set to allow you to Manage Users & Groups, Users and Groups will not be displayed in the tree view.
- Enter the details on the General page.
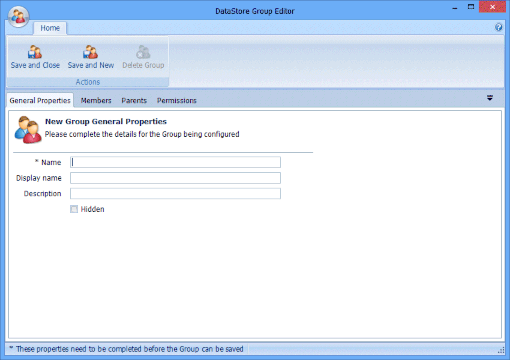
- Enter a Name for the new Group. This field is mandatory – you will be unable to save the new Group until this field has been completed.
- Complete the Display name and Description fields if required.
- To configure explicit permissions for the Group, use the Permissions tab. Additionally, you may make the Group a member of other Groups and give the Group one or more Roles to inherit permissions that you have already set up, as in the example above.
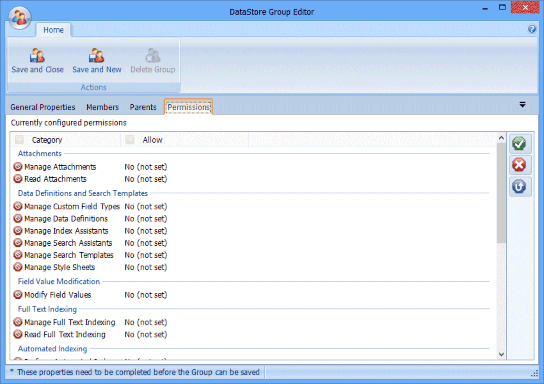
- Select the Categories you want to allow and click the Allow button.

- Select the Categories you want to deny and click the Deny button. See Table 148, “Terminology: Group Permissions” for more information.

- If you want to change a setting from Allow or Deny back to No (not set), select the Category and then click the Inherit button.

- Repeat for all the Groups you want to create.