
Data Encryption: Depot Data at Rest
Please note that encryption is a chargeable DataStoreDSX module.
Introduction
Key Hierarchy
Within DataStoreDSX, encryption occurs are the file level. Files stored on an encryption-enabled depot are encrypted using an AES256 symmetric algorithm. Each file is protected by its own, unique symmetric encryption key which is controlled by the DataStoreDSX internal key management system.
To increase security, each file key is protected by a depot level encryption key. This key is unique to an individual depot and takes the form of an RSA asymmetric key which is also controlled by the internal key management system.
Finally, a system level master RSA asymmetric key is responsible for providing protection to all of available depot keys. This creates a robust and secure hierarchy of encryption keys which protects the stored data and is completely transparent to the end user.

Essential Backups
The system level master key is a crucial part of the process in that it relates to an essential Windows certificate that will be applied to the server machine automatically when it is generated.
It is essential that the current master key is backed up at all times. When a new one is generated from with the Management Studio key management screen, the user is informed of this and also taken to the backup dialog to perform the backup. It is important to note that if this key is not backed up and a system failure occurs on the server, there is no way for the system to gain access to the encrypted files. No backdoor approach is available as this would weaken the protection.
Disaster Recovery
An export and import feature exists within the key management screen. Should disaster-recovery be required, assuming the DataStoreDSX database and depot storage areas have been restored, importing the exported master key (.pfx file) into the restored system will automatically create a new master key and associate it with the existing data.
All existing depot and file level keys will be automatically recovered. When working with a customer who is using encryption for the first time, it is prudent to walk through disaster recovery with them. It would be a wise exercise for them to walk through and test their disaster recovery process before going live with encryption.
Applying Encryption
Creating Master Key
- On a fresh DataStoreDSX system or one that has been upgraded to version 4.1 or above, encryption will become available, providing the system is licensed accordingly.
- To start, at least one user must be permitted to be in control of encryption key management:

- Two permissions exist:
- one to allow the viewing of the key management screen;
- one to actually make changes
- To maintain security, users with management permissions should be selected carefully as they will be able to access sensitive areas of the application that allow for the backup of master keys and generations of new ones.
- Once a permitted user has logged into Management Studio, the Key Management section will be available;;

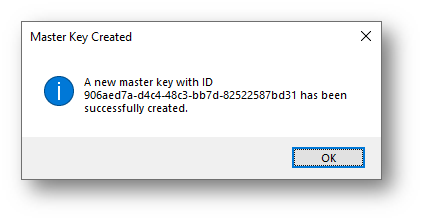
- Within the Key Management screen a new master key must be generated before DataStoreDSX will start encrypting files. This is done using the New Master Key button:

- If successful, the ID of the new key is returned:
- This key should now be set as the current master key that is protecting the system using the Set As Current option:

- When activating this master key, the user is warned about the dangers of not backing up the key and given the option to back it immediately:

- It is strongly advised to answer ‘Yes’ and perform the backup before proceeding:

Creating an Encrypted Depot
- Now that a master key has been created, activated and backed up, the system is ready for the next step – the creation of an encrypted depot.
- This depot is created in the same way as a standard depot, but a new ‘Type’ property exists for the depot that determines whether data will be encrypted when it is stored on the depot or not:

- When successfully created, any data that is now stored on that depot will be encrypted.
- Behind the scenes, a new asymmetric encryption will have been created for the new depot and will now be visible in the key management screen. Expanding the row should give further information regarding the depot it protects:

Data Migration
- On existing DataStoreDSX systems, existing data will have to be migrated to new, encrypted depots for it to be encrypted.
- To do this, firstly, a user will need to be granted permission to perform data migration:

Note: It is important to also choose this user with care. A user with data migration permission will potentially be able to migrate data from encrypted depots to unencrypted ones to allow them to be accessed. It is advisable to treat this user selection with the same care as the Manage Data Encryption permission.
- Once permitted, the Data Migration section will be available withing the Storage section of Management Studio:

- Within this screen, choose the source device and depot that contains the data to be migrated:

Note: It is also possible to move just data for a specific Data Definition.
- Once the source data options are complete, choose the destination device and encrypted depot onto which the data is to be moved.
- Choosing Start Migration will now activate the server-side migration.
Migration Progress
- As this is potentially a long running server-side operation, progress can be updated by clicking Refresh for the bottom view. As data is moved across it will become immediately available for searching. Should a migration be interrupted, all data will all still be accessible by the end user, only some of it will be encrypted and some will still be on the original depot. The system will automatically pick up this half complete migration and carry on from where it was interrupted. This migration progresses in the background and users can continue to use the system during this time.
Encryption Key Expiry
Configuration
- Each level of encryption key (Master, Depot, File) has a default lifespan. This can be altered by configuration values in the DataStore Service configuration file:

- The LifeSpanType dictates how the values are interpreted:
- 0 indicates days
- 1 indicates months
- 2 represents years.
- The other settings speak for themselves and represent the lifespan for the different types of key.
- It is important to note that expired keys are still effectively valid. All data will still be available, the expiry of a key is informational and identifies that security standards may be compromised if they are not updated.
- If a master key approaches expiry, anyone logging into Management Studio will be informed of the approaching expiry threshold and inform the administrator that it is time to generate a new system master key. They should then create a new one, activate it and perform a backup.
- Depot and File encryption key expiry is handled by the system via scheduled maintenance:

Note: On systems that are using encryption for the first time, it is important to ensure these jobs are enabled in order for key ‘rollover’ to be performed.
Roll Depot Wrapper Keys Maintenance Job
- When the Roll depot Wrapper Keys maintenance job is performed, it first checks if any depot keys have expired.
- If they have, a new depot encryption key is created and associated with the appropriate depot.
- All the files on the depot then have their keys updated, so they are protected by the new depot key.
- If this process takes longer than the available time in the maintenance window, the new depot key is still the active key used to protect any new file keys for the depot, but the old one still exists and is used to protect the file keys that are yet to be updated.
- The next time the maintenance job is run, the remaining keys are updated and the old depot key removed from the system.
Roll File Encryption Keys Maintenance Job
- When the Roll File Encryption Keys maintenance job is performed, any files that require updating are identified and then individually processed.
- To do this, a new key is generated, a copy of the file is decrypted using the old key, encrypted with the new key and moved back to storage.
- At this point, Maintenance Mode is enforced so the system can be assured that no users are currently searching or indexing.
- As this may be a long-running operation, any files that are not processed as part of a maintenance run will be picked up and processed during the next available maintenance run.