
Create a Shadow Invoice
Step-by-step guide with screenshots detailing how to create a shadow invoice in Collaborati.
Shadow Invoices: This invoice type is used when the client will not be paying based on the actual work performed, but still needs to see a detailed invoice of actual work performed (for analytical purposes, not for payment). Reference number can be used optionally with a shadow invoice if that shadow invoice refers to a separate, standard invoice.
To start creating the shadow invoice:
- Hover over the Invoices tab
- Click on the Create Invoice sub-tab
Fill in pertinent information. Select Office from "Bill Invoice as" drop down list. Most clients require the Invoice Period. Invoice Date must be after Invoice Period. It is recommended to leave the Invoice Total at $0.00 as Collaborati will automatically add the amount. The Invoice Type is “Shadow Invoice”. Place a brief description of the invoice in the Description box. You may also want to enter the Reference Number.
1. HEADER
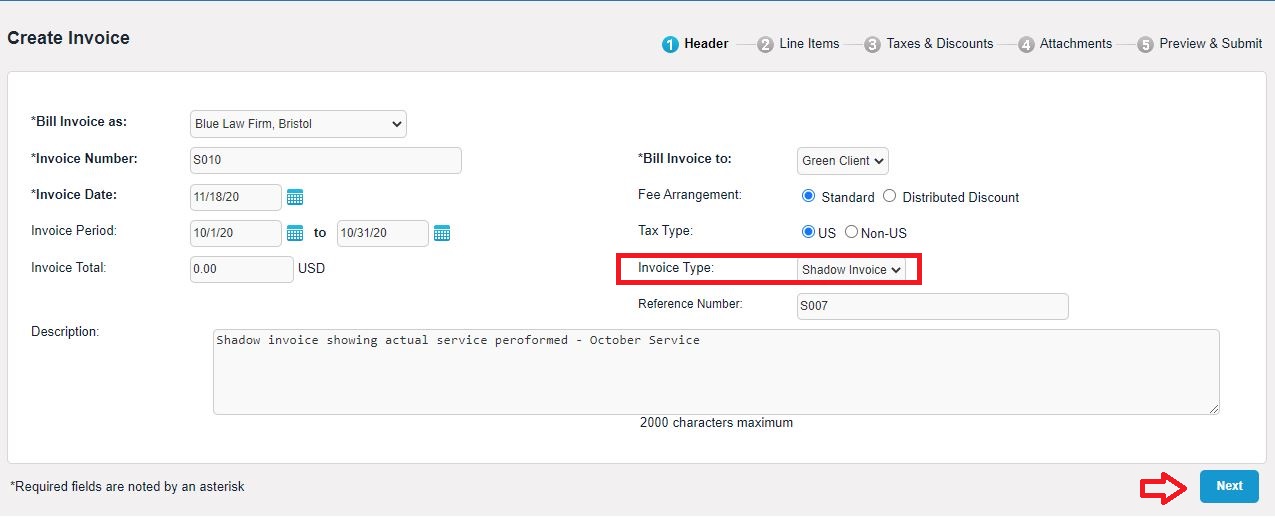
- Click Next button
2. LINE ITEMS: Fee or Expense
Select your Matter from the drop-down list. Item Type is Fee. TK is the timekeeper. Fee is the code from your Task Codes list. Activity is the code from your Activity Codes list. Rate is the hourly rate of the timekeeper used (authorized by the client). Hours is the amount of time the timekeeper worked on the matter. A description of the fee should be typed into the Description box.
For Expenses, you must select the proper Expense code. Item Type is Exp.
- Click on the Add Item button to finish the line item fee or expense
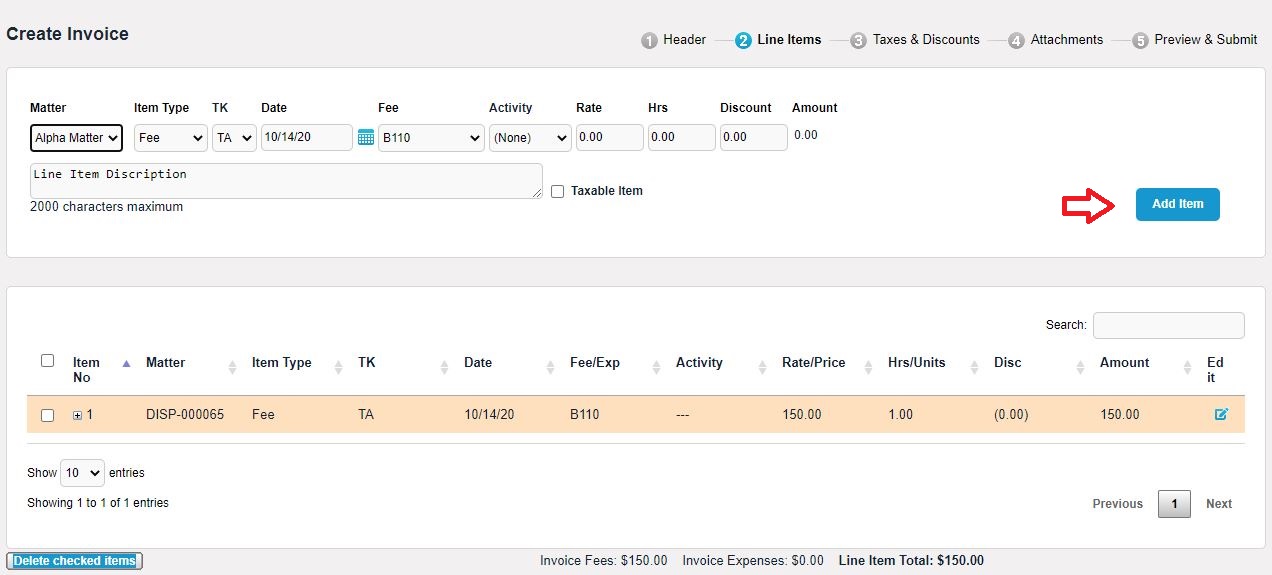
- Click Next button
3. TAXES AND DISCOUNTS
If you are applying discounts to the invoice, here is where you apply your discount by % on Fees and / or Expenses.
Taxes are applied at the % to the Taxable items.
- Click Next button
4. ATTACHMENTS
Use the Browse button to search for the document that you wish to attach.
After you have found the document, click on the Attach Files button.
The attached document will appear in the attachment section.
- Click Next button
5. PREVIEW: Completed Invoice
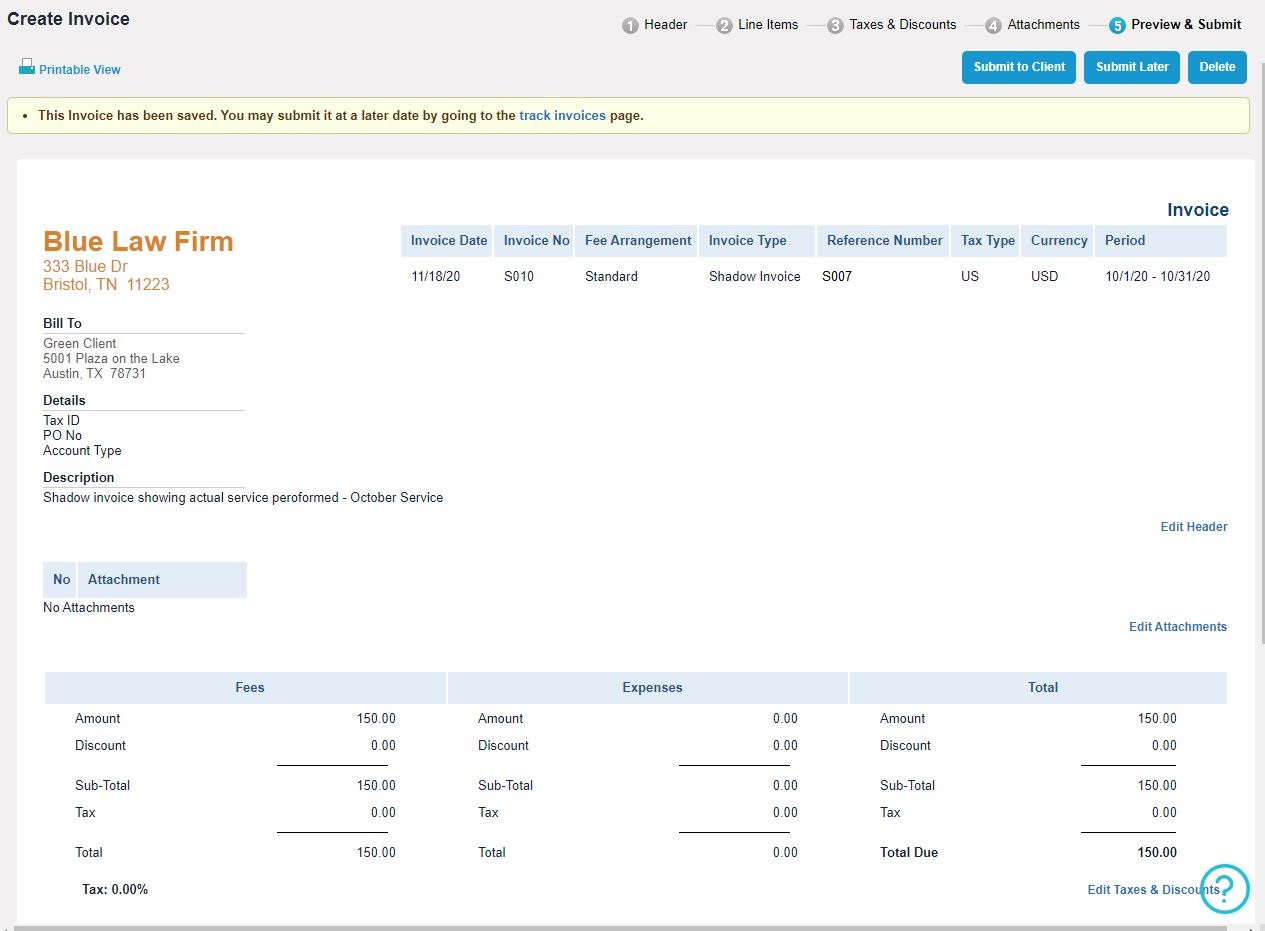
Shadow Invoice is now ready to submit to the client.
Note: Please confirm with your client if they accept Shadow Invoices. Some clients do not accept this invoice type.