
Roles and Role Permissions
Introduction
CMO best practices allow users to be assigned certain/multiple roles and give role permission(s) to carry out certain/multiple task(s) assigned to them. Assigning roles and providing role permissions to the users is managed by CMO application Administrator (Admin) only.
Note: Best Practice has the following roles pre-configured, however, new roles can be added.
- End User
- Contractor
- Reporter
- Supervisor
- General Manager
- Operational Manager
- HSEC Manager
- Client Administrator
- Employee
- Stakeholder
- RTW Coordinator
- Risk Manager
- Occupational Health Nurse
- Environmental Manager
- Permit to Work End User
Create New Role
A new role is created and granted role permission(s). A new role can also be created by cloning an already-created role. For information on how to create a new role by cloning, see the section - View, Edit & Clone Created Role.
Note: To assign a newly created role(s) to a user, see the section - Assign Roles to Users.
Steps to create a new role
- Login CMO application as an Admin user and navigate to Admin > Roles and click New.
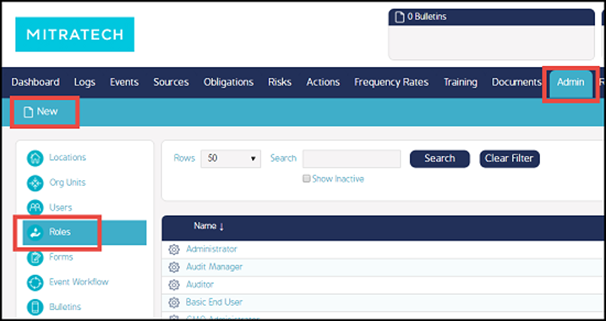
2. A New Role pop-up screen appears.
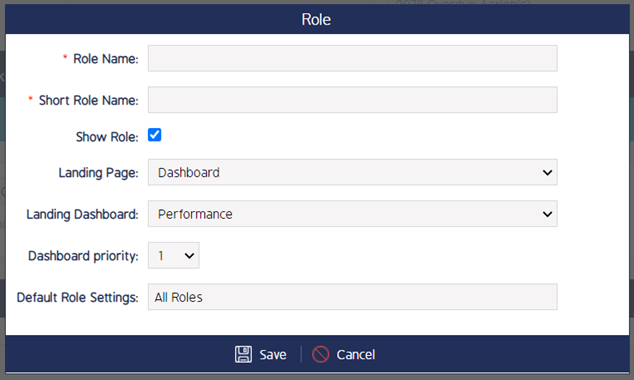
3. Fill in the required information and any additional details associated with this role and click Save.
|
S. No |
Fields |
Description |
|
1 |
Role Name |
Users can define the name of the role |
|
2 |
Short Role Name |
Short name of the role |
|
3 |
Show Role |
When the show role box is checked, the created role is listed in the Roles screen. |
|
4 |
Landing Page |
The user can choose on which page to land once logged in. The list of landing pages is as follows.
|
|
5 |
Landing Dashboard |
The user can have multiple roles assigned and each role has different dashboard permissions. The user can choose which dashboard to land on once logged in. |
|
6 |
Dashboard Priority |
The list of dashboards is visible to the user according to the priority given to the dashboards. |
|
7 |
Default Role Settings |
The user can choose the default role setting (All Roles) and already existing roles available in the CMO application. |
4. The user will be redirected to the Role Permissions page.
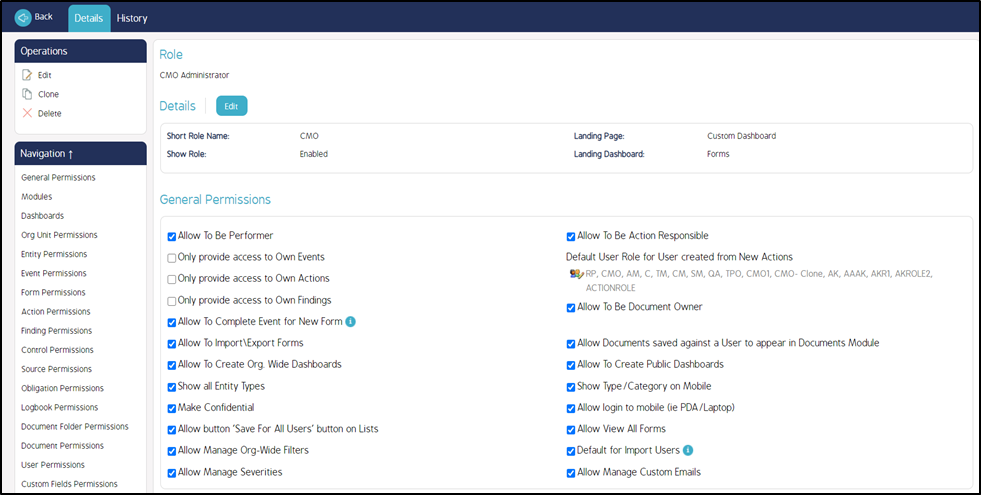
5. The Admin can grant role permissions to the following permissions list available in the CMO application just by enabling the checkboxes in each permission list. This would map role permissions to the role.

6. Click the CMO Back button to exit this screen or to go to the previous page.

Note:
- Each role in the CMO application is granted different role permissions.
- A user may have one role or multiple (no limit) roles assigned. The user will have access to all the role permissions granted to him irrespective of a number of roles assigned.
E.g.: If one role has permission granted to Obligation permissions and other role to Event permissions, the user has both Obligation and Event permissions.
View, Edit & Clone Created Role
A role which is already created can be viewed, edited and cloned.
Steps to View a Role
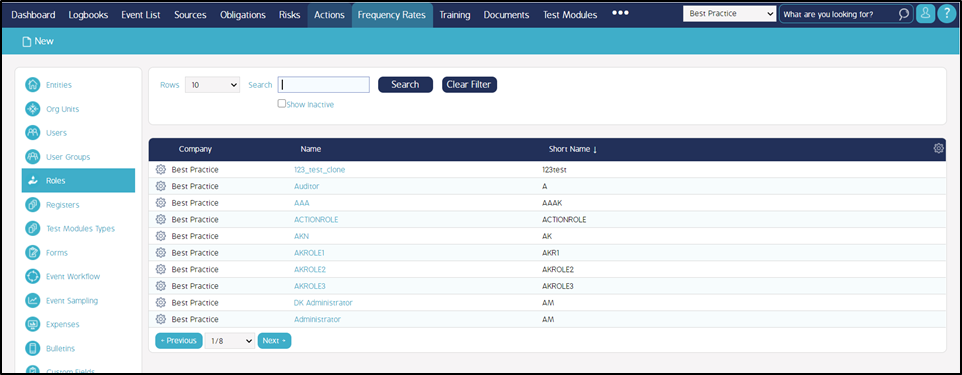
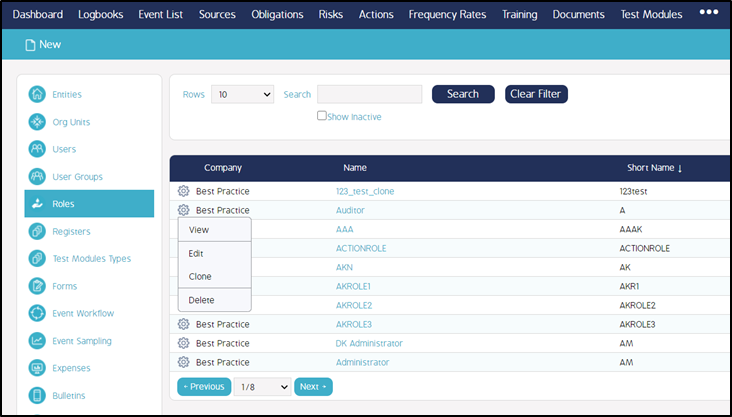
- Login CMO application as an Admin user and navigate to Admin > Roles.
- All the roles created can be viewed on the roles page as seen in the following image.
Steps to Edit a Role
The edit functionality is used to change the settings/configurations already made to the existing role.
- Login CMO application as an Admin user and navigate to Admin > Roles.
- Choose the desired role from the existing roles displayed on the roles page or search using the search field.

3. Click on the cog wheel of the desired role and choose edit.
4. A Role pop-up screen appears and the user can make desired changes. Click Save to exit.
Steps to Clone a Role
- Click on the cog wheel of the desired role and choose clone.
- A Role pop-up screen appears and the user can create a new role just by providing the role name. Click Save to exit.
Assign Roles to Users
According to the nature of the role, a user gets access to the CMO application. The CMO Admin assigns a role to a new user by creating a user profile and mapping the role.
Steps to Create a User and Map Roles
- Login CMO application as an Admin user and navigate to Admin > Users and click New.
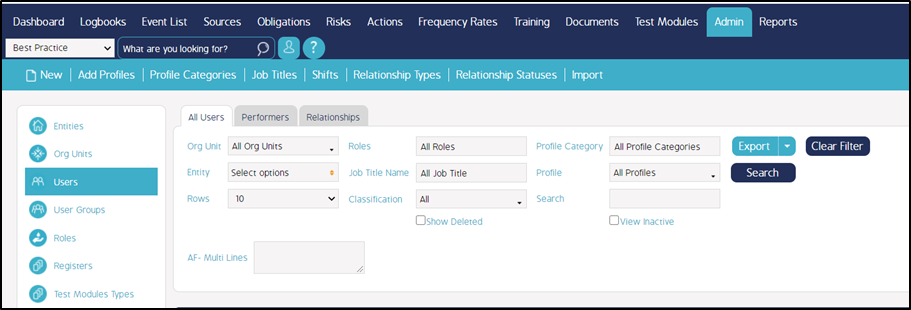
2. A New User pop-up window appears.
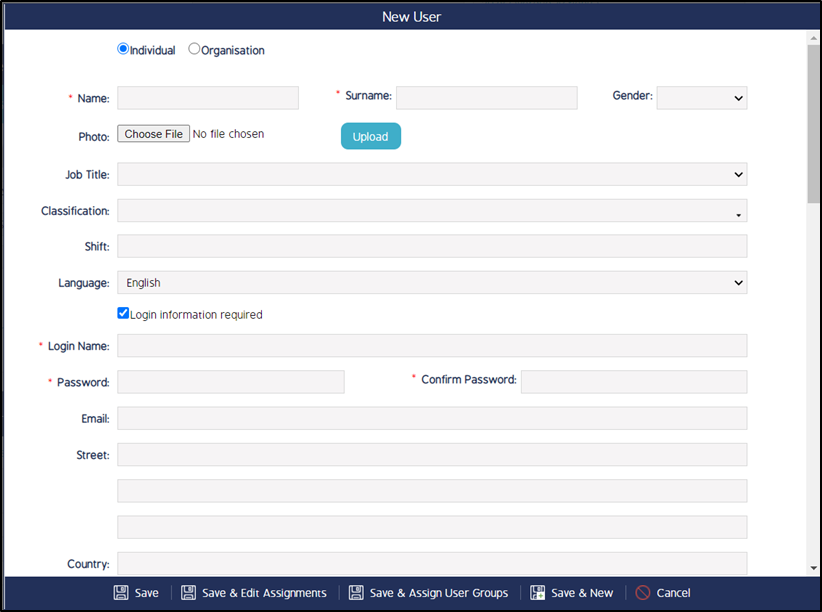
3. Fill in all mandatory fields in the New User pop-up screen. Scroll down to the Roles field to select the desired roles to map to the user by checking in the check box. All the permissions granted to the role are mapped to the user.
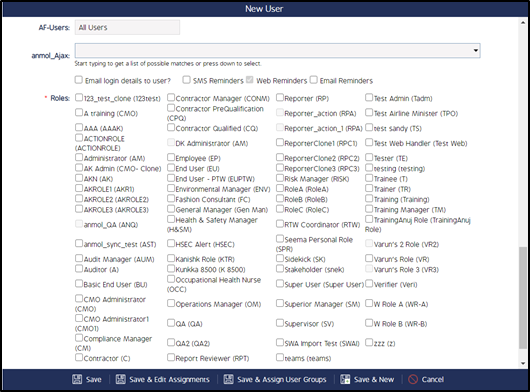
Note: The list of the roles in the aforementioned New User pop-up screen are the roles created which are available in the CMO application.
4. Click Save to exit from the pop-up screen.
Note: A user can only know about the permissions he was granted when the Admin and Roles module is enabled on the permission page under Modules.
Grant Role Permissions to Forms, Workflows, Event Status and Modules
Forms
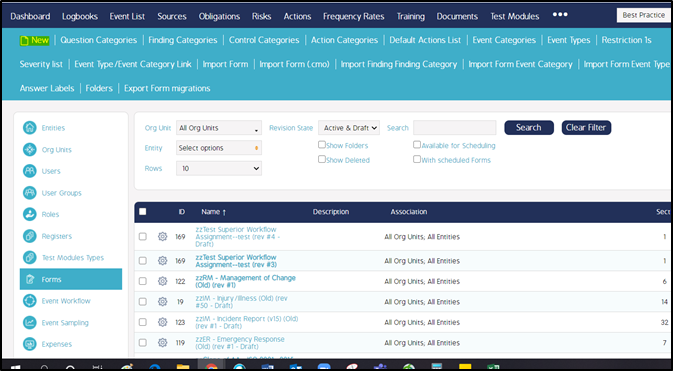
- Log in as a user and navigate to Admin > Forms.
- Click New to create a new Form.
3. A New Form pop-up screen appears. Click the Permissions to Complete Event and the Access Permissions links in the pop-up screen to select the roles.

4. Fill in the required fields to complete creating a new form and click Save to exit.
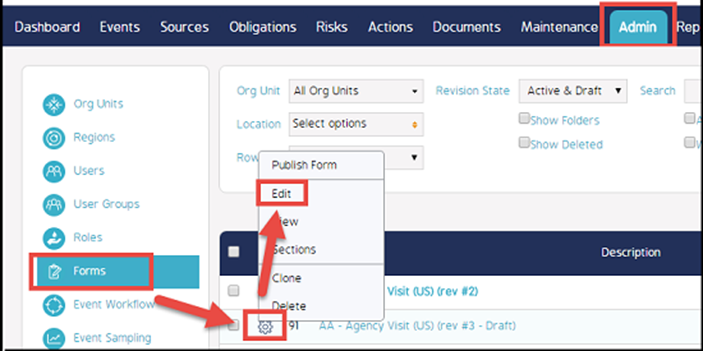
5. The user can also grant role permission through Edit functionality to already existing Forms.
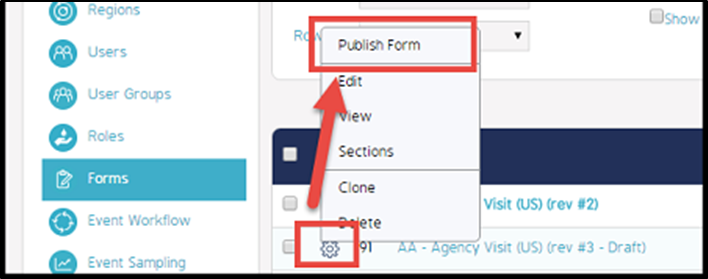
6. Find the Form you want to edit, click the cog wheel, and select Edit.
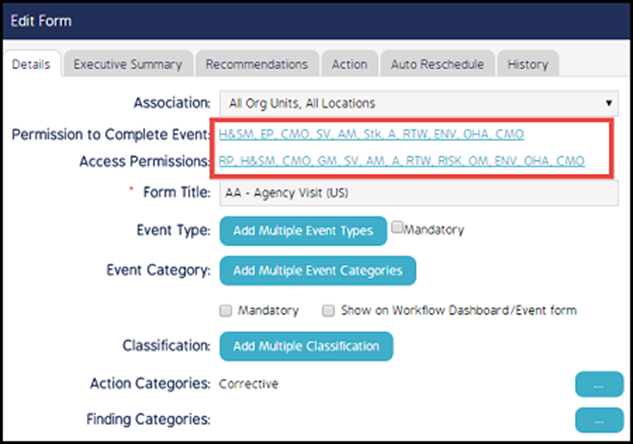
7. Click the Permission to Complete Event and the Access Permissions links from the Edit Form pop-up screen.
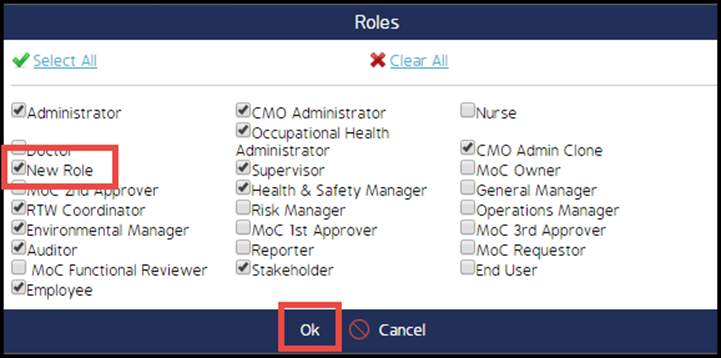
8. Select your Role from the Role pop-up screen and click Ok.
9. Navigate back to the Form, click the cog wheel, and select Publish Form.
Workflows
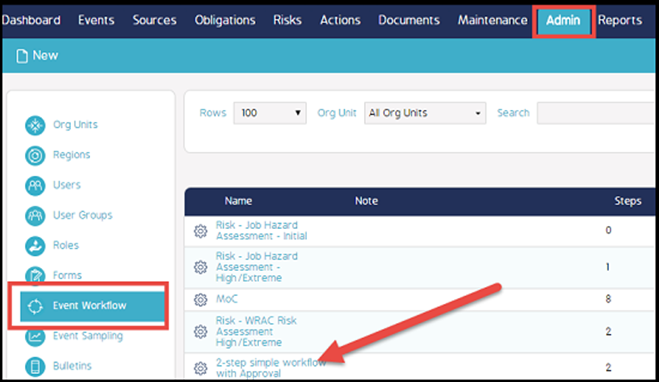
- Log in as a user, navigate to the Admin module, and click Event Workflow.
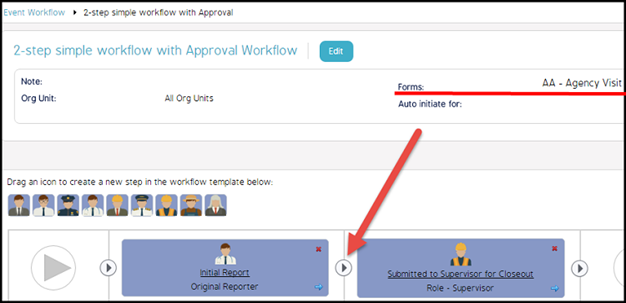
- Open the Workflow you want to edit by clicking the Workflow name.
3. Take note of the Form your Workflow is using and click the transition button found between steps.
Note: Any configuration at the transition point will apply to the step BEFORE it.
4. Click the Event Permissions Edit button in the Edit Stage pop-up screen.
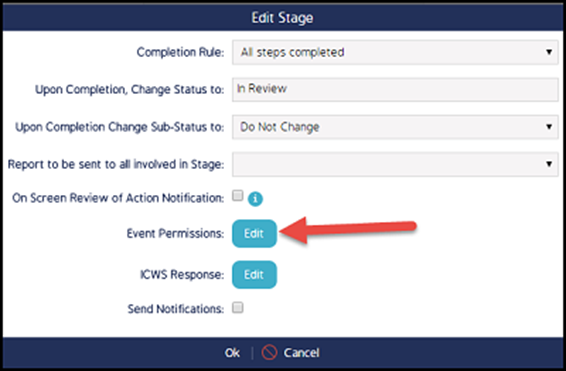
5. Select your Workflow Form from the Form dropdown in the Event Permission pop-up screen.
6. Adjust the edit and view permissions by clicking the respective button for each category.
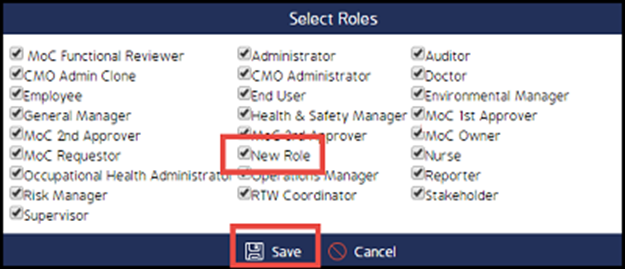
Once the Select Roles pop-up screen appears, check/uncheck the box next to the Role you want to grant/revoke permissions.
Event Status
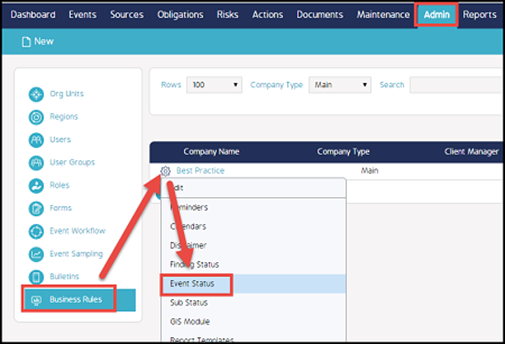
- Log in as a user, navigate to the Admin module and select Business Rules.
- Click the cog wheel and select Event Status.
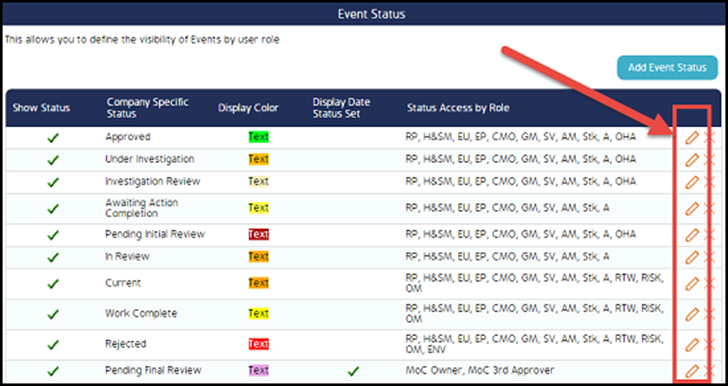
3. From the Event Status screen, click the edit (pencil) icon for each status you want the Role to have access to. The Status screen will appear.
4. From the Status Access by Role dropdown list check-in the checkboxes next to the Roles you want this status to be available for. Click the cancel button (X) to hide the dropdown list.
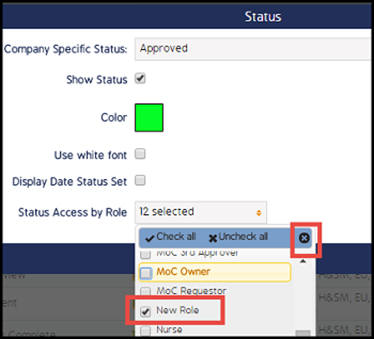
5. Click Save.
Note: If a Role is not added to an Event Status then the users assigned to that Role will not have access to the Event.
Sources
- Log in as a user, navigate to the Sources module and click New.

2. A new pop-up screen New Source appears.
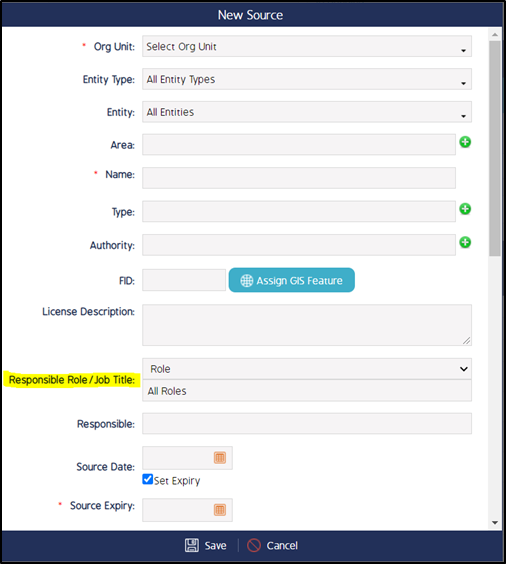
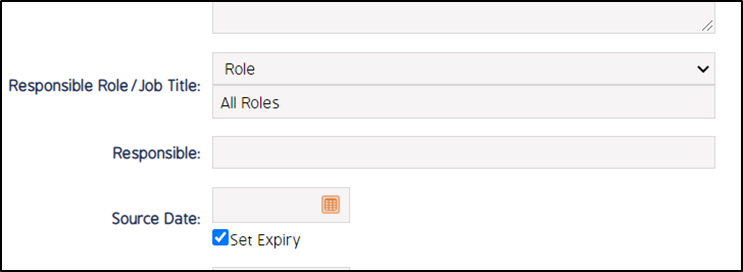
3. Enter all the details in the required fields in the Sources screen and select the responsible role to assign to the sources from the Responsible Role/Job Title field.
4. According to the Responsible Role/Job Title selected, the list of people will be available in the Responsible dropdown field. Select a person with an already defined role from the list to assign the Source.
5. Click Save and exit from the Sources screen.
6. The newly created Source will be populated in the Source list screen.
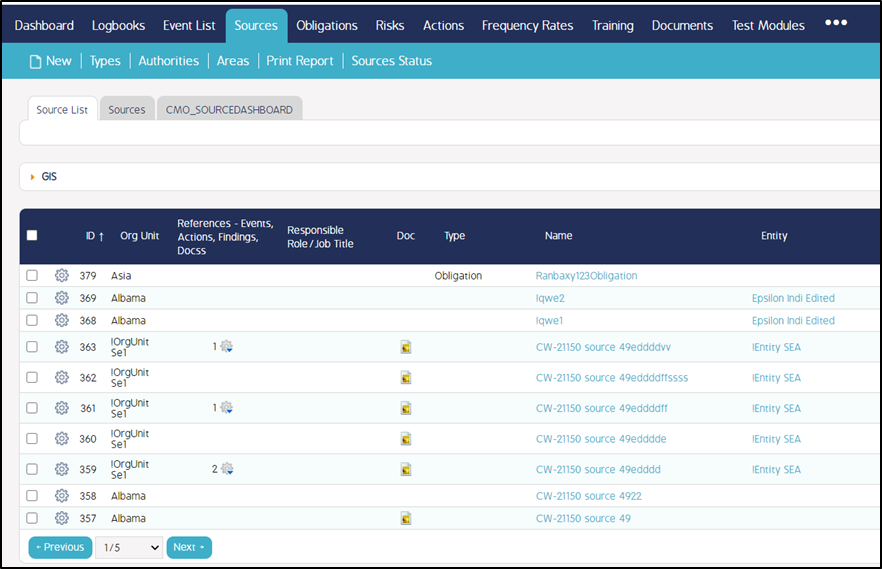
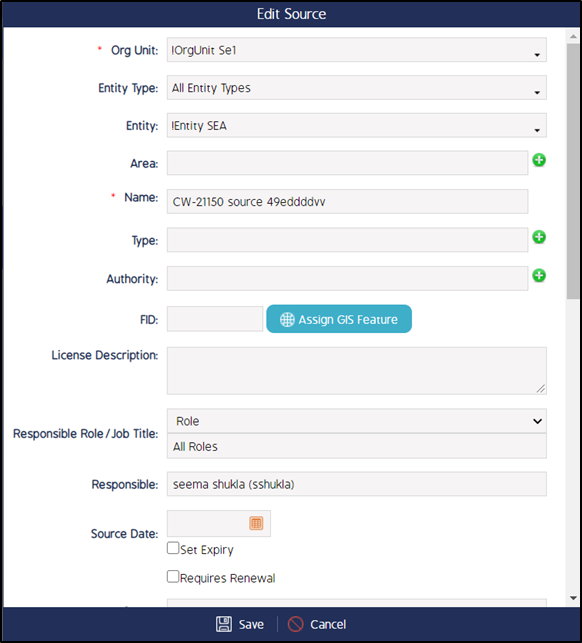
The user can edit the role by selecting the source from the source list.
7. Click on the cog wheel and select Edit.
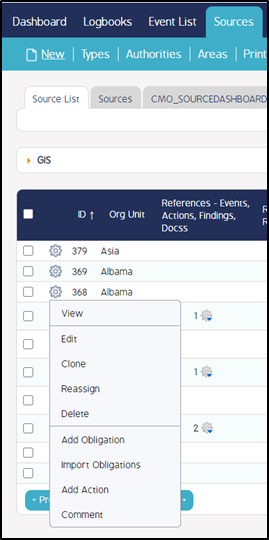
8. The Edit Source screen appears as shown in the following image. The user can change the roles according to the requirement.
Obligations
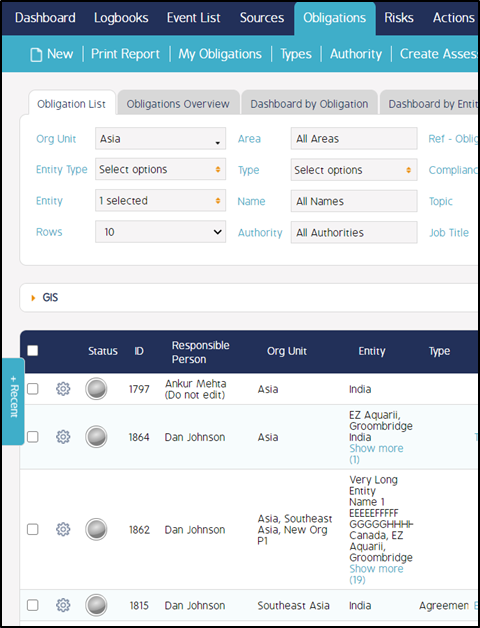
- Log in as a user, navigate to the Obligations module and click New.

2. A new Obligation pop-up screen appears.

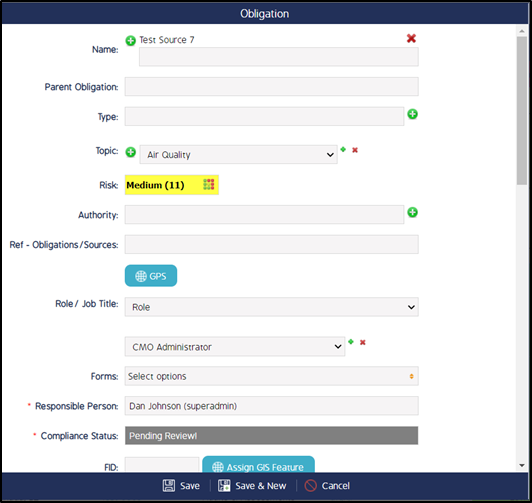
3. Enter all the details in the required fields in the Obligations screen and select the Role/Job Title field. According to the selection, the list of Roles or Job Titles will be available in the second dropdown field. Select the desired role or job title.

4. Choose the desired form from the Forms field. Select the desired person from the Responsible Person dropdown field.

5. Enter values in the remaining required fields and click Save to exit from the screen.
6. The newly created Obligation will be populated in the Obligation list screen.
The user can edit the role by selecting the Obligation from the Obligation list.
7. Click on the cog wheel and select Edit
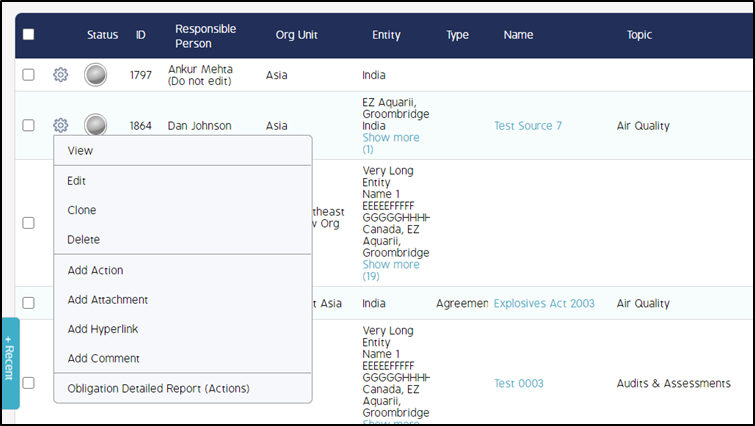
8. The Obligations screen appears as shown in the following image. The user can change the roles according to the requirement.
Actions
-
Log in as a user, navigate to the Actions module and click New.

2. A New Actions pop-up screen appears.
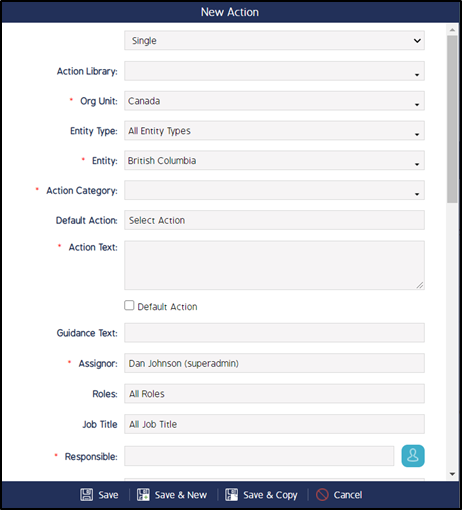
3. Enter all the details in the required fields in the New Actions pop-up screen.
4. Select the responsible role from the Roles dropdown field and A job title from the Job Title dropdown field. to assign to the Actions from the Roles field.

5. Select a responsible person from the Responsible dropdown field according to the roles and job titles selected.

6. Fill in the rest of the required fields and click Save to exit from the screen.
7. The newly created Actions will be populated in the Action list screen.
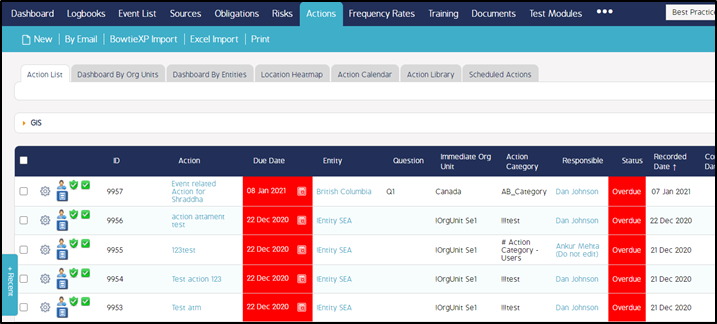
The user can edit the role by selecting the Action from the Action list.
8. Click on the cog wheel and select Edit.
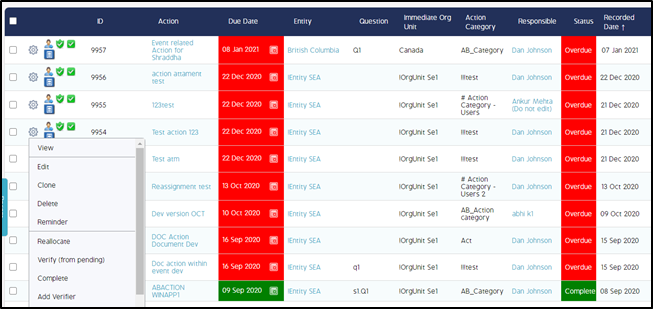
9. The Edit Action pop-up screen appears. The user can change the roles according to the requirement.
Role Permissions for User Groups
Another way to give a role permission is through a User Group. A User Group can be first assigned to an Org Unit and Entity and then a user can be added to the User Group. Thus the User Group takes the user-defined roles.
Steps to Create a User Group
- Log in as a user and navigate to Admin > User Groups and click New.
- A new Add User Group pop-up screen appears.
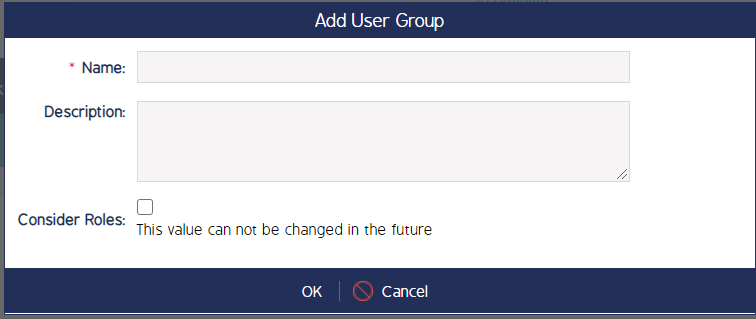
3. Enter the name and the description of the User Group and click OK. A new User Group is created.
4. The newly created user group has to be assigned to an Entity and Org Unit.
5. Go to Admin > Entities. Select an Entity to assign a User Group and click on the cog wheel.
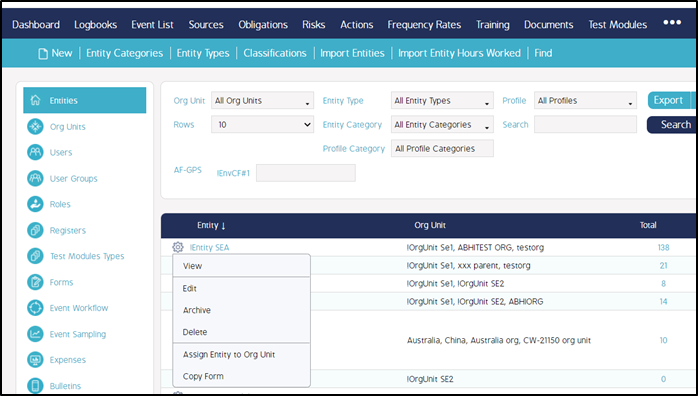
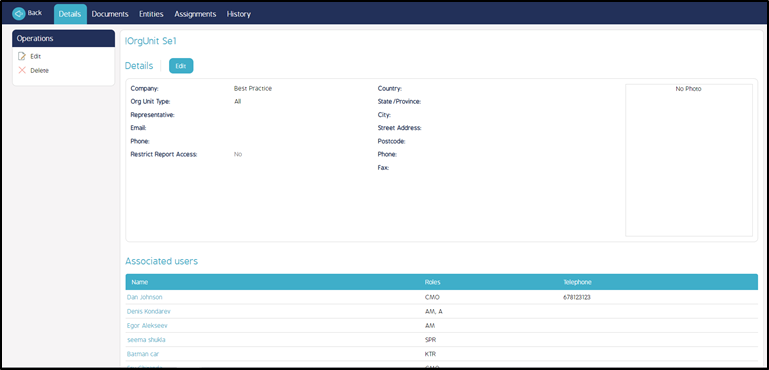
6. Select View and the Details screen appears.

7. From the top menu bar select Assignments. Under the Assignments select Add Assignment.
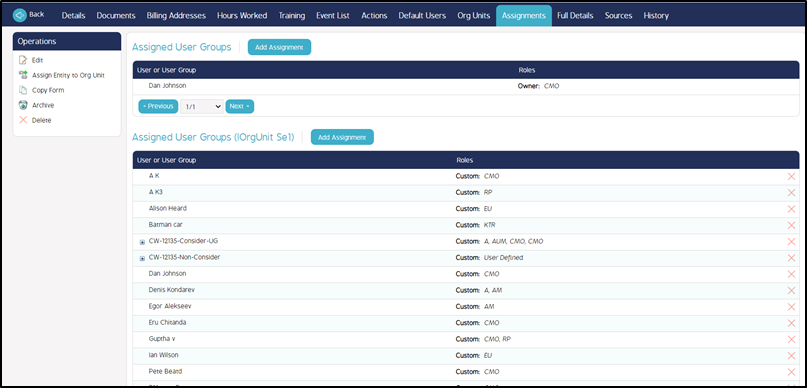
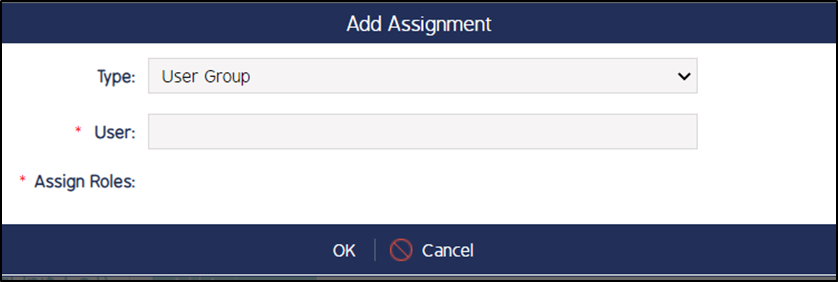
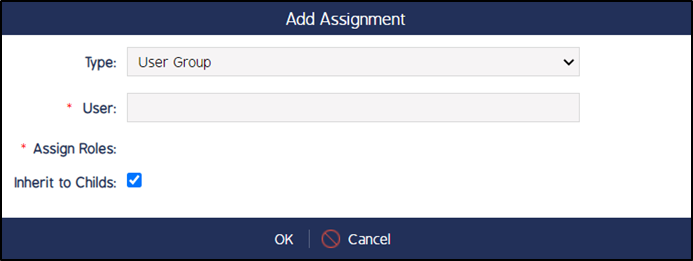
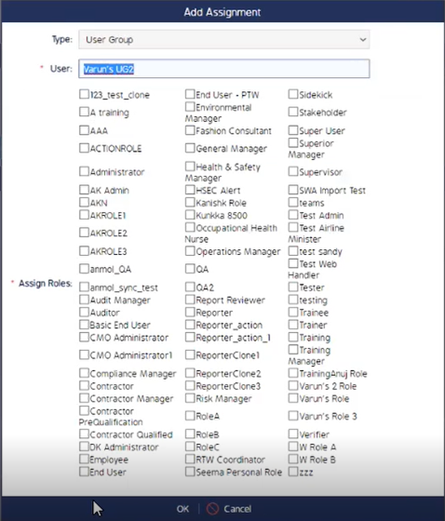
8. A new Add Assignment pop-up screen appears. In the User field, select the desired User Group created and click OK.
Note: Remember the Org Unit that is mapped to the Entity in order to assign the User Group to an Org Unit in the next step.
9. Go to Admin > Org Units. Select the Org Unit to assign a User Group and click on the cog wheel.
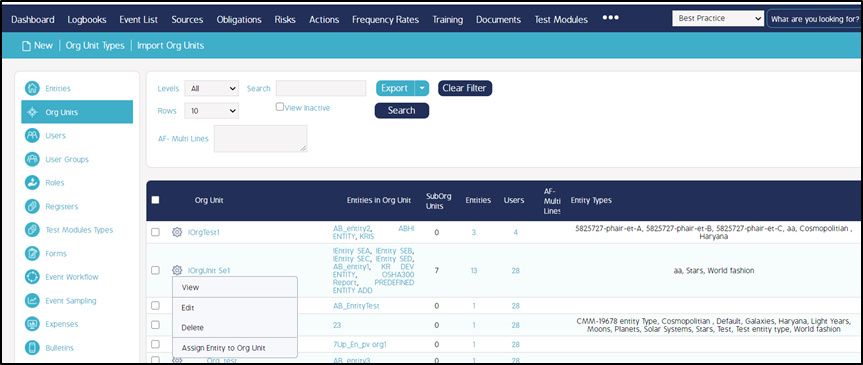
10. Select View and the Details screen appears.
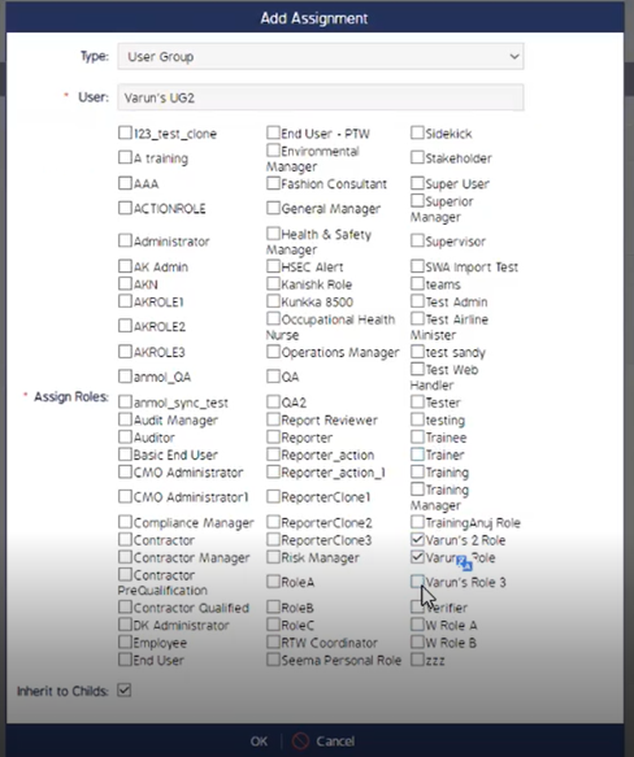
11. From the top menu bar select Assignments. Under the Assignments select Add Assignment
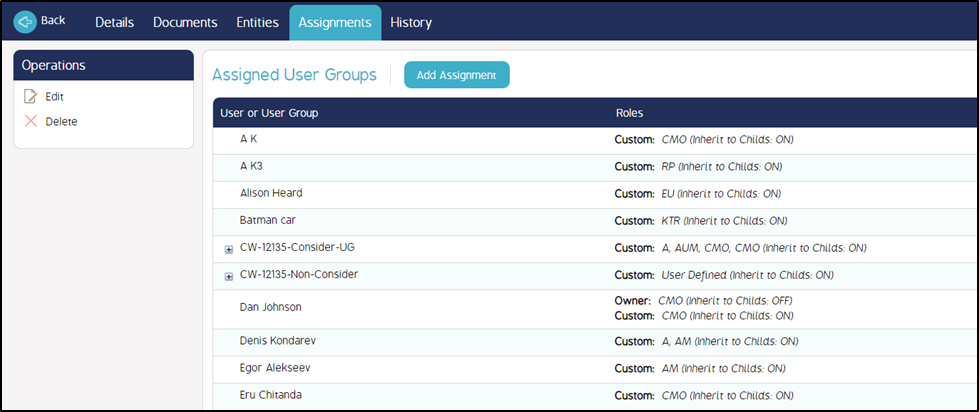
12. A new Add Assignment pop-up screen appears. In the User field, select the desired User Group created and click OK.
13. Create a new Event with the combination of the Org Unit and Entity to which the newly created User Group was assigned.
14. Open the Event, and click on the Assignments tab to check if the assigned User Group is populated. Based on the combination of Org Unit and Entity, the system identifies that the newly created User Group has to be assigned to the module.
Similarly, the user groups can be created and assigned to other modules like Obligations and Actions.
Whenever an action is performed with the combination of the org Unit and Entity, the action to perform will be assigned to the user/user group with the role permissions already mapped while creating a user/user group.
Assign Roles via Adding a User to a User Group
-
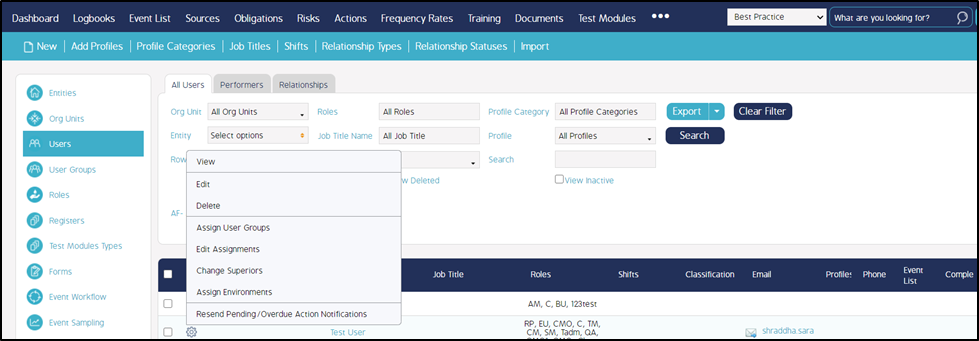
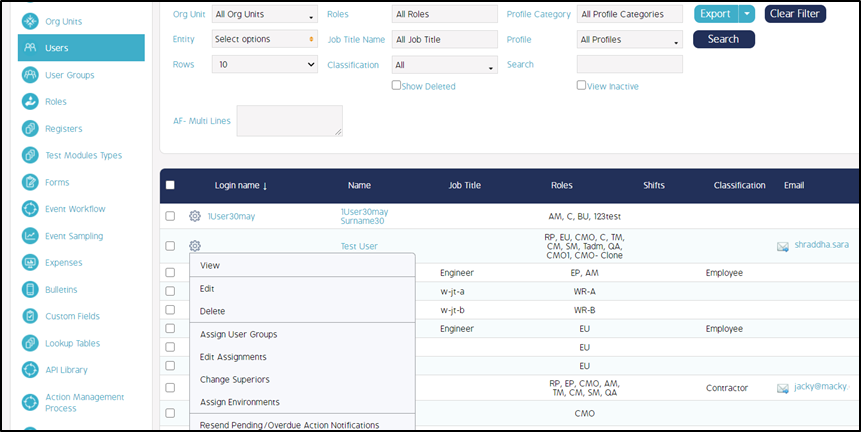
Log in as a user and navigate to Admin > Users. Select a user, click on the cog wheel and select View.
2. From the user details screen, select the Member Of tab from the top menu bar.
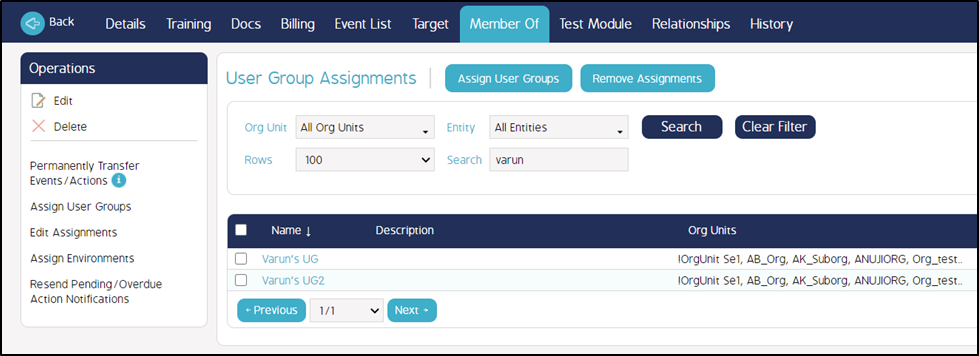
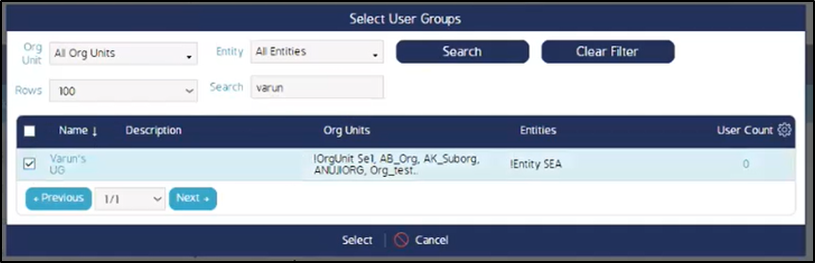
3. Click on the Assign User Groups tab and a new screen Select User Group appears. Check in the check box next to the User Group and click Select.
4. Go to Events and follow step 14 from section 6.1.
5. Under Assignment click on the + icon beside the User Group name to see if the User has been assigned to the User Group.

6. The User Group inherits all the roles defined for the User.

Define Roles to a User Group
The roles can now be assigned to the User Group independent of the users being assigned. CMO application allows roles to be assigned to the User Group via Consider Roles check box.
Steps to define roles for User Group
- Navigate to Admin > User Groups > New.
- A new screen Add User Group appears.
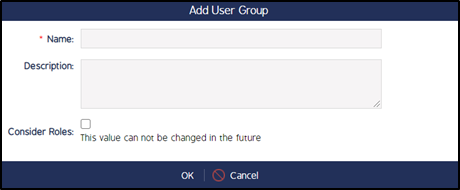
3. Enter the Name and Description fields and check in the Consider Roles check box to define roles for the User Group.
4. Go to Entities and follow steps 5 – 8 from section 6.1.
5. When the desired User Group is selected, the list of all roles available in the CMO application will be populated.
6. Select the desired roles and click OK to map the roles to the User Group under the Entity.
7. Go to Org Units and follow steps 9 – 11 mentioned in section 6.1.
8. A new Add Assignment screen appears. In the User field, select the desired User Group, and a list of all available roles in the CMO application will be populated.
9. Select the desired roles and click OK to map the roles to the User Group under the Org Unit.
10. Go to Users, click on the cogwheel of desired User list and select ‘Assign Users Group’. (The user can also follow steps 1- 4 to assign user groups to users mentioned in section 6.2.)
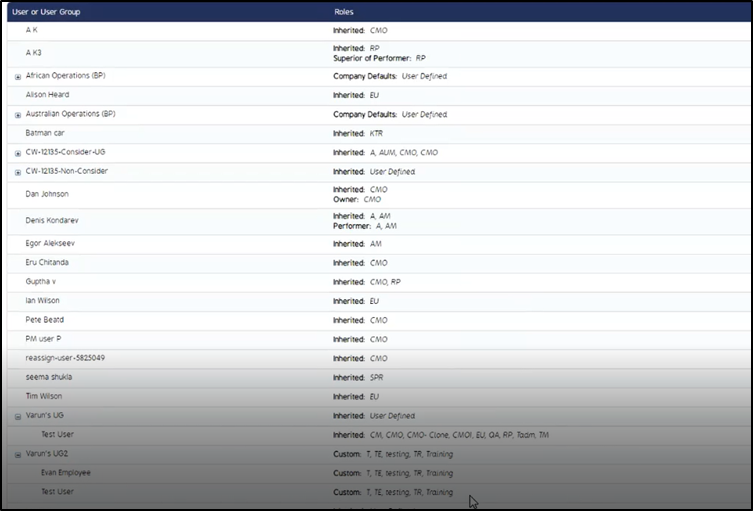
11. Once the User has been assigned to the User group, click on the + icon and check the roles mentioned as not user-defined but the roles (Custom) manually selected for the User Group.
Assign Roles while Configuring Custom Emails
Find below a high-level overview of how to configure Custom Emails within the CMO Admin section.
- Go to Admin > Business Rules > Cog wheel > Custom Emails
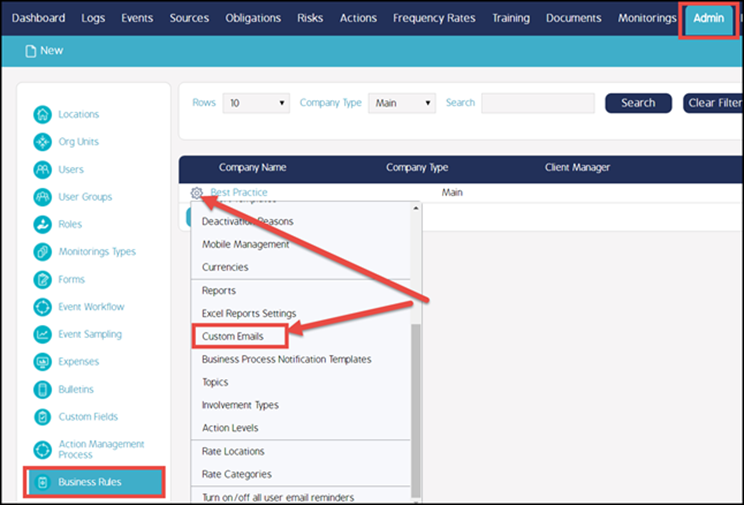
2. In the Custom Emails screen, in the left-hand column you will see the list of modules (Form – Action – Finding etc.) that use notifications, beneath which will be a list of each notification that is built for that module. In the right-hand column, you will see the Roles configuration button and the subject and text of the notification.
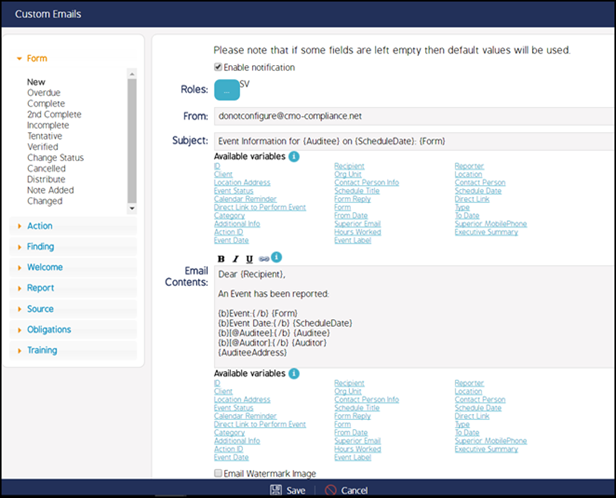
3. Select the notification that you want to configure.
4. The checkbox “Enable notification” must be checked for the notification to be active.
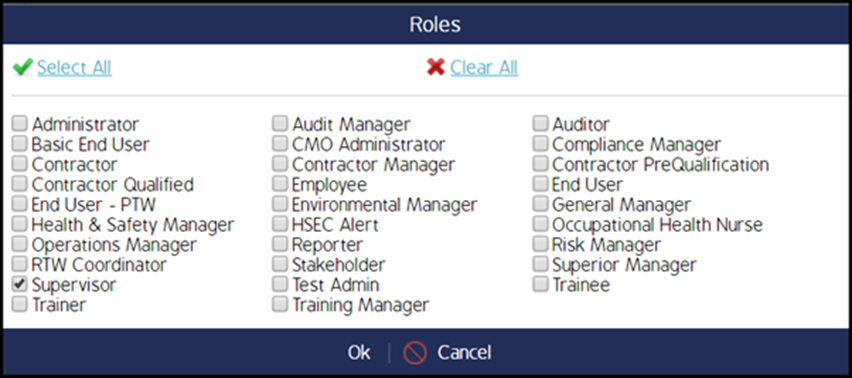
5. Click the Roles button. In the Roles pop-up box, select the roles that you want to receive this notification. Click Ok.
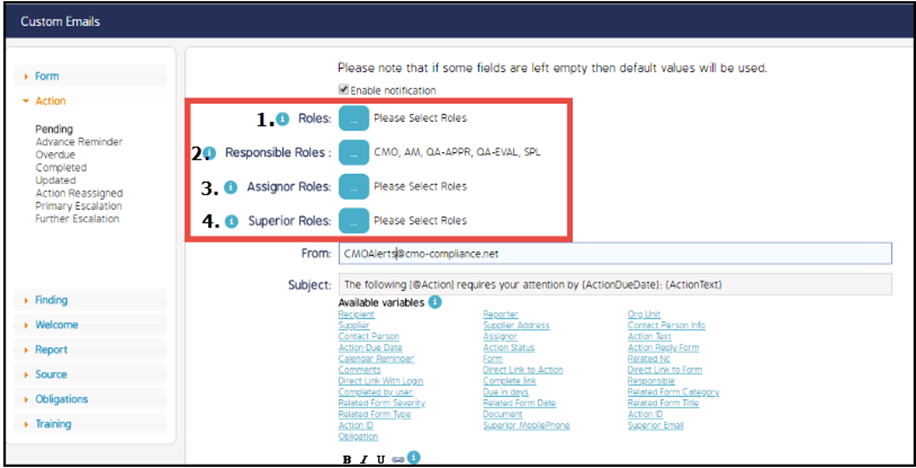
Note: In the Action: Pending notification there are 4 role options to configure (see below).
Role 1: Roles: Roles selected here will receive notification of ALL actions created. This option should be used only in special situations.
Role 2. Responsible Roles: Roles selected here will receive a notification when they are chosen as the Action Responsible. Normally, all roles will be selected here, unless you don’t want certain roles to know when an action is assigned to them.
Role 3: Assignor Roles: When you want the Assignor to receive this notification.
Role 4. Superior Roles: When you want the Supervisor of Responsible to receive this notification.
Note: In most of the notifications in the Action section, there is only the Roles option:
Roles: Roles selected here will receive notification of ALL actions in this category. This option should be used only in special circumstances. When no roles are selected, only Action Responsible will still receive a notification by default.

6. The configuration of the email message itself will be covered in the Notification Message Configuration section.
Assign User Roles to Combination of Org Unit and Entity
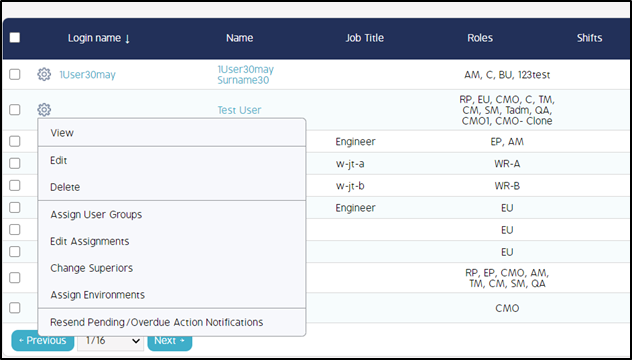
- Navigate to Admin > Users. Select a desired user from the Users list and click on the cog wheel. Select Edit Assignments.
2. A new pop-up window Edit User Group Assignments appears.
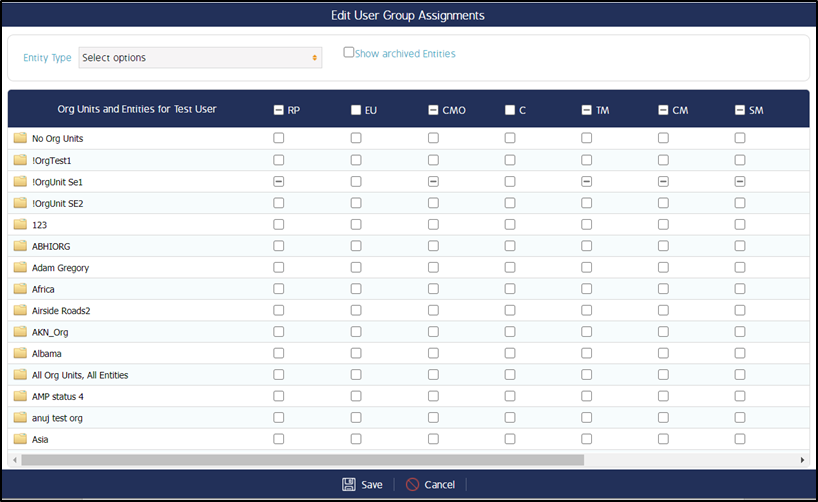
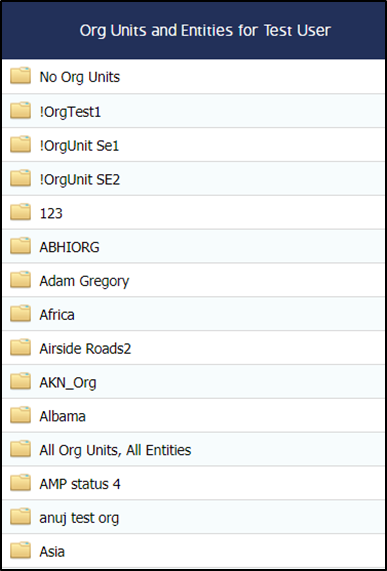
3. The Edit User Group Assignments window has all the Org Units present in the CMO application. Each Org Unit has sub-org units and entities mapped under Org Unit and Entities column on the left-hand side.
4. To the right of the window, all the roles assigned to the selected User will be displayed.
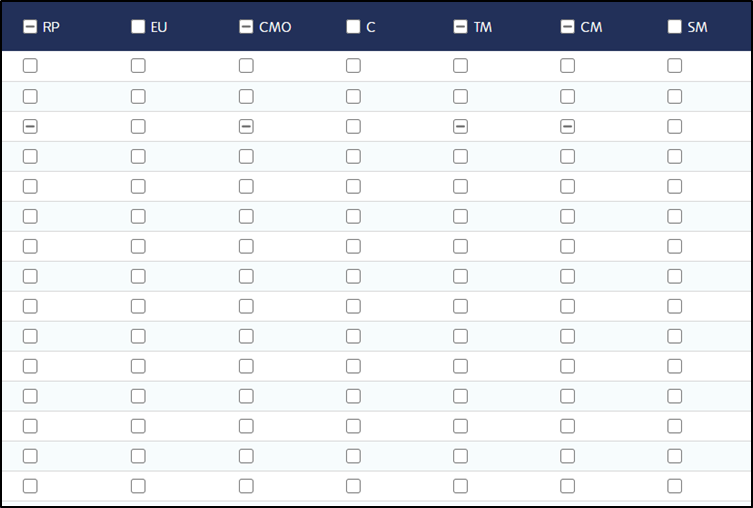
5. Check in the checkboxes under the roles to which the Org Unit and Entities combination can be assigned.
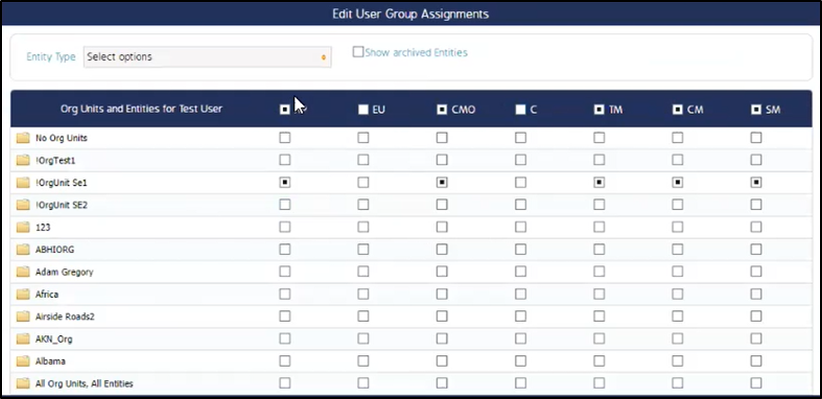
6. Click Save to map the preferences and exit the window.
User Role Access to Reports
The steps provided in the article are performed by the Admin of the CMO Application as the settings require access to the Admin module (Business Rules).
-
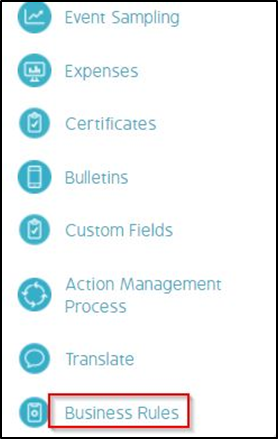
Go to Admin > Business Rules.
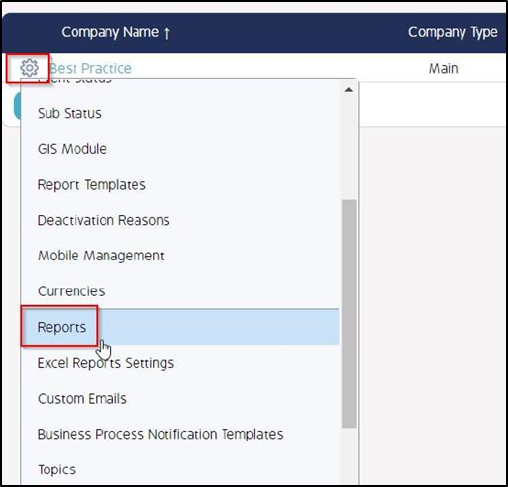
2. Click the cogwheel for the company and select Reports.
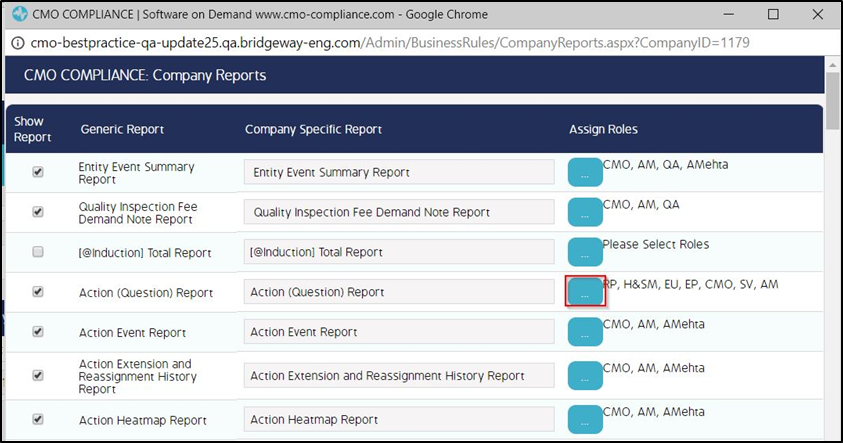
3. In the Reports window - go to the specific report. Click the Assign roles link for the required report.
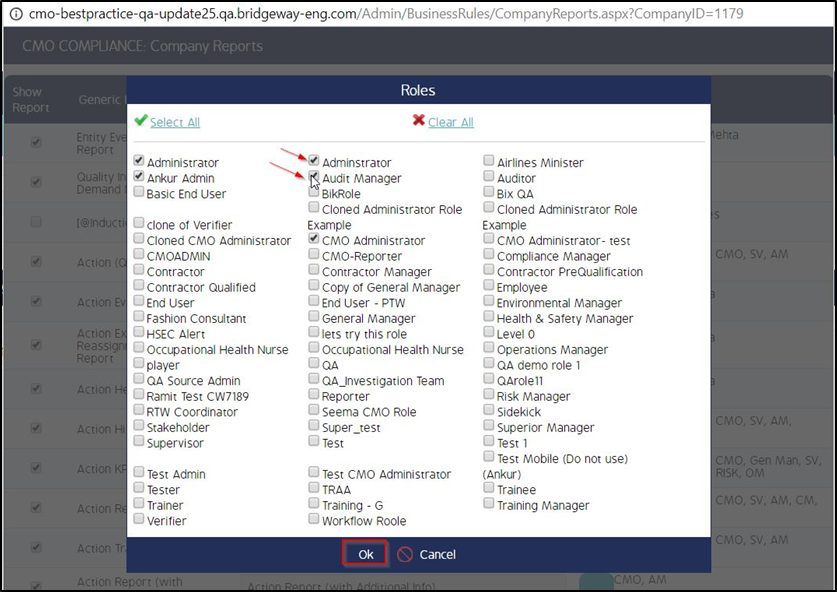
4. Select the User roles to allow access to the required report. Click OK to save the changes.
5. Click Save to save the changes in the Company report window.
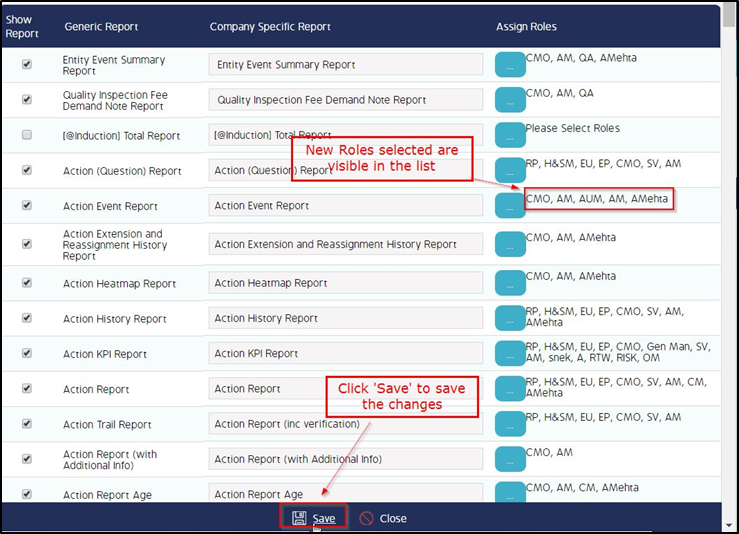
6. As a result of the above setting, the selected Roles will then have the access to the required report for which the changes have been made.