Mitratech Success Center

Client Support Center

Need help? Click a product group below to select your application and get access to knowledge articles, webinars, training content, and release notes or to contact our support team.

Authorized users - log in to create a ticket, view tickets status and check your success plan details.


Setting Mobile Permissions

Setting Mobile Permissions
Admin Users must grant Role Permission to log in, view, and edit in the mobile CMO app. This section details how to enable the permissions listed below.


Setting mobile permissions is an admin-level function.

This page details how to enable several permissions that are relevant to users who use CMO mobile apps. This includes relevant Role Permissions, individual user permissions, allowing users to access forms via mobile devices, and setting users' mobile tokens.

List of mobile-related permissions:

The following permissions are a mix of Buisiness Rules and Role Permissions that apply across all mobile platforms. Each of the permissions below is described in detail throughout the rest of this page. 

  • Allow Performer to Log in on Mobile
  • Revoke mobile token
  • [Forms] Available on Mobile
  • Role Permissions
    • Allow Restore to Server
    • Allow Resync to Mobile
    • Allow Restore
    • Show Type/Category on Mobile
    • Allow Login to mobile (ie PDA/Laptop)

Note: All permissions must be set on the web application. Permissions set in the web application will be mirrored across all mobile iOS devices. 


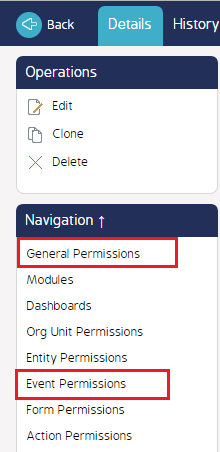
Role Permissions for mobile:

Role permissions must be set on the CMO web application. All role permissions set in the web application will be mirrored in the mobile iOS device.
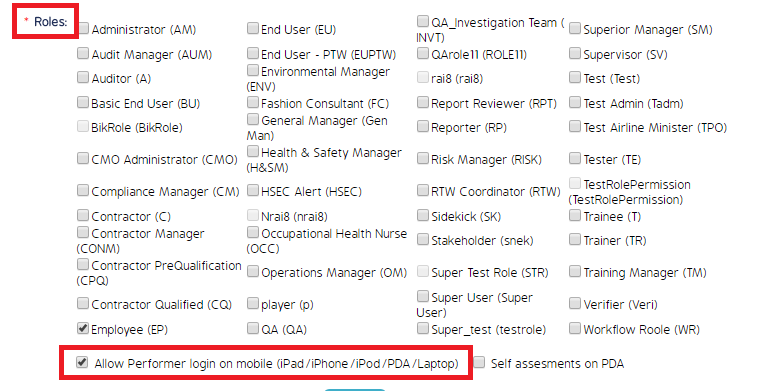
  1. (On the web application) Log in as an Admin and navigate to the Admin module.
  2. Click Roles on the left sidebar menu.
  3. The roles register will appear.
  4. Click the role name you want to set mobile permissions for.
  5. Navigate to the following permissions in the General and Events sections to enable the respective permission(s):
    • Allow Login to Mobile (General Permissions)
    • Show Type/Category on Mobile (General Permissions)
    • Allow Change Sync Status (Events Permissions) - Most important
    • Allow Re-sync to Mobile (Event Permissions)
    • Allow Restore to Server (Event Permissions)

iOS_RolePermissions.png


User Permissions

Administrators must grant users permission to log in on a mobile device. This is done through the Allow Performer to log in on mobile permisison within an individual User's record.

  1. Log in as an Admin and click into the Admin module.
  2. Click Users from the left sidebar menu.
  3. Find the user you want to add the permission to, click the cog wheel, then select Edit.
  4. Scroll to the bottom of the Edit User screen, under the Roles section.
  5. Click the Allow Performer login on mobile (iPad/iPhone/iPod/PDA/Laptop) checkbox.
  6. Click Save. 
  7. Click the Back button to exit the user details page.
iOS_Permissions2.png


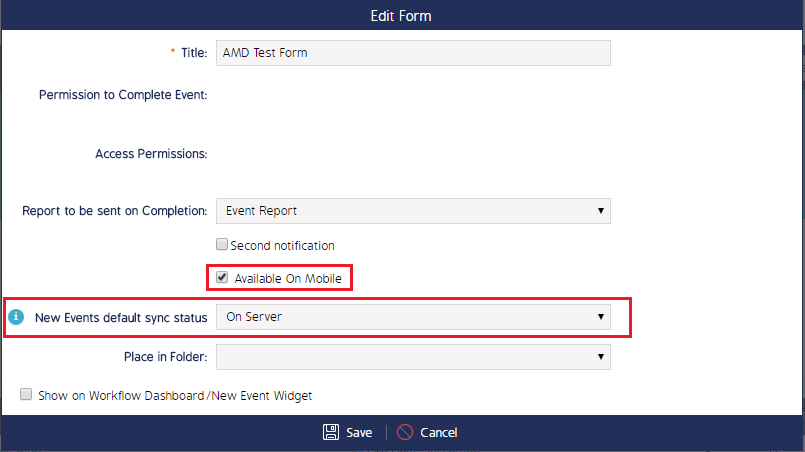
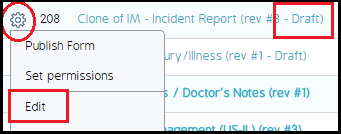
Access Forms on Mobile

This option allows users to access Forms on the iOS mobile app, and should be set after a Form is already created. 
Please note, this function is typically only available for Admin-level users. If you do not have access to the Admin Module, please contact your CMO Administrator.

  1. Log in as an Admin and navigate to the Admin module.
  2. Click Forms on the left sidebar menu.
  3. Navigate to the draft of the form you want to move to mobile. 
  4. Click the cog wheel to the left of the form name (draft) and select Edit
    iOS_Permissions5.png
     
  5. Check the Available on Mobile permission. 
  6. Select a default value for the Sync Status of the form.
  7. Click Save.
Forms_AvailableOnMobile.png


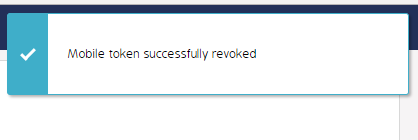
Revoke Mobile Token:

  1. Log in as an Admin and click the Admin module.
  2. Click Users from the left sidebar menu.
  3. Click into an individual user record.
    • The User Details page will appear.
  4. Click the Revoke Mobile Token link in the left sidebar menu.
  5. A Success message should appear in the top right corner of the screen once this is finalized. 
  6. Click the Back button to exit the User Details page.

iOS_Permissions3.png

iOS_Permissions4.png


  • Was this article helpful?