
How To Create A Scheduled Event
Steps To Create A Scheduled Event
Scheduling Events is an efficient way to set up re-occurring Events without having to recreate a new instance of the Event manually. The How To Article below will details the necessary steps to create a Scheduled Event.
Once logged in, select the 'Events' tab from the top of the screen.

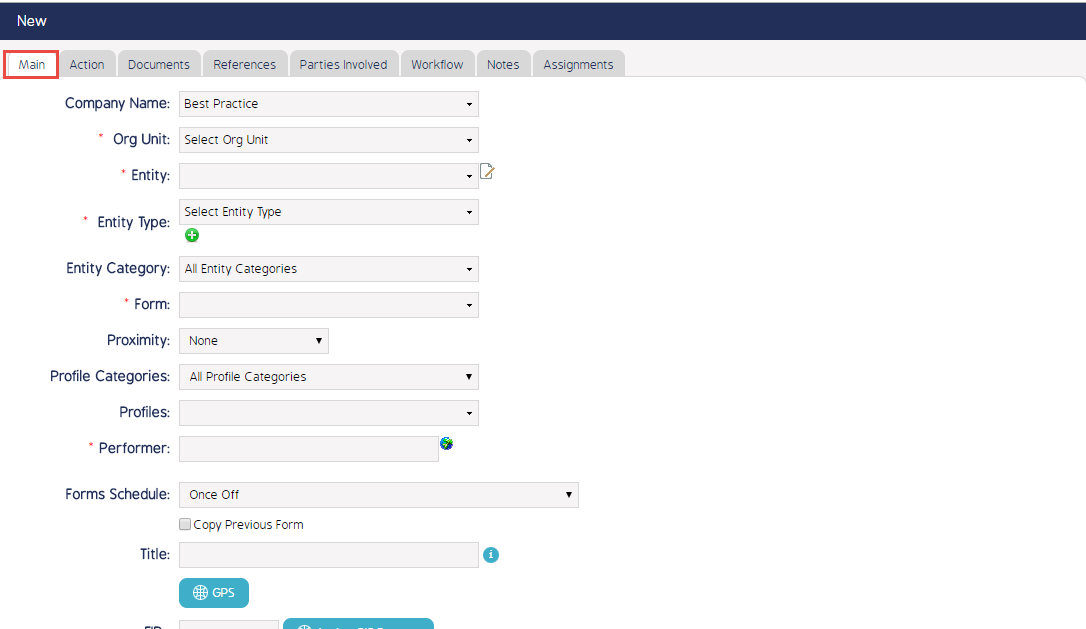
In the Events Module, click on 'New'. You will be presented with the New Event creation window. Fill out all of the necessary fields under the 'Main' tab to create the Event as well as any additional parameters such as 'Entity Category' and 'Notify' options, if needed.
Once all ot the 'Event' information has been entered, scroll down to the 'Forms Schedule' option. Select the drop down arrow, and then choose 'Scheduled'.
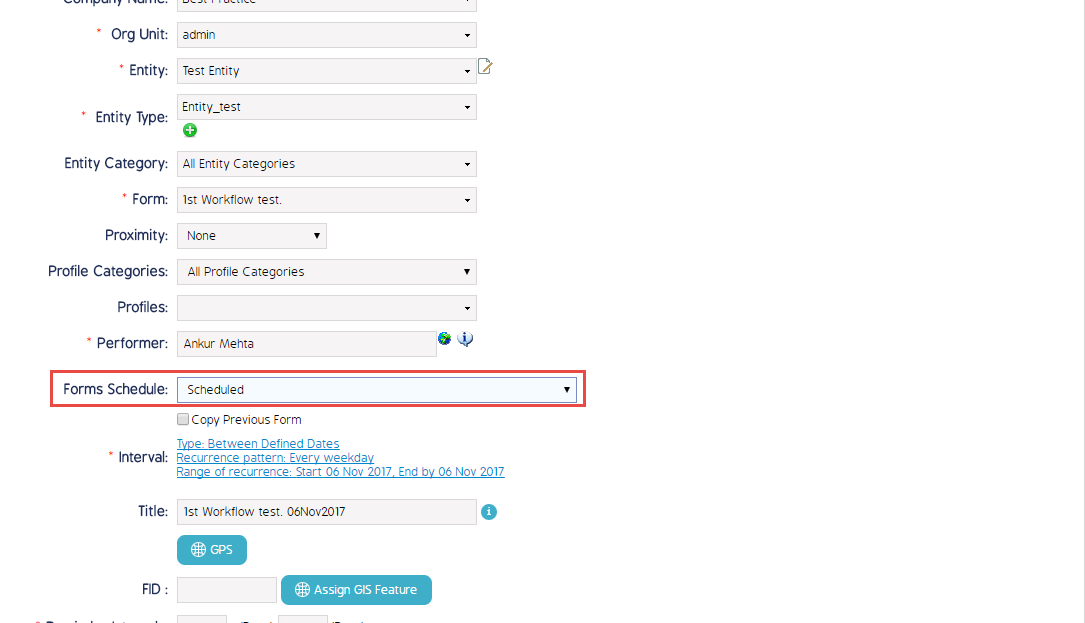
Note that the 'Event' must be designated as 'Available For Scheduling' upon the "Event's" initial creation to allow for the following steps to be available for the selected Event.
Now you must adjust the intervals at which the new instance of the form will be re-scheduled. This is done by navigating to the hypertext to the right of the now visible 'Interval:' text below the 'Forms Schedule:' menu. Select the hypertext to set the intervals.

After selecting the hypertext, a new window will appear over the 'Event' creation window.

Note that there are three required settings to adjust to properly set the 'Scheduler'.
- First there is the 'Schedule Type'. This can be set to schedule a new instance of the 'Event' prior to the successful completion of instance of the 'Event', between defined time periods, or based on a pre-determined interval. In the example of above, the 'Scheduled Type' is set to create a new 'Event' once the last 'Event' reaches a status of 'Complete'.
- Next, the 'Recurrence Pattern' must be adjusted to the desired time frame in which the new 'Event' cycle is began again. The 'Recurrence Pattern' above is set to create a maximum of one new 'Event' on the last weekday of the month.
- Finally, the 'Range of Recurrence' is the length of time this new series of re-occurring 'Events' will continue. The example above is set to 'No End Date' which will repeat this pattern indefinitely.
After all of this information has been entered hit 'Ok' at the bottom of the screen.
Once all of the 'Event' fields including the aforementioned 'Scheduler' settings have been selected, click save at the bottom of the 'New Event' window.
