How to create a Default Document
How to create a Default Document
After completing this how-to you will be able to create Default Documents on your Site.
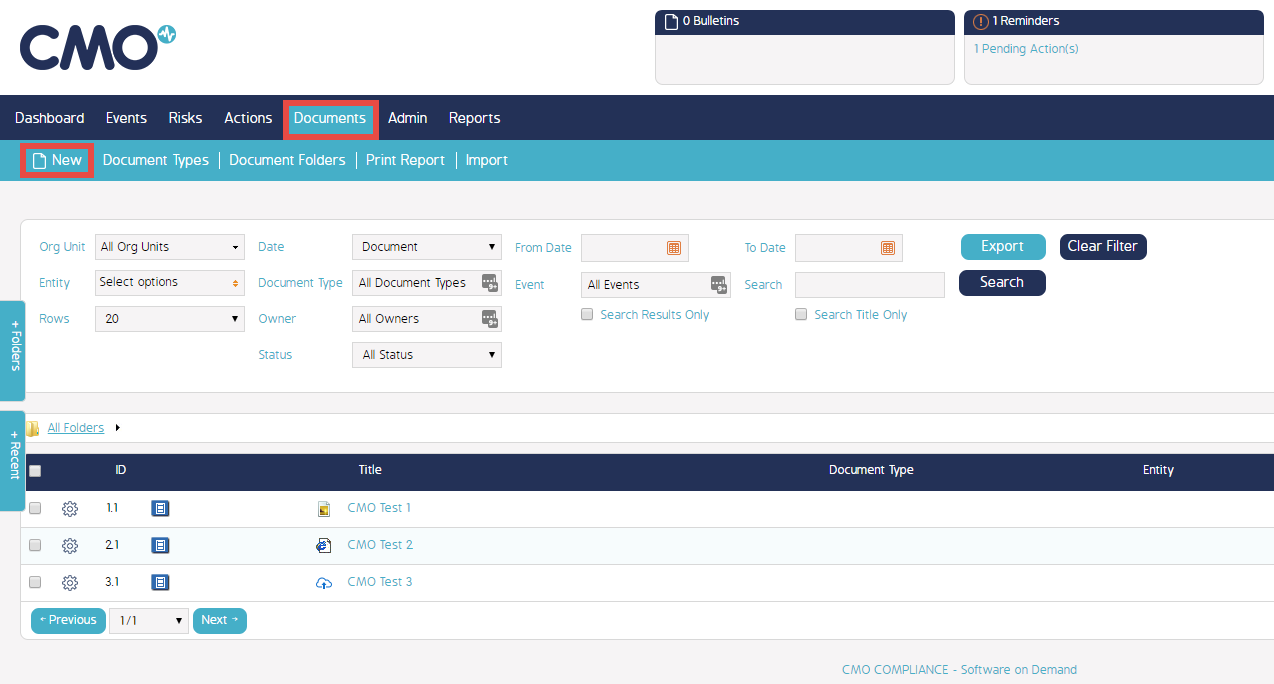
Navigate to the Documents Module.
- Begin by navigating to the Documents Module.
- Select the 'New' button as shown below.

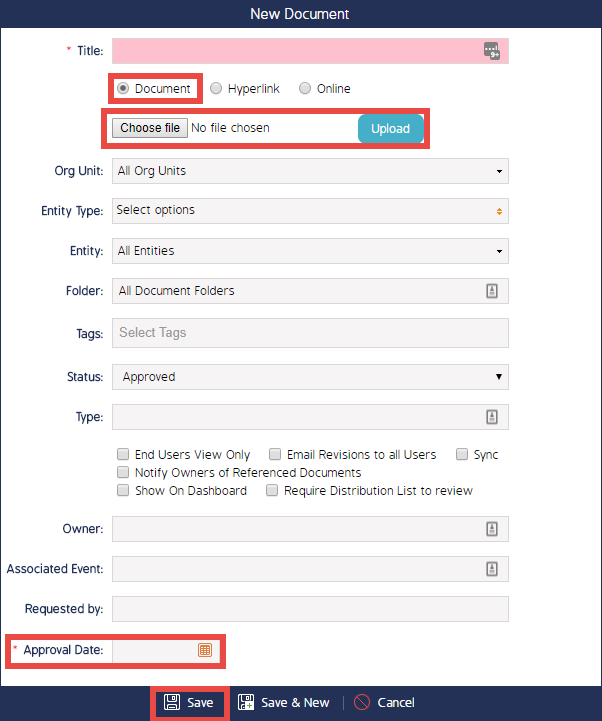
Fill in the new Document Details
- Then continue by filling in the details for the new Document.
- Ensure the 'Document' Checkbox is selected to create a Default Document.
- Select the 'Choose File' button to select a file from your PC. Once selected hit the Upload button.
- Select which Org Units/Entity Types/Entities you wish to be able to access this Document.
- Assign any Tags relevant to the Document.
- If you wish to make the Document immediately available ensure the Status of the Document is set to 'Approved'.
Alternatively, you can set the Status to 'Draft' or 'Inactive' if you plan to make changes later. - Select Save once you have filled in all necessary fields.


