Creating And Configuring Action Workflow Steps
This article outlines how to create and edit an action workflow step.
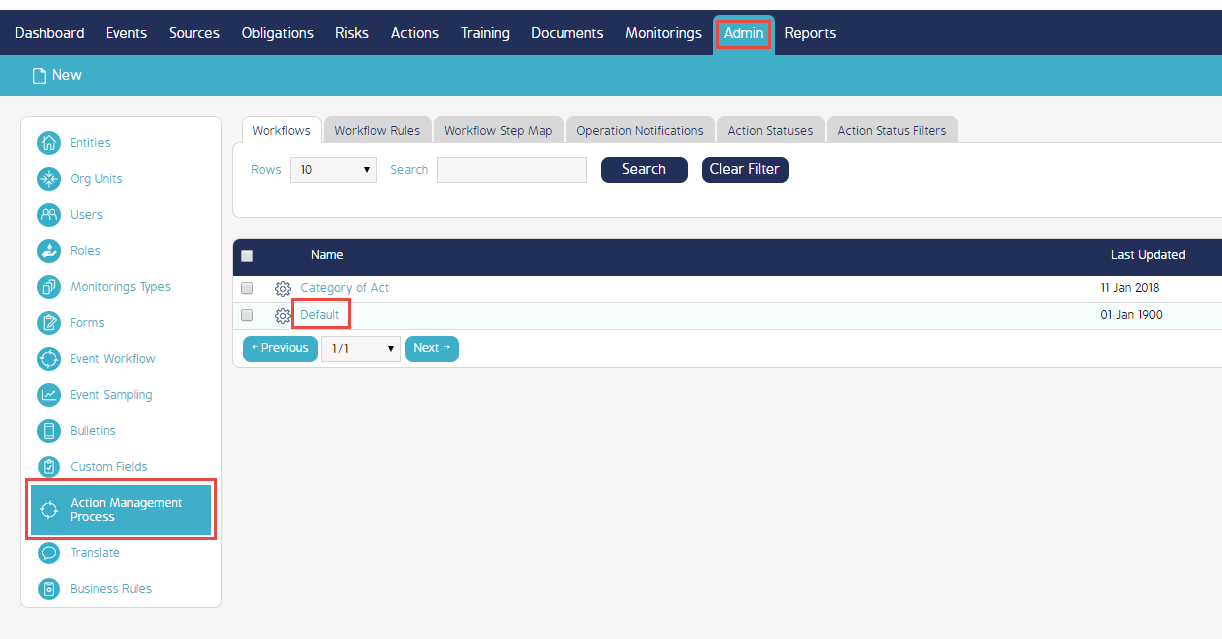
Initial Navigation
- Begin by going to the Admin module
- Go to the Action Management Process and make sure you are under the "Workflows" tab
- Click on the name of workflow you want to edit
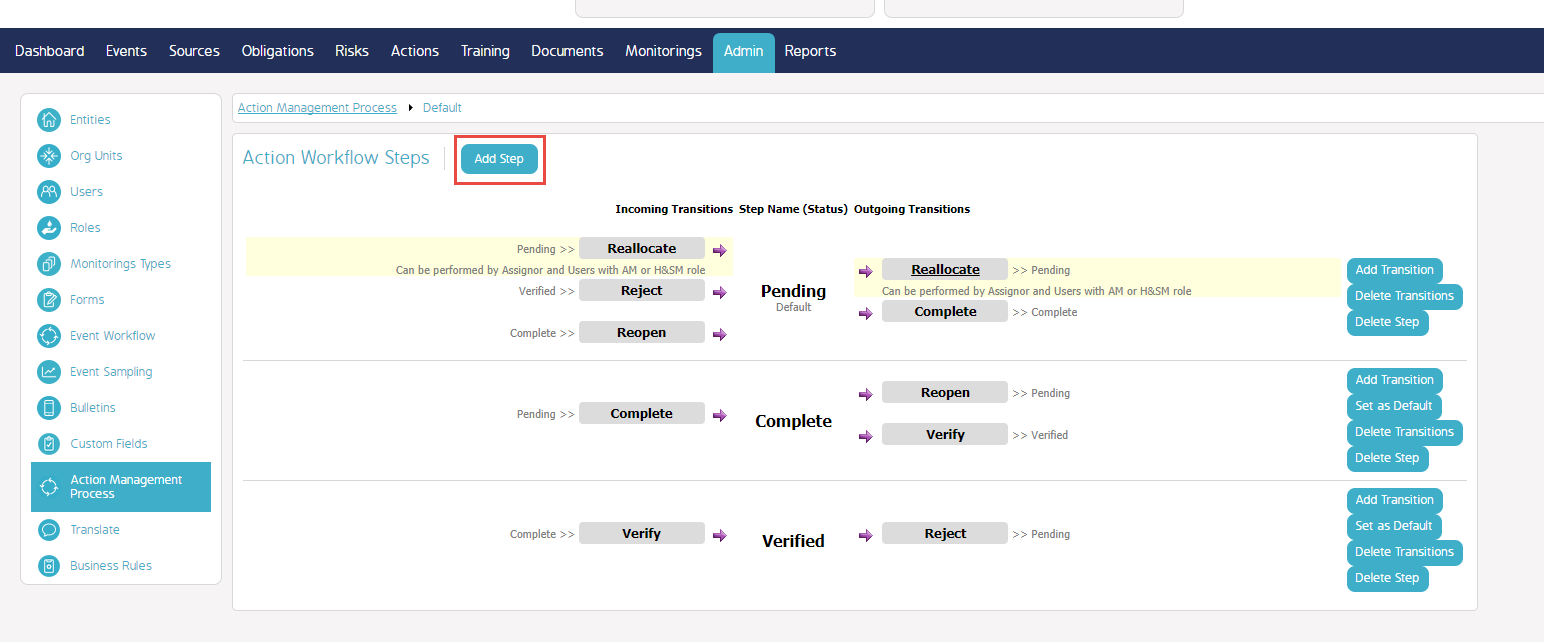
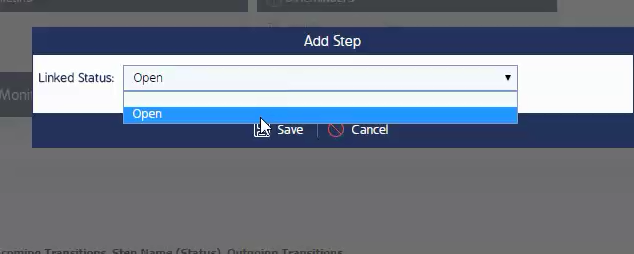
- Click on Add Step
- Select the Action Status to which the Step will link
- Click on Save
Configuring The Action Workflow Step
- A new screen will appear with all available Operations available on this step
- Select the roles that will have the ability to perform the shown options

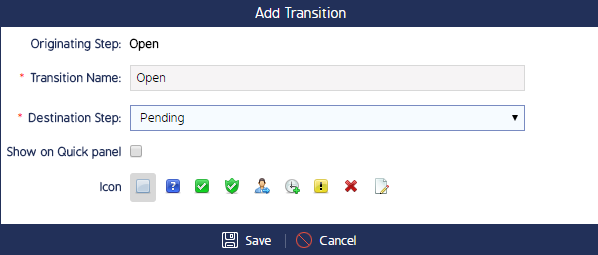
Edit Transitions
- Go back to the Action Workflow Steps where you will see all available action statuses
- Click on Add Transition to form a connection between two statuses (e.g. if you would like for the action to move from the newly created status to the default Pending status, click on Add Transition next to the newly created status)
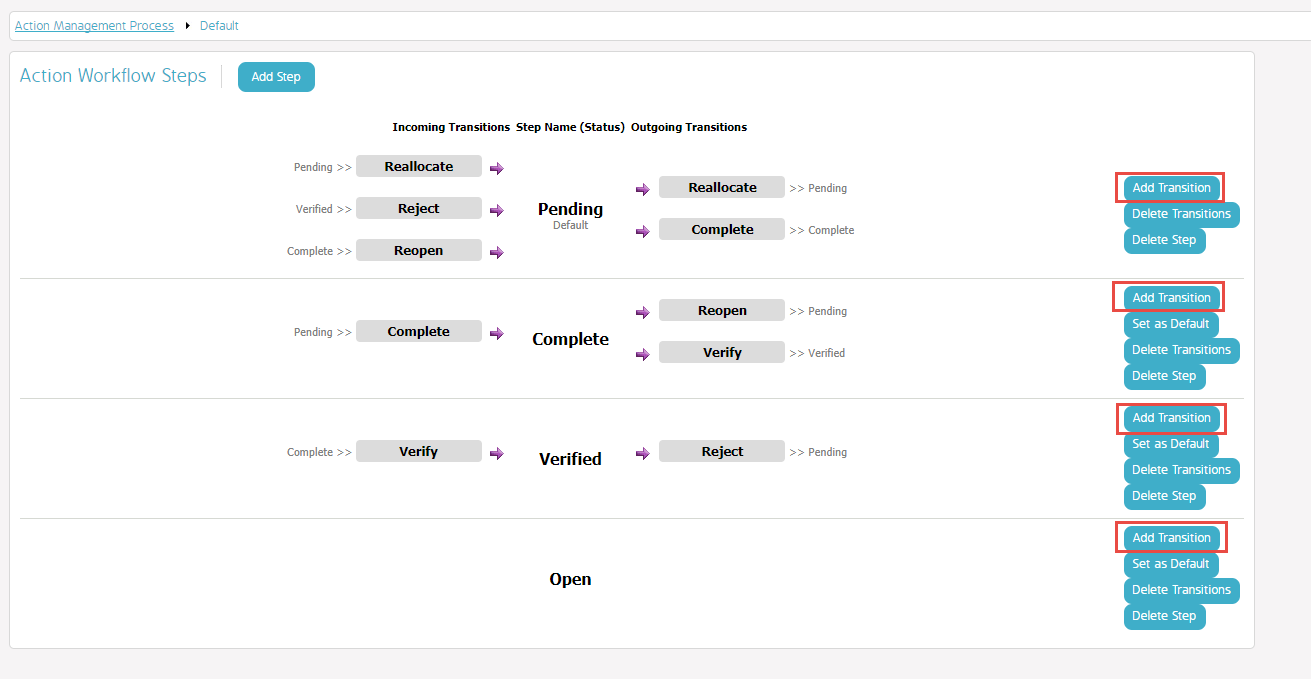
- Enter a Transition Name
- Enter the Destination Step
- Configure "Show on Quick panel" and "Icon" as desired
- Click Save