
Creating Actions
The Basics
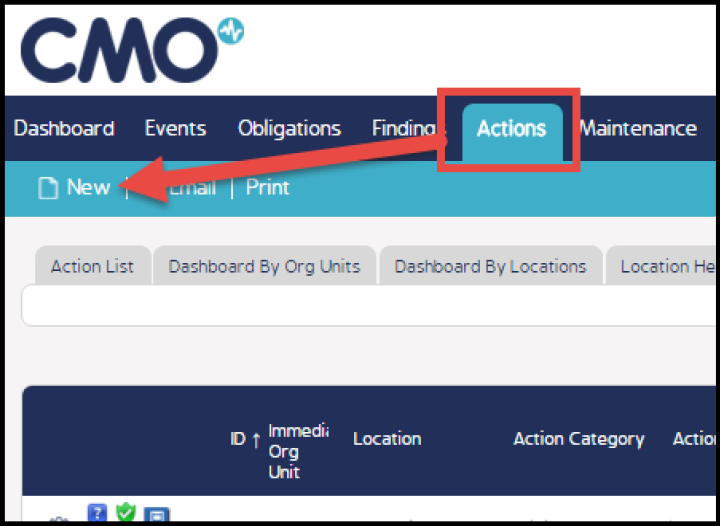
In CMO, as long as an End User has the appropriate permissions, they can directly create individual Actions from the Actions tab.
To begin, login to CMO. In the opening dashboard shown to the right, click on the Actions tab and then click the New button.
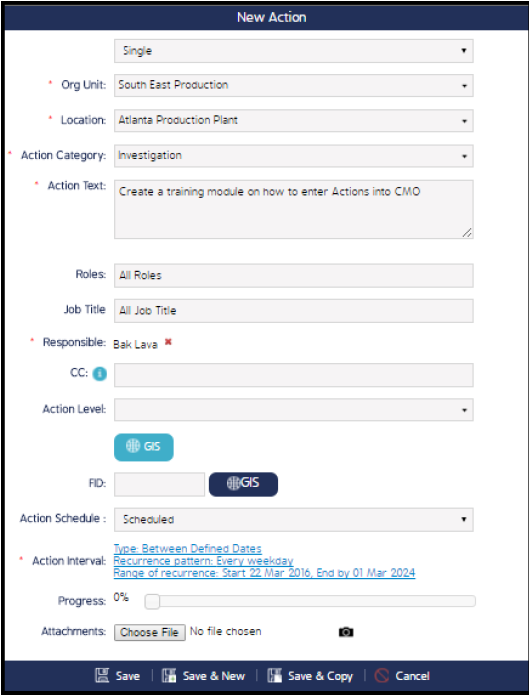
A New Action pop up screen will display where you will need to select the following:
Single or Multiple: This is a Role-based option, allowing the user to enter actions for multiple users, roles, locations, etc.
NOTE: All fields with (*) are required.
Org Unit: If there are multiple levels, choose only at the lowest level.
Location: Site, or lowest level of hierarchy
Action Category: Choose from the list.
Action Text: Define the action.
Roles & Job Title: These are filters to help select the Responsible in the next field - Not needed if you know the name of the Responsible.
Responsible: Begin typing the name in the field and auto-complete will find the match(es).
FID: Has to do with the GIS coordinates.
Action Schedule: You may create a scheduled (recurring) or Once Off action.
If you choose “Scheduled” the Action Interval response will display. If you click on the hyperlink, the screen below will display.
If you choose Once Off, the Due Date and Action Status fields will display.
Action Status: Unless you are completing the action yourself, leave the status as Pending.
Due Date: Select a date either using the calendar or manual entry.
Progress bar: This may be manually adjusted to show progress.
Attachments: Click button to add.
Click one of the Save buttons at the bottom of the screen.
Scheduled Actions
If you chose Scheduled up above, this screen will display where you schedule the interval for the action for be
accomplished.
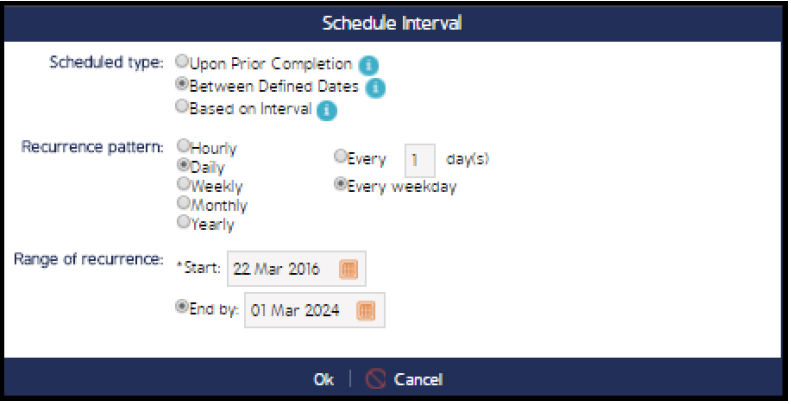
Click OK. Finally, he Action creation window will close once these specifications are saved.
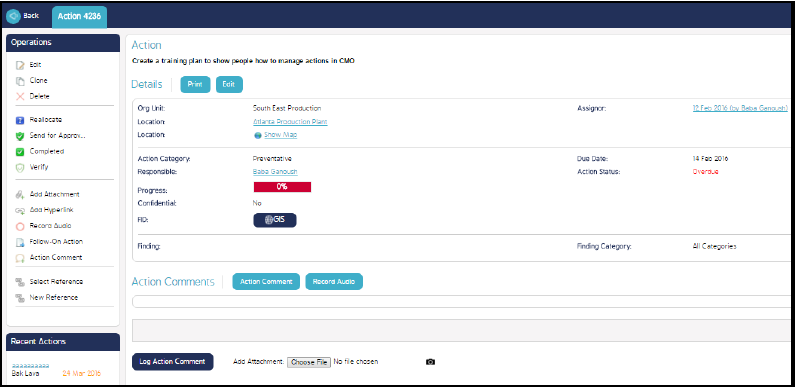
Notes On Action Record Options
Selecting the Action record after it is created will bring you to the area below where you may Reallocate, Request Extension, Add Attachments and Hyperlinks and other operations found on the menu bar in the left hand column.
Video Demo
Coming soon...