
Upload Invoice
Uploading an Invoice 
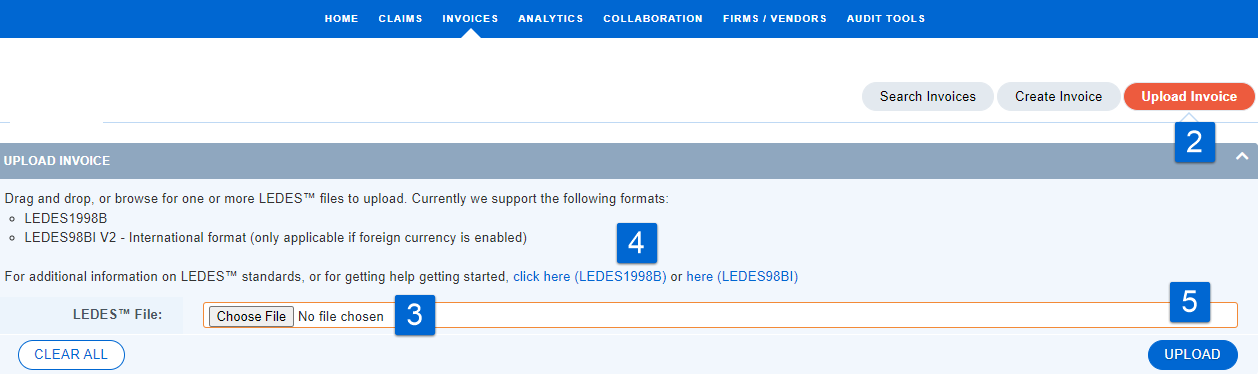
In Acuity, firm users have the option to upload LEDES1998B and/or LEDES98BI V2 - International Format (only applicable if foreign currency is enabled). For video instructions on uploading an invoice, see How to Upload an Invoice
1. From the Home Page, select  within the Your Invoices information box.
2. OR, navigate to the Invoices Navigation link and select Upload Invoice.
3. Browse and attach, or click-and-drag, your LEDES file into the designated field.
4. For additional information about the accepted LEDES formats, follow the hyperlinks.
5. Click Upload.
Invoice Upload Results
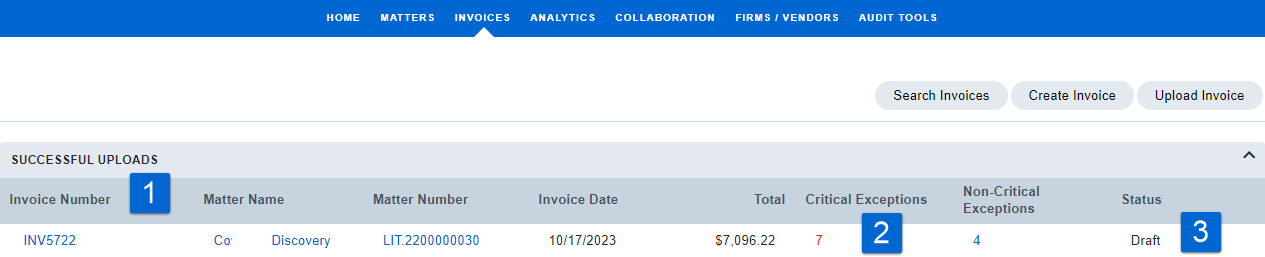
The Upload Results page displays important information about your invoice. Acuity will also send you an email with this same information for your records.
-
Click your invoice number to navigate directly to your invoice profile.
-
Quickly review the number of critical and non-critical exceptions on your invoice. You will have an opportunity to resolve these directly in your invoice.
-
Notice your invoice status is DRAFT. You must change the status of your invoice to FOR APPROVAL for the client to review it. To change the status of your invoice, click on the Invoice Number.
 Note: For written instructions on manual invoice entry, see Create Invoice