
Vendor Management
Vendor Management
Acuity’s Vendor Management feature allows for submission of non-law firm invoices through Acuity. Your users can create profiles for your approved 3rd party vendors, and your firms or your staff can submit their invoices for approval and payment similarly to firm invoice submission. For video instructions, see How to Add a Vendor Profile
Note: If your organization does not currently use Vendor Management and you would like to know more, please reach out to your Customer Success Manager.
Creating a Vendor Profile
The ability to create vendor profiles will be determined by your permissions within Acuity. If your organization uses Vendor Management but you do not see the “Create” option after following the below steps, you may not have the permissions to do so.
1. To create a new Vendor Profile, select the Firms/Vendors tab on your top navigation

2. Select “Search Vendors”.
Note: Before creating a new vendor profile, Acuity will require you to perform a search to confirm the vendor does not already exist within Acuity.

3. Enter the Vendor’s name or tax ID into the search form, then select “Search”.
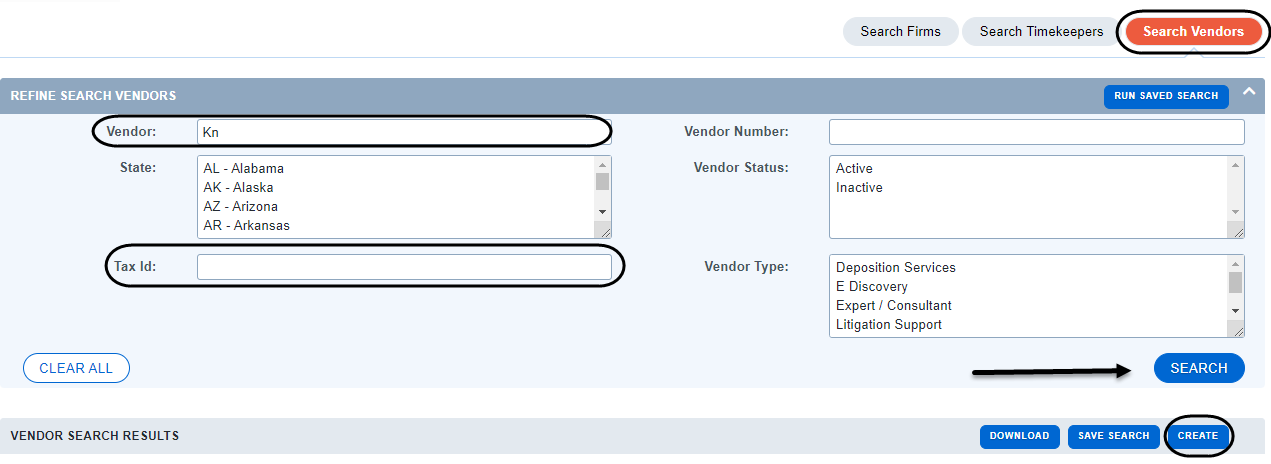
4. After performing the search, the “Create” option will appear in the Vendor Search Results.
5. Select “Create” to open the vendor profile creation form.
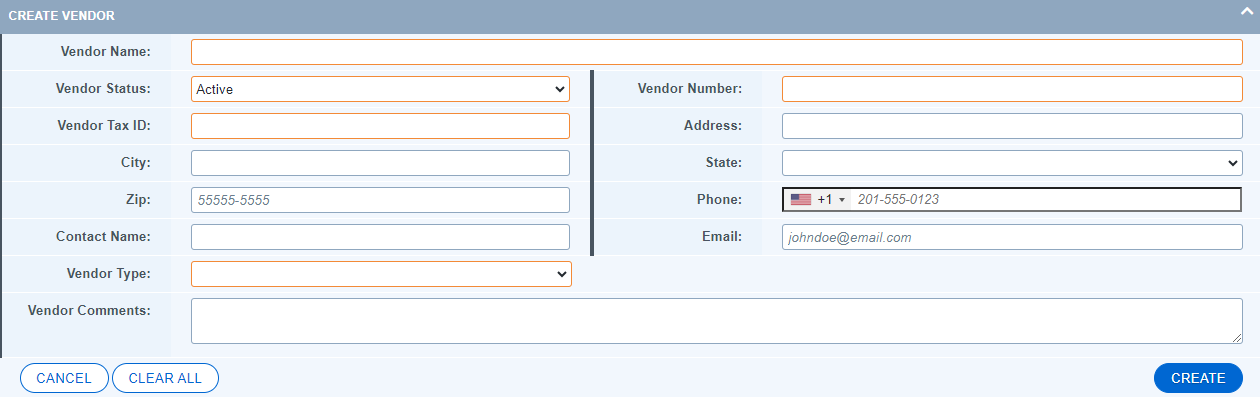
Note: On the Create Vendor form, required fields will be indicated with a gold border. Fields with a blue border are optional.
6. After filling in all required fields, select “Create” to save and create the new Vendor Profile.
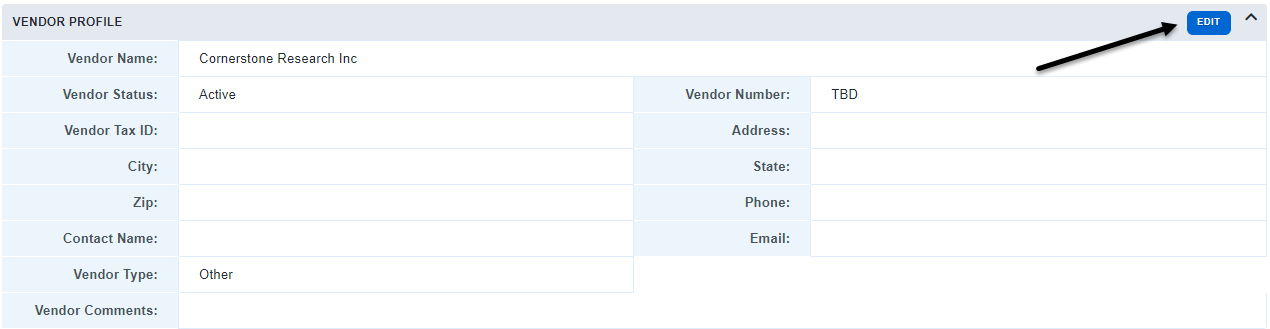
7. After creating the vendor profile, you can make edits to the profile using the “Edit” button at the top right corner of the profile page.
Editing or Deactivating a Vendor
1. To make changes to an existing vendor profile, begin by doing a Vendor Search under “Firms/Vendors”, “Vendor Search”.
2. Search for the vendor in question using any of the available criteria on the Search Vendor form.
3. In the search results, click on the vendor name to navigate to the vendor profile.
4. On the Vendor Profile, select the “Edit” button.
5. While the Vendor Profile is open for editing, all of the fields except for the Tax ID can be edited.
6. After making your edits, select “Save” to apply the updates to the profile.
7. If the vendor is no longer active, use the drop down field beside “Vendor Status” to change from Active to Inactive. This will prevent this profile from being used for any future billing.
Note: If there are any in-flight vendor invoices for that vendor, please address them before inactivating the vendor profile.
Creating a Vendor Invoice
1. You can create an invoice on behalf of your vendor by selecting “Create Vendor Invoice” under the “Invoices” tab.

2. Selecting the “Create Vendor Invoice” option will open up an invoice creation window.
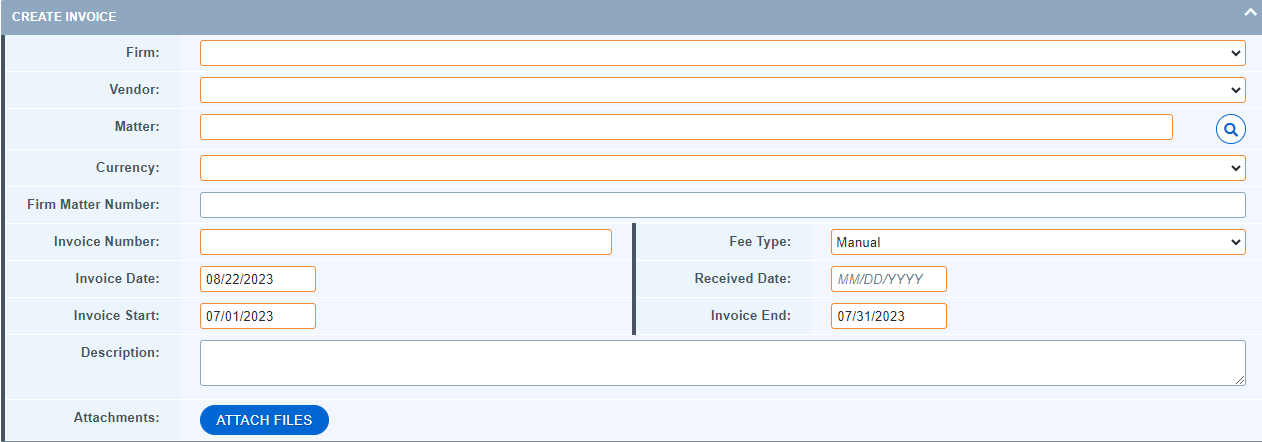
3. Fill in the cover sheet information in the top section.
4. Select the vendor name from the vendor drop down list.
5. Enter the matter name or number into the “Matter” field or select the magnifying glass beside the field to search for the matter in question.
Note: On this form, fields with a gold border are required fields. The fields with a blue border are optional.
6. Below the cover sheet information, you will create one or more line items for the invoice.
Note: For vendor invoices, only expense lines can be input.
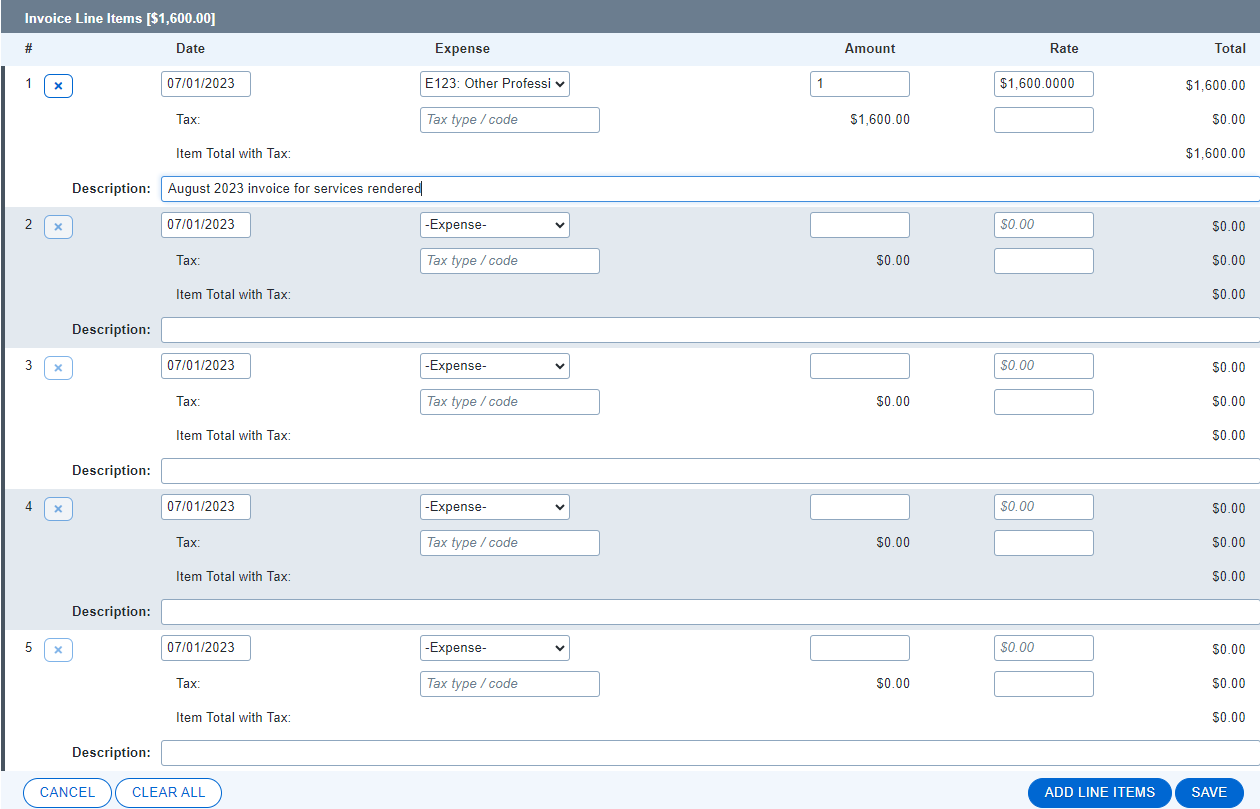
7. Add the line item date, the expense code, the amount, rate, and description.
Note: The “rate” should be the dollar amount and the “amount” the number of units (usually 1).
8. After entering the line item information, select “Save” to create a draft of the vendor invoice.
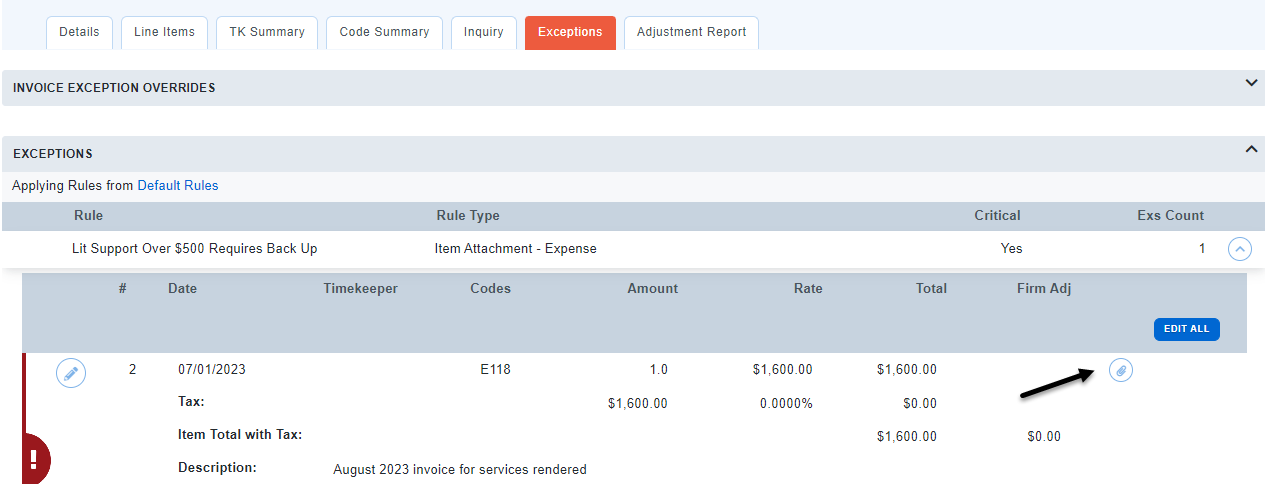
Resolving an Exception
Depending on the billing rules that have been set up for your organization, you may need to add supporting documentation to your expense line(s) to resolve a critical backup requirement exception.
1. If you see one of these critical exceptions on your invoice, select the Exceptions tab, view the line item in question, and use the paperclip icon to the far right of the line item to attach the receipt or copy of the vendor’s invoice.
2. You may need to use the “Re Audit Exceptions” button at the top of the invoice profile to refresh your page after adding the backup.
3. Once your critical exception is resolved, you can change the invoice status from “Draft” to “For Approval” to begin the approval workflow.