
Configuration Guide
Getting Started
TeamConnect Office Link includes the TeamConnect Office and Outlook Add-ins.
Use TeamConnect Office to make updates to documents that open in Microsoft Word, Excel, and PowerPoint.
Use TeamConnect Outlook to manage tasks, appointments, emails, and documents from Microsoft Outlook.
Both add-ins require settings information after you install them. For TeamConnect Office, when you enter settings information for Word, Excel, or PowerPoint, the other programs update with the same settings. For TeamConnect Outlook, you enter settings information separately. See the entries on Installing the TeamConnect Office Add-In and Installing the TeamConnect Outlook Add-In for further details.
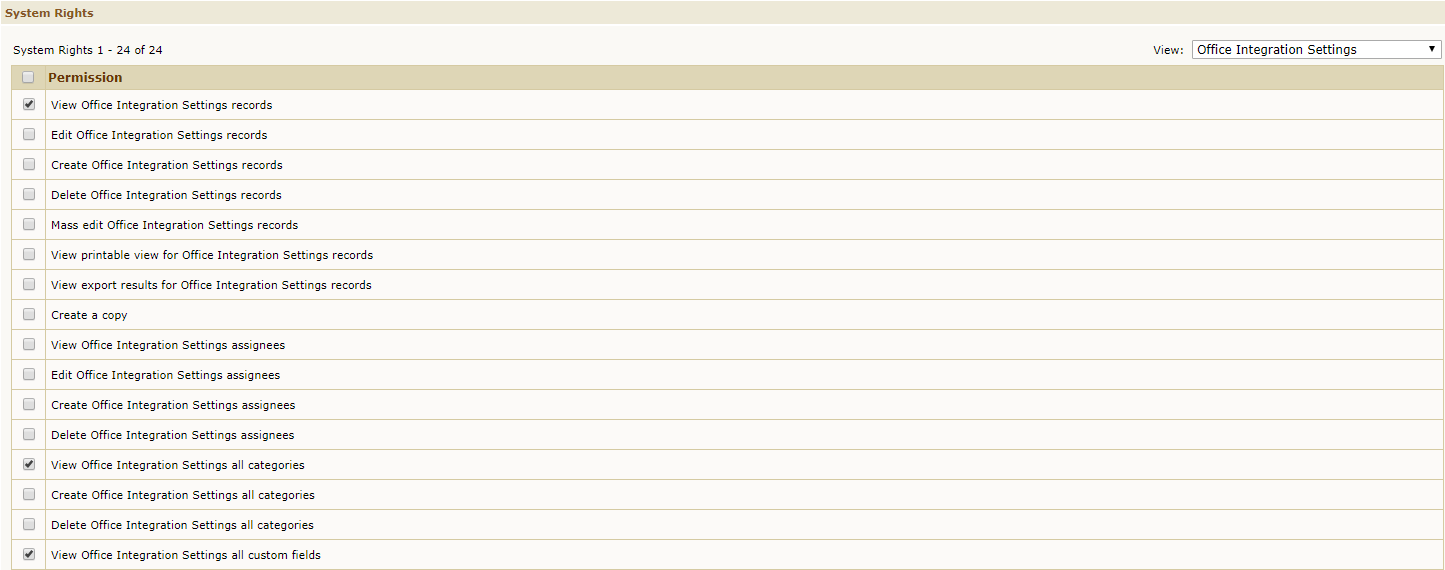
Admins must enable the following permissions in TeamConnect for users and groups in order for Office Link to function:
- View Office Integration Settings records
- View Office Integration Settings all categories
- View Office Integration Settings all custom fields
Updating Login Settings
Follow the instructions below to update login information settings.
For TeamConnect Office:
- Open a Microsoft Office program, such as Word, Excel, or PowerPoint.
- From the TeamConnect tab, click the Settings button.
- Click the tab. Enter your changes. Click Ok.
- A message appears to indicate whether authentication was successful or not.

For TeamConnect Outlook:
- Open Microsoft Outlook.
- From the TeamConnect pane, click the Settings button.
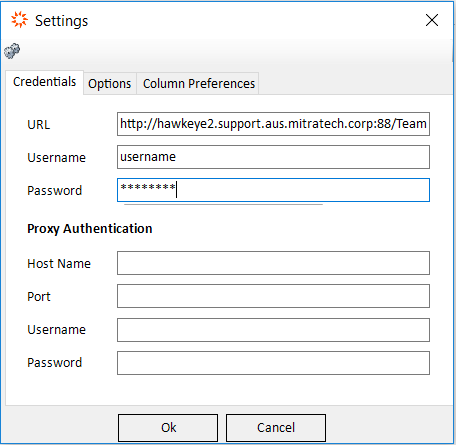
- From the Credentials tab, enter your changes. Click Ok.
- A message appears to indicate whether authentication was successful or not.
Note: You must enter your username exactly how it is in TeamConnect, including any capitalizations.
Proxy Authentication
Depending on your network configurations, your application may require proxy authentication to connect to Mitratech’s server.
To set up a connection to a proxy:
- From the TeamConnect tab or pane, click the Settings button.
- Navigate to the Credentials tab.
- Enter information about your proxy server. See table below for a description of each field.
- Click Ok.
| Field Name | Description |
| Host Name | The host name of the proxy server on your network. |
| Port | The port number on which your proxy server listens for requests. |
| UserName | The user name that authorizes requests to the proxy server. |
| Password | The password that authorizes requests to the proxy server. |
Project Integration
You can choose which projects integrate into Outlook and other Office programs. In addition, you can also determine which search views appear as folders in the folder hierarchy.
Note: To optimize performance, it is best to limit the number of projects included to only those which you are currently working on.
To integrate projects:
- Log in to the TeamConnect instance.
- Click the Setup link.
- From the Go to drop-down, select Object Definitions.
- Select a project.
- Click the Search Views tab.
- Select the link for a search view.
- Under Used for, place a check-mark in the Integration check-box.
- Click the Save and Close button.
- Repeat steps 6-7 for each search view folder you want to appear under a project.
- Repeat steps 4-9 for each project you want to appear in the folder hierarchy.
Preventing Records from Appearing
By default, TeamConnect enables documents, appointments, and tasks from TeamConnect to appear in the Outlook plug-in. However, if you do not want one or two of these types of records to appear, you can disable them.
To prevent documents, appointments, or tasks from appearing in Outlook
- From the TeamConnect pane, click the Settings button.
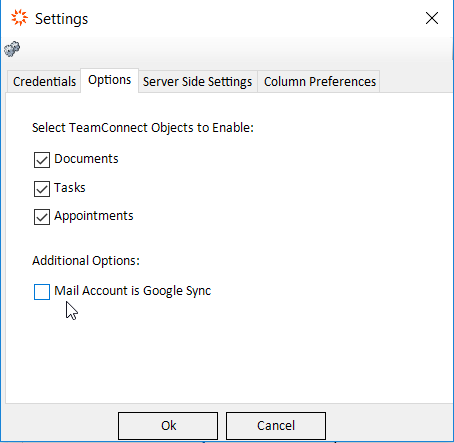
- From the Settings window, click the Options tab.
- Remove the checkmarks from Documents, Tasks, or Appointments if you do not want any of those records to appear in Outlook.
Note: You cannot remove the checkmarks from all three record types. - Click Ok.
- Restart Outlook.
Syncing Outlook with Google Mail (Gmail)
If you use Google mail as your mail server, specify that your mail account is Google mail as part of your settings.
To specify your mail account is Google mail
- From the TeamConnect pane, click the Settings button.
- From the Settings window, click the Options tab.
- Select the Mail Account is Google Sync check-box.
- Click Ok.
Syncing and Offline Mode
The following page details functionality available from the Options subtab of the Settings menu.

Autosync/Background Sync Intervals
The Auto Sync Interval allows users to set the plugin to sync enabled items automatically after a predetermined amount of time. This setting applies only for Outlook users. Set the value to '0' to disable this feature.
Working in Offline Mode
Checking the Start in Online Mode will cause the plugin to initiate sync upon load for each time you open Outlook or an Office product. Note: The default setting for this box is checked.
Leaving this block unchecked will result in the plugin opening in offline mode. Offline mode may help expedite processes by preventing unnecessary sync upon opening the program.
Once in the program, click the Offline Mode icon to enable Online Mode. The user will need to navigate to each desired object and turn on the Online Mode after starting in Offline Mode. This process will need to be repeated each time the application is closed and re-opened with the default Start in Online Mode left unchecked.
Document Check in & Check Out
The TeamConnect Office Suite plug-in incorporates document check-in and check-out in order to prevent files from being edited by more than one user at a time. See Document Management for further information. Note: Local changes will not be automatically reflected in the plug-in. Users must check the document back in for these changes to be stored and reflected in the plug-in.
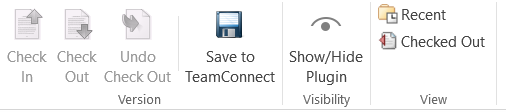
To check out a document, open a document from a Matter folder by double-clicking. Select View and click Edit Document from the drop-down list. Click the now highlighted Check Out icon under the TeamConnect tab.

Note: If the file is already checked out by another TeamConnect user, you will be given a notification.
After editing the document, click Check In under the TeamConnect tab, or click Undo Check Out to return the document to the Matter folder without changes. Users may be prompted or required to enter a comment upon check-in. See Version Control below for more information.
Documents that are already checked out by another user will still have the Check Out option in the TeamConnect tab. Clicking Check Out will then display a message stating that the document is checked out and listing the user that has checked out the document.
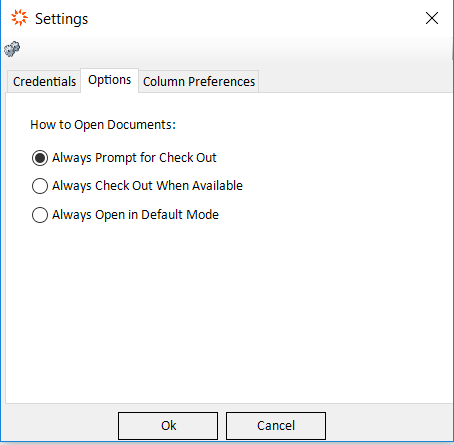
Check In Settings
Users can change the default settings for how document check-out operates in Office 2.0. From the TeamConnect plug-in window, select the Settings button and then Options to choose between the three available options detailed below.
 |
Option | Details |
| Always Prompt for Check Out | Users are prompted to confirm any document check-out. | |
| Always Check Out When Available | Opening a file that is available for check-out will automatically check out the document without any prompts or confirmation. | |
| Always Open in Default Mode | Files will be opened in read-only mode unless they are already checked out. |
Document Management
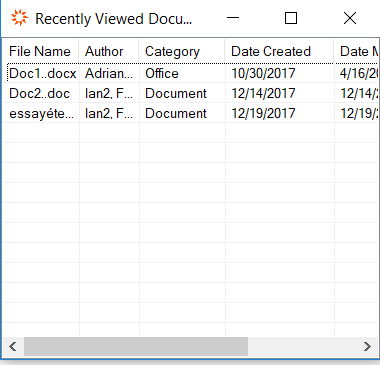
Users are able to view all recently edited or opened documents via the Recent button in the View section of the TeamConnect tab.
Similarly, the Checked Out button will show all documents currently checked out and the user associated with that document. These documents must be checked back in to save changes to the system. Local changes do not automatically reflect in the application.
Search Filtering
Outlook and Office users are able to utilize a search filter in the plug-in to optimize access to their matter folders and documents. This feature can be disabled or configured from the respective TeamConnect account for the Office account as detailed in TeamConnect-side Configuration.
Important: If the Setting up Search steps are not completed, existing files from before the upgrade will not be returned in the search.
Setting Up Search
After installation, users should navigate to the Server Side Settings tab of their plug-in Settings to setup searching and filtering.
Click the Sync All Documents, Tasks, and Appointments button to ensure that all existing files are eligible for searching. Depending on the number of files in your TeamConnect system, this may take a large amount of time to complete. It is recommended to begin this sync when there is significant available time for processing so that your work with Outlook is not interrupted.
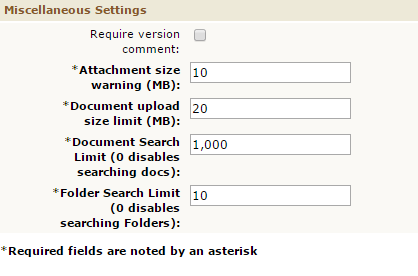
TeamConnect-side Configuration
Office Suite searching can be configured (or disabled) from the Office Integration Settings page within TeamConnect. See the images and table below for more detail.
 |
Field | Function | Example |
| Document Search Limit | Sets the number of Document/File matches that will be returned upon a search. |
Document Search Limit = 100 |
|
| Folder Search Limit |
Sets the number of folders that will be expanded per search. Users can continually repeat the search to continue expanding further groups of folders. This functionality is designed as such to optimize performance. All visible matches will be highlighted. |
Folder Search Limit = 10 1. Enter a search for "Dispute." |
Searching and Filtering with Office Suite
Type into the search bar to view folders or documents matching your query. Details on configuring search as well as how search operates can be found in the table above in the Search Filtering. See the examples below for further details.