
Key Dates (LXT 1.0.0)
Key Dates
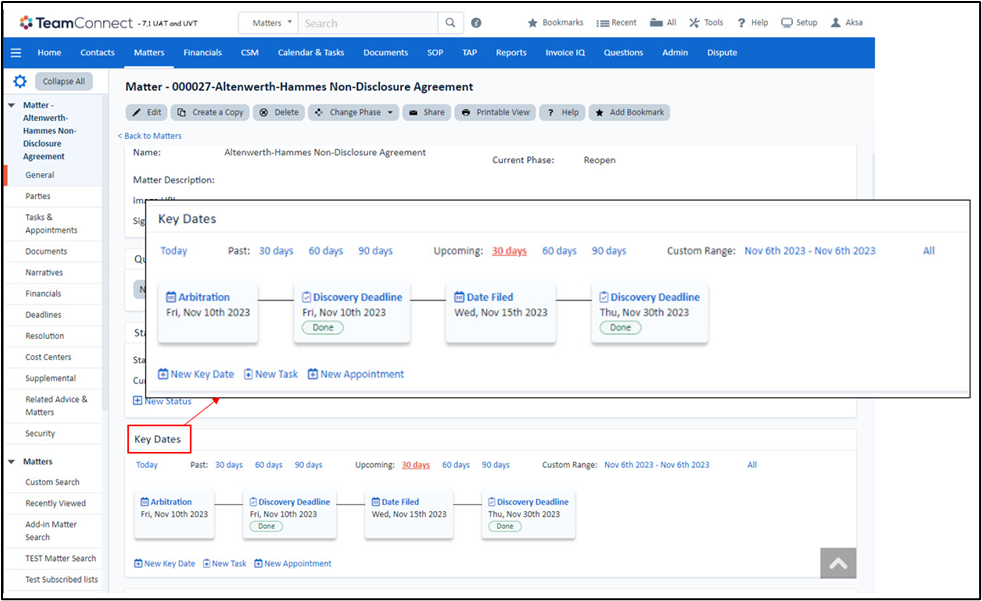
As part of TeamConnect version 7.1's redesigned user interface, a new Key Dates object with visual timeline feature has been introduced which can be added to highlight significant events in the life of a matter.
Quick Reference links:
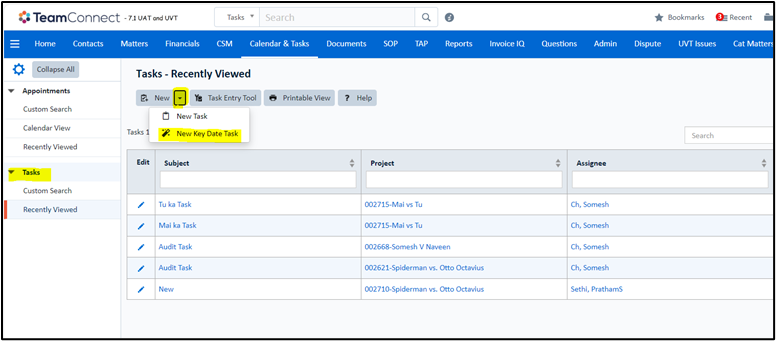
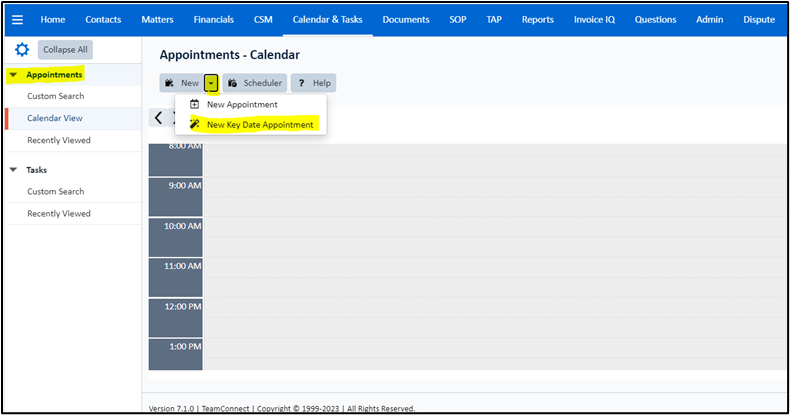
- How to create New Task and New Appointment as Key Dates
- How to create Key Date in the “Matter Key Dates” section
- Key Date Settings
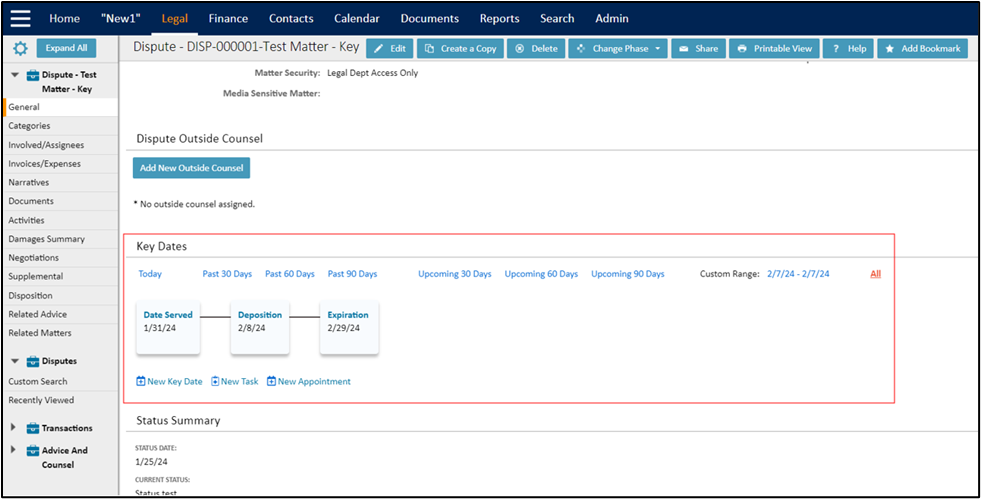
The users can visually see the matter lifecycle at a glance and can manually add dates to the object or populate it from Tasks and Appointments, if desired. The timeline will plot activities designated as key dates onto a linear visual map that can be displayed on a tab inside the object record.
For more information on Key Dates and Settings, please see the videos on Installing Key Dates and Introduction to Key Dates and Configuring Key Date Settings.
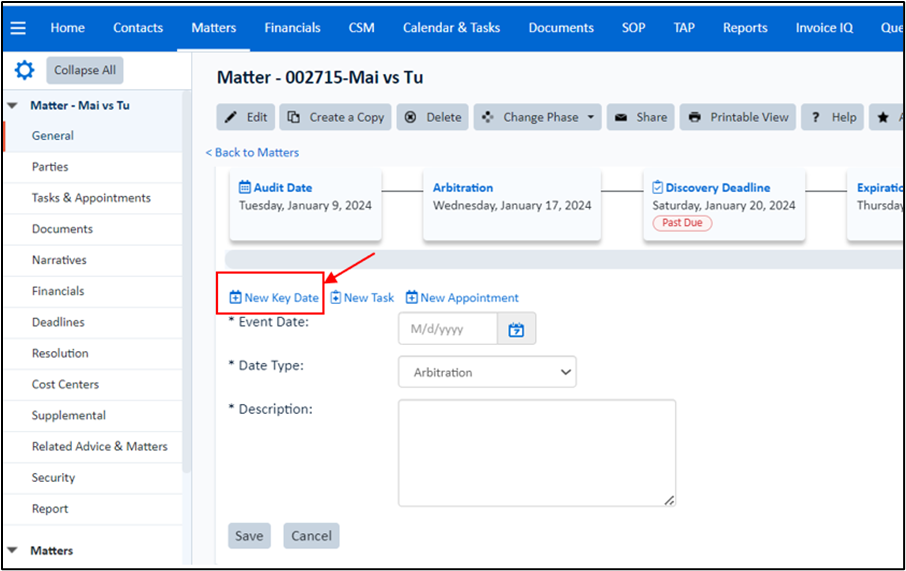
While creating/updating a matter, the user can follow the below steps to create the Key Dates:
Note:
- Ensure that normal users have permission to set Key Dates.
- Ensure that you add "Key Dates" and "Matter Key Dates" to different tabs, as placing both on the same page may cause conflicts and issues.
| Steps to follow | Screenshots for reference |
|---|---|
|
 |
|
 |
Note:
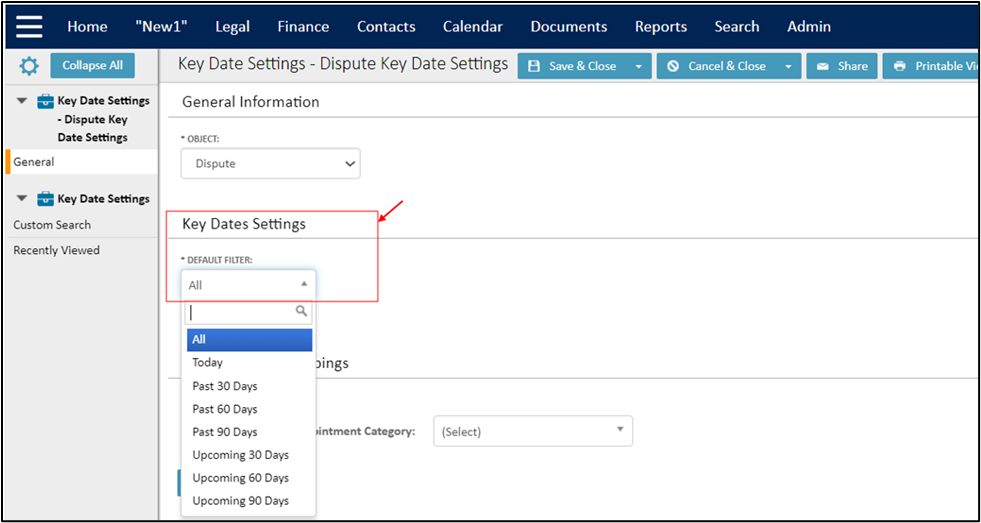
- The user can see filtering options such as ‘Today’, ‘Past’, ‘Upcoming’, ‘Custom Range’, and ‘All’ and will be able to filter the Key Dates for 'Past' and 'Upcoming' with 30, 60, and 90 days.
- When a user clicks on the “Today” filter option, the Key Dates, Appointments and Tasks that are due today will be displayed in the timeline.
- The user can select the required date range from the "Custom Range" filter option to display the Key Dates, Appointments and Tasks in the timeline.
- When the user selects the "All" option, the timeline will display all of the relevant particular matter records.
- If you are not able to see the Key Dates, make sure the filter is set correctly.
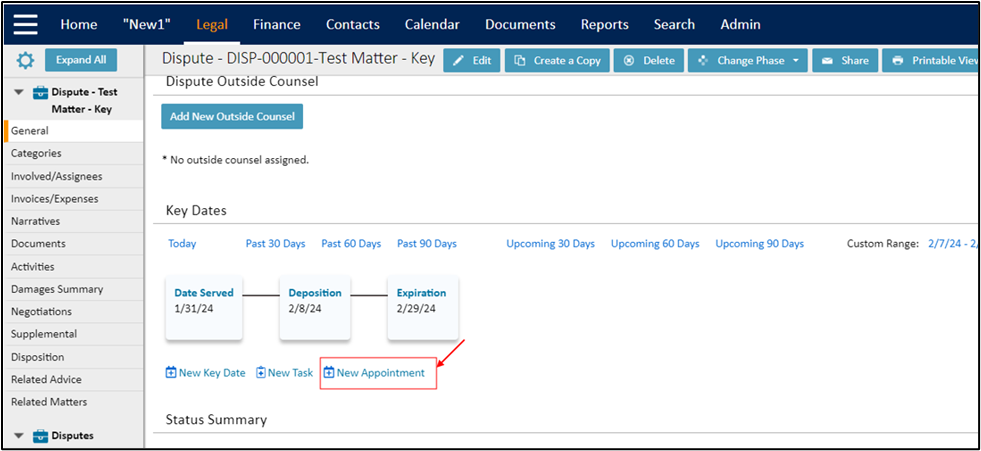
How to Create New Task and New Appointment as Key Dates
| Steps to follow | Screenshots for reference |
|
 |
|
 |
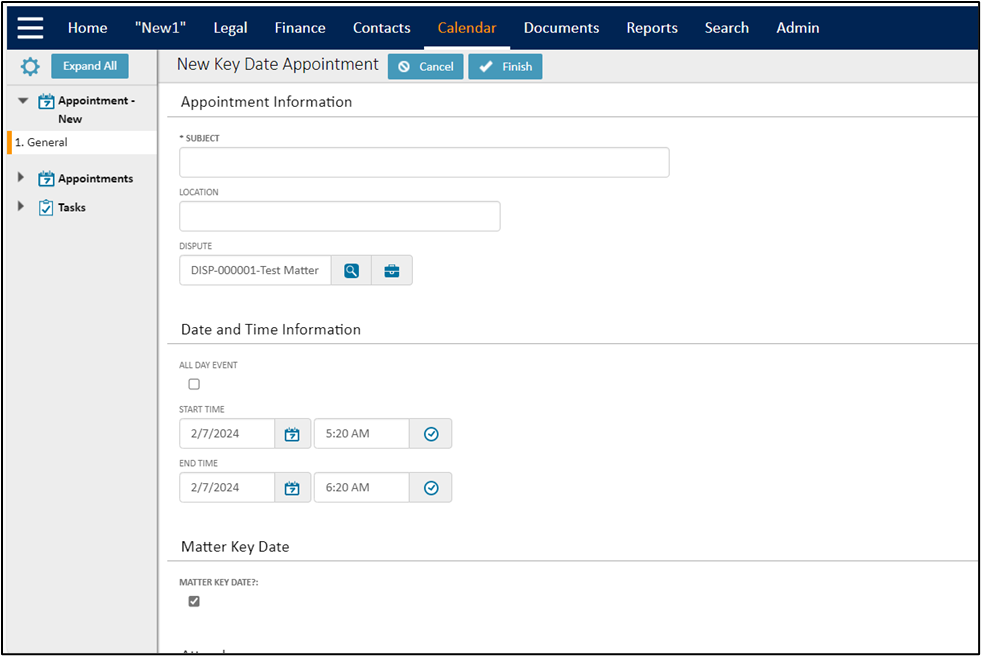
Note: If the user does not select the “Matter Key Date” check box under “Update Matter Key Dates” section, the created Task or Appointment will not appear in the Key Date timeline.
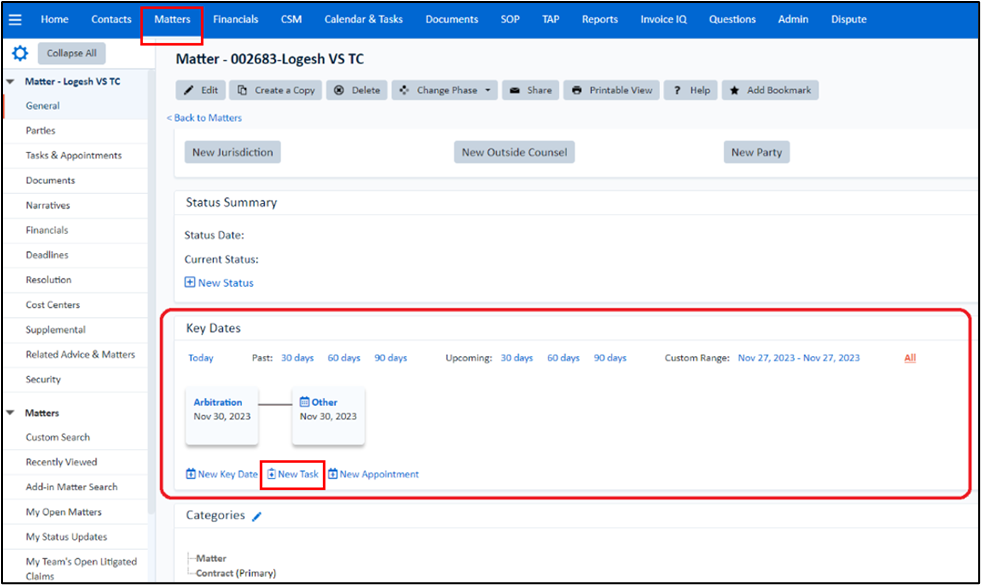
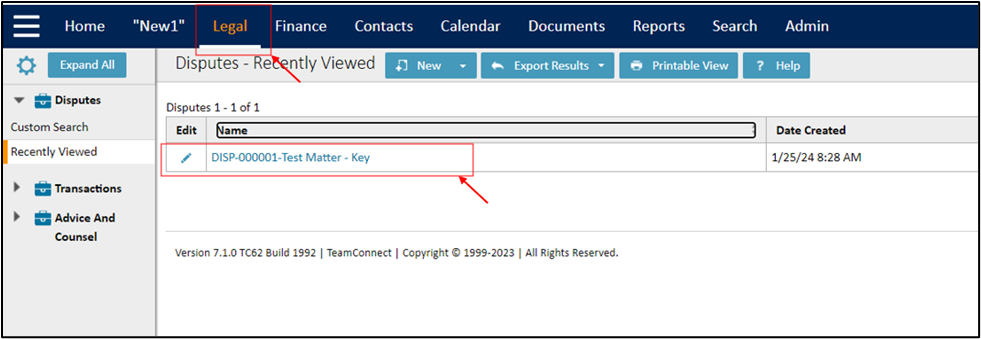
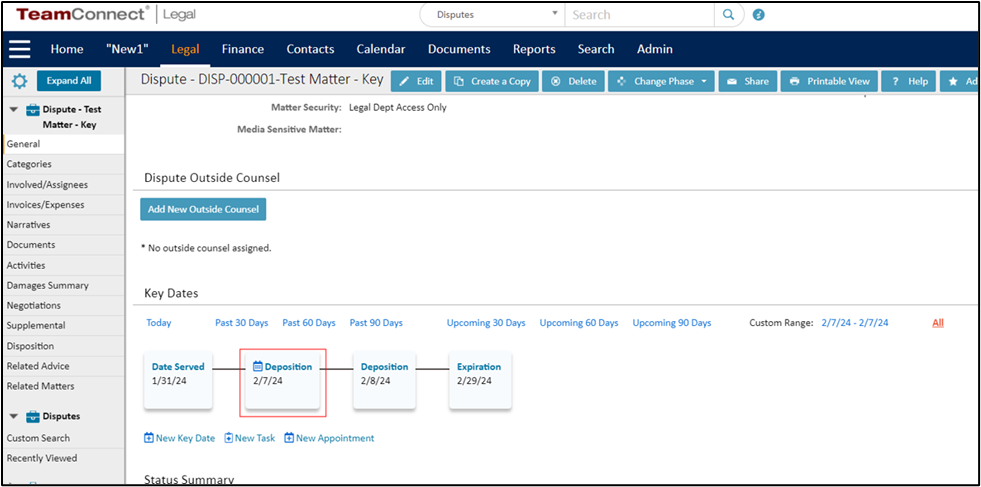
- Navigate back to your specific matter and open it.
- Scroll down to the Key Date section to find the newly added Task with the heading of the task will be Other & Task logo will be displayed as a prefix. Also, the Start date of the respective Task will be displayed in the timeline tile.
Note: The user can follow above similar steps for the creation of New Appointment on Key Dates.
Important:
- After adding the legal extensions module, previously added/existing tasks and appointments can also be converted to key dates.
- The user should note that, the existing Task and Appointments can be changed to Key Dates
- While editing a newly created Key Date for the Task or Appointment, if Matter Key Date is unchecked, then the the specific Task or Appointment will not appear in general page’s Key Dates timeline, but can be seen under Matter Key Date section of the “Tasks&Appointment” page.
- When the matter of the respective task or appointment is changed, the task or appointment will not appear in the previous matter record Key Date timeline.
For more information on Key Dates, please see the video.
Tasks & Appointment Page
When key dates is installed, the events Tasks & Appointment will have 3 tables:
- Tasks - shows all tasks, including ones that are flagged to generate a key date
- Appointments - shows all appointments, including ones that are flagged to generate a key date.
- Key dates - shows only key date records that were created manually (and not from a task or appt record).
While users can directly populate the Matter Key Dates object, it is also possible to add and remove key dates from Tasks and Appointments tab.
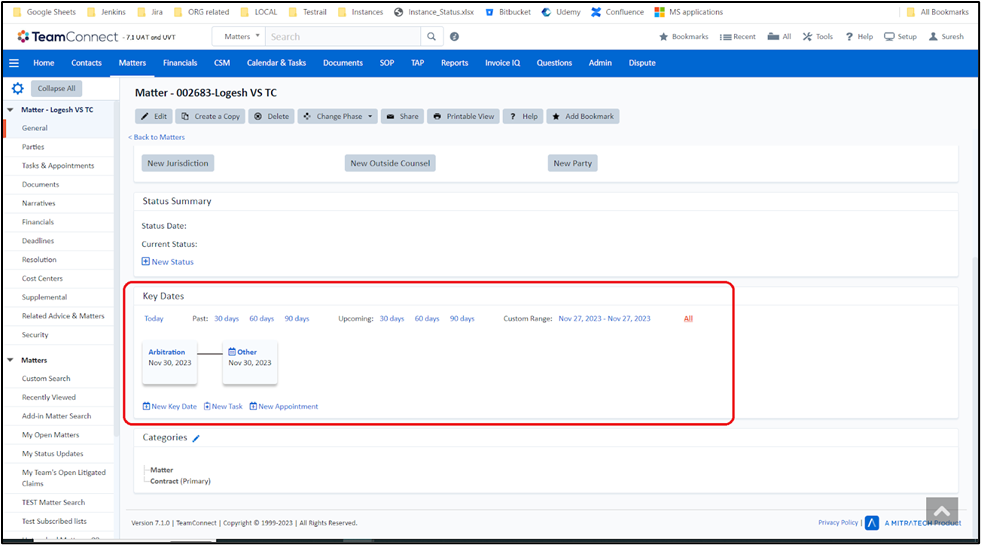
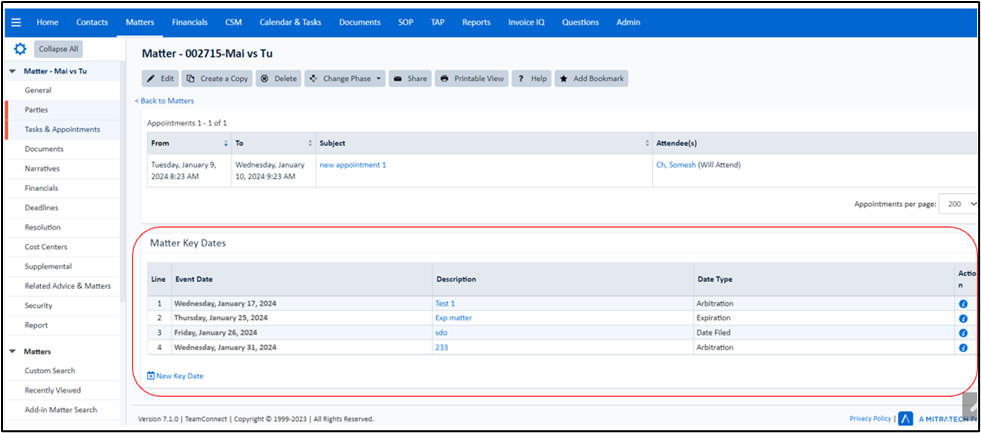
All the Key Dates of respective matter is also displayed in “Tasks&Appointment” page, which is accessible from the side navigation bar of the matter. The user can create Key Date from “Matter Key Dates” section which is available in the “Tasks&Appointment” page, and the Key Date will be displayed in the “Key Dates” timeline of the general page.

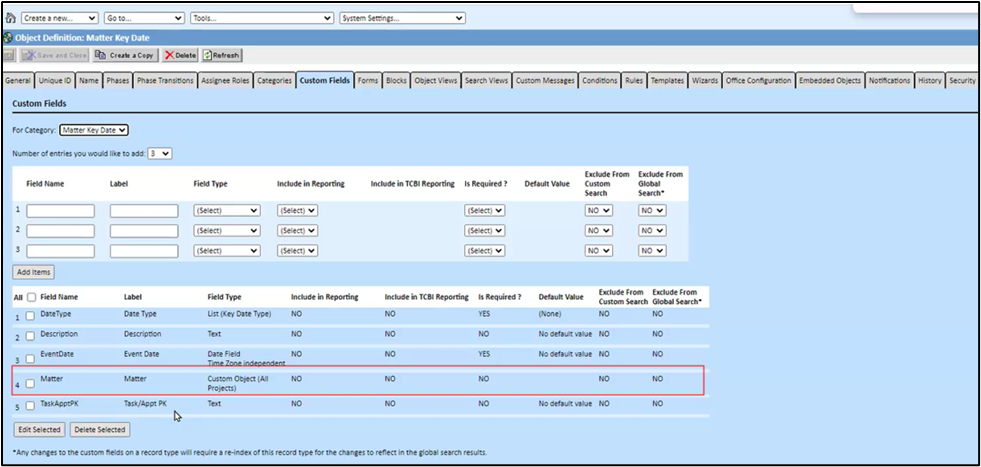
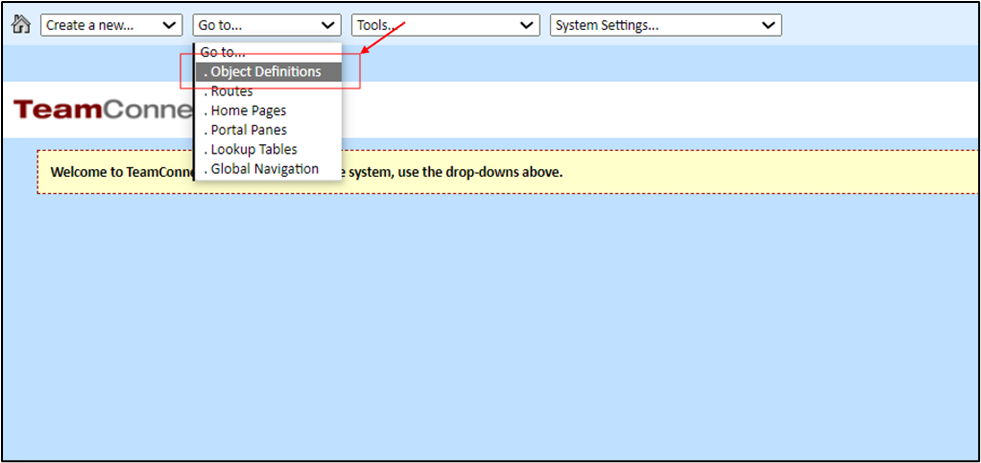
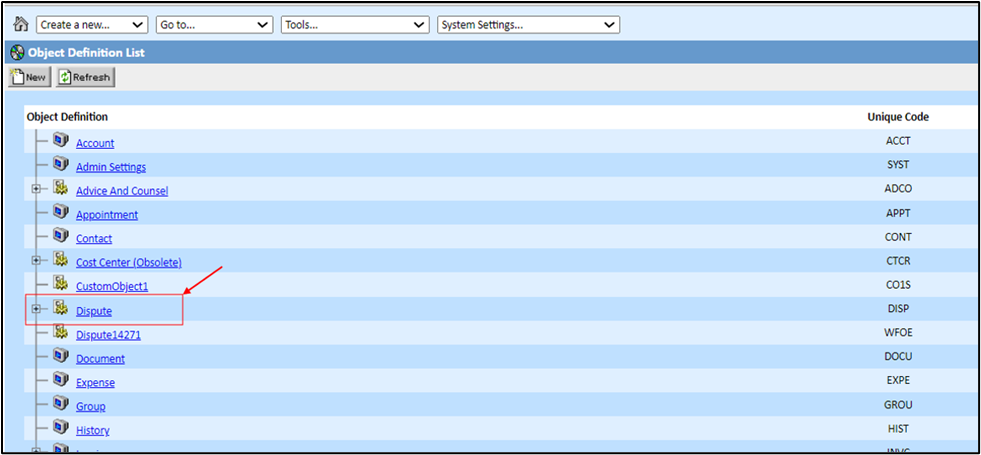
Note: In TeamConnect 7.1 and below version, the Matter Key Date was embedded under Matter object. Now, after adding the legal extensions module, “Matter Key Date” will act as a stand alone object. For more information, the user can navigate to Setup > Click the "Go to…" dropdown > Select ".Object Definitions" from the dropdown> Select “Matter” and under Matter, they can select the Custom Fields to see all the field names along with newly added “Matter” custom field.
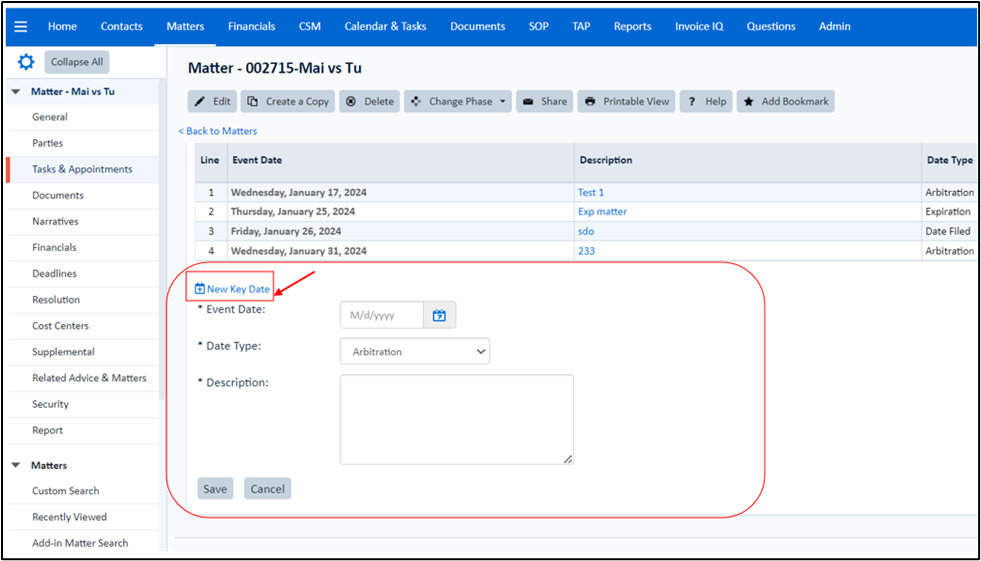
How to Create Key Date in the “Matter Key Dates” Section
| Steps to follow | Screenshots for reference |
|
 |
|
 |
|
|
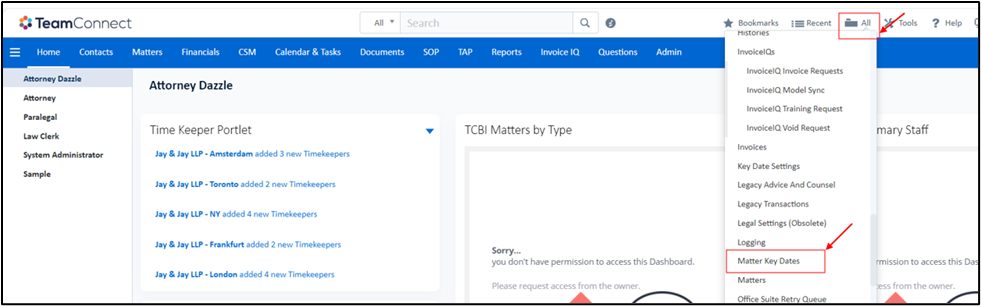
Important: The user can access the “Matter Key Date” object from the “All” option also.
Note:
-
When the user delete a key date from “Matter Key Dates” section which is available in the “Tasks&Appointment” page, key date is no longer displayed in the general page's "Key Dates" timeline.
-
The user can edit the Date Type, Date and Description of the Key Date in “Matter Key Dates” section of the “Tasks&Appointments” page and the same changes will be displayed in the general page's “Key Dates” timeline.
Important: The user can create or update the new or already existing Key Date Task/Appointment under “Clendar&Task” global navigation respectively.
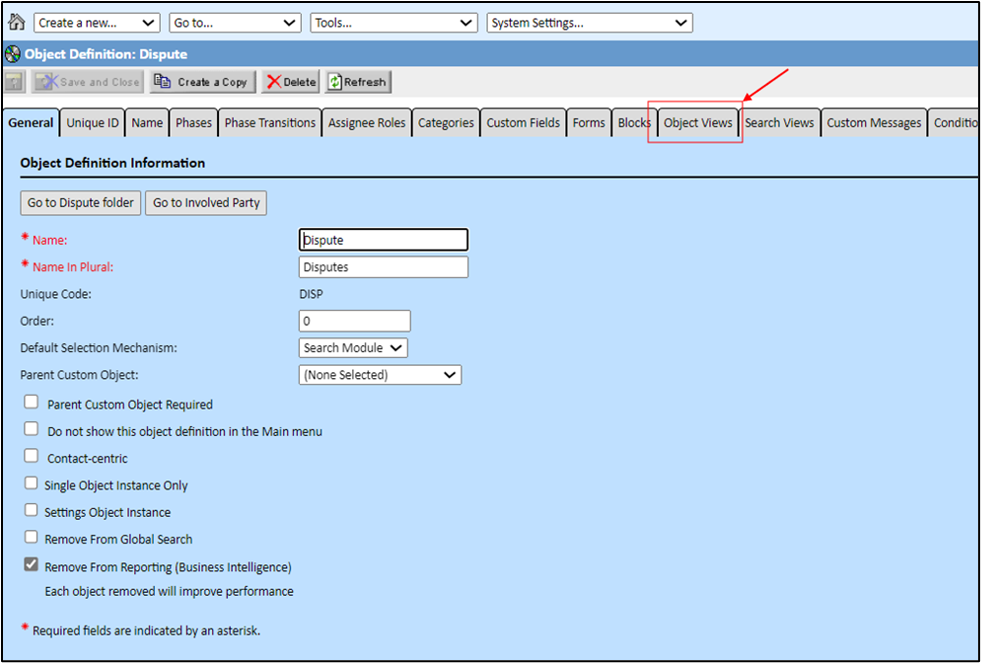
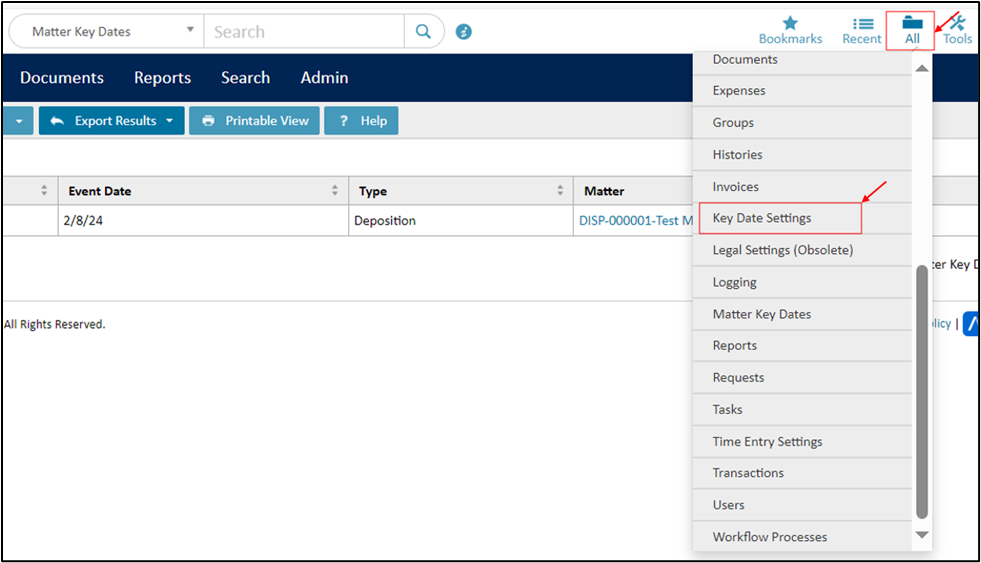
Key Date Settings
To create a new Key Date settings for DISP (Dispute) and TRAN(Transaction) object, the user should follow below instructions:
For more information on Key Dates Settings, please see the video.
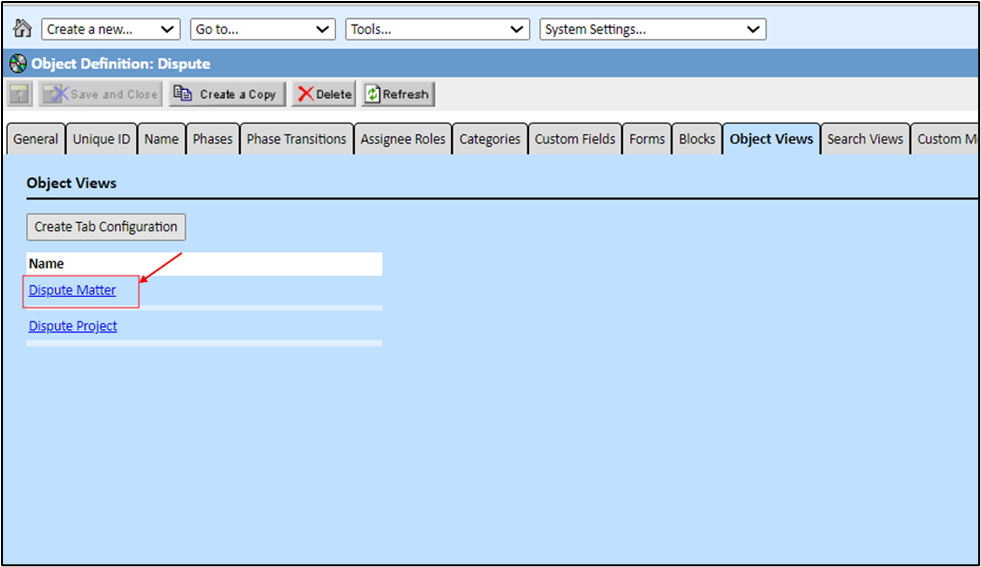
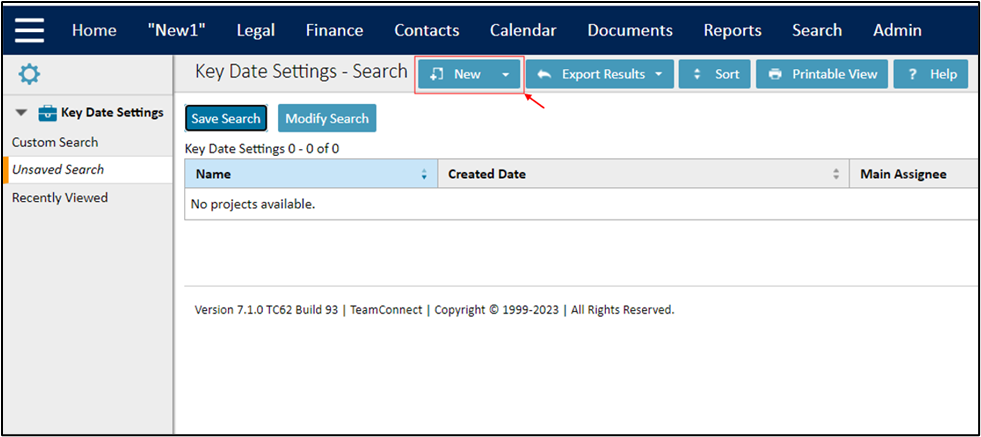
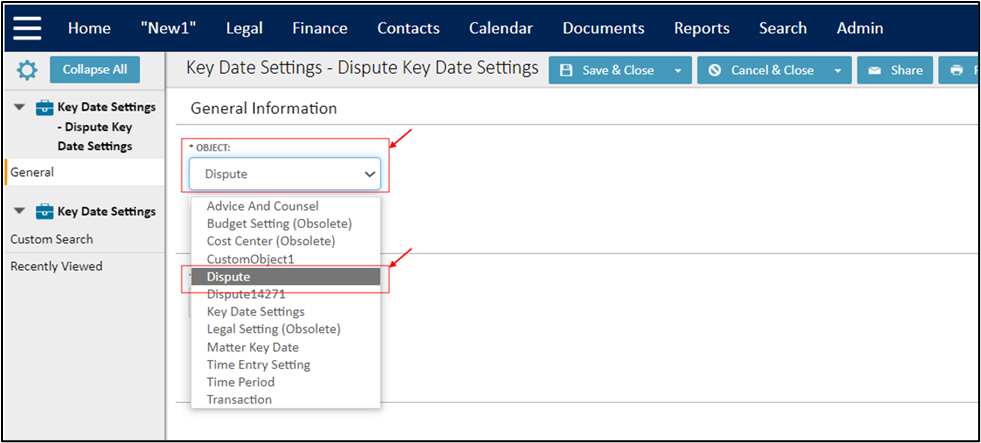
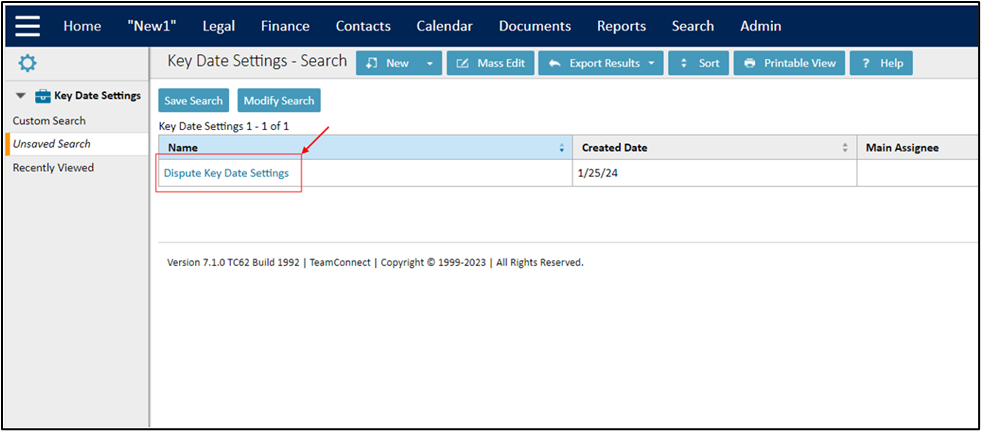
How to create “Key Date Settings” for DISP and TRAN objects
| Steps to follow | Screenshots for reference |
|
 |
|
 |
|
 |
|
 |
|
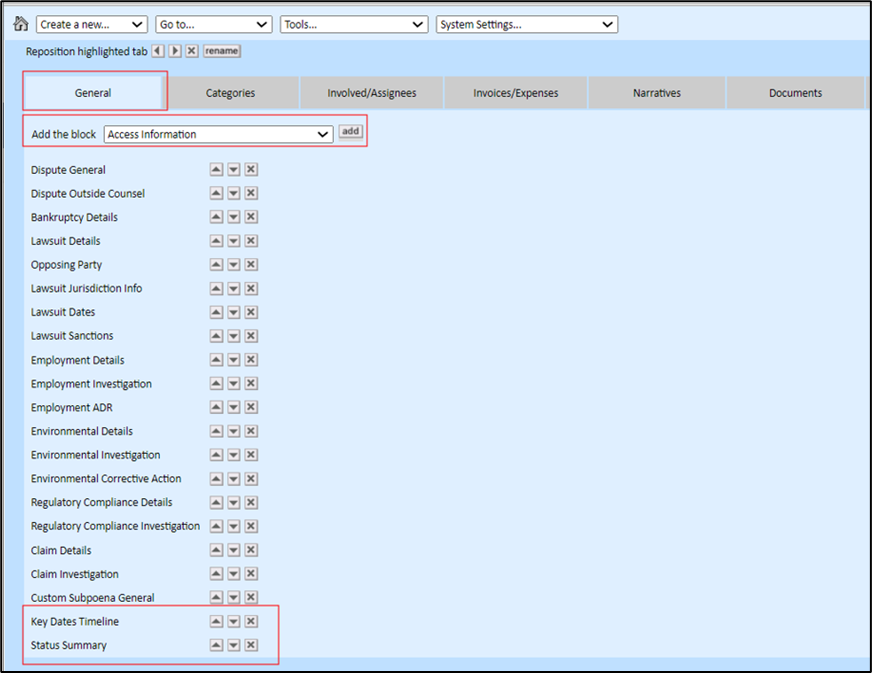 |
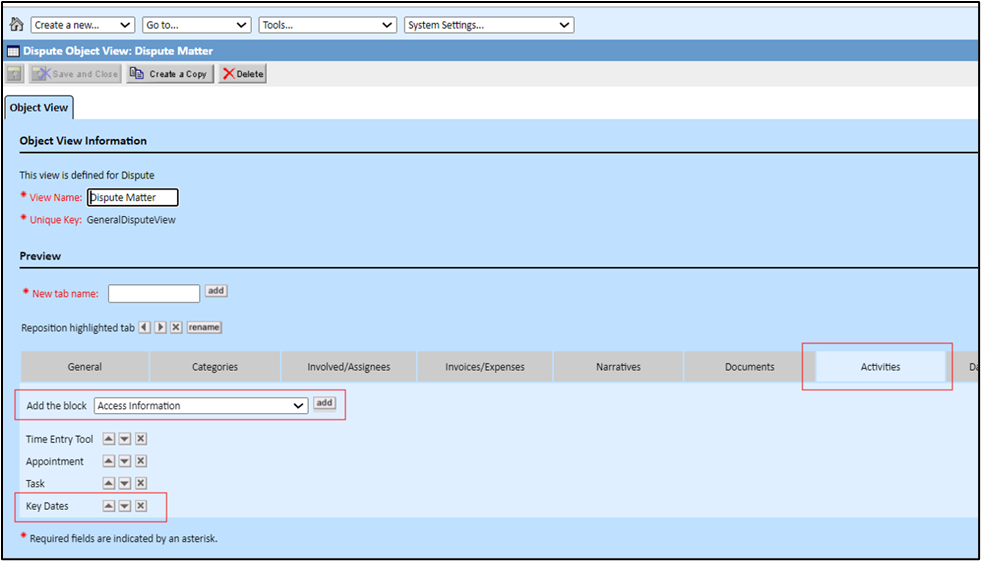
Note: You can position the blocks using up and down arrows. |
 |
|
 |
|
 |
|
 |
|
 |
|
 |
|
 |
|
 |
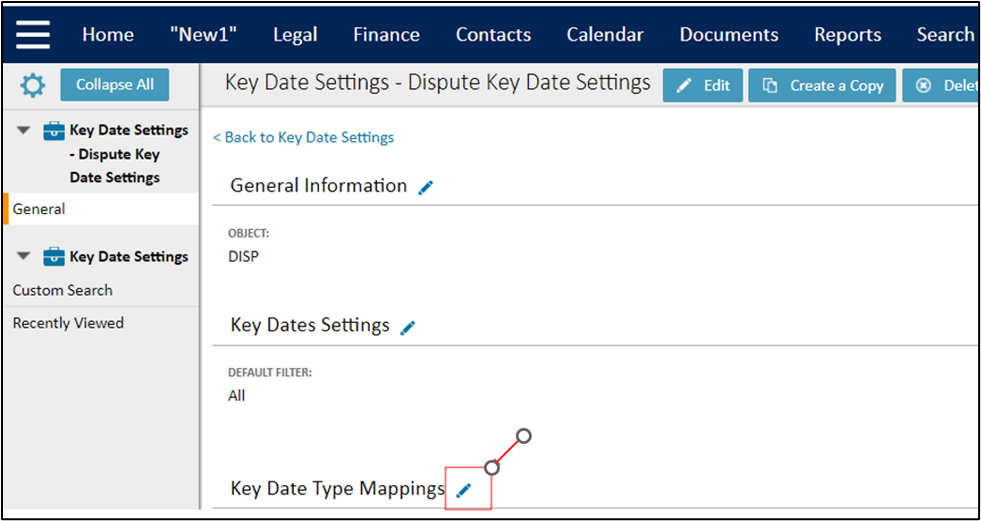
Key Date Type Mappings
A user can create a specific Task or Appointment Key Date type with a required category by mapping the Task or Appointment in the Key Date Settings under “Key Date Type Mappings” section.
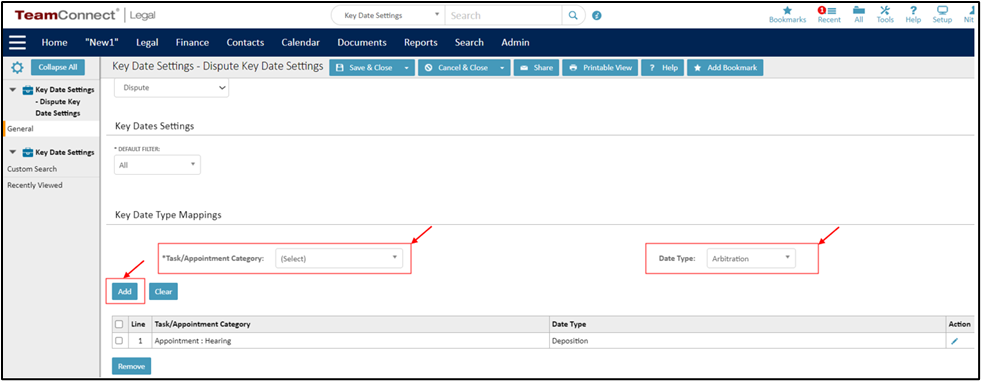
How to change the Key Date Type
When a user selects the “Matter Key Date” check box while creating either Task or Appointment Key Date, a duplication may occur when the user creates Key Date type and also Task or Appointment type. Hence, to resolve this, we have introduced Key Date Type Mapping. The user should Map the Task or Appointment in the Key Date Settings under “Key Date Type Mappings” section before creating a Task or Appointment Key Date.
| Steps to follow | Screenshots for reference |
|
 |
Note: The Key Date Settings is applicable for dispute (DISP) and Transaction (TRAN). |
 |
|
 |
|
 |
|
 |
|
 |
|
 |
|
 |
|
 |