TeamConnect Business Intelligence 6.1.3 Release Notes
Summary
Release Date: 04/26/2019
Installation Instructions can be found at the end of these release notes.
Issue Resolutions
TeamConnect Business Intelligence 6.1.3 resolves the following issues:
- Issue: If field label were changed, the fields in reports would have to be remapped. If two fields had the same label, syncs would fail.
Dependencies
This update requires the installation of TeamConnect 6.1 and TeamConnect Business Intelligence 6.1.
Installation Instructions
This section contains a quick overview of the upgrade process. Each line links to specific instructions on how to perform the process.
NOTE: Dashboard owners MUST backup their existing dashboards prior to upgrade. Under normal upgrade processes, dashboard templates will persist and not have to be re-imported. The backup ensures that you do not lose your dashboards in the case that we encounter a unique scenario and the dashboards are deleted.
To upgrade TeamConnect Business Intelligence:
- Install the Metadata Plugin.
- Replace the ElastiCube build files with released version on build server.
- Create a backup of the Existing ElastiCube.
- Upgrade the ElastiCube.
- Copy the .json files
- Remap fields in any pre-existing reports built in TeamConnect Business Intelligence 6.1.2 or earlier.
Install the Metadata Plugin
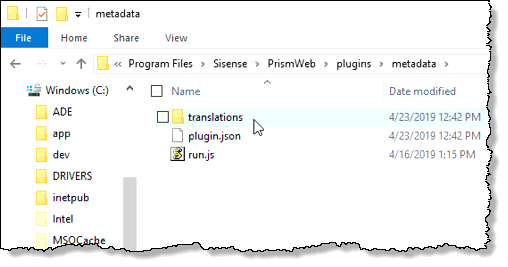
- Extract the SisenseMetadataPlugin.zip file and copy the whole folder into <Sisense Installation Folder>\Prism Web\plugins where <Sisense Installation Folder> is the location of your Sisense installation.
Replacing ElastiCube Build Files
- Create a backup of the existing TeamConnect_BI directory by removing it from this directory, placing a copy in a different location, and changing the name of the copy (for example, TeamConnect_BI_backup). Make a note of the location of the autoCube.proproperties file. You will need the property values in this file.
- Extract the files from the TCBI_Install_Package.zip to the same the location of the original TeamConnect_BI directory.
Creating a Backup of the Existing ElastiCube
To backup your ElastiCube:
- In Windows Services, stop Sisense.ECMS.
- Open the PrismServer\ElasticubeData directory, typically located here:
%ProgramData%\Sisense\PrismServer\ElastiCubeData
Note: If the directory is not in this location, open the Sisense Server Console and click the Server Preferences icon to verify the correct path.
 - Copy the data to your backup location.
Upgrading the ElastiCube
New parameters have been added to the autoCube.properties file. The older version of this file cannot be used, or else null pointer issues can occur due to missing properties.
To update the autoCube.properties files:
- After creating a backup, uninstall the ElastiCube by running the TCBI_Uninstall.bat script from the original installation files.
- Check the log for any errors.
- Open the new autoCube.properties file with a text editor. Define the property values with the information from the previous installation, being careful not to erase any new properties.
- Run the updated TCBI_SchemaSync.bat as an administrator and check the log for any errors.
NOTE: This sync must be run as an administrator.
Copying .json Files
Important:
- A specific .json file must be copied to the translations folder of the metadata plugin after every schema sync, data sync, or data reload.
- You must be logged in as an administrator in order to access the plugins folder.
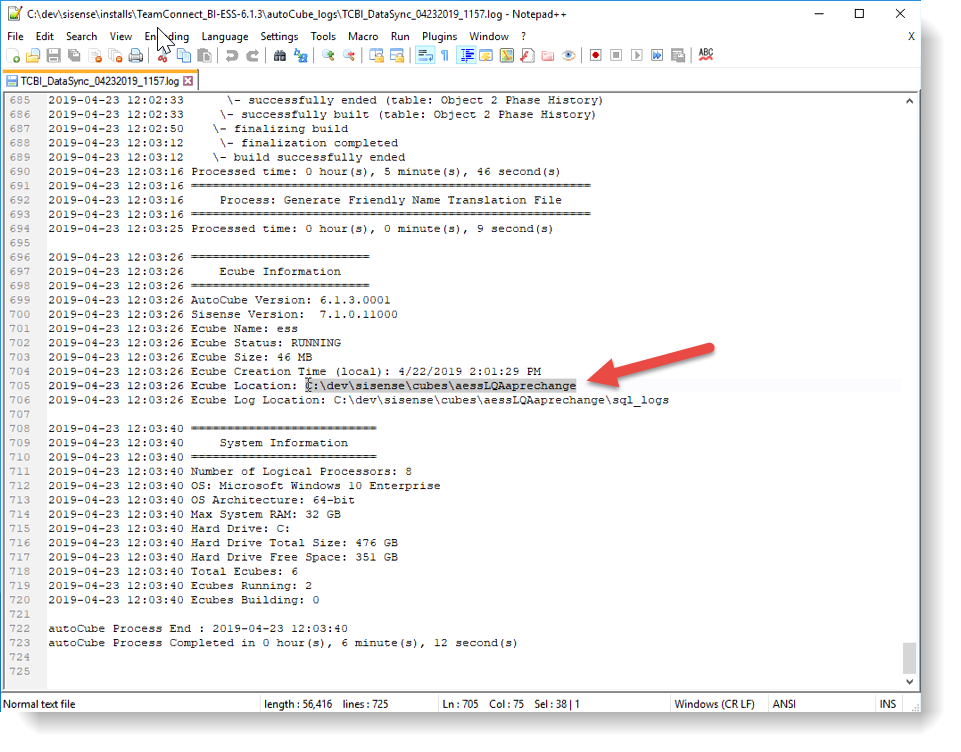
- Find and copy the <eCubeName>.json file. The location of the .json file can be found in the schemaSync, dataSync or dataReload logs. Because Sisense does not always write the file in the same location, you must check the location every time.

- Paste a copy of the the .json file into the translations folder where you installed the metadata plugin.

Remapping Fields
In existing TeamConnect Business Intelligence reports and dashboards built with TeamConnect Business Intelligence 6.1.2 or earlier, all fields must be remapped once. After this one-time remapping and implementation of this plugin, renamed fields will not need to be remapped anymore. Note: This step only applies to instances that are upgrading from an older version of TeamConnect Business Intelligence and have existing reports created on those older versions.
Note: These steps must be performed by the owner of the dashboard.
To remap a field in a report:
- Open the TeamConnect Business Intelligence dashboard in TeamConnect. Reports that need to be remapped display an error stating that an item cannot be found.
- Click the Edit Widget icon in the upper right corner of the report.
- Delete each field in the report by clicking the
 Remove the item icon for the individual field.
 - Re-add each field to the report.
- Click Apply.
Troubleshooting
If the plugin is not working after these steps (i.e., if the field lists do not list "friendly" names):
- Verify that the plugin is enabled in the Sisense Admin console.
- Verify that the correct .json file has been properly copied to the translations folder.

