
Saving and Publishing Custom Blocks
You can save your custom blocks to a file for importing into your instance of TeamConnect, or simply to save your work and continue working on it at a later time. You can also publish your custom block directly to TeamConnect from the Screen Designer application.
To save a custom block
- After editing your custom block, open the File menu and select Save Block.
- If there are any missing required properties on your custom block, an error message will be displayed with a list of the affected elements or fields. Fill in the missing information and save the screen again.
- Enter a file name and location for your custom screen file. Your custom screen file will be saved in XML format with the file extension *.scr.xml.
- Click Save.
To open a custom block
- Open the File menu and select Open Block.
- Click Browse....
- Locate your previously saved custom block file, which should have the file extension *.scr.xml.
- Click Open.
- Select the object type of the custom block file from the Target Object drop-down list.
- Click Open.
To publish a custom block
- After editing your custom block, open the File menu and select Publish Block.
- If there are any missing required properties on your custom block, an error message will be displayed with a list of the affected elements or fields. Fill in the missing information and publish the screen again.
- Select the Publish Type: Enter New Name or Select Existing File.
- If you selected Enter New Name, enter a File Name for your custom block, then click OK. Your custom screen will be saved and uploaded to the TeamConnect instance with the file extension *.scr.xml.
- If you selected Select Existing File, choose an existing custom block file from the Select File drop-down list, then click OK. Your custom block will be saved and uploaded to the TeamConnect instance, replacing the past version of the selected file.
Block Identifiers
NOTE: Introduced in TCE 7.1 version.
Identifying the block name in any block issue takes time because the user must first figure out the object definition, the block list, the tab list on the object views, and so on.
The newly introduced functionality allows the user to see the block name as well as the block key while the custom block is rendered, allowing the user to identify which block has issues while diagnosing block issues.
Below are the steps to follow:
- Open TeamConnect.
- Login to TeamConnect with Admin User.
- Navigate to the Finance/Contact or any other module tab (if the block has been created under this).
- For example, click the Finance tab.
- Select any invoice.
- If the user is validating inside the “Matter Budget Insight'' block, press the “Ctrl+Shift+i” key to inspect under the element section.
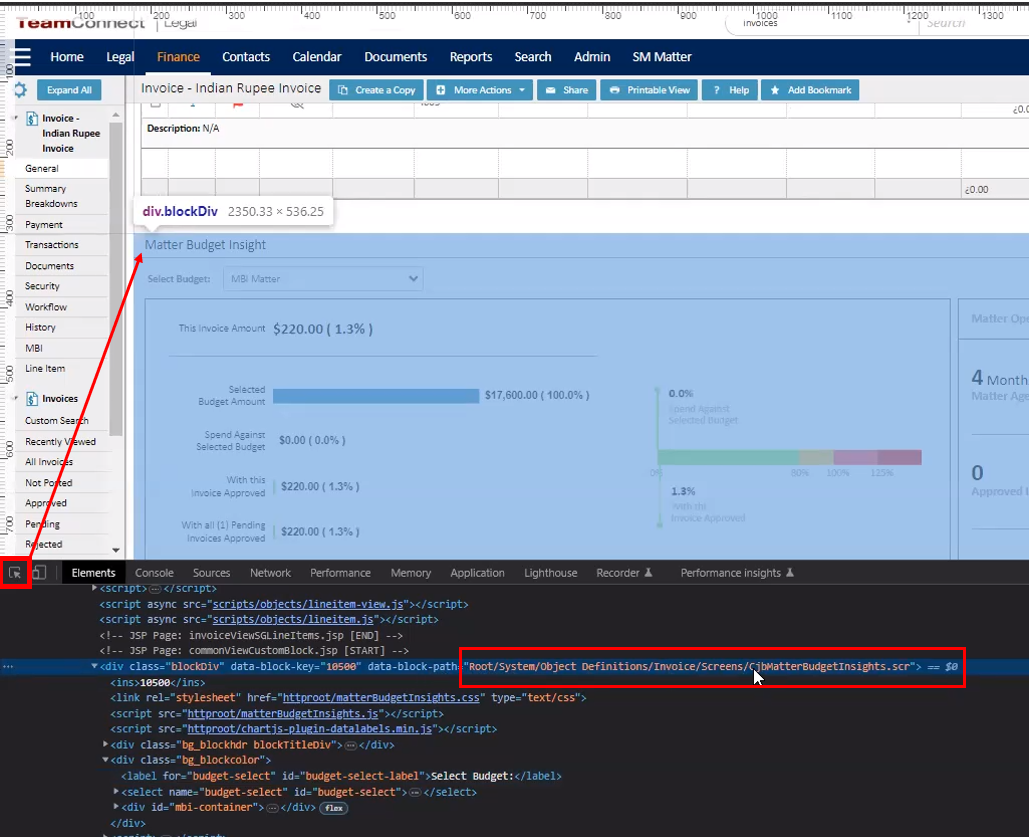
- Click the icon
in inspect mode to hover over and select the block (in this case “Matter Budget Insight”).
- The user will find the data-block path which contains the whole path where that particular file is present.