
Dashboard Quick Start
Managing Your Workflows
What is the Workflow Dashboard?
The Workflow Dashboard is your landing page when you log in to TAP. From the Dashboard, you have a bird's eye view of the status of every workflow — whether it is completed, in process, or yet to be initiated. But what is a workflow, and why would you be interested in its status? Let’s dive in.
What are TAP Workflows?
TAP Workflows are your business processes – automated. Any time your company has a process in place, it can be automated through TAP. When you click the submit button after filling out a webform, you’re completing one stage of what could be a very long and intricate process. Your “completed” form will automatically be submitted to the right person (and the data is pushed to the appropriate database) with minimal effort on your part – TAP workflows use conditional routing to push and pull information to the right place, every time.
Why am I at the Dashboard?
You’re at the Dashboard because you are interested in your company’s business processes. You want to initiate requests, check on the status of those requests you have already initiated, and look at the information that has been submitted into various forms.
How do I initiate a request?
.jpg?revision=1)
The Select your workflow menu at the top left side of the Workflow Dashboard shows a list of different workflow templates. Select the desired template and then click the Create button to display the first stage of the end-user form.
How do I respond to a request?
Workflows connect different people and applications to different tasks. In some cases, you may want to initiate a workflow, but at other times your role is that of the person responding to a request that has been initiated. In most cases, you’ll receive email notification alerting you that your action is needed. However, if you spend a lot of time in the Dashboard, you might want to respond to requests from this central location.
The Actions menu associated with each workflow gives you several options for managing workflows. The available options depend on your specific role permissions as well as the status of the workflow. Click the ··· icon in the Actions column of the Dashboard to open the Actions menu, then select Edit Request.
This will open the current stage of the end user form, where you will enter information. This information, once submitted, is directed to the appropriate place, according to the workflow requirements.
.jpg?revision=1)
Where can I view Workflow History?
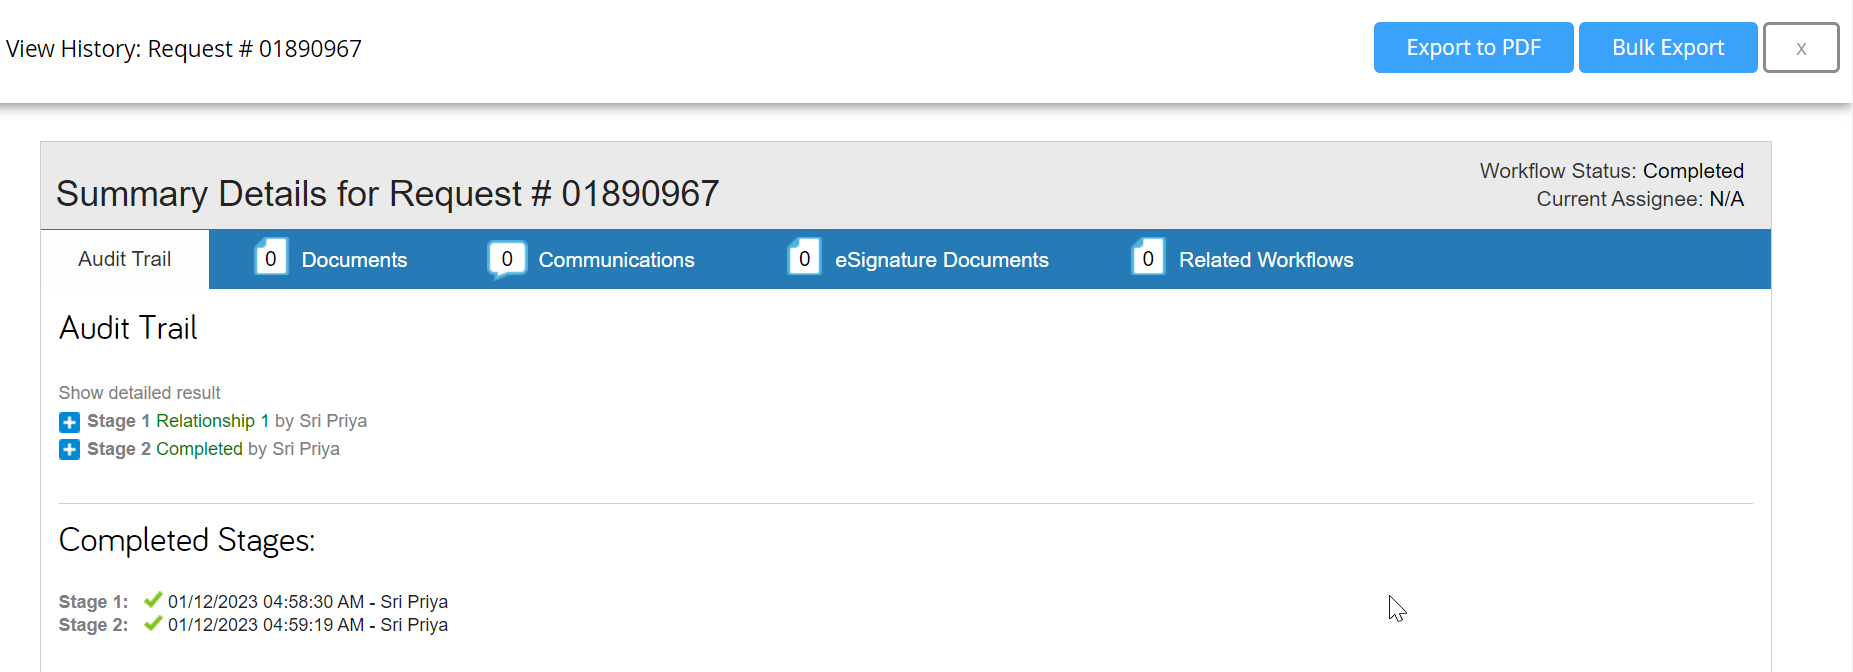
Let’s say a workflow has completed its life cycle, and you’d like to review its history? You can do this using the same Actions menu you used to edit the workflow. This time, select View History. This will display the full Audit Trail for the workflow, which includes all information that has been submitted into the form at any stage, any Documents attached at any stage, any comments and Communications, any eSignature Documents, and any Related Workflows. You can download attachments and eSignature documents; and you can export the Audit Trail as an Adobe PDF document. You can even bulk export the audit trail information.
Can I filter my view of the Dashboard?
You might see a lot of workflows in your Dashboard! No need to be overwhelmed. Instead, use filters to customize your view of the Dashboard.
To Filter Your Dashboard View
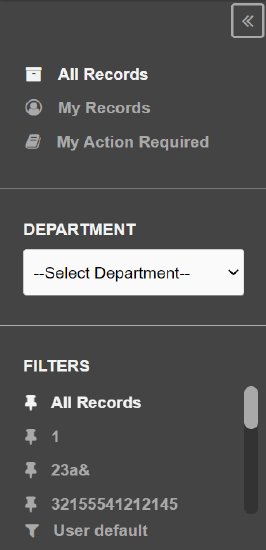
Use the three “out of the box” filters to toggle the Dashboard view between All Records, My Records, and My Action Required records. These filters are located in the collapsible side menu (on the left-hand side of the page), above Department.
- All Records allow you to see any workflow. This means you can check up on workflows that are not currently assigned to you, and that you yourself did not initiate.
- My Records lets you filter the Dashboard contents to show only those workflows that you initiated. These workflows may or may not currently be in flight. This filter is helpful for viewing workflows that you initiated – you might want to check up on their progress and see who they are assigned to or check out the Audit Trail.
- My Action Required is your “to-do” list. This filter shows you all the workflows that are in flight and currently waiting for your action.
To Filter Dashboard Columns
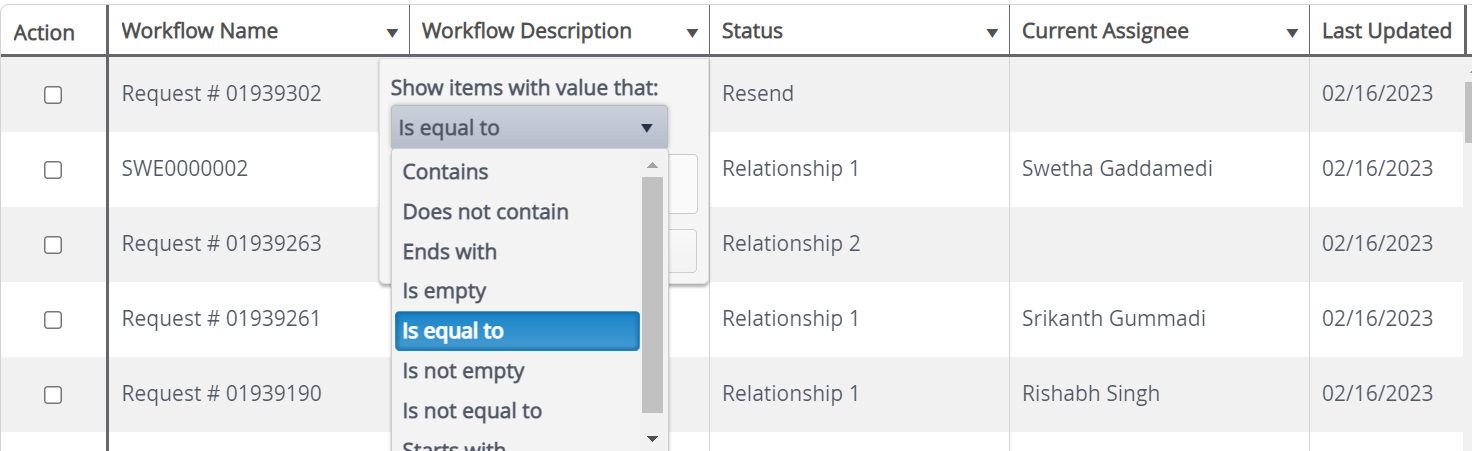
You can further customize your view of the Dashboard by filtering within the columns themselves.
Select the filter icon to the right of a column name. Select your matching criteria from the Show items with value that menu, enter a term in the text box, and click the Filter button.
By clicking the "x" in red, beside the column name, we can clear the present filter which we have setup already.
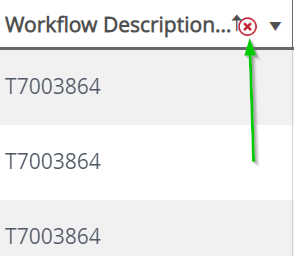
Also clicking the Clear button clears the previously entered filter.
To Add Dashboard Columns
You can further customize your view of the Dashboard by selecting new columns to sort your information.
Select the column icon .jpg?revision=1&size=bestfit&width=32&height=32) above the workflow records area on the right-hand side. A pop-up will appear. Selecting from the two drop-down options in the pop-up will allow you to add new columns or delete Dashboard grid columns.
above the workflow records area on the right-hand side. A pop-up will appear. Selecting from the two drop-down options in the pop-up will allow you to add new columns or delete Dashboard grid columns.
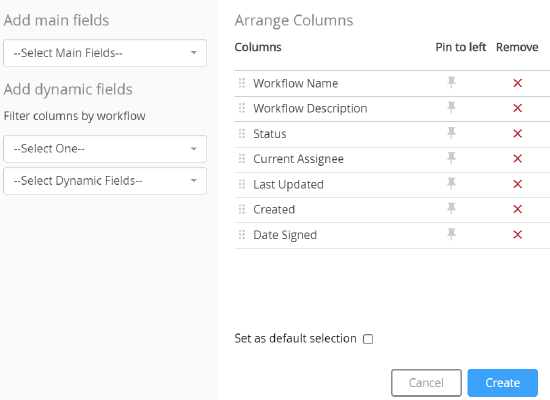
There are two different sections here: Main Fields and Dynamic Fields.
Main Fields represent information about the workflow – pieces of information that are generically relevant to any workflow. Every workflow, whether it’s a Self-Service NDA or an Onboarding workflow, will have a name, a description, and a status. The pieces of information you are interested in will determine the main fields that you Add. Dynamic Fields represent pieces of information that are meta to a workflow.
Main Fields:
- Workflow Name
- Status
- Created, Completed
- Workflow Description
- Next Signer
- Document ID
- Last Updated - updates automatically with a date of last stage submission
- Current Assignee
- Stage progress (How completed a specific stage is, not the progress of the whole workflow)
- Date Signed
- Time to Complete (Hours)
Main fields are sortable by clicking on the column header in the dashboard.
Dynamic Fields represent pieces of information that are found within a workflow. For example, if one form field in your workflow asks that someone fills in a certain geographic region, TAP can pull this geographic region into its own column, titled, Geographic Region. Any piece of information submitted into a workflow is 100% trackable. Just Add the dynamic field. Remember to Save when you are done.
Add the fields that you wish to track by first selecting them from their respective drop-downs and then selecting Add. After doing so, Save and close the pop-up. When you return to your dashboard view, you should be able to see a new configuration with custom-added columns. If you like this view and wish to return to it in the future, be sure to save it .jpg?revision=1&size=bestfit&width=18&height=33) with the Save icon in the top right corner, next to the Select Columns icon. You will be asked to name it, and after you do so, you will find this view saved in your collapsible side menu.
with the Save icon in the top right corner, next to the Select Columns icon. You will be asked to name it, and after you do so, you will find this view saved in your collapsible side menu.
For a video tutorial on configuring the dashboard go here