
Workflow Design
Introduction
This guide shows how to configure workflow in PolicyHub that will be used when sending documents/policies for formal review/approval.
Configuring a New Workflow
Create Workflow
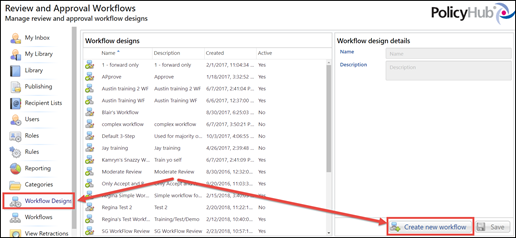
- Go to the Workflow Designs menu item in the left-hand column
- Click on the button “Create new workflow” in the bottom right-hand corner
- Compete the Name and Description fields in the right-hand side of the screen and click the Save button
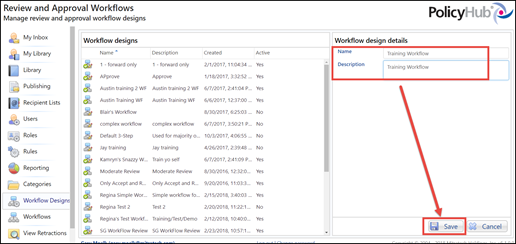
-
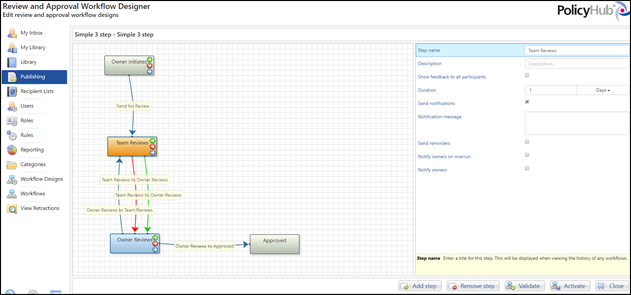
By default, the workflow design screen will have 2 steps: Start / End. The Start will always be a grey box and needs to be the initial step. The End will always be orange and needs to be the final step.
To change the name of a step, for instance from End > Approved, click on the step and edit the name and description in the top right-hand corner.
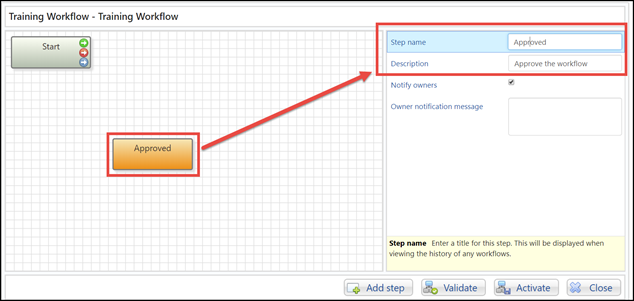
Note: each step must have its own unique name.
Configure Steps
-
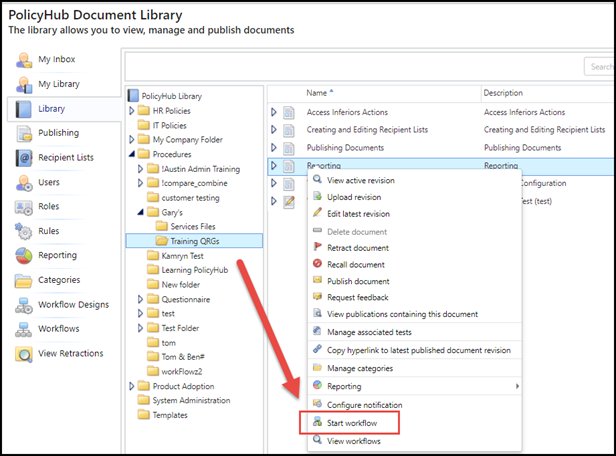
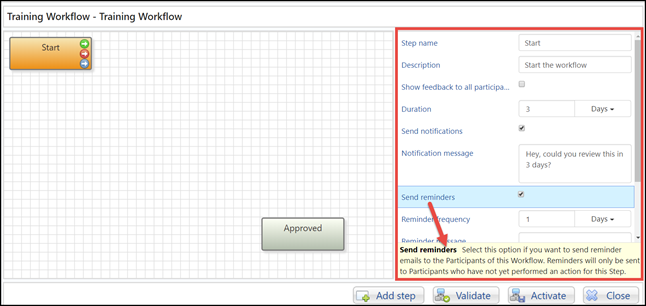
Click on the Start step to begin to configure it.
This is the step that will be triggered when a user clicks the Start workflow button (Library > [document] > Start workflow)
Note: When you click on a step, edit fields display in the right-hand side of the screen.
Note: When you click on a field, help text displays at the bottom of the box.
Note: The last step only has a Notify Owners field (see screen shot further above)
-
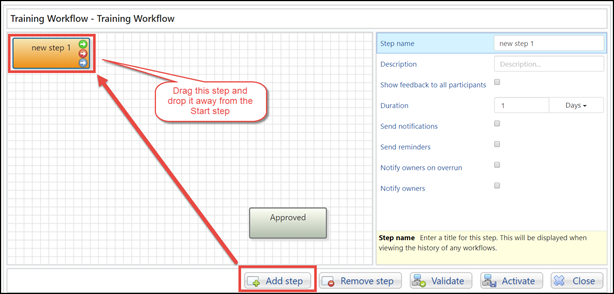
To add a new step, either click the “Add step” button at the bottom of the screen or double-click anywhere on the design gride
Note: You may equally remove a step by highlighting it and clicking the button Remove step
-
A new step will be created and will be placed directly on top of the Start step.
-
Drag it away from the start step and configure the fields in the right-hand side of the screen.
NOTE: New steps must be placed between the default Start and End steps.
- Complete the fields for the step:
- Name: this must be a unique name for the step
- Description: enter a description for the step, the more detailed the better to avoid confusion
- Show feedback to all participants: select this if you want the participants in this step to see the feedback made to the document by other users who have already completed their review
- Duration: enter the length of time you would like this step to be completed in
- Send notifications: select this option if you want all participants in this step to receive an initial notification when the step has been reached
- Notification message: any text entered in this box will be added to the initial notification email
- Send reminders: select this option if you want to send reminder emails to the participants in this step if they still have completed their review
- Reminder frequency: determines how often reminder emails are sent.
- Reminder message: any text entered in this box will be added to the reminder emails
- Notify owners on overrun: used in conjunction with categories, this option allows owner(s) of the category to be notified if the step has exceeded the duration
- Overrun notification frequency: select how often you would like to send out the overrun notifications to the category owner(s)
- Overrun notification message: any text entered in this box will be added to the overrun emails
- Notify owners: used in conjunction with categories, this option allows owner(s) of the category to be notified when this step has been reached
Configure Actions
-
Each step (except for the final step) gives you 3 actions (arrows) which are each used to configure different actions in your workflow.
-
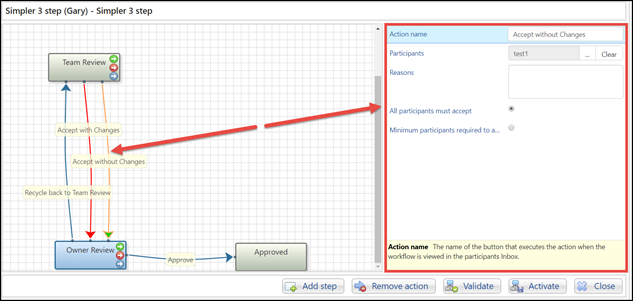
Green Arrow: This gives the Reviewer a button that moves the policy/document to the attached step without adding revisions to the document.
-
Red Arrow: This gives the Reviewer a button that allows them to add feedback and move the policy/document to the attached step. This is often used as a reject step, but may also be viewed as an Accept with revisions suggested.
-
Blue Arrow: Pushes a workflow forward to the next step.
-
- Click one of the arrows and connect it to another step.
- Complete the appropriate fields for the action:
All Actions
- Action name: the name of the action
Note: this name will display on the button that the participant(s) will see. This button will be available in the step the arrow is coming FROM, not going TO
- Participants: choose the participant(s) that can take this action
Note: The Participant list(s) are different from the Recipient Lists. Any lists you create here will be available for workflows only
- Reasons: a list of reasons that the participant can choose from when taking the action from their Inbox
Accept (Green) Action
- All participants must accept: the action will only be performed once all participants have accepted
- Minimum participants required to accept: specifies that a minimum number of participants are required to accept in order for the action to be performed
Note: when choosing this option, you are prompted to specify the number of approvers that are required for this action
Reject (Red) Action
- Reject immediately: perform the rejection as son as any participant chooses this action
- Wait for all responses: if this is set and one participant rejects, then the reject action will always be performed, but not until all participants have selected an action. This allows other participants to still leave comments.
Forward (Blue) Action
- Allow new revision: allows one of the participants to create a new revision of the document(s) when performing this action
- To delete an action, select it and click on the Remove action button in the bottom right-hand corner of the screen:

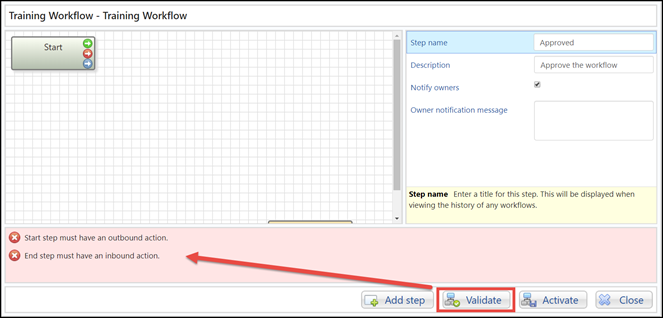
Validate Workflow
- The Validate button at the bottom of the page may be clicked at any time to get system confirmation that the workflow is valid, or receive a list of needed corrections, as shown below
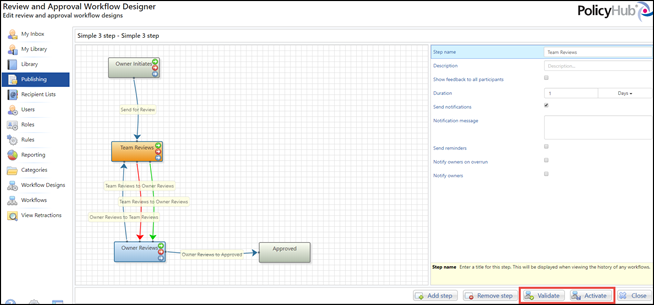
Activate Workflow
- Once you are satisfied with your workflow, and you get no validation errors when clicking the Validate button, click the Activate button.
- Your workflow will close and it may now be used.
- You may always return to view, edit, or copy your workflow by clicking Workflow Designs > right click on your workflow
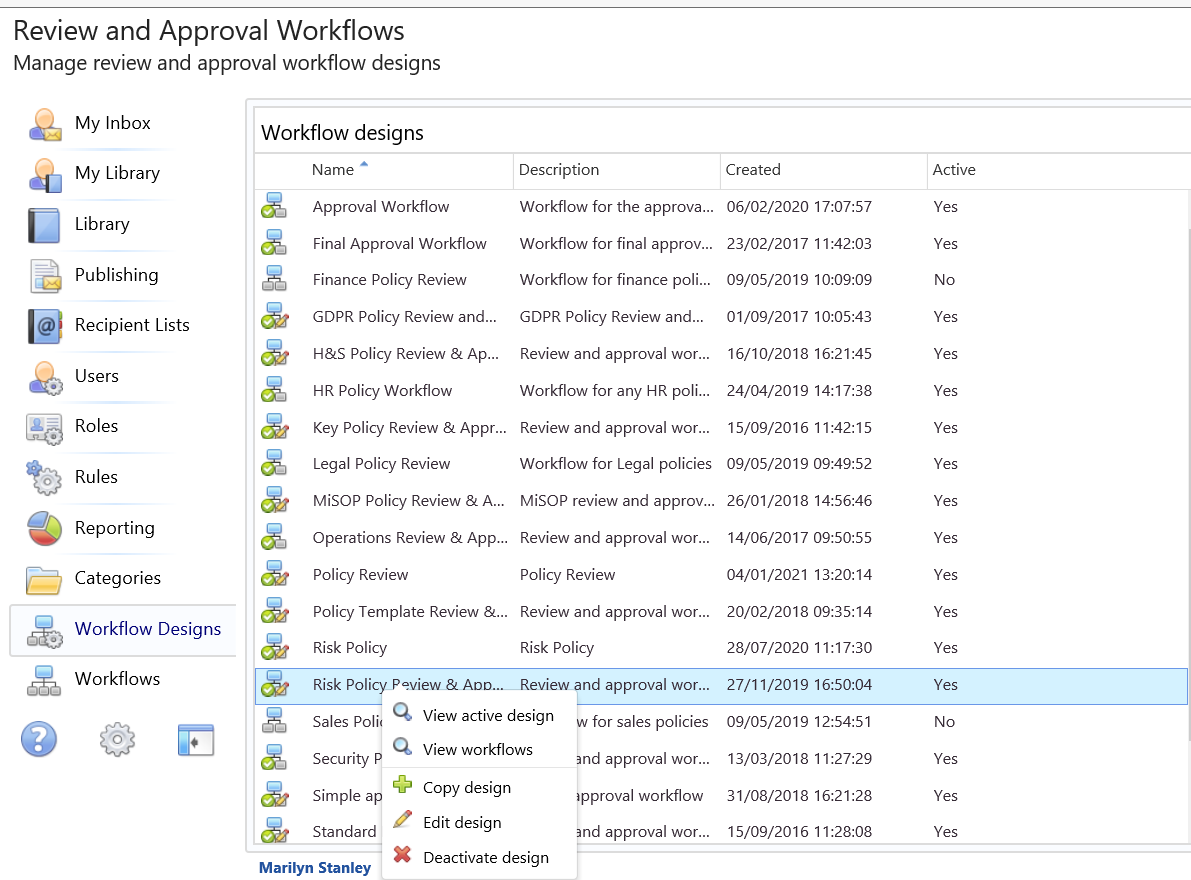
- Once a workflow has been used, it cannot be deleted but can be deactivated (see screenshot above).